Table of Contents
Advertisement
Advertisement
Table of Contents

Subscribe to Our Youtube Channel
Related Manuals for ASCOM Avena 122


Summary of Contents for ASCOM Avena 122
- Page 1 The world in your hands Ascom Avena 122 and Ascom Avena 122 plus THIS EQUIPMENT IS NOT DECT Cordless telephone DESIGNED FOR MAKING EMERGENCY TELEPHONY CALLS WHEN THE POWER FAILS. ALTERNATIVE ARRANGEMENTS SHOULD BE MADE FOR ACCESS TO EMERGENCY SERVICES.
- Page 3 – operation of up to 6 handsets on one base station – internal calls between 2 handsets – operation of a handset on up to 4 base stations of the Ascom Avena 122/Ascom Avena 122 plus family to expand the area in which you can make and receive calls.
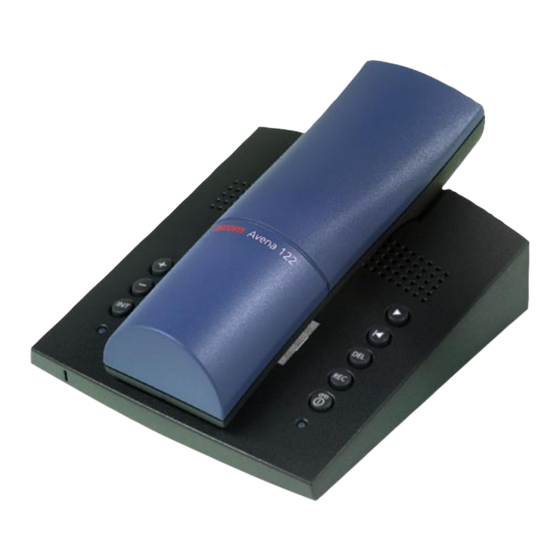
- Page 4 Explanations Handset Receiver Display 8888. 8 8888888. 8 8 ABCD One-touch dialling key Redial key Programming key (P-key) Signal key Delete/Microphone OFF key Internal key Keypad 0 – 9, *, # Connect key Microphone Battery charge contacts Display symbols Answering machine switched Programming mode on and/or handset in answering machine mode.
- Page 5 Explanations Base station without answering machine Loudspeaker Volume key "+" Volume key "–" Internal key LED red: lit when line is seized, flashes when a handset is logging on. LED green: lit when batteries are fully loaded up, flashes while Microphone for loading.
-
Page 7: Explanations
Explanations Designation Function Designation Function ‚ ‚Ã – Initiates the secondary – Switches the handset off functions or a programming Ë process – Initiates an internal call – ‚‚ – Code input prompt ‚Ë – Initiates the answering – Signal key function (Flash) machine mode in connection with a Ë8... - Page 8 Explanations Designation Function Designation Function – Number 1 – Number 8 ‚1 ‚8 – Retrieves/checks the call – Incoming/outgoing call via charges base station C – Number 2 – Number 9 ‚2 ‚9 – Incoming/outgoing call via – Adjusts the ringing tone on base station A the handset –...
-
Page 9: Table Of Contents
Contents Explanations ......... 1 Unit/call charge metering ....22 Introduction ........22 Contents ..........3 Calling number identification .... 23 Setting up and putting into service ..5 Introduction ........23 What’s included in the delivery package Call register ......... 24 and accessories ........ - Page 10 Contents Call handover/inquiry to another Operating the answering machine handset ..........33 by remote access ........ 49 Setting the ringing allocation for the Introduction ........49 handsets ..........34 Remote access PIN ......50 Remote access procedure ....50 Operation on several base stations ..35 Switching on the answering machine ..
-
Page 11: Setting Up And Putting Into Service
• User Guide incl. Quick Reference User Guide Please note: The plug-in main unit is located under the fibre mould. Accessories You can purchase the following accesso- ries from your Ascom dealer: • Charging station for the handset • Additional handsets... -
Page 12: Installation Location/Range
(min. 1 m) between the base station Listening protection or handset and the other telephone. The Ascom Avena 122/Ascom Avena 122 plus transmits the voice data between base Setting up your telephone station and handset in cryptologically en- Your telephone is designed to be used un- ciphered form (scrambling). -
Page 13: Connecting The Base Station
Setting up and putting into service Connecting the base station Disconnecting the cords from the base station/charging bracket Warning: Make sure that you do not confuse the First unplug the mains unit from the mains plugs of the connecting cord and plug-in socket. -
Page 14: Inserting And Charging The Battery Cells In The Handset
Setting up and putting into service Inserting and charging the battery cells in the handset Inserting the battery cells Slide the battery compartment cover back To remove the battery compartment cover, over the battery cells until you hear it snap press it lightly and slide it downwards. -
Page 15: Charging The Battery Cells
Setting up and putting into service Charging the battery cells Note: An audible acknowledgement tone at the start of the battery charging process sig- The battery cells are not charged when nals that the handset is correctly positioned supplied. To charge the batteries, you need on the base station. -
Page 16: Basic Settings
Basic settings Handset: ON, OFF, Lock states Switching the LOCK state on/off (key lock): Incoming calls are signalled in the lock state Switching the handset to the OFF and can be answered by pressing the Con- state nect key. To make an outgoing call you Incoming calls are not signalled in the OFF need to switch the handset from the Lock state. -
Page 17: Operate The Dialing Method
Basic settings Operate the dialing method To set DTMF with long flash signal You can operate your telephone using two different dialling methods: ‚ – tone dialling (dual tone multi-frequency dialling = You heard the audible acknow- DTMF) ledgement tone. –... -
Page 18: Setting The Ringing Tone On The Handset/Base Station
Basic settings Setting the ringing tone on the handset/base station Handset switched to ON ‚ The ringing tone on the handset rings as previously set. The ringing tone on the base station rings as previously set. 01234 89*o * The values currently set flash. To adjust the volume, use the numeric keys: 0 = off to 4 = loud To set the tone sequence, use the numeric... -
Page 19: Selecting The Battery Type
Basic settings Selecting the battery type Activating/deactivating the keyclick The telephone is supplied with three re- chargeable NiCd battery cells (250 mAh). If you do not want every keypress con- You can also equip your telephone with firmed by a click, you can deactivate this NiMH battery cells (550 mAh), which have function. -
Page 20: Range Warning
Basic settings Range warning Note: If the range is insufficient, shifting the base station can bring about an improvement. If you activate the range warning, a warn- See page 6 for information about the opti- ing signal will sound if you leave the radio mum location. -
Page 21: Offhook Answering
Basic settings Offhook answering System PIN (Personal Identifica- tion Number) The offhook answering facility enables you to take incoming calls directly, simply by The system PIN is required if you want to lifting the handset from the base station protect individual operating options (de- (without having to press the Connect key). -
Page 22: Handset Pin (Personal Identification Number)
Basic settings Note: Entering the handset PIN: Please do not forget your system PIN! Handset switched to ON ‚‚ If you do forget your system PIN, you will have to call out your specialist dealer at your expense to intervene on the system. For- getting your system PIN is like losing a key. -
Page 23: Telephoning
Telephoning Answering a call Dialling out with the numeric keypad Incoming calls (outside calls, internal calls) are signalled as follows: Handset switched to ON fl Incoming outside call: The external connection is indicated on the You hear the dialling tone. handset and you hear the external ringing tone. -
Page 24: Last Number Redial
Telephoning Last number redial Storing abbreviated dialling numbers The last five numbers dialled are stored automatically. To redial one of those five You can store numbers you use often so numbers, proceed as follows: that you do not have to key in the entire number each time. -
Page 25: Dialling Abbreviated Dialling Numbers Directly
Telephoning Dialling abbreviated dialling Dialling several abbreviated numbers directly dialling numbers in succession Handset switched to ON For example to dial several provider codes followed by a call number, you can dial sev- Ù eral abbreviated dialling numbers in suc- cession. -
Page 26: Open Listening At The Base Station
Telephoning Open listening at the base station Mute switch During an outside call you can switch on If you do not want your call partner to hear the loudspeaker on the base station so that you (for instance, when you confer with other people can listen in to the call. -
Page 27: Temporary Switchover To Dtmf Function
Telephoning Temporary switchover to DTMF function By switching over to the DTMF dialling ¯ method, you can use the special "star" · and "hash" keys to enter information during a call, for such functions as Voicemail, City Call, etc. You made a connection … ‚... -
Page 28: Unit/Call Charge Metering
Unit/call charge metering Introduction Note: If you are operating several handsets on your base station, you can activated or de- Before you can use the unit/call charge activate the display individually for each metering facility, you need to apply for a handset. -
Page 29: Calling Number Identification
Calling number identification Introduction Activating/deactivating CLIP Your telephone supports the feature "call- Deactivating CLIP ing number identification" *) on accesses Handset switched to ON for analogue switched connections. Before ‚‚ you can use the CLIP display, you need to apply for a call number transfer from your telephone company, if such a transfer is not yet in place. -
Page 30: Call Register
Calling number identification Call register Note: If a number from the call register is dialled, it is automatically deleted from the call reg- Your telephone automatically saves the call ister and stored in the Redial. numbers of last ten callers. An unanswered call is indicated on the display by the pictograms "... -
Page 31: Suppressing The Display (Clir)
Suppressing the display (CLIR) Activating/deactivating CLIR Your telephone supports the feature "call- ing line identification restriction or CLIR" on accesses for analogue switched connec- tions. You can use this feature to suppress the transmission of your call number, i.e. your call number will not be displayed on the called party’s set despite CLIP. -
Page 32: Direct Call (Babyphone Feature)
Direct call (babyphone feature) Introduction Activating/deactivating direct call When direct call (babyphone feature) is ac- Handset switched to ON tivated, an important number can be called ‚ by pressing any key except the Program- ming key. This function is also known as "direct call". -
Page 33: Provider Dialling
Provider dialling Introduction Activating/deactivating provider dialling With this feature you can set the number of a provider (network operator) which is Deactivating provider dialling then dialled with each outgoing call before (default setting) the actual call number is dialled. This fea- Handset switched to ON ture only works if a provider number has ‚‚... -
Page 34: Intercom
Intercom Duplex calls between handset and From base station to handset base station (global call) ˜ With the intercom feature you can set up Briefly press the internal a duplex connection between handset and key on the base station base station. An incoming outside tel- The internal ringing tone rings on ephone call is signalled by a call waiting all the registered handsets... -
Page 35: Room Monitoring
Room monitoring Disabling/enabling room Initiating room monitoring monitoring Room monitoring is possible only if the ba- sic setting "Enable room monitoring" is If room monitoring is enabled, you can use activated. the handset to listen in to the room where the base station is located. -
Page 36: Operation With Several Handsets
Operation with several handsets Introduction Registering a handset The Ascom Avena 122/Ascom Avena 122 You can register other handsets to the base plus allows you to operate up to 6 hand- station or register your own handset to sets on one base station. You can make another base station. -
Page 37: Logging A Handset Onto A Third-Party Base Station (Gap)
Operation with several handsets Logging a handset onto a third- Logging a third-party handset party base station (GAP) onto the base station (GAP) To log your handset onto a third-party base A handset must support the GAP generic station, the latter must support the GAP access profile in order to be logged onto generic access profile. -
Page 38: Gap Uses
‚ GAP uses You hear an audible acknowledge- ment tone. Your Ascom Avena 122/Ascom Avena 122 plus supports the multi-vendor DECT GAP The handset connects briefly with protocol. To be able to register it on a for- the base station. Handset 2 is now eign base station, it must support the GAP de-registered. -
Page 39: Call Waiting
Operation with several handsets Ë Call waiting The outside call goes on hold. If you receive an outside call while making Press the numeric key for the an internal call, the outside call is signalled internal call number you want in both handsets with a call waiting tone. -
Page 40: Setting The Ringing Allocation For The Handsets
Operation with several handsets Setting the ringing allocation for the handsets An incoming external call is signalled on all the registered handsets. You can switch off the ring signalling on individual hand- sets. You can then only be reached on that handset if another handset hands a call over to you. -
Page 41: Operation On Several Base Stations
Application example Switching over to base station C You own a Ascom Avena 122/Ascom Avena ‚ 122 plus at home and use the same equip- ment at your workplace in the office. You... -
Page 42: Selecting The Base Station
Operation on several base stations Selecting the base station In the default setting the handset always automatically dials up on the base station in whose range it is located. In the case of overlapping radio cells the connection is set up with the base station indicated on the handset. -
Page 43: Setting The Answering Machine
This Section applies only if you have and the greeting messages are saved. acquired a Ascom Avena 122/Ascom Avena 122 plus with an integrated an- Setting the date and time swering machine. The total recording time is approx. 22 min- Your Ascom Avena 122/Ascom Avena 122 utes. -
Page 44: Setting The Number Of Rings
Setting the answering machine Setting the number of rings 730 = Number of rings automatic 732 = Number of rings 2 rings 73x = Number of rings x rings You can set the number of rings after which 739 = Number of rings 9 rings the answering machine switches itself on to between 2 and 9 rings*), or to "auto- matic". -
Page 45: Setting The Total Recording Time
Setting the answering machine Setting the total recording time Long recording time (approx. 22 mins) Handset switched to ON The maximum recording time available for incoming messages on your answering ‚‚ machine depends on the recording quality you wish to have. As on a tape recorder a short recording time results in the best pos- sible recording quality and vice versa. -
Page 46: Operating Modes
Setting the answering machine Operating modes Restricting messages to 120 seconds (default setting) Handset switched to ON You can use the answering machine in two operating modes: ‚‚ Record messages: Greeting message A is played back and the caller can leave messages. When the ‚... -
Page 47: Operating The Answering Machine With The Handset
Operating the answering machine with the handset Indication of new messages In answering machine mode, you can carry out any function you want. For the precise sequence of operations, please refer to this As soon as new messages have been re- Section. -
Page 48: Recording The Greeting Message
Operating the answering machine with the handset Recording the greeting message Note: This function can only be carried out when the answering machine is switched off. The handset is in answering machine mode and the answering machine is switched off. "rEC"... -
Page 49: Switching The Answering Machine On/Off
Operating the answering machine with the handset Switching the answering machine If there are only messages which have already been played back, the on/off machine begins by playing back the oldest message. Handset in answering machine mode. Functions available during playback: Play current messages back again: The current setting is displayed Press... -
Page 50: Deleting Messages
Operating the answering machine with the handset Deleting messages Intercepting a call while the answering machine is answering Deleting individual messages: a call An individual message can only be deleted while that message is being played back. You have the possibility of intercepting a call even if the answering machine has al- You are playing back a message and want ready switched itself on, is playing back... -
Page 51: Monitoring Incoming Calls Over The Handset
Operating the answering machine with the handset Monitoring incoming calls over the handset to prevent unauthorised and/ or non-monitored recording from the base the handset station. You have the possibility of monitoring in- You are in the middle of a call … coming messages over the handset with- out the caller hearing you (message moni- To start recording:... -
Page 52: Operating The Answering Machine From The Base Station
Operating the answering machine from the base station Recording your greeting message Deleting the greeting message You can record your greeting message over Answering machine switched off. the integrated microphone on the base sta- tion. However, we do recommend that you Press the Delete key. -
Page 53: Switching The Answering Machine On/Off
Operating the answering machine from the base station Switching the answering machine Playing back messages on/off The red LED on the base station flashes to indicate that a new message has been left. To switch on: Answering machine switched off. ˚... -
Page 54: Deleting Messages
Operating the answering machine from the base station Deleting messages Temporary monitoring Deleting individual messages: Even if the "message monitoring" feature An individual message can only be deleted is deactivated, you can monitor incoming while that message is being played back. messages over the base station loudspeaker You are playing back a message and want without the caller hearing you. -
Page 55: Operating The Answering Machine By Remote Access
Operating the answering machine by remote access Introduction Overview of the key function of the code transmitter and telephone: You can access and remote control your È = Rewind answering machine from any telephone, = Select greeting message A i.e. ”... -
Page 56: Remote Access Pin
PIN incorrectly three times in succession, your ‚ Ascom Avena 122/Ascom Avena 122 plus will You hear an audible acknowledge- automatically disconnect the line. The PIN ment tone. Remote access is now alarm is then activated (indicated by a rapid deactivated. -
Page 57: Switching On The Answering Machine
Operating the answering machine by remote access Switching the answering machine It is now impossible to remote access your equipment until the PIN alarm has been on/off cancelled by pressing the ON/OFF key on the base station. You are connected with your answering machine:You are connected with your an- swering machine: Switching on the answering... -
Page 58: Playing Back Recorded Messages
Operating the answering machine by remote access Playing back recorded messages Deleting all messages: With this procedure you can delete in one go all the messages you have already played You are connected with your answering back. This function can only be carried out machine: if the answering machine is switched off ‹... -
Page 59: Deleting The Greeting Message
Operating the answering machine by remote access Carrying out room monitoring To record greeting message B ‹ This feature enables you to monitor, from You hear the Record tone. a distance, the area around your answering machine for noise. After the beep tone speak the text Remote room monitoring is possible only of your greeting message... -
Page 60: Pbx-Related Operation
Setting the exchange identification code (EIC) To connect your Ascom Avena 122 behind a PBX, the Ascom Avena 122 must be You only need to carry out the following programmed in the PBX mode. settings if you are connected to a PBX that does not wait for the dial tone. -
Page 61: Deleting The Exchange Identification Code (Eic)
PBX-related operation Deleting the exchange Setting the dial pause identification code (EIC) You have the possibility of setting the ‚‚ pauses required after the exchange codes to suit the requirements of each PBX: Please refer to the operating instructions for your PBX. Enter the system PIN if required. -
Page 62: System Settings
System settings Setting a feature 090x Deactivate PBX mode Activate PBX mode PLEASE remember the following sequence: Delete functions Handset switch to ON 250 S Reset to default settings, base ‚ station Press P-key twice 251 H Delete all one-touch memories fi... - Page 63 System settings Units/call charge/talk time display Display off 812x Talk time display Features 770x S Disable room monitoring 771 S Enable room monitoring 900 S De-register handset 901 S Register handset Register handset to foreign system 903 S Register foreign handset 904x Automatic base station selection...
-
Page 64: Resetting The Base Station To The Default Settings
– Dial pause 3 seconds (code 023) This procedure resets the exchange – Exchange line "ON" (code 961) identification code. Plus, on the Ascom Avena 122/Ascom Avena 122 plus with answering machine: Resetting the handset to the default settings – Announcement texts –... -
Page 65: General Information
General information Troubleshooting Most malfunctions will not be due to a defect on your telephone. You can often save time and money by correcting minor faults yourself. The following tips are intended to help you do this. Symptom Cause Remedy No display Handset not switched on Press Connect key... -
Page 66: Technical Data
Technical Data Standard: DECT/GAP Admissible ambient conditions Frequency range: 1880 MHz to for operation: 5 °C to 40 °C 1900 MHz 5% to 85% relative humidity Number of channels: 120 duplex channels Admissible storage temperature: – 25 °C to + 70 °C Channel spacing: 1728 kHz Dialling method: pulse dialling / DTMF Channel selection:dynamic... -
Page 67: Write-On Labels
Write-on labels Write-on labels for Base station... - Page 69 Write-on labels Handset...
-
Page 71: Quick Reference User Guide
(00…19) , followed fi ‚ by call number Ascom Avena 122 – Q uick Reference Guide for Operating the Answering Machine Remotely and from the Handset Remote initiating procedure: Initiating procedure from the handset: Dial your call number. - Page 72 Quick Reference User Guide Registering the handset Retrieving message / jump functions ˜ ˚ Keep pressed down for 5 seconds, Messages are played back over the ‚ followed by twice. loudspeaker. fi ˙ , followed by system PIN or Back to the beginning of the message or default setting.
- Page 73 Avoid the use of all polishes and – fuses, bulbs, antennas and batteries; abrasives. – network and transmission problems that are not related to the Ascom Avena 122 Approval handset; Your Ascom Avena 122/Ascom Avena 122 – damage not due to defects in material...
- Page 74 ABSC 20312004 20312004en_ba_a0 _K029...
Need help?
Do you have a question about the Avena 122 and is the answer not in the manual?
Questions and answers