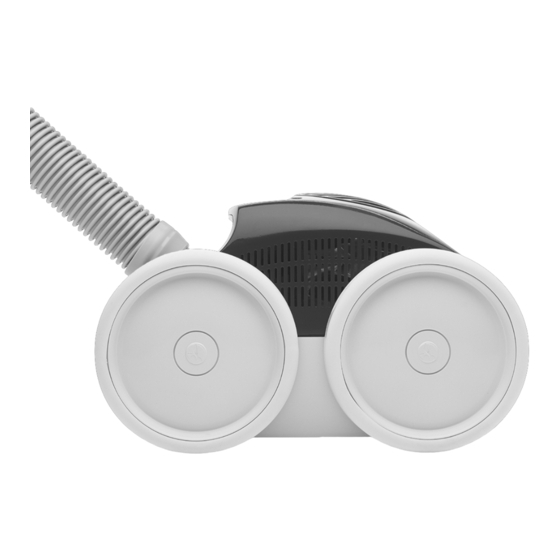
Polaris 340 Owner's Manual
Automatic pool cleaner
Hide thumbs
Also See for 340:
- Owner's manual (144 pages) ,
- Owner's manual (64 pages) ,
- Owner's manual (11 pages)
Table of Contents
Advertisement
Quick Links
Advertisement
Table of Contents
Troubleshooting

Summary of Contents for Polaris 340
- Page 1 I M P O R TA N T I N F O R M AT I O N...
- Page 2 Always remove the Polaris before swimmers enter the pool. • Always handle the Polaris with care. Do not let children or pets play with the Polaris; it is not a toy. • Except when checking the wheel RPM, do not handle the Polaris while it is operating.
-
Page 3: Table Of Contents
A. What to Expect from Your Polaris 340 ....... . . -
Page 4: Introduction
Polaris dealer nearest you. pool and less time cleaning it. The numbers in parentheses found throughout The Polaris 340 has been built with the finest the manual refer to the index numbers in the materials available. It is backed by the Polaris Exploded Parts Diagram on pages 14-15. -
Page 5: Installation Instructions
B. Identifying the Type of Pool Connection The Polaris 340 box contains (the numbers below refer to the Exploded Parts Diagram on The Polaris 340 comes equipped to connect to pages 14-15): a dedicated suction line or a pool skimmer. We •... -
Page 6: Identifying The Type Of Pool Skimmer
3. Turn off the flow to all the skimmers, except Refer to Section E. the one to which the Polaris will be con- 2. If the pool has only one skimmer: nected. If the pool is not equipped with a valve that allows independent flow to each a. -
Page 7: Installing In A Single Skimmer
2" plug from your local Polaris dealer. 4. Once the unused skimmers are blocked, G. Connecting the Hose remove the same items from the skimmer to which the Polaris will be connected. 1. Set aside the leader hose with the hose weight and the standard hose with the F. -
Page 8: Adjusting The Water Flow
If this is not possible during sents the correct water flow range for the connection, leave the weighted end of the Polaris 340. While holding the flow indicator hose in the water and place your hand over underwater, verify that the indicator is within the male hose cuff while moving the hose. -
Page 9: Checking The Wheel Rpm
• Check the hose sections for any leaks. 3. Hold the Polaris by the handle at the back of the cleaner below the water level. Watch • For dedicated suction line installa- the wheels on the Polaris. - Page 10 If the Polaris is operating above 34 RPM: • For dedicated suction line installations, adjust the valve at the equipment area between skimmer flow and dedicated suction flow until the correct wheel RPM is reached. • For skimmer installations, push in the knob...
-
Page 11: Iii.operation And Maintenance
5-10 psi above the C. Turning On/Off the Polaris number recorded here. The Polaris 340 operates on the suction side of For dedicated suction line installations, periodically the pool filtration system and can be turned check the wheel RPM as the pool filter becomes on/off by simply turning on/off the filtration pump. -
Page 12: Accessories
140 hose and prevents permanent coils from forming. 7. Ground Clearance Kit (Part #5-3500) The Polaris 340 Ground Clearance Kit increases clearance for your cleaner to easily accommo- date irregular surfaces or sharp convexes on pool bottoms. -
Page 13: Iv.troubleshooting
21). See page 10. 1-1/2 minutes. Problem: Polaris is sluggish, running with 4. If the Polaris is installed on a dedi- less power than normal. cated suction line, attach the 45-degree elbow to the universal Solution: 1. -
Page 14: Troubleshooting Worksheet
Recheck the wheel RPM once you service, have the following information available have obtained the proper water at the time of the call or when taking the Polaris in flow for the 340. See page 8. for service. 4. Remove lower housing (#20). -
Page 15: Exploded Parts Diagram
Serial Number... - Page 16 ® 5-5505 Bulk Leader Hose (14 sections) 5-5600 Bulk Standard Hose (28 sections, 39" each) Pool Wall or Skimmer To insure proper operation and long life for To The the Polaris, be sure to insist on genuine Polaris Polaris parts.
-
Page 17: Warranty
EXAMPLE: P 1 2 3 4 5 6 The Polaris 340 frame is warranted for a period of five years. The rest of the Polaris 340 parts are warranted for a period of one year from date of manufacture of the unit as established by the serial number, or one year from date of purchase with proof of purchase, whichever is later. - Page 18 ©2002 Polaris Pools Systems, Inc. All Rights Reserved. TL-300 4/02...


Need help?
Do you have a question about the 340 and is the answer not in the manual?
Questions and answers