
Related Manuals for NETGEAR WN3500RP


Summary of Contents for NETGEAR WN3500RP
- Page 1 Universal Dual Band WiFi Extender – Wallplug Edition User M anua l 350 East Plumeria Drive San Jose, CA 95134 October 2011 202-11049-01 v1.0...
- Page 2 Trademarks NETGEAR, the NETGEAR logo, and Connect with Innovation are trademarks and/or registered trademarks of NETGEAR, Inc. and/or its subsidiaries in the United States and/or other countries. Information is subject to change without notice. © NETGEAR, Inc. All rights reserved.
-
Page 3: Table Of Contents
Log In to the Extender ........17 Use NETGEAR genie After Installation ......18 Add a WPS Client to the Extender WiFi Network . - Page 4 Universal Dual Band WiFi Extender – Desktop/Wallplug Appendix A Supplementary Information Factory Settings ..........37 Technical Specifications.
-
Page 5: Chapter 1 Getting Started
This chapter covers the following topics: • How the Extender Works • Hardware Features • Install the Extender • Position the Extender • Extender Performance • Music Playback For more information about the topics covered in this manual, visit the support website at http://support.netgear.com. -
Page 6: How The Extender Works
Figure 1. Range extender in a home When to Use Your Extender NETGEAR recommends that you connect to the extender only when your home network connection is poor. Because data traffic routed through the extender is inherently slower than traffic routed directly from the network, the computer should stay on the network if the connection is good enough. -
Page 7: Hardware Features
Universal Dual Band WiFi Extender – Desktop/Wallplug The extender LEDs can help you tell if the extender is correctly set up and working as it should. The best performance is delivered when the Link Rate LED and the • Wireless Device to Extender LED are green. -
Page 8: Leds
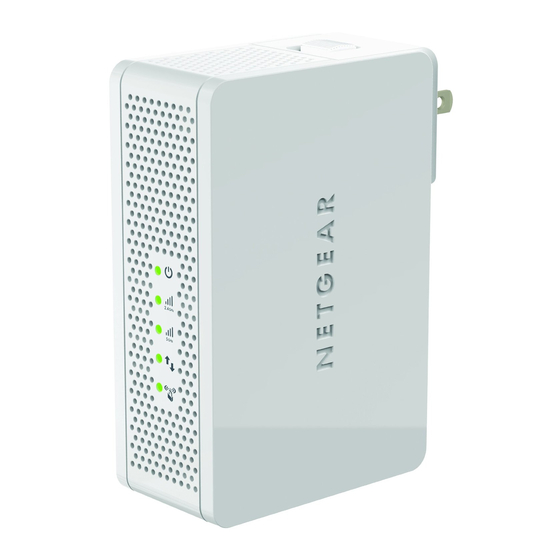
Universal Dual Band WiFi Extender – Desktop/Wallplug LEDs The LEDs show how the is working. extender Power On/Off Link Rate 2.4 GHz Link Rate 5 GHz Wireless Device to Extender Figure 3. Extender front panel The following table describes the LEDs. Table 1. -
Page 9: Buttons And Ports
Universal Dual Band WiFi Extender – Desktop/Wallplug Buttons and Ports The following figure shows the buttons and ports on the extender. Audio port USB port Reset Factory Defaults Ethernet port Power On/Of Figure 4. Extender side and bottom panels. The Power On/Off button and WPS button are on the side panel. Power On/Off button. -
Page 10: Insert The Ac Plug
Universal Dual Band WiFi Extender – Desktop/Wallplug Insert the AC Plug You can use the AC plug to plug the extender directly into an outlet, or you can attach the stand and plug in the power adapter cord (see Attach the Stand and Power Adapter Cord page 11). -
Page 11: Attach The Stand And Power Adapter Cord
Universal Dual Band WiFi Extender – Desktop/Wallplug Attach the Stand and Power Adapter Cord The extender comes with a stand and power adapter cord. You can attach them as shown if you do not want to plug the extender directly into an outlet. Figure 6. -
Page 12: Install The Extender
Universal Dual Band WiFi Extender – Desktop/Wallplug To cable a computer to the extender: Locate the ports on the extender. USB port Ethernet port Use an Ethernet cable or USB cable to connect your computer the extender. Plug in the AC adapter or attach the stand and power adapter cord to the extender, and then plug it into an electrical outlet. - Page 13 Follow the genie steps to set up the extender to work with your network and to set up your computer or wireless device to connect to the extender network. These steps are explained in on page 18. Use NETGEAR genie After Installation Getting Started...
-
Page 14: Position The Extender
Universal Dual Band WiFi Extender – Desktop/Wallplug Position the Extender The best connection is established when there is a clear line of sight between the extender and the router and between the extender and the computer or wireless device. If this straight path is blocked by a thick wall or other materials, move the extender to a different location half-way between the computer and the router. -
Page 15: Extender Performance
Windows 7 users can use Windows Media Player (WMP) to play back music. • Android phone, iPhone, or iPad users can download NETGEAR genie to play back music • (go to http://www.netgear.com/genie). -
Page 16: Chapter 2 Extender Network Settings
Extender Network Settings This chapter covers the following topics: • Log In to the Extender • Add a WPS Client to the Extender WiFi Network • Setup Menu • Maintenance Settings • Advanced Settings... -
Page 17: Log In To The Extender
Universal Dual Band WiFi Extender – Desktop/Wallplug Log In to the Extender You can log in to the extender to use NETGEAR genie or to use the menu selections to view or change the extender’s settings. To log in: Launch an Internet browser such as Mozilla Firefox or Microsoft Internet Explorer. -
Page 18: Use Netgear Genie After Installation
Universal Dual Band WiFi Extender – Desktop/Wallplug Use NETGEAR genie After Installation NETGEAR genie can help you set up your extender to connect to a wireless network. For information about more configuration options, see Chapter 2, Extender Network Settings. The installation guide (included in the package) explains how to install your extender. During installation, when you launch your Internet browser, NETGEAR genie automatically displays. - Page 19 Universal Dual Band WiFi Extender – Desktop/Wallplug If the network is secure, you are prompted to enter the passphrase (network password): Enter the password for your wireless network and click Continue. The genie sets up a WiFi connection from the extender to the router, which takes about 2 minutes.
-
Page 20: Add A Wps Client To The Extender Wifi Network
Universal Dual Band WiFi Extender – Desktop/Wallplug Add a WPS Client to the Extender WiFi Network WPS (Wi-Fi Protected Setup) lets you join a secure WiFi network without typing its password. Instead, you use a WPS button or enter a PIN to connect. WPS supports WPA and WPA2 wireless security. -
Page 21: Extender Wireless Settings
Universal Dual Band WiFi Extender – Desktop/Wallplug Select Setup > Connect to an Existing Network. The extender scans for wireless networks, and displays a list. If your wireless network is not on the list, the extender might be too far away from the router. - Page 22 Universal Dual Band WiFi Extender – Desktop/Wallplug To change the wireless settings for the extender’s network: Select Setup > Wireless Settings to display the following screen: In the Name (SSID) field, you can type in a new name to customize your extender network. This will make it easier to identify your extender if more than one is operating in your neighborhood.
- Page 23 For WPA-PSK or WPA2-PSK, enter the passphrase. Click Apply to save your settings. Set Up WEP WEP is a legacy wireless security setting. NETGEAR recommends that you use a newer standard such as WPA2 or WPA unless you have older wireless equipment that supports only WEP.
-
Page 24: Extender Ip Address Setup
Universal Dual Band WiFi Extender – Desktop/Wallplug Not all wireless computers support passphrase key generation. If Note: your computer does not support the passphrase, then you will need to type the encryption key in order to join the wireless network. Key 1–Key 4. -
Page 25: Maintenance Settings
Universal Dual Band WiFi Extender – Desktop/Wallplug Gateway IP Address. The IP address for the gateway. Primary DNS. The primary Domain Name Server (DNS). Secondary DNS. The secondary Domain Name Server (DNS). Maintenance Settings You can use the maintenance settings to view the extender status, view attached devices, back up and restore configuration settings, set the password, and update the firmware. -
Page 26: Show Statistics
Universal Dual Band WiFi Extender – Desktop/Wallplug Link Rate. The actual transmission (Tx) and receive (Rx) link rate in the current wireless • connection. Extender IP Info MAC Address. The physical address of the extender, as seen from the local area •... -
Page 27: Attached Devices
Universal Dual Band WiFi Extender – Desktop/Wallplug TxPkts. The number of packets transmitted on this port since reset or manual clear. • RxPkts. The number of packets transmitted on this port since reset or manual clear. • Collisions. The number of collisions on this port since reset or manual clear. •... -
Page 28: Set The Password
Set the Password The user name to access the extender is admin, and its default password is password. NETGEAR strongly recommends that you set a more secure password. To set the password: Select Maintenance >... -
Page 29: Advanced Settings
Universal Dual Band WiFi Extender – Desktop/Wallplug If you do not want to use the automatic firmware check, clear the Check for New Version Upon Login check box. To check for firmware and upgrade if it is available: Select Maintenance > Firmware Update. The following screen displays: Click Check to see if new firmware is available. - Page 30 Universal Dual Band WiFi Extender – Desktop/Wallplug To view or change the advanced wireless settings: Select Advanced > Wireless Settings. The following screen displays: You can view or configure the following settings: Advanced Wireless Settings • Enable Wireless Access Point (2.4 GHz). Enable the extender to work as a wireless access point.
-
Page 31: Readyshare Printer
On each computer that will share the printer, download the NETGEAR USB Control Center utility. The NETGEAR USB utility has a Mac version and a Windows version, which you can access from the ReadySHARE Printer area of the page you access using this URL: www.netgear.com/readyshare. -
Page 32: Fastlane Technology
Universal Dual Band WiFi Extender – Desktop/Wallplug FastLane Technology FastLane Technology offers maximum WiFi performance. It provides high-speed WiFi with a dedicated band connecting the extender and the wireless device, and a second band connecting the extender and the router. It is ideal for HD gaming and HD video streaming. ... -
Page 33: Chapter 3 Troubleshooting
Troubleshooting This chapter includes the following sections: • Frequently Asked Questions • Connecting to http://www.mywifiext.net • Joining WiFi Networks... -
Page 34: Frequently Asked Questions
Universal Dual Band WiFi Extender – Desktop/Wallplug Frequently Asked Questions NETGEAR genie keeps asking me for my wireless password, and I am sure I have entered the correct wireless password. What can I do? It is likely that the extender is placed at the borderline of the range covered by the router. -
Page 35: Connecting To Http://Www.mywifiext.net
Universal Dual Band WiFi Extender – Desktop/Wallplug I have completed the Installation Wizard, but my wireless devices cannot get the IP address from the extender. What should I do? Make sure that the passphrase you entered on your wireless device is correct, and power cycle the extender and your router. -
Page 36: Joining Wifi Networks
This is case-sensitive. PASSWORD25 is not the same as Password25 or password25. See on page 11. Use NETGEAR Genie to Set Up the Extender If the Smart Wizard does not find your wireless network (it is not displayed in the Select •... -
Page 37: Factory Settings
Supplementary Information Factory Settings You can press and hold the Restore Factory Settings button on the rear panel for 7 seconds. The extender resets, and returns to its factory settings. Factory Settings Smart Wizard Enabled Wireless Wireless communication Enabled Wireless network name (SSID) NETGEAR_EXT Security Disabled... -
Page 38: Technical Specifications
Universal Dual Band WiFi Extender – Desktop/Wallplug Technical Specifications Technical specifications Data and routing protocols: TCP/IP, DHCP server and client, DNS relay, Network protocol and standards compatibility TFTP client Power adapter • North America (input): 120V, 60 Hz, input •... - Page 39 European Union (1999/5/EC). This equipment meets the following conformance standards: EN300 328 (2.4Ghz), EN301 489-17, EN301 893 (5Ghz), EN60950-1 For complete DoC please visit the NETGEAR EU Declarations of Conformity website at: http://support.netgear.com/app/answers/detail/a_id/11621. EDOC in Languages of the European Community...
- Page 40 Universal Dual Band WiFi Extender – Desktop/Wallplug Español Por medio de la presente NETGEAR Inc. declara que el Radiolan cumple con los [Spanish] requisitos esenciales y cualesquiera otras disposiciones aplicables o exigibles de la Directiva 1999/5/CE. Ελληνική ΜΕ ΤΗΝ ΠΑΡΟΥΣΑ NETGEAR Inc. ∆ΗΛΩΝΕΙ ΟΤΙ Radiolan ΣΥΜΜΟΡΦΩΝΕΤΑΙ ΠΡΟΣ...
- Page 41 This transmitter must not be co-located or operating in conjunction with any other antenna or transmitter. FCC Declaration of Conformity We, NETGEAR, Inc., 350 East Plumeria Drive, San Jose, CA 95134, declare under our sole responsibility that the Universal Dual Band WiFi Extender – Desktop/Wallplug complies with Part 15 Subpart B of FCC CFR47 Rules.
- Page 42 Universal Dual Band WiFi Extender – Desktop/Wallplug For product available in the USA market, only channel 1~11 can be operated. Selection of other channels is not • possible. This device and its antenna(s) must not be co-located or operation in conjunction with any other antenna or •...
- Page 43 Universal Dual Band WiFi Extender – Desktop/Wallplug Interference Reduction Table The following table shows the recommended minimum distance between NETGEAR equipment and household appliances to reduce interference (in feet and meters). Household Appliance Recommended Minimum Distance (in feet and meters)
Need help?
Do you have a question about the WN3500RP and is the answer not in the manual?
Questions and answers