Table of Contents
Advertisement
Available languages
Available languages
Quick Links
Informationstechnische Einrichtung Class A
Warnung! Dies ist eine Einrichtung der Klasse A. Diese Einrichtung kann
im Wohnbereich Funkstörungen verursachen. In diesem Fall kann vom
Betreiber verlangt werden, angemessene Maßnahmen durchzuführen.
Class A information technology equipment
Warning! This device is categorized as class A
equipment. This equipment can cause radio interference in living spaces.
If this is the case, you can request the operator to undertake appropriate
measures to prevent such interference.
Dispositif d'informations techniques classe A
Avertissement ! Ce dispositif appartient à la classe A. Ce dispositif est
susceptible de provoquer des perturbations radioélectriques dans une
zone habitable. Il peut être exigé de l'utilisateur de prendre des mesures
appropriées.
Equipo de tecnología de información clase A
Aviso: Éste es un aparato de la clase A. Este aparato puede provocar
interferencias en el ámbito doméstico. En este caso, el usuario puede
estar obligado a tomar medidas adecuadas.
Informatietechnische inrichting Class A
Waarschuwing! Dit is een klasse-A-inrichting. Deze inrichting kan in
woonomgevingen storingen veroorzaken. In dat geval dient de gebruiker
passende maatregelen te nemen.
Dispositivo per tecnologie dell'informazione classe A
Attenzione! Questo è un dispositivo della classe A che può causare distur-
bi radio nella zona abitativa. In questo caso l'esercente può richiedere di
prendere particolari
provvedimenti.
Informationsteknisk enhet klass A
Varning! Detta är en enhet enligt klass A. Dessa enheter kan förorsaka
radiostörningar i bostäder. I detta fall kan
driftsansvarig åläggas att vidtaga passande åtgärder.
Luokan A tietotekniikkalaite
Varoitus: Tämä on A-luokan laite. Tämä laite voi aiheuttaa
radiohäiriöitä asunnossa käytettäessä. Siinä tapauksessa
käyttäjältä voidaan edellyttää kohtuullisia korjaustoimia.
All listed brands are trademarks of the corresponding companies. Errors and omissions excepted,
and subject to technical changes. Our general terms of delivery and payment are applied.
d
Specyfi kacja informacyjno techniczna – urządzenie klasy A
UWAGA! Urządzenie klasy A. Urządzenie może powodować zakłócenia
w obrębie mieszkania. W takim wypadku użytkownik musi przedsięwziąć
odpowiednie kroki zapobiegawcze.
g
Információtechnikai berendezés, A-osztály
Figyelem! Ez az eszköz A-osztályú berendezés.
Ez az eszköz lakásban üzemeltetve rádiófrekvenciás zavart kelthet.
Ha hosszabb időn át üzemeltetve, a közelben lévő készülékeket zavarja,
célszerű áthelyezni más környezetbe.
f
Technicko informační zařízení třídy A
Varování! Tohle je zařízení třídy A. Může způsobit rádiové rušení v obytné
zóně. V takovém případě může být požadováno od provozovatele, aby
provedl příslušná opatření.
Technicko-informačné zariadenie triedy A
e
POZOR! Toto je zariadenie triedy A. Môže spôsobiť rádiové rušenie v
obytnej zóne. V takomto prípade môže byť požadované od
prevádzkovateľa, aby urobil príslušné opatrenia.
Aparelho de tecnologia da informação Class A
o
Aviso! Este é um aparelho de Classe A. Este aparelho pode provocar
interferências em áreas residenciais. Neste caso, pode-se exigir ao
utilizador que tome as medidas adequadas.
i
k
s
m
Hama GmbH & Co KG
D-86651 Monheim/Germany
www.hama.com
q
h
c
v
p
u
t
r
Advertisement
Table of Contents

Related Manuals for Hama 95252


Summary of Contents for Hama 95252
- Page 1 Varoitus: Tämä on A-luokan laite. Tämä laite voi aiheuttaa radiohäiriöitä asunnossa käytettäessä. Siinä tapauksessa käyttäjältä voidaan edellyttää kohtuullisia korjaustoimia. Hama GmbH & Co KG D-86651 Monheim/Germany www.hama.com All listed brands are trademarks of the corresponding companies. Errors and omissions excepted,...
-
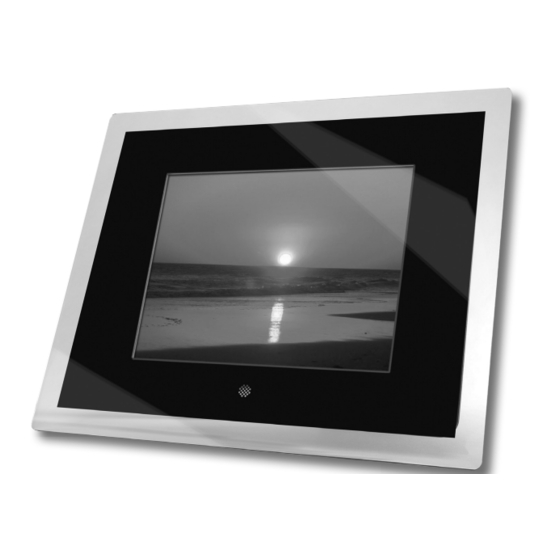
Page 2: Digitaler Bilderrahmen
D I G I T A L P H O T O Digitaler Bilderrahmen 10.4 Digital Photo Frame 00095252... - Page 3 Stand der Dokumentation 11/2009 Vielen Dank, dass Sie sich für einen digitalen Bilderrah- Sicherheitshinweise: men aus dem Hause Hama entschieden haben. Bitte • Setzen Sie das Gerät keinen starken Erschütterungen lesen Sie vor der ersten Inbetriebnahme und Benutzung aus und vermeiden Sie Stoß oder Fall.
- Page 4 • Bitte beachten Sie die im Anhang technischen Daten Funktionsüberblick: im Bezug auf die Multimedia-Kompatibilität beim • hochaufl ösendes 10.4 (=26,4 cm) TFT-LC-Display im Anschluss von USB-Geräten, bzw. bei der 4:3 Format Wiedergabe von Fotos, Musik, Videos oder Filmen (je •...
- Page 5 Aufbau des digitalen Bilderrahmens und der Fernbedienung: Funktionen der Fernbedienung: Stummschaltung Setup Zoom SD/MMC/MS Slot Beenden Compact Flash Slot Mini USB Anschluss Drehen USB Anschluss ON/OFF Lautstärke + Netzteil Anschluss Menü Lautstärke - Hauptschalter Auswählen / Nach oben Ausführen Nach rechts Modus Nach unten Diavortrag...
- Page 6 Menüfunktionen: MENÜ Untermenüs & Funktionsbeschreibungen Funktionsauswahlmenü PHOTO Photo Diashow MUSIK COMBO Musik + Photo Diashow MOVIE Video SPIELLISTE Liste aller Dateien mit Dateimanagement sowie Lösch- & Kopierfunktion EINSTELLUNGEN Systemeinstellungen (variiert je nach Spezifi kation des Gerätes) (Setting/Setup) KALENDER Kalender-, Uhr- und Alarmeinstellungen Kartenauswahlmenü...
- Page 7 Original: Originalgröße (4:3 Format) In der Einstellung „Normal“ behält das Bild sein Originalformat bei Smart: Originalgröße (4:3 Format) In der Einstellung „Strecken“ wird das Bild auf die Displaygröße angepasst Split-Screen-Modus: Mit der Split-Screen-Funktion können mehrere Bilder zeitgleich auf dem Display angezeigt werden. Im Modus Bildpräsentation, drücken Sie auf „Slide Show”...
- Page 8 Starten des digitalen Bilderrahmens 3. Kopieren und Löschen von Dateien: Stecken Sie zuerst den Adapterstecker in den digitalen a) Wählen Sie den USB – Stick bzw. die Speicherkarte Bilderrahmen und danach das Netzkabel in eine aus, den Sie bearbeiten möchten. Steckdose.
- Page 9 4. Anzeigen für die Wiedergabe ACHTUNG: Während der automatischen Diashow oder der Wiedergabe von Einzelbildern ist keine USB-Ver- Aktionen: bindung möglich. Ebenso ist es nicht möglich, eine Dia- Drücken Sie während der Wiedergabe MENU und die show zu starten oder Dateien zu betrachten, während Info-Leiste wird angezeigt.
- Page 10 • Zeiteinstellung (AUS): Ausschalten soll. Reinigung des Gerätes ein weiches, fusselfreies Tuch Achtung: Funktion nur wenn der Hauptschalter auf (z.B. Hama Art.-Nr. 51076/51077 u.ä.). Bei stärkeren EIN ist! Verschmutzungen feuchten Sie das Tuch sehr leicht an. • Splitscreen Funktion: Bei dieser Funktion können bis Verwenden Sie jedoch keinesfalls starke Lösungsmit-...
-
Page 11: Fehlersuche
FEHLERSUCHE: Beim Anschluss von USB-Endgeräten werden diese nicht angezeigt. Ursache: inkompatibles USB-Protokoll Der Bilderrahmen lässt sich nicht einschalten: Nicht alle Geräte unterstützen die USB-Kommunikation Ursache: Problem in der Stromversorgung des in gleicher Weise. Im Zweifelsfall testen Sie ein anderes Bilderrahmens. Gerät am digit. - Page 12 Produktfehler dar. Support- und Kontaktinformationen Bei defekten Produkten: Bitte wenden Sie sich bei Produktreklamationen an Ihren Händler oder an die Hama Produktberatung. Internet/World Wide Web Produktunterstützung, neue Treiber oder Produktinfor- mationen bekommen Sie unter www.hama.com Support Hotline – Hama Produktberatung: Tel.
-
Page 13: Operating Instructions
Operating instructions Operating instructions Issue of documentation: November 2009 Thank you for choosing a Hama digital picture frame. Safety Notes: Please read the complete operating instructions • Do not expose the player to heavy vibrations and do carefully before using the device for the fi rst time. - Page 14 Function overview: • Please note that that files that are displayed or played • High-resolution 10.4 (=26.4 cm) TFT LC display in on the digital picture frame may be subject to 4:3 format copyright laws from third parties. All liability claims •...
- Page 15 Structure of the digital picture frame and the remote control: Remote control function: Mute Setup Zoom SD/MMC/MS Slot Exit Compact Flash Slot Mini USB connection Rotate USB connection ON/OFF Volume + Power supply unit connection Menu Volume - Main switch Select / Execute Right...
-
Page 16: Alarm Setting
Menu functions: MENU Submenus & function descriptions Function selection menu PHOTO Photo slide show MUSIC COMBO Music + photo slide show MOVIE Video PLAY LIST List of all fi les with fi le management as well as delete & copy functions SETTINGS System settings (varies according to the device specifi... - Page 17 Original: Original size (4:3 format) With the „Normal“ setting, the image keeps its original format Smart: Original size (4:3 format) With the „Stretch“ setting, the image is adjusted to fi t the size of the display Split screen mode: With Split screen function, several images can be displayed at the same time. In the pictures review mode, press „Slide Show”...
- Page 18 Starting the digital picture frame 3. Copying and deleting fi les: First, insert the adapter plug into the digital picture frame a) Select the USB stick or memory card you want to edit. and then insert the power supply cord into a power socket. b) Select the playlist using the buttons and press Switch on the device with the main switch.
- Page 19 4. Displaying the playback 6. Calendar Actions: During Playback, press MENU and info bar displays on the screen. Then select a function item by pressing and press ENTER to perform the corresponding func- tion. (Exhibit 7) Press EXIT to return to fi le list display screen. 4.2 Structure and function of the info bar Image rotation Zoom...
- Page 20 Occasional care and cleaning of the device ensure a images can be displayed simultaneously. long service life. Use a soft, lint-free cloth (e.g. Hama • Auto play: Function menu to set the conditions under item no. 51076/51077 etc.) to clean the device. Slightly which the picture frame should start.
-
Page 21: Troubleshooting
TROUBLESHOOTING: Data on a memory card can not be accessed. Cause: incompatible memory card or incorrect data The picture frame can not be switched on: media format Cause: Problem with the electrical supply of the picture There are some types of memory cards/media that are screen. - Page 22 Support and contact information If the product is defective: Contact your retailer or Hama Product Consulting if you have any product claims. Internet/World Wide Web Product support, new drivers and product information are available at www.hama.com.
- Page 23 Consignes de sécurité : Nous vous remercions d’avoir choisi un cadre photo • Protégez l’appareil des secousses violentes et évitez numérique de Hama. Veuillez lire attentivement le tout choc ou toute chute. présent mode d‘emploi avant sa première utilisation et •...
- Page 24 • En cas de défaut constaté sur votre cadre photo Aperçu des fonctions : numérique, veuillez vous adresser à votre revendeur • écran haute résolution TFT-LCD de 10.4 (= 26,4 cm) spécialisé. au format 4:3 • Veuillez noter les caractéristiques techniques en •...
- Page 25 Structure du cadre photo numérique et de la télécommande : Fonctionnement de la télécommande : Mise en sourdine Confi guration Fente carte SD / MMC / MS Zoom Quitter Fente carte Compact Flash Connexion mini USB Connexion USB Rotation Augmentation Connexion pour bloc mise sous / du volume audio...
- Page 26 Fonctions du menu : MENÜ Sous-menus & description des fonctions Menu de sélection de fonctions PHOTO Diaporama MUSIQUE COMBO Musique + diaporama MOVIE Vidéo LISTE DE JEUX Liste aller Dateien mit Dateimanagement sowie Lösch- & Kopierfunktion PARAMETRES Liste de tous les fi chiers à gestion de fi chier ainsi (réglage / setup) que fonction de suppression et de copie CALENDRIER...
- Page 27 Original: Format d’origine (format 4:3) En réglage « Normal », l’image conserve son format d’origine Smart: Format d’origine (format 4:3) En réglage « Allonger », l’image est adap- tée à la taille de l’écran Mode split-screen : Avec la fonction split-screen, plusieurs images peuvent être affi chées simultanément à l’écran. Dans le mode présentation des images, vous pressez sur «...
- Page 28 Démarrage du cadre photo numérique 3. Copie et suppression de fi chiers : Insérez premièrement la fi che adaptateur dans le cadre a) Sélectionnez la clé USB (la carte mémoire) dont vous photo numérique, puis branchez le câble secteur dans une désirez éditer les fi...
- Page 29 4. Ecran de lecture ATTENTION : la connexion USB ne peut pas être établie pendant un diaporama automatique ou pendant la Actions : lecture d’images individuelles. Il n’est pas non plus Pendant la lecture, appuyez sur MENU, une barre possible de démarrer un diaporama ou de visualiser d’informations sera affi...
- Page 30 • Saturation des couleurs chiffon non textile doux pour nettoyer l’appareil (par • Paramètres horaires (ON) : heure de mise sous exemple l’article de Hama réf. 51076/51077). tension du cadre photo numérique En cas de saletés tenaces, humidifi ez légèrement le •...
-
Page 31: Recherche Des Pannes
RECHERCHE DES PANNES : Vous n’arrivez pas à mettre le cadre photo numérique Les appareils USB ne sont pas affi chés après avoir été sous tension connectés : Cause : problème d’alimentation du cadre photo. Cause : protocole USB incompatible Vérifi... - Page 32 En cas d’appareils défectueux : En cas de réclamation concernant le produit, veuillez vous adresser à votre revendeur ou au département conseil produits de Hama. Internet / World Wide Web Notre support technique, les nouveaux pilotes et les informations produits sont disponibles sous : www.hama.com...
-
Page 33: Instrucciones De Uso
Le agradecemos que se haya decidido por la compra Indicaciones de seguridad: de este marco digital de la casa Hama. Antes de utilizar • No someta el aparato a fuertes sacudidas y evite que por primera vez el marco, léase detenidamente estas sufra golpes o caídas. - Page 34 • Observe los datos técnicos que se indican en el Sinopsis del funcionamiento: anexo en cuanto a la compatibilidad de multimedia • Pantalla TFT-LCD de 10.4 (=26,4 cm) de alta resolución cuando se conectan dispositivos USB, o en cuanto a en formato 4:3 la reproducción de fotos, música, vídeos o películas •...
- Page 35 Estructura del marco digital y del mando a distancia: Funcionamiento del mando a distancia: Reproducción sin sonido Setup Zoom Ranura SD / MMC / MS Finalizar Ranura Compact Flash Conexión mini USB Girar Conexión USB Tecla Power Volumen + Conexión para fuente ON/OFF de alimentación Menú...
- Page 36 Funciones de menú: MENU Submenús y descripciones de funcionamiento Menú de selección de funciones PHOTO Sesión de diapositivas MUSICA COMBO Música + Sesión de diapositivas MOVIE Vídeo LISTA DE REPRODUCCIÓN Lista de todos los archivos con administración de archivos y función de copia y borrado AJUSTES (Setting/Setup) Ajustes del sistema (varía en función de la especifi...
- Page 37 Original: Tamaño original (formato 4:3) En el ajuste „Normal“, la imagen conserva su formato original Smart: Tamaño original (formato 4:3) En el ajuste „Estirar“, la imagen se ajusta al tamaño de la pantalla Función de Pantalla Partida: Mediante la función de Pantalla Partida se pueden visualizar varias imágenes al mismo tiempo. En el Modo de Formato de visualización de imágenes, seleccione “Slide Show”...
- Page 38 Iniciar el marco digital 3. Copiar y borrar archivos: Enchufe primero el conector adaptador en el marco digital a) Seleccione la memoria USB o la tarjeta de memoria y después el cable de red a una toma de corriente. Encien- que desee editar.
- Page 39 4. Visualizaciones para la reproducción ATENCIÓN: Durante la visualización automática de diapositivas o durante la reproducción individual de Acciones: imágenes, la conexión USB no es posible. Tampoco es Durante la reproducción, pulse MENU y se visualiza la posible iniciar una sesión de diapositivas o la visualización barra de información.
- Page 40 (p. ej., art. • Saturación de color n° de Hama: 51076/51077 o similar). Si la suciedad es • Ajustes de hora (ON): Aquí se puede ajustar cuándo fuerte, humedezca el paño sólo muy levemente. Nunca...
-
Page 41: Búsqueda De Fallos
No se visualizan los dispositivos USB conectados. BÚSQUEDA DE FALLOS: Causa: Protocolo USB incompatible No se puede encender el marco digital: No todos los aparatos soportan la comunicación vía USB del mismo modo. En caso de duda, pruebe otro Causa: Problema en la alimentación de corriente del marco digital. - Page 42 En caso de productos defectuosos: Si tiene que hacer alguna reclamación sobre nuestros productos, diríjase a su proveedor o a su asesor de productos Hama. Internet/World Wide Web Encontrará soporte para sus productos, nuevos controladores o información sobre los productos en www.hama.com...
- Page 43 Stand van de documentatie 11/2009 Hartelijk dank dat u voor de aanschaf van een Veiligheidsinstructies: digitale fotolijst van Hama heeft gekozen. Lees de • Stel het toestel niet bloot aan zware schokken en gebruiksaanwijzing volledig en goed door voordat u voorkom stoten of vallen.
- Page 44 • Houd rekening met de technische gegevens in de Functieoverzicht appendix over de compatibiliteit met multimedia bij de • 10.4 -TFT-LC-display (26,4 cm) met hoge resolutie in aansluiting van USB-apparatuur, resp. bij de 4:3 formaat weergave van foto´s, muziek, video´s of fi lms •...
- Page 45 Opbouw van de digitale fotolijst en de afstandsbediening: Functies van de afstandsbediening: Mute-functie Setup Zoom SD/MMC/MS Slot Beëindigen Compact Flash Slot Mini-USB-aansluiting Draaien USB-aansluiting Power ON/OFF- Volume + Aansluiting voor toets voedingsadapter Menu Volume - Hoofdschakelaar Selecteren / Naar boven uitvoeren Nach rechts Modus...
-
Page 46: Beeld Instellen
Menufuncties: MENÜ Submenu´s & beschrijving van de functies Functiemenu FOTO Foto-diashow MUZIEK COMBO Muziek + foto-diashow MOVIE Video SPEELLIJST Lijst van alle bestanden met bestandsmanagement en wis- en kopieerfunctie INSTELLINGEN Systeeminstellingen (varieert afhankelijk van de specifi caties van het toestel) (setting/setup) KALENDER Kalender, klok en alarm instellingen... - Page 47 Origineel: Originele afmeting (4:3 formaat) Onder de instelling „Normal“ blijft het originele formaat van de foto behouden Smart: Originele afmeting (4:3 formaat) Onder de instelling „Strekken“ wordt de foto aan de grootte van het scherm aangepast Split-screen functie: Met de split-screen functie verschijnen meerdere afbeeldingen tegelijkertijd op het scherm. In de modus diavoorstelling, klikt u op „Slide Show“...
- Page 48 Starten van de digitale fotolijst 3. Kopiëren en wissen van bestanden: Steek eerst de adapterstekker in de digitale fotolijst en a) Selecteer de USB-stick of geheugenkaart die u wilt daarna de voedingskabel in een contactdoos. Schakel het bewerken. toestel met de hoofdschakelaar in. b) Selecteer met behulp van de pijltoetsen playlist en druk op ENTER.
- Page 49 4. Indicaties voor de weergave ATTENTIE: Tijdens de automatische diashow of de weergave van afzonderlijke foto´s is een Acties: USB-verbinding niet mogelijk. Het is ook niet Druk tijdens de weergave op MENU en de informatielijst mogelijk een diashow te starten of bestanden wordt weergegeven.
- Page 50 • Tijdinstelling (UIT): uitgeschakeld. (bijv. Hama art.-nr. 51076/51077 o.i.d.). Bij hardnekkiger Attentie: deze functie werkt alleen als de vuil maakt u de doek iets vochtig. Maar gebruik...
-
Page 51: Opsporen Van Storingen
OPSPOREN VAN STORINGEN: USB-eindapparatuur wordt bij het aansluiten ervan niet weergegeven De fotolijst kan niet worden ingeschakeld: Oorzaak: incompatibel USB-protocol Oorzaak: probleem in de stroomvoorziening van de Niet alle apparaten ondersteunen de USB- fotolijst. communicatie op dezelfde manier. In geval van twijfel Controleer of de stekker van de voedingsadapter test u een ander toestel op de digit. - Page 52 Support- en contactinformatie Bij defecte producten: Neem bij klachten over het product contact op met uw verkoper of met de afdeling Productadvies van Hama. Internet/World Wide Web Productondersteuning, nieuwe drivers of productinformatie is verkrijgbaar onder www.hama.com...
-
Page 53: Istruzioni Per L'uso
Istruzioni per l‘uso Istruzioni per l’uso Stato della documentazione 11/2009 Grazie per avere acquistato la cornice digitale di Hama. Indicazioni di sicurezza: Prima dell’utilizzo, leggete attentamente le istruzioni per • Non sottoporre l‘apparecchio a scossoni ed evitare l’uso! Conservate queste istruzioni. Vi saranno di grande colpi o cadute. - Page 54 • Osservate attentamente i dati tecnici allegati in Schema delle funzioni: merito alla compatibilità multimediale per l‘attacco • display LCD TFT da 10.4 (26,4 cm) ad alta risoluzione di apparecchi USB ovvero per la riproduzione di in formato 4:3 foto, musica, video o fi lm (secondo le specifi che •...
- Page 55 Struttura della cornice digitale e del telecomando: Funzioni del telecomando Mute Set up Zoom Slot SD/MMC/MS Esci Slot Compact Flash Attacco mini USB Ruota Attacco USB Tasto ON/OFF Volume + Attacco alimentatore Menu Volume - Interruttore principale Seleziona / In alto Esegui A destra Modo...
-
Page 56: Impostazione Immagine
Funzioni del menu: MENU Sottomenu e descrizioni delle funzioni Menu scelta della funzione FOTO Slideshow immagini MUSICA COMBO Musica + Slideshow immagini MOVIE Video PLAYLIST Elenco di tutti i fi le e loro gestione e le funzioni cancella e copia IMPOSTAZIONI Impostazioni di sistema (variano secondo le specifi... - Page 57 Originale: Dimensione originale (Formato 4:3) Nella impostazione „Normale“ l‘immagine mantiene il suo formato originale Smart: Dimensione originale (Formato 4:3) Nella impostazione „Estendi“ l‘immagine viene adattata alla dimensione del display Funzione Split screen: Con la funzione spit screen possono essere guardate sul display diverse foto contemporaneamente. Nel Modo presentazione, premere il tasto “Slide Show”...
- Page 58 Avvio della cornice digitale 3. Copia e cancellazione di fi le: Inserire prima la spina dell’adattatore nella cornice a) Selezionare la chiavetta USB o la scheda di memoria digitale, quindi il cavo di rete in una presa. Accendere su cui si desidera lavorare. l’apparecchio dall’interruttore principale.
- Page 59 4. Indicatori per la riproduzione ATTENZIONE: durante il dia show automatico o la riproduzione di immagini singole, non è possibile Azioni: effettuare il collegamento USB. Mentre la cornice Preme MENU durante la riproduzione per visualizzare digitale sta lavorando non è nemmeno possibile la barra delle informazioni.
- Page 60 • Impostazione ora (ON): qui si può impostare quando prolungano la durata. Utilizzate un panno in microfi bra la cornice digitale si deve accendere o morbido e senza pelucchi (ad es. Hama articolo • Impostazione ora (OFF): spegnere. 51076/51077). In caso di sporco persistente, inumidite Attenzione: la funzione è...
-
Page 61: Ricerca Guasti
RICERCA GUASTI: Non si riesce ad accedere ai dati di una memory card. Causa: memory card incompatibile o formato errato del La cornice digitale non si accende: supporto dati. Causa: problema all’alimentazione elettrica della Alcuni tipi di memory card o supporti non sono cornice digitale. - Page 62 Informazioni per l’assistenza e i contatti In caso di prodotti difettosi: Per reclami in merito ai prodotti, rivolgetevi al vostro rivenditore o alla Consulenza prodotto Hama. Internet/World Wide Web Assistenza sui prodotti, nuovi driver o informazioni sui prodotti all’indirizzo www.hama.com Support Hotline –...
- Page 63 d Hinweis zum Umweltschutz: Ab dem Zeitpunkt der Umsetzung der europäischen Richtlinien 2002/96/EG und 2006/66/EG in nationales Recht gilt folgendes: Elektrische und elektronische Geräte sowie Batterien dürfen nicht mit dem Hausmüll entsorgt werden. Der Verbraucher ist gesetzlich verpfl ichtet, elektrische und elektronische Geräte sowie Batterien am Ende ihrer Lebensdauer an den dafür eingerichteten, öffentlichen Sammelstellen oder an die Verkaufsstelle zurückzugeben.
- Page 64 Wskazówki dotyczące ochrony środowiska: Od czasu wprowadzenia europejskiej dyrektywy 2002/96/EU i 2006/66/EU do prawa narodowego obowiązują następujące ustalenia: Urządzeń elektrycznych, elektronicznych oraz baterii jednorazowych nie należy wyrzucać razem z codziennymi odpadami domowymi! Użytkownik zobowiązany prawnie do odniesienia zepsutych, zniszczonych lub niepotrzebnych urządzeń elektrycznych i elektronicznych do punktu zbiórki lub do sprzedawcy.
Need help?
Do you have a question about the 95252 and is the answer not in the manual?
Questions and answers