Table of Contents
Advertisement
Quick Links
Operating Instructions
GB
English, 1
52 TCW S
HAE 51 K S
HAE 51 P S
HAE 51 X S
HAE 51 G S
52TCK
PLEASE PHONE US TO REGISTER YOUR APPLIANCE AND ACTIVATE YOUR PARTS GUARANTEE ON 08448 24 24 24
Contents
Warning, 2
Introduction, 3
Installation Instructions,5
Features, 6
Hotplate, 8-10
Grill, 11
Oven, 12-13
Oven Cooking Charts, 14-15
Care and Cleaning, 16-17
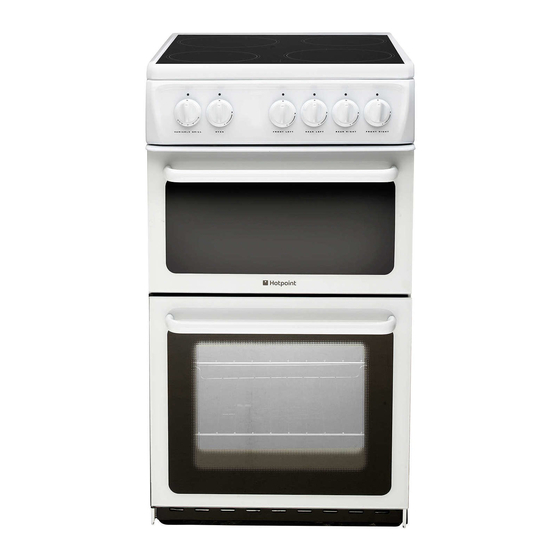
50cm Electric Cooker
GB
Advertisement
Table of Contents

Related Manuals for Hotpoint 52 TCW S


Summary of Contents for Hotpoint 52 TCW S
-
Page 1: Table Of Contents
Installation Instructions,5 Features, 6 Control Panel, 7 Hotplate, 8-10 Grill, 11 Oven, 12-13 52 TCW S Oven Cooking Charts, 14-15 HAE 51 K S HAE 51 P S Care and Cleaning, 16-17 HAE 51 X S Cooking Results Not Satisfactory?,17... -
Page 2: Warning
WARNING WARNING: The appliance and its The internal surfaces of the accessible parts become hot compartment (where present) may during use. become hot. Care should be taken to avoid Never use steam cleaners or touching heating elements. pressure cleaners on the appliance. Children less than 8 years of age Remove any liquid from the lid shall be kept away unless... -
Page 3: Introduction
Introduction The cooker is designed specifically for domestic use To the Installer: Before installation, fill in the product details on the and responsibility will not be accepted for use in any back cover of this book. other installation. The information can be found on the rating plate. * The guarantee is subject to the provisions that To the User: the appliance:... -
Page 4: For Your Safety
For your Safety When used properly your appliance is completely safe but as with any NEVER Never dry any items on either the hob or oven doors. electrical product there are certain precautions that must be observed. NEVER Never install the appliance next to curtains or other soft PLEASE READ THE PRECAUTIONS BELOW BEFORE USING YOUR APPLIANCE. - Page 5 Installation The cooker is Positioning the Cooker WARNING – THIS APPLIANCE MUST BE EARTHED. designed to fit between kitchen Electrical connection cabinets spaced Electric cookers come without a power supply 500mm apart. The cable. The cooker is designed to operate on an space either side electricity supply which conforms to the electrical need only be...
-
Page 6: Features
Features HOB VENTILATION SLOTS 1700W 1200W 1700W 1200W Hob Hot Indicators CONTROL PANEL GRILL/MEAT PAN WITH REMOVABLE HANDLE AND WIRE FOOD SUPPORT FOOD SUPPORT MODEL & SERIAL NUMBER GRILL TOP OVEN/ GRILL DOOR MAIN OVEN INNER GLASS W I R E W O R K DOOR SHELF SUPPORTS... -
Page 7: Control Panel
Control Panel ACTIVE HOB MAIN OVEN THERMOSTAT TOP OVEN/GRILL INDICATOR LIGHT INDICATOR LIGHT INDICATOR LIGHT RIGHT RIGHT GRILL LEFT LEFT MAIN FRONT REAR REAR FRONT OVEN BURNER BURNER BURNER BURNER Control Knobs Operating the control when the grill is in use The knobs for the hotplates can be rotated in either In common with all cookers having controls sited direction to provide variable heat control, the Main... -
Page 8: Hotplate
Hotplate Turn the control to 6 for fast cooking. To cook more CAUTION: IF AT ANY TIME A CRACK IN THE slowly or simmer, turn the control to a lower setting SURFACE BECOMES VISIBLE, DISCONNECT THE according to the size of the saucepan and the APPLIANCE IMMEDIATELY FROM THE SUPPLY. - Page 9 THE BEST COMBINATIONS THE BEST COMBINATIONS THE BEST COMBINATIONS THE BEST COMBINATIONS THE BEST COMBINATIONS Do Not PANS SHOULD This table is a general guide to Do not Do not the types of pan suitable for Do not Do not Do not cook directly on the hob surface without different types of hobs and...
- Page 10 Choosing Your Utensils Do not Do not Do not Do not Do not use utensils with rough bases. Do not Do not Do not Do not Do not use lightweight utensils with thin, distorted or uneven bases. Do not Do not Do not Do not Do not...
-
Page 11: Grill
Grill The food must be placed on the rack in the grill pan. Grilling Position the grill pan on top of the oven rack. The best results are achieved by placing the oven rack GRILLING MUST BE DONE WITH THE GRILL DOOR on the uppermost shelves. -
Page 12: Oven
Oven Main Oven - Fan Cooking Using the Main Oven for Other Functions This control switches on the main oven. To select ‘S’ SLOW Setting Fan Cooking - Turn thecontrol clockwise and select any temperature between 100°C and Max. As the This is used for slow cooking, keeping food warm and control is turned the fan will start.The main oven light warming plates for short periods. - Page 13 Points to consider when preparing food for “SLOW” cooking: 1. Make sure that the dishes to be used will fit into the oven ensuring enough room for air to circulate. 2. All dishes cooked on the slow setting will require a minimum of 6 hours, however, if if if if if they are cooked for 1 -2 hours longer then deterioration in their appearance may be noticed.
-
Page 14: Oven Cooking Charts
Oven Cooking Chart- MEAT Fan Oven - Meat Meat Pre- Temperature Time (approx.) heat °C 25-30 mins per 450g Beef 160/180 (1lb) + 25 mins over. 20-30 mins per 450g Lamb 160/180 (1lb) + 25 mins over. 25-30 mins per 450g Pork 160/180 (1lb) + 25 mins over. - Page 15 Oven Cooking Chart- BAKING Fan Oven Cooking Food Pre - Te mpe rature °C Time in mins. heat Scones 210/220 9-12 Small Cakes 170/180 25-35 Victoria Sandwich 160/170 20-25 Sponge Sandwich 170/190 15-20 (Fatless) Swiss Roll 190/200 12-15 Semi-rich Fruit cakes 140/150 60-75 7 inch Rich Fruit Cakes...
-
Page 16: Care And Cleaning
Care and Cleaning Decorative Trims Ceramic hob It is advisable to clean the decorative trims regularly To reduce the amount of cleaning always ensure that to prevent any build up of soiling. The the hob and cooking utensils are clean and dry recommended method of cleaning is to wipe over before use. -
Page 17: Cooking Results Not Satisfactory
CLEANING THE DOORS 3. The inside of the outer door glass can now be Take particular care not to damage the inner Take particular care not to damage the inner Take particular care not to damage the inner Take particular care not to damage the inner Take particular care not to damage the inner cleaned while still fitted to the cooker. -
Page 18: Something Wrong With Your Cooker
Something Wrong with your Cooker? Before contacting your Service Centre or Installer, check the problem guide below, there may be nothing wrong with your cooker. Problem Slight odour or small amount of This is normal and should cease after a short period. smoke when using the cooker for the first time. -
Page 19: Guarantee Information
Guarantee 12 months Parts and Labour Guarantee Your appliance has the benefit of our manufacturer's guarantee, which covers the cost of breakdown repairs for twelve months from the date of purchase. This gives you the reassurance that if, within that time, your appliance is proven to be defective because of either workmanship or materials, we will, at our discretion, either repair or replace the appliance at no cost to you. -
Page 20: Service Information
Indesit Company UK Limited, Morley Way, Peterborough, PE2 9JB Indesit Company, Unit 49 Airways Industrial Estate, Dublin 17 PLEASE PHONE US TO REGISTER YOUR APPLIANCE AND ACTIVATE YOUR PARTS GUARANTEE ON 08448 24 24 24...
Need help?
Do you have a question about the 52 TCW S and is the answer not in the manual?
Questions and answers