
Related Manuals for GE 25860


Summary of Contents for GE 25860
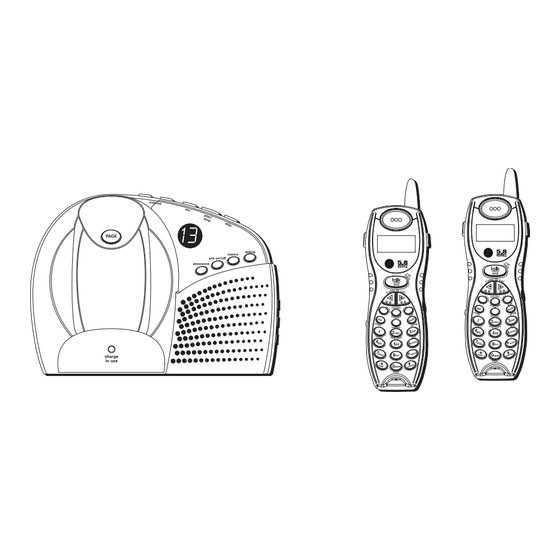
- Page 1 25860 5.8 GHz Dual Cordless Handset Call Waiting Caller ID Telephone/Answering System User’s Guide We bring good things to life.
-
Page 2: Equipment Approval Information
Equipment Approval Information Your telephone equipment is approved for connection to the Public SwitchedTelephone Network and is in compliance with parts 15 and 68, FCC Rules and Regulations and theTechnical Requirements forTelephone Terminal Equipment published by ACTA. 1 Notification to the Local Telephone Company On the bottom of this equipment is a label indicating, among other information, the US number and Ringer Equivalence Number (REN) for the equipment.You must, upon request, provide this information to your telephone company. -
Page 3: I Nstallation
Interference Information This device complies with Part 15 of the FCC Rules. Operation is subject to the following two conditions: (1) This device may not cause harmful interference; and (2)This device must accept any interference received, including interference that may cause undesired operation. This equipment has been tested and found to comply with the limits for a Class B digital device, pursuant to Part 15 of the FCC Rules.These limits are designed to provide reasonable protection against harmful interference in a residential installation. -
Page 4: Table Of Contents
Table of Contents QUIPMENT PPROVAL NFORMATION ...3 NTERFERENCE NFORMATION ...3 EARING OMPATIBILITY ...5 NTRODUCTION ...6 EFORE EGIN ...6 ARTS HECKLIST ELEPHONE EQUIREMENTS ...7 ANDSET AND AYOUT ...8 NSTALLATION MPORTANT NSTALLATION ...8 NSTALLING THE HONE ...10 OUNTING ...10 EGISTRATION ...10 NSWERING YSTEM ETUP ... -
Page 5: Introduction
Introduction CAUTION: When using telephone equipment, there are basic safety instructions that should always be followed. Refer to the IMPORTANT SAFETY INSTRUCTIONS provided with this product and save them for future reference. This telephone answering system is designed to be simple to use, however, you can reach its full potential more quickly by taking a few minutes to read this user’s guide. -
Page 6: Before You Begin
VCRs. To minimize or prevent such interference, the base of the cordless telephone should not be placed near or on top of a TV, microwave ovens, or VCR. If such interference continues, move the cordless telephone farther away from these appliances. -
Page 7: Handset And Base Layout
Handset and Base Layout talk/callback (button) Caller ID-vol (-) (caller ID/volume button) redial (button) memory (button) del/chan (delete/channel button) ringer (switch) review (button) play/stop (button) * exit (button) message (indicator) volume (buttons) PAGE (button) announce charge/in use (button) (indicator) (answer on/off button) display erase (button) (review button) -
Page 8: Important Installation Guidelines
Installation • Never install telephone wiring during a lightning storm. • Never install telephone jacks in wet locations unless the jack is specifically designed for wet locations. • Never touch non-insulated telephone wires or terminals, unless the telephone line has been disconnected at the network interface. •... - Page 9 NOTE: You must connect the handset battery before use. NOTE: Battery and battery door are packaged together inside a plastic bag and are separate from the handset. • Locate the battery compartment on the back of the handset. • Plug the battery pack cord into the jack inside the compartment. •...
-
Page 10: Wall Mounting
Wall Mounting NOTE: For best results, charge the telephone/answering system on a flat surface before hanging it on the wall. Slip the mounting holes (on the back of the base) over the wall plate posts and slide the unit down into place. (Wall plate not included.) Registration YOU MUST REGISTER BOTH HANDSETSTOTHE MAIN BASE BEFORE USE! a) 1st handset - The 1st handset being charged on the main base station... -
Page 11: Voice Time/Day Stamp
• Press the ans on/off button to turn the answering system on and off. The MESSAGES indicator lights when the answering system is on.The indicator blinks when you have new messages. NOTE: The answering system displays “- -” when it is off. Voice Time/Day Stamp 1. -
Page 12: Answering System Operation
Sample Outgoing Announcement Hi, this is (use your name here), I can’t answer the phone right now, so please leave your name, number and a brief message after the tone, and I’ll get back to you. Thanks. Reviewing the Announcement Press and release announce button to review your outgoing announcement. -
Page 13: Emory Ull
Message Playback The messages indicator on the base lets you know when you have messages.To play messages, press play/stop. While a message is playing, you may do the following: • Press play/stop to stop the message playback. • Press and release rev to restart the current message; continue pressing and releasing rev to review previous messages. -
Page 14: Leaving A Memo
Leaving a Memo Use the memo feature to leave a message. 1. Press and hold the memo button on the base. You must hold the button until you finish recording the memo. 2. Begin speaking after you hear the beep. 3. -
Page 15: Factory Default
2. Use the CID-VOL (- or +) buttons on the handset or the handset touch- tone pad to select 1, 2, or 3. 3. Press the flash/prog button again. NOTE: Press the *exit button once to keep the previous setting and return to the standby screen. -
Page 16: Call Transfer
2. When finished, place the handset back in the cradle, or press the talk/ callback button again. IMPORTANT: Because cordless phones operate on electricity, you should have at least one phone in your home that isn’t cordless in the event of a power failure. Call Transfer During an external call, you may transfer the external call to another handset. -
Page 17: Volume
Volume When the phone is ON, press the CID-VOL (- or +) buttons to adjust the volume of the handset’s earpiece to a comfortable listening level. There are four settings to choose from. VOL 1 is the minimum volume level and VOL 4 is the maximum. -
Page 18: Call Waiting Caller Id
Caller ID (CID) Caller ID (CID) is a service available from your local telephone company. For Caller ID to work on this system, you must subscribe to Caller ID service from your local telephone company. This unit receives and displays information transmitted by your local phone company.This information can include the phone number, date, and time;... -
Page 19: Reviewing Cid Records
NOTE: Check with your local phone company regarding name service availability. Reviewing CID Records As records are received and stored, the display is updated to let you know how many calls you have received. 1. Make sure the phone is OFF (not in talk mode). 2. -
Page 20: Ialing Acid Number
NOTE: If the memory location is occupied, “REPLACE MEMO?” is displayed, and you must confirm replacement by pressing the memory button. If you do not want to replace number in memory location, press the *exit button. NOTE: It is necessary to format number prior to saving into memory location because you cannot format number after it is saved. -
Page 21: Storing A Name And Number In Memory
Changing the Number Format The format/mute button lets you change the format of a telephone number. Available formats are as follows. 7-digit 7-digit telephone number. 10-digit 3-digit area code + 7-digit telephone number. long distance code “1” + 3-digit area code + 7-digit 11-digit telephone number. -
Page 22: Changing A Stored Number Dc
the first and last name. Press the 7 key 4 times for the letter S; press the 6 key once for the letter M; press the 4 key 3 times for the letter I; press the 8 key for the letterT; press the 4 key twice for the letter H. NOTE: If you make a mistake press the chan/erase button to backspace and erase the wrong character(s) or number(s). -
Page 23: Inserting A Pause In The Dialing Sequence
Chain Dialing from Memory Use this feature to make calls which require a sequence of numbers, for example, when you use a calling card to dial a frequently called long distance number. Chain dialing lets you dial number sequences from memory with a few button presses.The following example shows you how to use chain dialing to make a call through a long distance service: The Number For... -
Page 24: Advanced Features
Advanced Features Channel Button While talking on the phone, you might need to manually change the channel in order to reduce static caused by appliances, such as baby monitors, garage door openers, microwave ovens, or other cordless phones. Press and release the del/chan button to move to the next clear channel. -
Page 25: Memory Full
Memory Full When answering system memory is full, the system answers after 10 rings, beeps and waits for you to enter the 3-digit security code. If you don’t enter the security code within 10 seconds, the phone hangs up. You should erase some messages so the answering system can record new messages. -
Page 26: Connecting An To The Handset
Changing the Security Code The default security code for accessing the answering system from another location is 1 2 3.You must use the handset to change the security code. With the phone OFF (not inTALK mode), follow these steps: 1. Press the transfer/answerer button to display ANSWERER REMOTE. 2. -
Page 27: Hanging The Battery
Changing the Battery CAUTION: To reduce the risk of fire or personal injury, use only the battery 5-2548 that is compatible with this unit. 1. Make sure the telephone is OFF (not inTALK mode) before you replace battery. 2. Remove the battery compartment cover. 3. -
Page 28: Andset Sound Signals
Handset Sound Signals Signal A long warbling tone (with ringer on) Three short beeps (several times) Single beep every 7 seconds Two short beeps Display Messages The following messages shows the status of the phone, provides Caller ID information, or helps you set up and use your phone. ERROR ENTER TEL NUMBR ENTER NAME... - Page 29 NO BATTERY BLOCKED NAME INCOMPLETE DATA LONG DISTANCE LOW BATTERY REPT NO DATA EMPTY NO CALLS CALL WAITING ANSWERER REMOTE UNAVAILABLE PRESS TALK KEY PLEASE REGISTER Indicates the battery is not properly installed in the handset, or the battery pack is not properly connected to the jack inside the battery compartment.
-
Page 30: Roubleshooting Tips
Answering System Display Messages The following messages show the status of the answering system or help you set up and use the system. 0-59 CL (blinking) An (blinking) F (blinking) Six bars (blinking) LA (Line Access) Troubleshooting Tips Cordless Phone Solutions No dial tone •... -
Page 31: Caller Id Solutions
Handset does not ring • Make sure the ringer switch on the handset is turned to ON. • The handset may be out of range of the base. Move closer to the base. • You may have too many extension phones on your line.Try unplugging some phones. -
Page 32: Answering System Solutions
Caller ID Error Message • The unit displays this message if it detects anything other than valid Caller ID information during the silent period after the first ring.This message indicates either the presence of noises on the line, or that an invalid message has been sent from the telephone company. -
Page 33: Auses Of Poor Reception
• DO NOT expose to direct sunlight or moisture. • Avoid dropping the unit and other rough treatment. • Clean with a soft cloth. • Never use a strong cleaning agent or abrasive powder because this will damage the finish. •... -
Page 34: W Arranty
Service If trouble is experienced with this equipment, for repair or warranty information, please contact customer service at 1-800-448-0329. If the equipment is causing harm to the telephone network, the telephone company may request that you disconnect the equipment until the problem is resolved. This product may be serviced only by the manufacturer or its authorized service agents. -
Page 35: Headset
Accessory Information DESCRIPTION AC power supply converter Headset Replacement Handset Battery Belt Clip (translucent gray) To place order, have your Visa, MasterCard, or Discover Card ready 1-800-338-0376 and call toll-free A shipping and handling fee will be charged upon ordering. We are required by law to collect appropriate sales tax for each individual state, country, and locality to which the merchandise is being sent. - Page 36 Index Accessing the Answering System from Another Location 25 Accessory Information 35 Advanced Features 24 Answering a Call 15 Answering System Display Messages 30 Answering System Indicator 24 Answering System Operation 12 Answering System Setup 10 Answering System Solutions 32 Attaching the Belt Clip 26 Battery Safety Precautions 27 BeforeYou Begin 6...
- Page 37 Making a Call 15 Memory 21 Memory Full 13,25 Messages Indicator 12 Message Playback 13 Mute 17 Paging the Handset 17 Parts Checklist 6 Programmable Menus 14 Receiving and Storing CID Information Recording the Outgoing Announcement Redial 16 Registration 10 Remote Access 24 Reviewing and Deleting Stored Numbers Reviewing CID Records 19...
-
Page 38: Limited Warranty
This warranty gives you specific legal rights, and you also may have other rights that vary from state to state. If you purchased your product outside the USA: • This warranty does not apply. Contact your dealer for warranty information. Model 25860 00002431 (Rev 0 E/S) 05-01 Printed in China ATLINKS USA, Inc. - Page 39 25860 Guía del Usuario - Sistema de Teléfono / Contestadora / Auricular Inalámbrico Dual 5.8 GHz con Llamada en Espera e Identificador de Llamada Creamos cosas buenas para la vida.
-
Page 40: Información Sobre La Aprobación De Equipo
Información sobre la Aprobación de Equipo El equipo de su teléfono esta aprobado para la conexión con la redTelefónica Pública (Public Switched Telephone Network) y cumple con los requisitos establecidos en las secciones 15 y 68 de las Reglas y Regulaciones de la FCC y con los RequerimientosTécnicos para Equipos deTerminalesTelefónicas (Technical Requirements forTelephoneTerminal Equipment), publicado por ACTA. -
Page 41: Compatibilidad Con Audífonos (Cca)
Información de Interferencias Este artefacto cumple con la Parte 15 de las Reglas de la FCC. Su funcionamiento es sujeto a las dos condiciones siguientes: (l) Este artefacto no puede causar interferencia dañosa, y (2) Este artefacto debe aceptar cualquier interferencia recibida, incluyendo interferencia que puede causar un funcionamiento no deseado. - Page 42 Table of Contents NFORMACIÓN SOBRE LA PROBACIÓN DE NFORMACIÓN DE NTERFERENCIAS OMPATIBILIDAD CON UDÍFONOS ...6 NTRODUCCIÓN ...7 NTES DE OMENZAR ...7 ISTA DE ARTES EQUERIMIENTOS NCHUFE ...7 ELEFÓNICO ORMATO DEL URICULAR Y LA ...9 NSTALACIÓN NDICACIONES MPORTANTES PARA LA ...9 NSTALACIÓN NSTALACIÓN DEL ELÉFONO...
- Page 43 ARCAR UN ÚMERO DEL DENTIFICADOR DE AMBIAR EL ORMATO DEL ...22 EMORIA LMACENAR UN OMBRE Y ...22 EN LA EMORIA AMBIAR UN ÚMERO ARCAR UN ÚMERO ARCADO EN ADENA DESDE LA NTRODUCIR UNA AUSA EN LA ECUENCIA DE ARCADO EVISAR Y ORRAR LMACENADOS EN LA ...24...
- Page 44 Introducción CUIDADO: Cuando utilice equipo telefónico, hay instrucciones básicas de seguridad que siempre deben seguirse. Refiérase a la guía de INSTRUCCIONES DE SEGURIDAD IMPORTANTES provista con este producto y guárdela para referencia futura. Este teléfono/sistema contestador ha sido diseñado para ser de fácil manejo; sin embargo, usted puede aprovechar al máximo su potencial si se toma unos minutos ahora mismo para leer este manual de instrucciones.
-
Page 45: Ntes De Omenzar
Antes de Comenzar Lista de Partes Asegúrese que su paquete incluye los artículos mostrados aquí. Base Dos Paquetes de Gancho del Cinturón baterías para el auricular Requerimientos Para Enchufe Telefónico Para utilizar este teléfono, usted puede necesitar un enchufe modular telefónico tipo RJ11C como el ilustrado aquí, instalado en su hogar. -
Page 46: Formato Del Auricular Y La Base
Formato del Auricular y la Base talk/callback (botón para hablar/devolver el llamado) Caller ID-vol (-) (botón del identificador/ volumen) redial (botón para volver a marcar) memory (botón para memoria) del/chan (botón eliminar/canal) ringer (interruptor del timbre) review (botón para revisar) play/stop (botón para reproducir mensajes) -
Page 47: Instalación
Instalación • Nunca instale cableado telefónico durante una tormenta de relámpagos. • Nunca instale enchufes telefónicos en localizaciones mojadas a menos que el enchufe haya sido diseñado específicamente para localizaciones mojadas. • Nunca toque cables o terminales no aislados, a menos que la línea telefónica haya sido desconectada en la interfaz de la red. - Page 48 • Localice el compartimiento de las baterías en la parte de atrás del auricular. • Conecte el cable del paquete de las baterías dentro del enchufe en el compartimiento. • Introduzca el paquete de las baterías. OPRIMA FIRMEMENTE HACIA ABAJO NOTA: Es importante mantener la polaridad de (cable negro y rojo) en el enchufe dentro del compartimiento como se muestra en la ilustración.
-
Page 49: Registro
Montaje sobre Pared NOTA: Para mejores resultados, cargue el teléfono/sistema contestador sobre una superficie plana antes de montarlo sobre la pared. Deslice los agujeros de montaje (en la parte de atrás de la base) sobre los postecitos en la placa de pared y deslice el aparato hacia abajo hasta que entre en su sitio. (Placa de pared no incluida). -
Page 50: Sello De Hora/Fecha
• Oprima el botón ans on/off su sistema contestador. El indicador de mensajes (“MESSAGES”) se ilumina cuando el sistema contestador está activado. El indicador parpadea cuando usted tiene mensajes nuevos. NOTA: El sistema contestador muestra “- -“ cuando está apagado. Sello de Hora/Fecha 1. -
Page 51: Selector Del Timbre
Selector del Timbre Utilice el selector del timbre (“RINGER SELECT”) en la parte de debajo de la base para programar el número de veces que usted quiere que suene el teléfono antes de que el sistema contestador conteste la llamada. Usted puede seleccionar 3 timbres, 5 timbres, o AHORRADOR DE CARGOS (TS). -
Page 52: Memoria Llena
• Oprima el botón play/stop para detener la reproducción de los mensajes. • Oprima y suelte el botón rev para volver a escuchar el mensaje actual; continúe oprimiendo y soltando el botón de revisar para poder ir a otros mensajes previos. •... -
Page 53: Tono Del Timbre
Programación del Teléfono Menús Programables Hay cuatro menús disponibles en el auricular: Idioma, Clave de Área Local,Tono delTimbre y Programaciones de Fábrica. Cuando usted use estas programaciones, asegúrese que el teléfono esté apagado (OFF) (no en modalidad para hablar). Idioma de la Pantalla 1. -
Page 54: Programaciones De Fábrica
Programaciones de Fábrica Conforme usted se familiariza con esta sistema, usted puede preferir utilizar las programaciones originales. Siga los pasos abajo para volver a las programaciones originales de fábrica. 1. Oprima el botón para programar (“flash/prog”) hasta que la indicación de programaciones de fábrica (“PROG DE FABRICA”) aparezca en la pantalla. -
Page 55: Servicios Especiales ("Flash)
Transferencia de Llamada Durante una llamada externa, usted puede transferir esa llamada a otro auricular. 1. Presione el botón transfer/answerer en el auricular que origina la señal. TRANSFIRIENDO se visualiza en la pantalla. 2. Presione el botón transfer/answerer o el botón talk/callback en el auricular que recibe la señal para responder la llamada. -
Page 56: Para Salir
Para Salir Oprima el botón de salida (“*exit”) en el auricular para salir de una función del menú y volver a la pantalla de alerta. Enmudecedor Utilice el format/mute durante una conversación telefónica para hablar en privado fuera de la línea con una tercera persona. 1. -
Page 57: Llamada En Espera
El aparato recibe y muestra información transmitida por su compañía telefónica local. Esta información puede incluir el número telefónico, fecha y hora; o el nombre, número telefónico, fecha y hora. El aparato puede almacenar hasta 40 llamadas para ser revisadas después. Caller ID (Identificador de Llamadas) con Call Waiting (Llamada en Espera) Para poder recibir información del Identificador de Llamadas de una Llamada en Espera, usted... -
Page 58: Para Almacenar Un Número De Volver A Marcar
2. Cuando esté revisando el archivo más reciente, oprima el botón para borrar (“del/ chan”) en el auricular. La pantalla le pregunta si borra (“BORR LLAMADA ID?”). 3. Oprima nuevamente el botón para borrar (“del/chan”) para confirmar. La pantalla confirma que ha borrado (“BORRADO”). ParaBorrarTodoslosArchivosdelIdentificadordeLlamadas 1. -
Page 59: Para Cambiar El Formato Del Número
indica que inscriba el número (“INSCRIBA NUMERO”). 6. Oprima el botón para volver a marcar (“redial”) en el auricular para mostrar el nombre y número que va a marcarse. 7. Oprima el botón de memoria nuevamente para confirmar. NOTA: Si el número nuevo que va a volverse a marcar tiene más de 24 dígitos, entonces no puede ser almacenado en la memoria. -
Page 60: Memoria
4. Oprima el botón para hablar (“talk/callback”) para marcar el número. 5. Repita el paso 3, si fuera necesario, hasta que el formato correcto del número sea seleccionado y la llamada haya sido terminada. Memoria Usted puede almacenar hasta diez números de 24 dígitos en la memoria para marcado rápido. -
Page 61: Para Marcar Un Número Almacenado
Cuando la indicación de reemplazar memo (“REMPLAZAR MEMO?”) aparezca en la pantalla, usted debe oprimir el botón de memoria en el auricular para confirmar el reemplazo. Para Marcar un Número Almacenado 1. Asegúrese de que el teléfono esté activado (ON), oprimiendo el botón “talk/ callback”... -
Page 62: Funciones Avanzadas
1. Asegúrese de que el teléfono esté activado (ON) (en modalidad para hablar), oprimiendo el botón “talk/ callback. ” 2. Oprima el botón de memoria y después oprima el 7. 3. Cuando usted escuche el tono de acceso, oprima el botón de memoria y después oprima el 8. -
Page 63: Indicador Del Sistema Contestador
Acceso Remoto Usted puede tener acceso al sistema contestador con el auricular inalámbrico de cualquier otro teléfono compatible con modalidad para marcado por tono. Auricular Inalámbrico 1. Oprima el botón transfer/answerer para tener acceso al sistema contestador. 2. Utilice las teclas correspondientes al auricular como si usara las teclas de la base (ve ala sección de “Para Programar el Sistema Contestador”) Las funciones de botón están ubicadas en el auricular debajo de cada tecla numérica. -
Page 64: Para Cambiar El Código De Seguridad
Para Tener Acceso al Sistema Contestador desde Otra Localización Usted puede tener acceso a su sistema contestador desde cualquier teléfono de tono inscribiendo su código de 3 dígitos después de que usted escuche el anuncio saliente. La unidad colgará después de 3 intentos fallidos para ingresar el código de seguridad correcto. -
Page 65: Para Cambiar La Batería
Par a C o n e cta r e l G a n ch o del Ci n t u r ó n y A u d í f o n o s O pc i onales Para Sujetar el Gancho del Cinturón 1. -
Page 66: Señales Sonoras Del Auricular
5. Vuelva a poner la puerta del compartimiento de las baterías . 6. Coloque el teclado para marcar sobre la base o sobre la base para carga. Si usted no carga adecuadamente las baterías (16 horas) cuando usted instala el teléfono por primera vez y/ o cuando cambia el paquete de las baterías, la calidad del funcionamiento de la batería podría deteriorarse. - Page 67 ENTER TEL NUMBR (INSCRIBA NUMERO) ENTER NAME (INSCRIBA NOMBRE) DELETE ALL? (BORRARTODO?) DELETE CALL ID? (BORR LLAMADA ID) DELETED (BORRADO) END OF LIST (FIN DE LISTA) NEW (NUEV) UNKNOWN NAME/ CALLER/NUMBER (NOM/NUM DESCONOCIDO) PAGING (LOCALIZANDO) BLOCKED CALL (LLAMADA PRIVADA) NO BATTERY (NO BATERIA) BLOCKED NAME (NOMBRE PRIVADO)
- Page 68 LOW BATTERY (BAJA BATERIA) REPT (REPT) NO DATA (NO ENVIADO) EMPTY (VACIO) NO CALLS (NO LLAMADA) CALL WAITING (LLAMD EN ESPERA) ANSWERER REMOTE (ACC REMOTO CONT) UNAVAILABLE (NO DISPONIBLE) PRESS TALK KEY (OPR BOTONTALK) PLEASE REGISTER (REGISTRAR POR FAVOR) Indicadores de Mensajes del Sistema Contestador Los siguientes indicadores le muestran el estado actual del sistema contestador o le ayudan a programarlo y a utilizarlo:...
-
Page 69: Solución De Problemas
Seis barras (parpadeando) El aparato está grabando un recado o anuncio. LA (Acceso de Línea) Solución de Problemas Soluciones para el Teléfono Inalámbrico No hay tono de marcar • Verifique o repita los pasos para la instalación: Asegúrese que el cable de la base esté conectado a un contacto que sirve. Asegúrese que el cable telefónico esté... -
Page 70: Soluciones Para El Identificador De Llamadas
• Cargue la batería. El aparato emite tonos • Coloque el auricular en la base durante 20 segundos; si eso no funciona, cargue la batería durante 16 horas. • Limpie los contactos de carga en el auricular y en la base con un trapo suave o con una goma de borrar. -
Page 71: Cuidado General Del Producto
Los mensajes entrantes están incompletos • Una extensión del teléfono puede haber sido descolgada mientras se recibía el mensaje. • La memoria del sistema contestador está llena. Borre algunos mensajes. • Usted puede haber oprimido accidentalmente el botón “play/stop” durante la reproducción del mensaje y éste se detuvo. -
Page 72: Cómo Obtener Servicios De Mantenimiento
• Condiciones atmosféricas, como una tormenta eléctrica. • La base está instalada en el sótano o en un piso más bajo de la casa. • La base está enchufada en un tomacorriente con otros aparatos electrónicos. • El monitor del bebé está usando la misma frecuencia. •... - Page 73 Índice Acceso Remoto 25 Antes de Comenzar 7 Auricular Inalámbrico 25 Botón de Canales 24 Caller ID (Identificador de Llamadas) con Call Waiting 19 Causas de una Mala Recepción 33 Clave de Área Local 15 Cómo Obtener Servicios de Mantenimiento 34 Compatibilidad con Audífonos (CCA) 3 Cuidado General del Producto 33 Enmudecedor 18...
- Page 74 Para Conectar el Gancho del Cinturón y Audífonos O 27 Para Conectar los Audífonos Opcionales en el Auricular 27 Para Contestar una Llamada 16 Para Dejar un Recado 14 Para Encontrar el Auricular 18 Para Filtrar Llamadas desde el Auricular 25 Para Filtrar Llamadas desde la Base 13 Para Grabar el Anuncio Saliente 12 Para Hacer una Llamada 16...
- Page 75 DESCRIPCIÓN Convertidor de corriente AC Audífonos Batería de Repuesto del Auricular Broche de cinturón (gris translúcido) Para ordenar, tenga lista su tarjeta Visa, Mastercard o Discover y llame al 1-800-338-0376. Se aplicará un cargo por envío al ordenar. La ley nos requiere que cobremos el impuesto sobre la venta apropiado para cada estado, condado y área individuales a las cuales se envíe la mercancía.
-
Page 76: Garantía Limitada
• Esta garantía le ofrece derechos legales específicos, y usted puede tener otros derechos legales que varían de estado a estado. Si compró su producto fuera de los Estados Unidos: Modelo 25860 00002431 (Rev 0 E/S) 05-01 Impreso en China ATLINKS USA, Inc.
Need help?
Do you have a question about the 25860 and is the answer not in the manual?
Questions and answers