Advertisement
Table of Contents
- 1 Contents
- 2 Why Use a Power Capacitor?
- 3 Features
- 4 General Precautions
- 5 Installation Precautions
- 6 Terminal Locations
- 7 Important Note about Charging the Capacitor
- 8 Electrical Connections for CAP18 or CAP30
- 9 Electrical Connections for CAP8
- 10 Wiring Diagram
- 11 Charging the Capacitor
- 12 Discharging the Capacitor
- 13 Specifications
- Download this manual
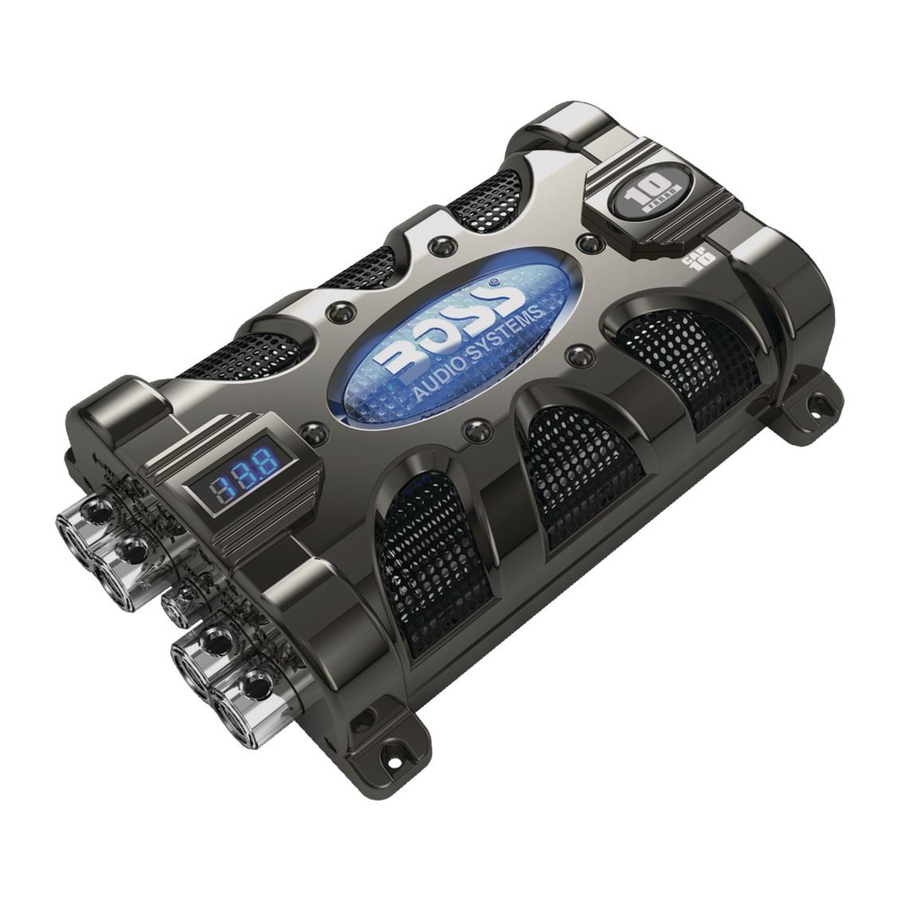
CAP8
8 Farad Super
Power Capacitor
18 Farad Super Hybrid
CAP18
Power Capacitor
30 Farad Super Hybrid
CAP30
Power Capacitor
Congratulations on your
purchase of a
Capacitor System.
It has been designed, engineered
and manufactured to bring you
the highest level of performance
and quality, and will afford you
years of listening pleasure.
Thank you for making a
your choice for car audio
entertainment!
page
Power
U S E R ' S M A N U A L
CONTENTS
2
2
4
6
Important note about charging
the capacitor
6
CAP18 and CAP30 electrical
connections
7
CAP8 electrical connections
8
9
safely before removal
CAP8 • CAP18 • CAP30 User's Manual - page 1
Advertisement
Table of Contents

Subscribe to Our Youtube Channel
Related Manuals for Boss Audio Systems CAP18


Summary of Contents for Boss Audio Systems CAP18
- Page 1 Charging the capacitor and quality, and will afford you years of listening pleasure. Discharging the capacitor safely before removal Thank you for making a your choice for car audio 10 Specifications entertainment! CAP8 • CAP18 • CAP30 User’s Manual - page 1...
- Page 2 (1F) for each 500 watts of amplifier power. (you can never have too much capacitance for any audio system). capacitors feature a digital voltage display. CAP8 • CAP18 • CAP30 User’s Manual - page 2...
- Page 3 . CAP8 • CAP18 • CAP30 User’s Manual - page 3...
- Page 4 3-digit LED display CAP8 terminal locations ( – ) Negative terminal Remote power connection terminal ( + ) Positive terminal CAP8 • CAP18 • CAP30 User’s Manual - page 4...
- Page 5 0GA and 4 GA cables. Remote power connection terminal ( – ) Negative OUTPUT terminal These terminals are designed to accommodate ( – ) Negative INPUT terminal 0GA and 4 GA cables. CAP8 • CAP18 • CAP30 User’s Manual - page 5...
- Page 6 Make all wiring connections as shown in the diagram, but do not attach the incoming positive cable to the capacitor positive terminal. Connect the positive terminal only after following the instructions for charging the capacitor on page 8. CAP8 • CAP18 • CAP30 User’s Manual - page 6...
- Page 7 Make all wiring connections as shown in the diagram, but do not attach the incoming positive cable to the capacitor positive terminal. Connect the positive terminal only after following the instructions for charging the capacitor on page 8. CAP8 • CAP18 • CAP30 User’s Manual - page 7...
- Page 8 The installation and charging process are now complete, and you can begin using your audio system and enjoying the benefits of your new system enhancement. 2 WATT/10 OHM RESISTOR (supplied) CABLE FROM BATTERY (+) POSITIVE CAP8 • CAP18 • CAP30 User’s Manual - page 8...
- Page 9 After 1-5 minutes, the capacitor will be discharged ( the display will show 0.00V) and you can safely remove and handle it. RESISTOR (supplied) CAP8 • CAP18 • CAP30 User’s Manual - page 9...
-
Page 10: Specifications
8,000,000 Working voltage 16VDC 16VDC 16VDC Surge voltage 20VDC 20VDC 20VDC ESR (Equivalent series resistance) 0.015 Ohm @ 120Hz/25ºC Capacitance tolerance +/- 10% All specifications subject to change without notice. CAP8 • CAP18 • CAP30 User’s Manual - page 10... - Page 11 Notes...
- Page 12 Notes...
Need help?
Do you have a question about the CAP18 and is the answer not in the manual?
Questions and answers