Advertisement
Class H Fitness Product
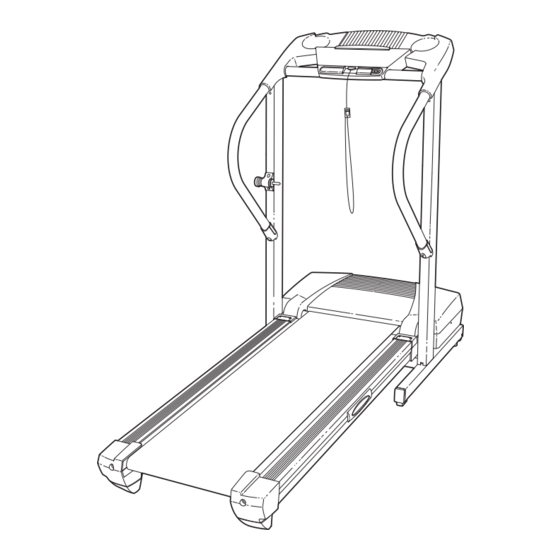
Model No. PETL30130
Serial No.
QUESTIONS?
As a manufacturer, we are com-
mitted to providing complete
customer satisfaction. If you
have questions, or if there are
missing or damaged parts,
please call:
08457 089 009
or write:
ICON Health & Fitness, Ltd.
Customer Service Department
Unit 4
Revie Road Industrial Estate
Revie Road
Beeston
Leeds, LS118JG
UK
email: csuk@iconeurope.com
CAUTION
Read all precautions and instruc-
tions in this manual before using
this equipment. Save this manual
for future reference.
Serial
Number
Decal
USER'S MANUAL
Visit our website at
www.iconeurope.com
Advertisement

Related Manuals for Pro-Form 360 P Treadmill


Summary of Contents for Pro-Form 360 P Treadmill
- Page 1 Class H Fitness Product Model No. PETL30130 USER'S MANUAL Serial No. Serial Number Decal QUESTIONS? As a manufacturer, we are com- mitted to providing complete customer satisfaction. If you have questions, or if there are missing or damaged parts, please call: 08457 089 009 or write: ICON Health &...
-
Page 2: Table Of Contents
ORDERING REPLACEMENT PARTS ..........Back Cover Note: An EXPLODED DRAWING and a PART LIST are attached in the centre of this manual. PROFORM is a registered trademark of ICON Health & Fitness, Inc. -
Page 3: Important Precautions
IMPORTANT PRECAUTIONS WARNING: To reduce the risk of burns, fire, electric shock, or injury to persons, read the following important precautions and information before operating the treadmill. 1. It is the responsibility of the owner to ensure No other appliance should be on the same cir- that all users of this treadmill are adequately cuit. - Page 4 21. Inspect and properly tighten all parts of the this manual. Never remove the motor hood un- treadmill regularly. less instructed to do so by an authorised ser- vice representative. Servicing other than the 22. Never insert any object into any opening. procedures in this manual should be performed by an authorised service representative only.
-
Page 5: Before You Begin
And when you’re not exercising, the is PETL30130. The serial number can be found on a unique 360 P treadmill can be folded up, requiring less decal attached to the treadmill (see the front cover of than half the floor space of other treadmills. -
Page 6: Assembly
ASSEMBLY Assembly requires two persons. Set the treadmill in a cleared area and remove all packing materials. Do not dispose of the packing materials until assembly is completed. Note: The underside of the treadmill walking belt is coated with high-performance lubricant. During shipping, a small amount of lubricant may be transferred to the top of the walking belt or the shipping carton. - Page 7 3. With the help of a second person, raise the Uprights (25, 29) to the vertical position. Open part bag B. Set the Crossbar (40) on the brackets on the Uprights (25, 29). Attach the Crossbar with two Crossbar Screws (39). Do not tighten the Crossbar Screws yet.
- Page 8 6. Place the Console Base (47) on the Right Handrail (72) and the Left Handrail (not shown). Attach the Console Base with four 3/4” Screws (2) (only two Screws are shown). Do not overtighten the Screws. Insert the Wire Harness (42) through the two indicated nylon ties on the Console Base (47).
-
Page 9: Operation And Adjustment
OPERATION AND ADJUSTMENT THE PERFORMANT LUBE WALKING BELT , a high-performance lubricant. IMPOR- Your treadmill features a walking belt coated with PERFORMANT LUBE TANT: Never apply silicone spray or other substances to the walking belt or the walking platform. Such substances will deteriorate the walking belt and cause excessive wear. - Page 10 CONSOLE DIAGRAM Note: If there is a thin sheet of Clip plastic on the console, remove it. Next, stand on the foot rails of the treadmill. Find the CAUTION: clip attached to the key (see the drawing above), and Before operating the slide the clip onto the waistband of your clothes.
- Page 11 To stop the walking belt, press the Stop button. Note: The console can display speed and dis- The Time/Incline display will begin to flash. To tance in either miles or restart the walking belt, press the Start button or kilometers. The letters the Speed + button.
- Page 12 When you are finished using the treadmill, move When you are finished exercising, remove the the on/off switch near the power cord to the off po- key. sition. Step onto the foot rails, press the Stop button, and adjust the incline of the treadmill to the lowest level.
-
Page 13: How To Fold And Move The Treadmill
HOW TO FOLD AND MOVE THE TREADMILL HOW TO FOLD THE TREADMILL FOR STORAGE Before folding the treadmill, adjust the incline to the lowest position. If this is not done, the treadmill may be per- manently damaged. Next, unplug the power cord. CAUTION: You must be able to safely lift 20 kg (45 lbs.) to raise, lower, or move the treadmill. - Page 14 HOW TO LOWER THE TREADMILL FOR USE 1. Hold the upper end of the treadmill with your right hand as shown. Using your left hand, pull the latch knob to the left and hold it. Pivot the treadmill down until the frame is past the latch pin.
-
Page 15: Troubleshooting
TROUBLESHOOTING Most treadmill problems can be solved by following the steps below. Find the symptom that applies, and follow the steps listed. If further assistance is needed, please call our Customer Service Department. PROBLEM: The power does not turn on SOLUTION: a. - Page 16 Locate the Reed Switch (10) and the Magnet (18) on the left side of the Pulley (17). Turn the Pulley until the 3 mm Magnet is aligned with the Reed Switch. Make sure that the gap between the Magnet and the Reed Switch is about 3 mm (1/8 in.).
-
Page 17: Conditioning Guidelines
CONDITIONING GUIDELINES ergy. Only after the first few minutes does your body WARNING: begin to use stored fat calories for energy. If your goal Before beginning this is to burn fat, adjust the speed and incline of the tread- or any exercise program, consult your physi- mill until your heart rate is near the lowest number in cian. - Page 18 SUGGESTED STRETCHES The correct form for several basic stretches is shown at the right. Move slowly as you stretch—never bounce. 1. Toe Touch Stretch Stand with your knees bent slightly and slowly bend forward from your hips. Allow your back and shoulders to relax as you reach down toward your toes as far as possible.
- Page 19 NOTES...
-
Page 20: Ordering Replacement Parts
Fax: 0 (044) 113 387 7125 To help us assist you, please be prepared to give the following information: • The MODEL NUMBER of the product (PETL30130) • The NAME of the product (PROFORM ® 360 P treadmill) • The SERIAL NUMBER of the product (see the front cover of this manual) •... - Page 21 PART IDENTIFICATION CHART Remove this chart and use it to identify small parts during assembly. Save this chart and the EXPLODED DRAWING/PART LIST for future reference. Silver Ground 3/4” Screw (2)–8 Crossbar Screw 1” Tek Screw Screw (75)–1 (39)–2 (58)–4 1/2”...
- Page 22 PART LIST—Model No. PETL30130 R0304B No. Qty. Description No. Qty. Description No. Qty. Description Hood 1/2” Silver Screw Right Rear Endcap 3/4” Screw Console Screw Hex Key Motor Belt Key/Clip Left Rear Endcap Motor Tension Bolt Incline Motor Walking Belt Flat Washer Incline Bracket Walking Platform...
- Page 23 EXPLODED DRAWING—Model No. PETL30130 R0304B...
Need help?
Do you have a question about the 360 P Treadmill and is the answer not in the manual?
Questions and answers