Table of Contents
Advertisement
Advertisement
Table of Contents

Related Manuals for Gateway HD1900


Summary of Contents for Gateway HD1900
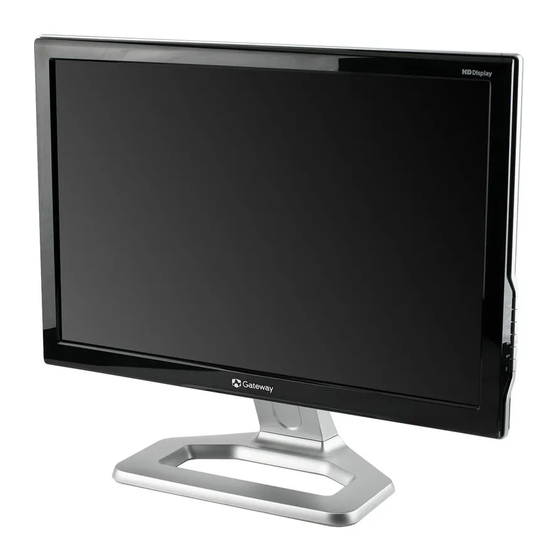
- Page 1 HD1900 19-inch Widescreen LCD Monitor USERGUIDE ®...
-
Page 3: Table Of Contents
Contents Using Your Gateway Flat-Panel Monitor ......1 Connecting your monitor ........... 2 Attaching the base . - Page 4 Contents...
-
Page 5: Using Your Gateway Flat-Panel Monitor
Using Your Gateway Flat-Panel Monitor • Connecting your monitor • Starting your monitor • Adjusting monitor settings • Changing Windows screen settings • Power management • Maintaining • Troubleshooting • Specifications... -
Page 6: Connecting Your Monitor
Connecting your monitor To set up your monitor, first unpack the box, unwrap the components, attach the base, then make your cable connections. Attaching the base To attach the base: • Place the monitor base on a table top, then slide the monitor neck down onto the base until it clicks into place. -
Page 7: Connecting Video Inputs
Connect the blue VGA video cable to the blue connector on the display. Make sure that your computer is turned off, then connect the other end of the video cable to the matching video port on the back of your computer. www.gateway.com... -
Page 8: Connecting Power
Connecting power To connect power: Position your monitor so you can reach the back, then connect the power cord to the power connector under the back of your monitor. Plug the power cord into a correctly grounded power outlet. We recommend using a surge protector to protect your monitor from voltage spikes. -
Page 9: Starting Your Monitor
Adjust the tilt of your monitor for the best viewing angle. Use the on-screen display (OSD) to adjust other monitor settings. For more information, see “Adjusting monitor settings” on page www.gateway.com (power) button on the side of your monitor. The power LED in front of the power Power button... -
Page 10: Adjusting Monitor Settings
Adjusting monitor settings Use your monitor controls (located on your monitor itself) and computer controls (accessible through Windows) to adjust the display image. For more information about computer controls, see “Changing Windows screen settings” on page Using the monitor buttons This monitor features an on-screen display (OSD) that lets you adjust contrast, brightness, and other settings for your monitor. -
Page 11: On-Screen Display Options
Press the Input button to return to a previous menu. When you have finished making all adjustments, press the Menu button at the Main Menu to exit. www.gateway.com (brightness) or (contrast) button to highlight a setting, then press (brightness) or... -
Page 12: Picture Menu
OSD menus OSD Menu Description Main menu Auto—Automatically adjusts your monitor to its optimum settings. Picture—Opens the Picture menu, where you can adjust brightness, contrast, gamma, and video scaling. Main Menu Geometry—Opens the Geometry menu, where you can adjust image size and minimize distortions. Advanced—Opens the Advanced menu, where you can adjust the color balance, change the OSD language, and Auto... -
Page 13: Geometry Menu
OSD Menu Geometry menu Geometry H-Position V-Position Clock Phase Advanced menu Advanced Color Language LED Brightness Resolution Reminder Information Description H-Position—Moves the display image left and right. You can also press the Auto button to configure the horizontal position automatically. -
Page 14: Changing Windows Screen Settings
Changing Windows screen settings Adjusting the color depth and screen area are two of the most basic display settings you may need to change. You can also adjust settings such as the screen background and screen saver. Changing color depth and screen resolution Color depth is the number of colors your computer uses to display images on your monitor. -
Page 15: Power Management
No power Make sure that the power cord is connected correctly to both the back of your monitor and the power outlet. For more information about connecting the power cord, see monitor” on page www.gateway.com LED Indicator Power Consumption Blue <38 W... -
Page 16: No Picture
No picture • Make sure that the power cord is connected correctly to both the back of your monitor and the power outlet. For more information about connecting the power cord, see power” on page • Make sure that the video cable is connected securely to both the back of your monitor and your computer. -
Page 17: Color Is Not Uniform
Make sure that your video card can display at 1440 × 900 resolution. • This may be caused by older video drivers on your computer. See the Gateway support Web site (www.gateway.com) for updated video drivers for your computer. You can also go directly to your video card’s support Web site for the most up-to-date video drivers. -
Page 18: Specifications
Specifications Specifications are subject to change without notice or obligation. Many products for Gateway and its subsidiaries are custom engineered by our suppliers to Gateway specifications and may vary from similarly marketed products. Panel size Panel type Pixel resolution Pixel pitch... -
Page 19: Video Modes
VESA 800 × 600 VESA 1024 × 768 VESA 1024 × 768 VESA 1024 × 768 VESA 1280 × 1024 VESA 1280 × 1024 VESA 1440 × 900 VESA 1440 × 900 www.gateway.com Horizontal frequency (kHz) 31.469 31.469 37.861 37.500 31.469 35.156 37.879... - Page 20 Using Your Gateway Flat-Panel Monitor...
-
Page 21: Safety, Regulatory, And Legal Information
Safety, Regulatory, and Legal • Important safety information • Environmental information • Regulatory compliance statements • Notices Information... -
Page 22: Important Safety Information
Your Gateway product is designed and tested to meet the latest standards for safety of information technology equipment. However, to ensure safe use of this product, it is important that the safety instructions marked on the product and in the documentation are followed. -
Page 23: Environmental Information
When your electrical or electronic equipment is no longer useful to you, “take it back” to your local or regional waste collection administration for recycling. ■ In some cases, your “end of life” product may be “traded in” for credit towards the purchase of new Gateway equipment. Call Gateway to see if this program is available in your area. ■... -
Page 24: Regulatory Compliance Statements
FCC declaration of conformity Model: HD1900 Caution Changes or modifications not expressly approved by Gateway could void the FCC compliance and negate your authority to operate the product. California Proposition 65 Warning This product contains chemicals known to the State of California to cause cancer, birth defects, and/or other reproductive harm. -
Page 25: Trademark Acknowledgments
Due to continuing system improvements, Gateway is not responsible for inaccurate information which may appear in this manual. For the latest product updates, consult the Gateway Web site at www.gateway.com. In no event will Gateway be liable for direct, indirect, special, exemplary, incidental, or consequential damages resulting from any defect or omission in this manual, even if advised of the possibility of such damages. - Page 26 Safety, Regulatory, and Legal Information...
- Page 28 MAN HD1900 USR GDE R0 5/08...
Need help?
Do you have a question about the HD1900 and is the answer not in the manual?
Questions and answers