Table of Contents
Advertisement
Quick Links
Download this manual
See also:
User Manual
Advertisement
Table of Contents

Related Manuals for Obreey SURFpad


Summary of Contents for Obreey SURFpad
-
Page 1: User Manual
User Manual PocketBook SURFpad... -
Page 2: Table Of Contents
Contents SAFETY PRECAUTIONS Storage, Carriage and Usage Conditions Maintenance RF Safety Utilization APPEARANCE TECHNICAL SPECIFICATIONS GETTING STARTED Charging The Battery Unlock Your Device Home Screen Display Views Finger Gestures Extended Home Screen Using the On-screen Keyboard Menus Establishing Wi-Fi OTG-Cable Usage USB Tethering Direct Tethering Reverse Tethering... - Page 3 CONTENTS Gallery Camera Photo and Video Modes Browser Email Setting Up the Account Inbox SET TINGS Language & Input Sound Settings Display Settings Storage Connecting Devices to Your Tablet Unmounting External Memory and Devices Location Services and Security Date & Time Restore Your Tablet to Factory Settings Battery Charge State Wi-Fi Connection...
-
Page 4: Safety Precautions
Safety Precautions Before start working with the Device, please, read this section care- fully. Following these instructions will help you ensure your safety and extend service life of the Device. Storage, Carriage and Usage Conditions Device operating temperature range is 0°С to +40°С, so don’t expose the Device to excessively high or low temperatures. -
Page 5: Rf Safety
For detailed information about service centers in your region please visit the official website of PocketBook International: http://www. pocketbook-int.com/support/. RF Safety The Device receives and transmits radio frequencies and may inter- fere with radio communications and other electronic equipment. - Page 6 SAFETY PRECAUTIONS domestic waste collection service, store where you purchased the Device, or the authorized service center. Disposal of electric and electronic components (the Directive is ap- plicable to the EU and other European countries where separate waste disposal systems exist). In other countries dispose batteries accordingly to local laws.
-
Page 7: Appearance
Appearance 1. Camera Camera 2. Micro-USB port Micro-USB 3. Headphone jack Headphone jack 4. Microphone Microphone 5. MicroSD card slot Micro-USB 6. Speaker Speaker 7. Power button On/Off button 8. Volume + Volume + Volume - 9. Volume -... -
Page 8: Technical Specifications
Technical Specifications Display 7” 800×480 touch screen Processor 1 GHz RAM 512 МB Internal Storage 4 GB * Platform Android™ 4.0.4 Input/Output Ports 1×micro USB, 3.5 mm audio jack Card reader micro SD up to 32 GB Communications Wi-Fi (b/g/n) Camera 0,3 Megapixels, 4 ×... -
Page 9: Getting Started
Getting Started CHARGING THE BATTERY The battery of your Device is not fully charged as you unpack it, so you need to charge it for 8-10 hours. It’s strongly recommended to keep the Device off during the first charge, otherwise power consumption may be more, than charging, especially when you charge it from PC. -
Page 10: Unlock Your Device
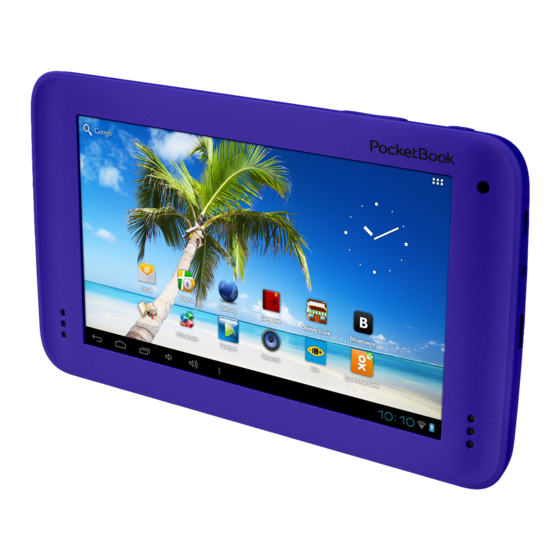
GETTING STARTED UNLOCK YOUR DEVICE Tap and drag the lock out of the circle to one of icons to unlock your Device. HOME SCREEN Search in Google Open a list of or Yandex applications and widgets Last opened Notification area applications and Settings Return to Home Screen... -
Page 11: Display Views
GETTING STARTED DISPLAY VIEWS The screen orientation is changed automatically when you hold the Device horizontally to vertically, and vice versa. To enable/disable screen auto-rotation, go to Settings > Device > Display. Landscape view Portrait view... -
Page 12: Finger Gestures
GETTING STARTED FINGER GESTURES Short soft touch on an item (e.g. file, application, folder or menu item) opens it. Press and Hold This gesture calls context menu with available options for an item. While you at Home Screen, it allows to move an item. Slide Slide means move finger across the screen vertically or horizontally. -
Page 13: Using The On-Screen Keyboard
GETTING STARTED USING THE ON - SCREEN KEYBOARD To access the on-screen keyboard, touch any textbox. Enter your text by touching the keys of the on-screen keyboard. Switches between upper and lower case; Switches to symbol mode; Field for text typing; Backspace –... -
Page 14: Establishing Wi-Fi
GETTING STARTED ESTABLISHING WI - FI If you skipped Wi-Fi configuration during the initial setup, you can configure it later. Go to Settings > Wireless & networks. Check Wi-Fi checkbox The list of available networks will be displayed. The Device automatically detects security type, and if there’s no need to specify additional data (e.g. -
Page 15: Usb Tethering
GETTING STARTED USB TETHERING Direct Tethering To share Internet connection from device to computer via USB con- nection do the following: Plug your Device into your PC via USB. Go to Settings > More… > USB tethering and put a mark tethering. -
Page 16: Software
Software MANAGE DATA File Manager to operate with files, stored in internal Device memory and external microSD card. To open File Manager, press on its icon in the list of applications. Bookmarks – opens a list of files and folders added to Bookmarks Root folder –... -
Page 17: Application Launching
SOFTWARE APPLICATION LAUNCHING The application can be launched by short press on the icon on the Homescreen or from the list of available applications. You can create a shortcut to an application at any desktop. Scroll Home Screen to the desktop you need, then open the application list. Button for opening lists of applications and widgets Touch and hold desired application icon until the desktop appears. -
Page 18: Creating Folders On The Home Screen
SOFTWARE CREATING FOLDERS ON THE HOME SCREEN The icons on the desktop can be grouped into folders. To create a folder, touch and hold the icon and drag it to the icon to which you want to merge, then release. You can add the icons of other pro- grams to this folder in a similar way. -
Page 19: Application Removing
SOFTWARE APPLICATION REMOVING After continuous touch on icon or widget Sign of application removing is activated. To delete element from the home screen or a folder, drag-and-drop it to this sign and release after it highlights in red. Sign of application removing LIST OF OPENED APPLICATIONS Opened applications are displayed in the list of opened applications (button for invoking a list is located on the left bottom corner of the... -
Page 20: Preinstalled Applications
SOFTWARE 2) Press and hold on the application in the list 3) Press ‘Remove from list’ 1) Button for invoking opened applications PREINSTALLED APPLICATIONS Supports functions for comfortable web-pages Browser viewing Calculator Simple Android calculator Calendar Events calendar with Google synchronizing Standard Android (photo/video) camera Camera application... - Page 21 SOFTWARE Settings Set your options and preferences Music Music player, supporting MP3, WMA, AAC Diary Organize your study schedule and homework Book Store Book store application Office Suite Pro View and edit DOC, XLS, PPT, DOCX, XLSX, PPTX, and other popular office file formats CoolReader Best Android open-source e-reader The most popular IM client supporting various protocols...
-
Page 22: Pbi Packages Support
SOFTWARE PBI PACKAGES SUPPORT Sometimes the distribution of several programs is stored in one pbi package. To install these programs open the package and mark the programs you want to install. Pre-installed pbi package is located in the mnt/sdcard/PB System.pbi2 folder. -
Page 23: Listen To The Music
SOFTWARE LISTEN TO THE MUSIC Music Library In Music Library you can see all the music, stored in the Device’s memory. Music library Shuffle Replay (one track, all, off) Tracks Playlists Albums Now Playing To create new playlist, bring up song’s context menu, select Add to playlist, and select New. -
Page 24: Gallery
SOFTWARE GALLERY Gallery is an application for images and video management. To open an image in full screen, just touch it. To scroll the collection use slid- ing gesture. To zoom an image, use scaling gestures (pinch/spread). From Gallery menu you can delete, crop, set as wallpaper or contact avatar, or rotate image. -
Page 25: Camera
SOFTWARE CAMERA Photo and Video Modes Last made photo or video. Touch W h i t e to open Gallery balance Zooming Take a photo (photo mode) or start/stop video recording Exposure (video mode) Camera settings G e o t a g s , Photo mode photo size Video mode... -
Page 26: Email
SOFTWARE EMAIL Setting Up the Account At the first run you will be suggested to enter from on-screen keyboard your account information: email address and password. If application isn’t able to detect incoming and outgoing server settings automatically, you would need to specify these settings manually (they should be given by your email service provider). -
Page 27: Settings
Settings In this chapter you will learn how to configure the Device for the most comfortable usage and make it truly yours. You can open set- tings in several ways: • press the menu button in the bottom of the screen; •... -
Page 28: Language & Input
SETTINGS Slide the list of settings upward to view all settings. LANGUAGE & INPUT To change interface language, go to Language and input > Language section and select the one you need. Personal dictionary section stores words, added by user for auto-completion. - Page 29 SETTINGS Android keyboard section you can turn on/off the following settings: • Auto-capitalization; • Sound on key-press; • Show settings key – define, whether show settings key on a keyboard or not; • Auto-correction – spacebar and punctuation correct mistyped words automatically;...
-
Page 30: Sound Settings
SETTINGS SOUND SET TINGS Multimedia volume is adjusted with volume control buttons. Under section Settings > Device > Sound you can adjust multimedia and alarm volume separately, and also set keypress, screen touch and screen lock sounds. -
Page 31: Display Settings
SETTINGS DISPLAY SET TINGS Under section Settings > Device > Display you can set next parameters: • Brightness; • Wallpaper; • Auto-rotate screen – turn on or off; • Sleep – set the delay before the screen goes down to save battery charge;... -
Page 32: Storage
SETTINGS STORAGE Storage section displays information about the Device storage (inter- nal and external SD-card (EXTSD) memory): total, occupied, available space. In this section you can also clean internal or external memory. Set automatic scanning Internal storage Press before on SD-card ejecting SD-card CONNECTING DEVICES TO YOUR TABLET USB devices are supported through the USB port, such as a keyboard,... -
Page 33: Location Services And Security
SETTINGS LOCATION SERVICES AND SECURITY In these Settings items you can set: • different ways of screen locking and unlocking; • owner info; • encryption; • administrators and passwords. DATE & TIME In this chapter you can set date, time, time zone, time and date dis- play format (12 or 24 hour) or check Automatic to determine time... -
Page 34: Restore Your Tablet To Factory Settings
SETTINGS RESTORE YOUR TABLET TO FACTORY SETTINGS Select Settings > Backup & reset > Factory data reset menu item, in opened window press Reset tablet Erase everything. It will restore your tablet to the factory settings and erase all your personal informa- tion: downloaded applications, system settings, google account. -
Page 35: Battery Charge State
SETTINGS BATTERY CHARGE STATE It displays battery charge level (in percents), information whether the Device is charging via network or working from battery. In Battery section you can view info about applications, consuming the power. Charging by USB, charging level - 72% Charging level >... -
Page 36: Wi-Fi Connection
SETTINGS WI - FI CONNECTION Connecting to Wi-Fi Network with Automatically Obtained IP-address Go to Settings > Wireless & networks and slide the Wi-Fi switch to the position. The device scans for available Wi-Fi networks and displays the names of those it finds. Touch a network name to connect to it and type a password if necessary. -
Page 37: Connection To Wi-Fi Network With Manual Configuring Network Settings
SETTINGS Connection to Wi-Fi Network with Manual Configuring Network Settings Tick it to view advanced options Settings by default To set parameters for Wi-Fi network access manually, press network in Settings, specify a network name, security protocol, pass- word in the opened window and press Save. Add network Touch &... -
Page 38: Advanced Options
SETTINGS ADVANCED OPTIONS Advanced options allow turning on/off notifications when an open network is available. To envoke them, open Settings > Wi-Fi and press the application menu button on the right top corner of the screen and touch Advanced. Button for evoking advanced options Sign of wireless network TURN OFF WI - FI To turn off Wi-Fi module slide the... -
Page 39: Transferring Data
SETTINGS TRANSFERRING DATA To transfer data between PC and the Device, connect micro-USB cable. After you connect the cable, a notification window suggesting to turn on USB storage will popup. Press Turn on USB storage and the Device memory and microSD card (if present) will be displayed as USB stor- ages in your PC Explorer or other file manager. - Page 40 SETTINGS After pressing the application’s title, you’ll be able to view its detailed information, stop it if it’s running and erase application data. Memory, occupied by applications Installed applications Choose the applications list...
-
Page 41: Firmware Update
Firmware Update Official firmware updates for the Device are published on the offi- cial PocketBook website (www.pocketbook-int.com/us). Installation of official firmware updates is recommended, as they contain fixes and additions improving the efficiency of the Device. Official firmware updates do not influence the warranty conditions. - Page 42 FIRMWARE UPDATE Select card. In the list appeared select the firmware version to install and press OK. Variant 2 Download to your PC firmware version you’d like to install Connect your Device to PC and copy firmware file (.upkg exten- external microSD-card sion) to an AT TENTION!
-
Page 43: Troubleshooting
FIRMWARE UPDATE TROUBLESHOOTING Issue Solution The Device doesn’t re- Restart the Device: press and hold power spond on screen touches button for 10 seconds until the Device or keys pressing goes off. If you will continue holding power button for 5 more seconds, the Device’s power management system will completely reboot. -
Page 44: Compliance With International Standards
Compliance with International Standards The EUT should be supplied by USB port from complied Limited Power Source of personal computer or notebook. The EUT should be supplied by Adapter from complied Limited Power Source. AC Power: Manufacturer: PENGSHENGYE ELECTRONIC Model: SAPA05010EU U Rated output voltage: DC 5.0V 2.0A IMPORTANT: Changes or modifications to this product not authorized could... - Page 45 COMPLIANCE WITH INTERNATIONAL STANDARDS ETSI EN 301 489-7 – Electromagnetic compatibility and Radio spec- trum Matters (ERM); ElectroMagnetic Compatibility (EMC) standard for radio equipment and services; Part 7: Specific conditions for mo- bile and portable radio and ancillary equipment of digital cellular radio telecom munications systems (GSM and DCS) EN 301 489-17 –...
- Page 46 COMPLIANCE WITH INTERNATIONAL STANDARDS Marking by the symbol indicates that usage restrictions apply. France - 2.4GHz for Metropolitan France: In all Metropolitan departments, wireless LAN frequencies can be used under the following conditions, either for public or private use: • Indoor use: maximum power (EIRP*) of 100 mW for the entire 2400-2483.5 MHz frequency band •...
Need help?
Do you have a question about the SURFpad and is the answer not in the manual?
Questions and answers