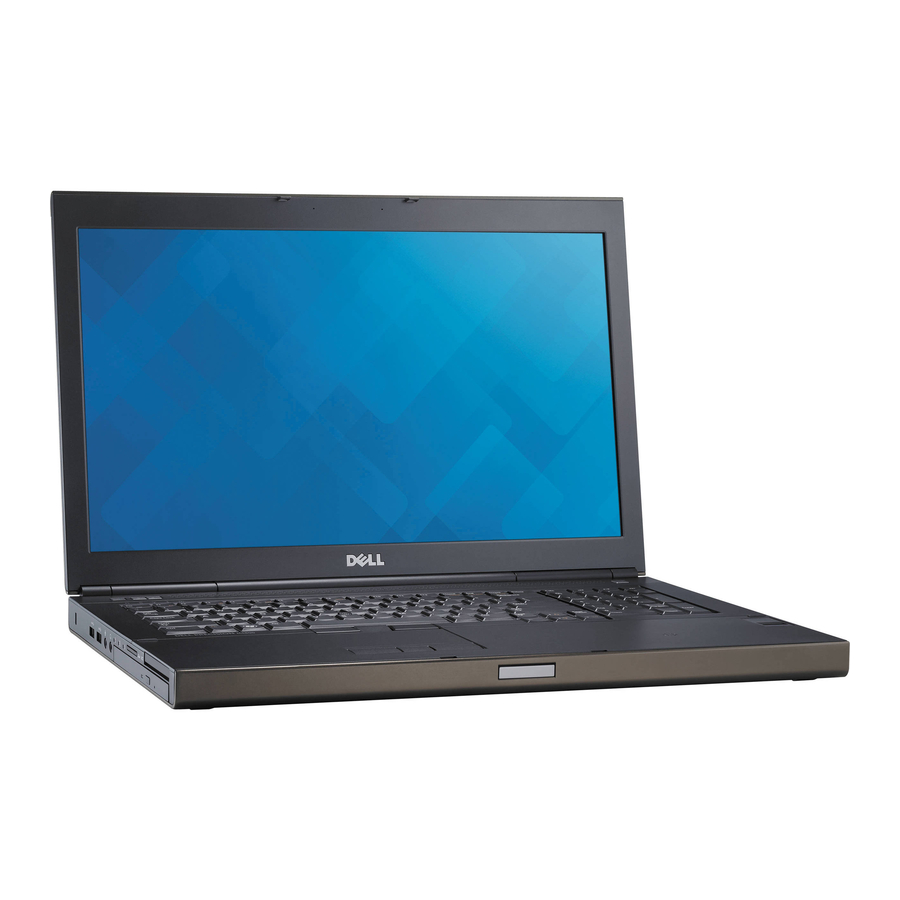
Dell Precision M6800 Owner's Manual
Dell precision mobile workstation m6800 owners manual
Hide thumbs
Also See for Precision M6800:
- How-to manual (46 pages) ,
- Setup and features information (10 pages) ,
- Setup & features manual (8 pages)

Related Manuals for Dell Precision M6800


Summary of Contents for Dell Precision M6800
- Page 1 Dell Precision Mobile Workstation M6800 Owner's Manual Regulatory Model: P30F Regulatory Type: P30F001...
- Page 2 Disc Association (BDA) and licensed for use on discs and players. The Bluetooth word mark is a registered trademark ® and owned by the Bluetooth SIG, Inc. and any use of such mark by Dell Inc. is under license. Wi-Fi is a registered ® ®...
-
Page 3: Table Of Contents
Contents 1 Working on Your Computer....................... 7 ........................7 Before Working Inside Your Computer ..............................8 Recommended Tools ............................8 Turning Off Your Computer ........................9 After Working Inside Your Computer 2 Removing and Installing Components................... 11 ..............................11 System Overview ......................11 Inside view —... - Page 4 ............................28 Installing the Keyboard ..........................29 Removing the Primary Memory ..........................29 Installing the Primary Memory ......................... 30 Removing the Secondary Memory .......................... 30 Installing the Secondary Memory ........................... 31 Removing the Display Bezel .............................32 Installing the Display Bezel .............................33 Removing the Camera ..............................33 Installing the Camera...
- Page 5 Deleting or Changing an Existing System and/or Setup Password 4 Diagnostics..........................71 ................71 Enhanced Pre-Boot System Assessment (ePSA) Diagnostics 5 Troubleshooting Your Computer.....................73 ............................... 73 Device Status Lights .............................. 74 Battery Status Lights 6 Specifications..........................75 ............................75 Technical Specification 7 Contacting Dell.......................... 83 ............................... 83 Contacting Dell...
-
Page 7: Working On Your Computer
Damage due to servicing that is not authorized by Dell is not covered by your warranty. Read and follow the safety instructions that came with the product. -
Page 8: Recommended Tools
Close the display and turn the computer upside-down on a flat work surface. NOTE: To avoid damaging the system board, you must remove the main battery before you service the computer. Remove the main battery. Turn the computer top-side up. Open the display. -
Page 9: After Working Inside Your Computer
After you complete any replacement procedure, ensure you connect any external devices, cards, and cables before turning on your computer. CAUTION: To avoid damage to the computer, use only the battery designed for this particular Dell computer. Do not use batteries designed for other Dell computers. -
Page 11: Removing And Installing Components
Removing and Installing Components This section provides detailed information on how to remove or install the components from your computer. System Overview Inside view — back 1. system fan 8. secondary hard drive 2. primary memory 9. battery latch 3. WLAN card 10. -
Page 12: Removing The Secure Digital (Sd) Card
Inside view — front 1. processor heatsink 5. I/O Board 2. secondary memory 6. video-card heatsink 3. wi-fi switch board 4. Express Card Cage Removing the Secure Digital (SD) Card Before Working Inside Your Computer . Follow the procedures in Press in on the SD card to release it from the computer. -
Page 13: Removing The Expresscard
Removing the ExpressCard Before Working On Your Computer . Follow the procedures in Push in on the ExpressCard. Slide the ExpressCard out of the computer. Installing the ExpressCard Insert the ExpressCard into the slot and press till it clicks into place. . After Working Inside Your Computer . -
Page 14: Installing The Battery
Installing the Battery Slide the battery into its slot until it clicks into place. Follow the procedures in After Working Inside Your Computer. Removing the Micro Subscriber Identity Module (SIM) Card Follow the procedures in Before Working Inside Your Computer . Remove the battery. -
Page 15: Installing The Micro Subscriber Identity Module (Sim) Card
Installing the Micro Subscriber Identity Module (SIM) Card Push in the micro SIM card into its slot. Install the battery. After Working Inside Your Computer . Follow the procedures in Removing the Base Cover Before Working Inside Your Computer . Follow the procedures in Remove the battery. -
Page 16: Installing The Base Cover
Installing the Base Cover Slide in and place the base cover to align with the screw holes correctly on the computer. Tighten the screws to secure the base cover to the computer. Install the battery. After Working Inside Your Computer . Follow the procedures in Removing the Wireless Local Area Network (WLAN) Card Follow the procedures in... -
Page 17: Installing The Wireless Local Area Network (Wlan) Card
Installing the Wireless Local Area Network (WLAN) Card Insert the WLAN card in its slot in the computer. Press down the WLAN card and tighten the screw to secure the WLAN card to the computer. Route the antenna cables through the routing channel and connect them to the WLAN card. Install the: a) base cover b) battery... - Page 18 a) battery b) base cover Remove the screw that secures the optical drive to the computer. Pry and slide out the optical drive to remove it from the computer.
-
Page 19: Installing The Optical Drive
Remove the screws that secure the drive-latch bracket to the optical drive and remove the bracket. Installing the Optical Drive Tighten the screws to secure the drive-latch bracket to the optical drive. Slide the optical drive into its slot and tighten the screw to secure the optical drive to the computer. Install the: a) battery b) base cover... -
Page 20: Installing The Primary Hard Drive
Flex the hard-drive bracket outward and pull out the hard drive from the bracket. NOTE: A rubber filler is installed to the hard-drive bracket for 7 mm hard drives. It is designed to prevent vibrations and for correct installation of the 7 mm hard drives. 9 mm hard drives do not require the filler when installed into the hard-drive bracket. -
Page 21: Removing The Secondary Hard Drive
Removing the Secondary Hard Drive Before Working Inside Your Computer . Follow the procedures in Remove the: a) battery b) base cover Remove the screw that secure that secondary hard drive in place. Pull the tab upward and remove the secondary hard drive from the computer. Remove the screw that secure secondary hard drive to the bracket. -
Page 22: Removing The Coin-Cell Battery
Install the: a) base cover b) battery After Working Inside Your Computer. Follow the procedures in Removing the Coin-Cell Battery Before Working Inside Your Computer . Follow the procedures in Remove the: a) battery b) base cover Disconnect the coin-cell battery cable. Pry the coin-cell battery upward and remove it from the computer. Installing the Coin-Cell Battery Replace the coin-cell battery in its slot in the computer. -
Page 23: Installing The Processor Fan
Disconnect the processor-fan cable. Installing the Processor Fan Connect the processor-fan cable. NOTE: Ensure that the processor-fan cable does not protrude outside its compartment. Insert the processor fan into its slot in the computer. Tighten the screws that secure the processor fan to the computer. Install the: a) base cover b) battery... -
Page 24: Installing The Video-Card Fan
Installing the Video-Card Fan Connect the video-card fan cable. NOTE: Ensure that the video-card fan cable does not protrude outside its compartment. Insert the video-card fan into its slot and tighten the screws to secure it to the computer. Install the: a) base cover b) battery Follow the procedures in... -
Page 25: Installing The Keyboard Trim
Installing the Keyboard Trim Slide in the keyboard trim from the front and align it to its original position on the computer. Ensure that the hard- tab on the left corner snaps into place. -
Page 26: Removing The Keyboard
Press along the sides of the keyboard trim until it snaps in place. Install the battery. After Working Inside Your Computer . Follow the procedures in Removing the Keyboard Follow the procedures in Before Working Inside Your Computer . Remove the: a) battery b) keyboard trim Remove the screws that secure the keyboard to the computer. - Page 27 Starting from the bottom of the keyboard, separate the keyboard from the computer and flip the keyboard over. Disconnect the keyboard-data cable from the system board and remove the keyboard.
-
Page 28: Installing The Keyboard
Installing the Keyboard Connect the keyboard-data cable to the system board. NOTE: Ensure that you fold the keyboard-data cable in perfect alignment. Press and align the keyboard to its compartment. Tighten the screws to secure the keyboard to the computer. Press over the cross section of the following keys to secure the keyboard to the computer: a) <R>... -
Page 29: Removing The Primary Memory
Install the: a) keyboard trim b) battery After Working Inside Your Computer . Follow the procedures in Removing the Primary Memory Before Working Inside Your Computer . Follow the procedures in Remove the: a) battery b) base cover Pry the retention clips away from the primary memory until it pops up. Lift the primary memory and remove it from the computer. -
Page 30: Removing The Secondary Memory
a) base cover b) battery After Working Inside Your Computer . Follow the procedures in Removing the Secondary Memory Before Working Inside Your Computer . Follow the procedures in Remove the: a) battery b) keyboard trim c) keyboard Remove the screw that secures the memory shield to the computer. Lift up and remove the memory shield from the computer. -
Page 31: Removing The Display Bezel
Removing the Display Bezel After Working Inside Your Computer . Follow the procedures in Remove the battery. Pry up the bottom edge of the display bezel. Work your way around the sides and top edge of the display bezel and remove the display bezel from the computer . -
Page 32: Installing The Display Bezel
Installing the Display Bezel Slide in the display bezel from the bottom and press on the display bezel. Work around the entire bezel until it snaps onto the display assembly. Install the battery. After Working Inside Your Computer. Follow the procedures in... -
Page 33: Removing The Camera
Removing the Camera Before Working Inside Your Computer . Follow the procedures in Remove the: a) battery b) display bezel Perform the following steps to remove the camera: a) Disconnect the camera cable. b) Remove the screw that secures the camera module to the computer. c) Remove the camera module from the computer. - Page 34 Peel back the adhesive tape that secures the LVDS cable to the display panel. Disconnect the LVDS cable.
- Page 35 Remove the screws that secure the display brackets to the display panel. Pull away the display brackets to remove them from the display panel.
-
Page 36: Installing The Display Panel
Installing the Display Panel Align the display brackets to the display panel. Tighten the screws to secure the display brackets to the display panel. Connect the LVDS cable and affix the adhesive tape. Align the display panel in its original position on the computer. Tighten the screws to secure the display panel to the display assembly. - Page 37 Remove the screws at the bottom of the computer. Peel the adhesive tape that secures the media board cable and speaker cable to the palmrest.
- Page 38 Disconnect the media board cable and the speaker cable from the system board. Peel the adhesive tape that secures the touchpad cable to the palmrest. Disconnect the touchpad cable from the system board.
- Page 39 10. Disconnect the power button cable from the system board. 11. Remove the screws that secure the palmrest to the computer.
- Page 40 12. Lift the left edge of the palmrest. Release the tabs on the right edge of the palmrest and remove the palmrest from the computer.
-
Page 41: Installing The Palmrest
Installing the Palmrest Align the palmrest to its original position on the computer and press on the positions indicated until it snaps in place. Tighten the screws that secure the palmrest to the computer. Connect the following cables: a) power button b) touchpad c) media board d) speaker... -
Page 42: Removing The Expresscard Module
Removing the ExpressCard Module Before Working Inside Your Computer . Follow the procedures in Remove the: a) ExpressCard b) battery c) base cover d) keyboard trim e) keyboard f) optical drive g) primary and secondary hard drive h) palm rest Disconnect the : a) ExpressCard cable from the system board b) USH board cable from the USH board... -
Page 43: Installing The Expresscard Module
Installing the ExpressCard Module Insert the ExpressCard module into its compartment. Tighten the screws to secure the ExpressCard module to the computer. Connect the: a) ExpressCard cable to the system board b) USH board cable to the USH board Install the: a) palm rest b) primary and secondary hard drive c) optical drive... -
Page 44: Installing The Heat Sink
Installing the Heat Sink Replace the heat sink in its slot. Tighten the captive screws to secure the heat sink to the computer. Connect the camera cable to the system board. Install the: a) processor fan b) palm rest c) primary and secondary hard drive d) optical drive e) keyboard f) keyboard trim... -
Page 45: Installing The Processor
Rotate the processor cam lock in a counter-clockwise direction. Remove the processor from the computer. Installing the Processor Align the notches on the processor and the socket, and insert the processor into the socket. Rotate the processor cam lock in a clockwise direction. Install the: a) heat sink b) processor fan... -
Page 46: Installing The Video-Card Heat Sink
Loosen the captive screws that secure the video-card heatsink to the computer [1, 2, 3, 4]. Remove the video-card heatsink from the computer. Installing the Video-Card Heat Sink Replace the video-card heat sink in its slot. Tighten the captive screws to secure the video-card heat sink to the computer. Connect and route the LVDS cable. -
Page 47: Removing The Video Card
battery After Working Inside Your Computer . Follow the procedures in Removing the Video Card Before Working Inside Your Computer . Follow the procedures in Remove the: a) battery b) base cover c) keyboard trim d) keyboard e) optical drive f) hard drive g) palm rest h) video fan... -
Page 48: Removing The Input/Output (I/O) Board
Removing the Input/Output (I/O) Board Before Working Inside Your Computer . Follow the procedures in Remove the: a) SD card b) battery c) base cover d) keyboard trim e) keyboard f) optical drive g) primary and secondary hard drive h) palmrest Perform the following steps to remove the I/O board: a) Disconnect the ExpressCard module connector from the I/O board. -
Page 49: Removing The Display Assembly
d) keyboard e) keyboard trim f) base cover g) battery h) SD card After Working Inside Your Computer . Follow the procedures in Removing the Display Assembly Before Working Inside Your Computer . Follow the procedures in Remove the: a) battery b) base cover c) keyboard trim d) keyboard... - Page 50 Flip the computer and remove the screws from the bottom and back of the computer. Remove the screw that secures the low-voltage differential signalling (LVDS) cable bracket. Remove the LVDS cable bracket and disconnect the LVDS and camera cable from the system board. Remove the screws that secure the display assembly to the computer.
-
Page 51: Installing The Display Assembly
Installing the Display Assembly Tighten the screws to secure the display assembly in place. Connect the camera and LVDS cables to the correct connectors on the system board. Place the LVDS cable bracket on the computer and tighten the screws to secure it to the computer. Route the cables through the routing channels. -
Page 52: Installing The Hinge Cover
b) base cover c) keyboard trim d) keyboard e) optical drive f) primary and secondary hard drive g) palmrest h) display assembly Remove the screws that secure the hinge cover to the computer. Remove the hinge cover from the computer. Installing the Hinge Cover Place the hinge cover in its position on the computer. - Page 53 g) optical drive h) primary and secondary hard drive primary memory secondary memory k) video-card fan palmrest m) heatsink n) processor o) video-card heatsink p) video card q) I/O board r) display assembly Disconnect the processor-fan cable, LVDS cable and the coin-cell battery cable from the system board. Disconnect the power connector cable.
-
Page 54: Installing The System Board
Installing the System Board Align the system board into its original position on the computer. Tighten the screws to secure the system board to the computer. Connect the following cables: a) power connector b) LVDS c) coin-cell battery d) processor fan Install the: a) I/O board b) video card... -
Page 55: Removing The Power-Connector Port
Removing the Power-Connector Port Before Working Inside Your Computer . Follow the procedures in Remove the: a) battery b) base cover c) keyboard trim d) keyboard e) optical drive f) primary and secondary hard drive g) palmrest h) I/O board display assembly Disconnect the power-connector cable from the system board and remove the power connector port from the computer. -
Page 56: Removing The Switch Board
Removing the Switch Board Before Working Inside Your Computer . Follow the procedures in Remove the: a) battery b) base cover c) keyboard trim d) keyboard e) optical drive f) primary and secondary hard drive g) palmrest Disconnect the switch-board cable from the system board and remove it from the latches. Remove the screws that secure the switch board to the computer and remove it from the computer. -
Page 57: System Setup
Boot Sequence allows you to bypass the System Setup‐defined boot device order and boot directly to a specific device (for example: optical drive or hard drive). During the Power-on Self Test (POST), when the Dell logo appears, you can: •... -
Page 58: System Setup Options
Keys Navigation <Enter> Allows you to select a value in the selected field (if applicable) or follow the link in the field. Spacebar Expands or collapses a drop‐down list, if applicable. <Tab> Moves to the next focus area. NOTE: For the standard graphics browser only. <Esc>... - Page 59 Option Description NOTE: Without this option, only UEFI option ROMs will load. This option is required for Legacy boot mode. This option is not allowed if Secure Boot is enabled. • Field Enable Legacy Option ROMs Date/Time Allows you to set the date and time. Table 3.
- Page 60 Option Description Drives Allows you to configure the SATA drives on board. The options are: • SATA-0 • SATA-1 • SATA-2 • SATA-3 • SATA-4 • SATA-5 • Zero Power ODD Default Setting: The highlighted devices are enabled. SMART Reporting This field controls if the hard drive errors for the integrated drives are reported during system startup.
- Page 61 Option Description Fn+B to resume normal operation. The option is disabled by default. • Enable Unobtrusive Mode Miscellaneous Devices Allows you enable or disable the various on board devices. The options are: • Enable Fixed Bay • Enable Microphone • Enable ExpressCard •...
- Page 62 Option Description Internal HDD-0 Password Allows you to set, change or delete the administrator password. Default Setting: Not set Strong Password Allows you to enforce the option to always set strong passwords. Default Setting: Enable Strong Password is not selected. Password Configuration You can define the length of your password.
- Page 63 Option Description • One Time Enable • Disable Admin Setup Lockout Allows you to prevent users from entering Setup when an Administrator password is set. Default Setting: Disabled Table 6. Secure Boot Option Description Secure Boot Enable This option enables or disables the Secure Boot feature.
- Page 64 Option Description or disable the additional processor sleep states. Default Setting: C states. Limit CPUID This field limits the maximum value the processor Standard CPUID Function will support. Some operating systems will not complete installation when the maximum CPUID Function supported is greater than 3. This option is disabled by default.
- Page 65 Option Description Default Setting: both the options are disabled. Wake on LAN/WLAN This option allows the computer to power up from the off state when triggered by a special LAN signal. Wake-up from the Standby state is unaffected by this setting and must be enabled in the operating system.
- Page 66 • Express Charge - The battery may be charged over a shorter period of time using Dell’s fast charging technology. NOTE: Battery settings may not be available for all battery types. In order to enable this option Ádvanced Battery Charge Mode must be disabled.
- Page 67 Option Description • 5 seconds • 10 seconds Table 10. Virtualization Support Option Description Virtualization This option specifies whether a Virtual Machine Monitor (VMM) can utilize the additional hardware capabilities provided by Intel Virtualization technology. • Enable Intel Virtualization Technology - Default Setting. VT for Direct I/O Enables or disables the Virtual Machine Monitor (VMM) from utilizing the additional hardware capabilities provided by Intel Virtualization technology for direct I/O.
-
Page 68: Updating The Bios
Restart the computer. Go to dell.com/support. If you have your computer's Service Tag or Express Service Code: NOTE: To locate the Service Tag, click Where is my Service Tag? NOTE: If you cannot find your Service Tag, click Detect Service Tag. -
Page 69: Assigning A System Password And Setup Password
Assigning a System Password and Setup Password You can assign a new System Password and/or Setup Password or change an existing System Password and/or Setup Password only when Password Status is Unlocked. If the Password Status is Locked, you cannot change the System Password. - Page 70 The computer reboots.
-
Page 71: Diagnostics
Diagnostics If you experience a problem with your computer, run the ePSA diagnostics before contacting Dell for technical assistance. The purpose of running diagnostics is to test your computer's hardware without requiring additional equipment or risking data loss. If you are unable to fix the problem yourself, service and support personnel can use the diagnostics results to help you solve the problem. -
Page 73: Troubleshooting Your Computer
Troubleshooting Your Computer You can troubleshoot your computer using indicators like Diagnostic Lights, Beep Codes, and Error Messages during the operation of the computer. Device Status Lights Table 14. Device Status Lights Turns on when you turn on the computer and blinks when the computer is in a power management mode. Turns on when the computer reads or writes data. -
Page 74: Battery Status Lights
Battery Status Lights If the computer is connected to an electrical outlet, the battery light operates as follows: Alternately An unauthenticated or unsupported non-Dell AC adapter is attached to your laptop. blinking amber light and white light Alternately Temporary battery failure with AC adapter present. -
Page 75: Specifications
Specifications Technical Specification NOTE: Offerings may vary by region. For more information regarding the configuration of your computer, click Start (Start icon) → Help and Support, and then select the option to view information about your computer. Table 16. System Information Feature Specification System Chipset... - Page 76 Table 18. Memory Feature Specification Type DDR3L Speed 1600 MHz and 1866 MHz Connectors 4 SoDIMM Sockets • Intel Core i5 and i7 Dual processors — two DIMM slots • Intel Core i7 Quad Core and i7 Quad Extreme processors — four DIMM slots Capacity 1 GB, 2 GB, 4 GB, and 8 GB...
- Page 77 Table 21. Communication Feature Specification Network adapter network interface card capable of 10/100/1000 Mb/s communication Wireless • internal wireless local area network (WLAN) • internal wireless wide area network (WWAN) • bluetooth wireless support • WiGig support Table 22. Expansion Bus Feature Specification Bus Type...
- Page 78 Feature M4800 M6800 Dimensions: Height 210 mm (8.26 inches) 270.60 mm (10.65 inches) Width 359.80 mm (14.16 inches) 416.70 mm (16.40 inches) Diagonal 396.24 mm (15.60 inches) 439.42 mm (17.3 inches) Active area (X/Y) • HD (344.23 mm X 193.54 •...
- Page 79 1 TB 5400 rpm, 320/500/750 GB 7200 rpm, 320GB 7200 rpm SED FIPS; 128/256/512 GB SATA 3 SSD, 256 GB SATA 3 SSD NOTE: The size of the hard drive is bound to change. For more information, see dell.com. Optical Drive: Interface •...
- Page 80 Feature Specification • 9-cell /9-cell LCL - 535 g (1.18 lb) Voltage 11.10 V Temperature range: Operating • Charge : 0 °C to 50 °C (32 °F to 158 °F) • Discharge: 0 °C to 70 °C (32 °F to 122 °F) Non-operating -20 °C to 65 °C (4 °F to 149 °F) Coin-cell battery...
- Page 81 Table 32. Physical Dimension Physical M4800 M6800 Height: Touch • Front: 36.1 mm (1.42 inches) • Back: 40.2 mm (1.58 inches) Non-touch • Front: 32.9 mm (1.29 • Front: 33.1 mm (1.30 inches) inches) • Back: 36.7 mm (1.44 • Back: 37.2 mm (1.46 inches) inches)
-
Page 83: Contacting Dell
Dell product catalog. Dell provides several online and telephone-based support and service options. Availability varies by country and product, and some services may not be available in your area. To contact Dell for sales, technical support, or customer service issues: Visit dell.com/support...
Need help?
Do you have a question about the Precision M6800 and is the answer not in the manual?
Questions and answers