Advertisement
Quick Links
Owner's Manual
Liquid Propane Gas Grill
Model141.155401
Z_
WARNING:
Read this Owner's Manual carefully and be sure
your gas grill is properly assembled, installed and
maintained.
Failure to follow these instructions
could result in serious bodily injury and/or property
damage. This gas grill is intended for outdoor use
only and is not intended to be installed in or on
recreational vehicles or boats.
Note to Installer:
Leave this Owner's Manual
with the consumer after delivery and/or installation.
Note to Consumer:
Leave this Owner's Manual
in a convenient place for future reference.
Sears,
Roebuck
and Co.,
Hoffman
Estates,
IL 60179
U.S.A.
P4794F - Rev: 3/28/2002
Advertisement

Related Manuals for Kenmore 141.155401


Summary of Contents for Kenmore 141.155401
- Page 1 Owner's Manual Liquid Propane Gas Grill Model141.155401 WARNING: Note to Installer: Leave this Owner's Manual with the consumer after delivery and/or installation. Read this Owner's Manual carefully and be sure your gas grill is properly assembled, installed and Note to Consumer: Leave this Owner's Manual maintained.
-
Page 2: For Your Safety
Warranty ............. z_ WARNI NG Safety Instructions ........Combustion byproducts produced when using this product contain chemicals known to the Pre-Assembly Instructions ......State of California to cause cancer, birth defects, or other reproductive harm. Hardware, Parts Diagram Lists ..5 Assembly Instructions ......... - Page 3 18-1/2inchesHIGHis the maximum sizeLP gas • LP gas tanks must be stored outdoors in a tank to use.You must use an "OPD" gas tank well-ventilated area and out of the reach of which offers an Overfill PreventionDevice.This children. Disconnected LP gas tanks must not safetyfeatureprevents t hetankfrombeingoverfilted be stored in a building, garage or any other...
-
Page 4: Cotter Pin
• Long nose pliers can be used to remove CAUTION: Spiders and small insects occa- Cotter Pin when cleaning the Burners sionally spin webs or make nests in the grill • Use work gloves to protect your hands Burner Tubes during transit and warehousing. •... - Page 5 The following table illustrates a breakdown of the hardware pack. It highlights what components are used in the various stages of assembly. Ref. Component Qty. to Use Purpose of Components H019 1/4"x2" Pattern Head Screw Attaches Cart Legs To Bottom Shelf H017 1/4"x1/2"...
- Page 6 19 18 17 23 "39...
- Page 7 Left P0755C To make sure you obtain the correct replacement Bowl Panel- Right P07A1B parts for your Kenmore gas grill, please refer to the part numbers on this page. The following Outside Bowl Panel - Right P0758D information is required to assure you receive the...
- Page 8 Figure BRA( CAUTION: While it is possible for one person to LEG-LEFT assemble this grill, obtain assistance from another person when handling some of the larger, heavier pieces, espe- cially the grill head. 1. Open Lid of shipping carton and remove top sheet of cardboard.
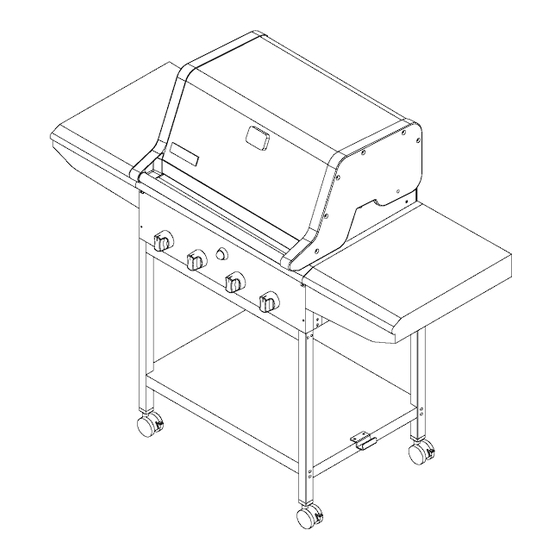
- Page 9 Installing The Grill Head Figure 4 GRILL Now that you've assembled the grill cart you can install the pre-assembled Grill Head. See Fig. 4. If you haven't already done so, we suggest you open the Grill Lid and remove the packed components. Even with the com- ponents removed, this next step requires 2...
- Page 10 Slide the 5 Tool Hooks onto the Tool Holder Electrode Check - Requires an Assistant with hooks facing the grill Head. Attach Tool Before placing the cooking components into your Holder to the left side of the Side Shelf and grill, ensure that the Spark Electrode Tip is properly secure firmly using 2 of the M5x8mm Pattern positioned within each Gas Collector Box (a 3-1/4"...
- Page 11 12. If a leak is found, turn the tank valve off and do not use your grill until the Congratulations leak is repaired. Your Kenmore LP gas grill is now ready for use. Before the first use and at the beginning Disconnecting...
- Page 12 /!X,WARNING A strong gas smell, or the hissing sound of Basic Lighting Procedures gas indicates a serious problem with your 1. Familiarize yourself with the safety guidelines at gas grill or the LP gas tank. Failure to the front of this manual. Do not smoke while immediately follow the steps listed below lighting grill or checking gas supply connections.
- Page 13 Lighting Your Grill by Match Misalignment of the Ignitor on Burner Correction: Check for proper position of the To light your gas grill by match, follow steps 1 through Electrode Tip as shown in Figure 10. The gap 6 of the Basic Lighting Procedures. Then, insert a lit between the Spark Electrode Tip and Spark match through the Lighting Hole on the left side of the Receiver should be approximately 3/16", adjust if...
- Page 14 Cover each Gas Valve Orifice with aluminum foil. Brush the inside and bottom of the grill with a fiber Aswithallappliances, proper c areandmaintenance pad or nylon brush, and wash with mild soap and a wiltkeepyourgrillintopoperating c ondition a nd warm water solution. Rinse thoroughly and let dry. prolong itslife.Byfollowing t hesecleaning p rocedures Remove aluminum foil from Orifices and check ona timelybasis, y ourgrill w illstayclean andwork...
- Page 15 Cleaning The Burner Tubes and Burner Ports Regardless of which Burner cleaning procedure you use, we recommend you also complete the following To reduce the chance of "FLASH-BACK" the proce- steps to help prolong Burner life. dure below should be followed at least once a month in 1.
- Page 16 Question: Why doesn't the hose and regulator assem- Kenmore gas grill from the weather? bly supplied with my new Kenmore grill fit the older LP gas tank I've used for years? Answer: A good quality grill cover should be used to protect your grill when not in use.
- Page 17 Never use the CONGRATULATIONS HIGH setting for extended cooking. Your Kenmore gas grill is now ready to grill. Re- Medium to Low Settings: Most recipes specify member to keep the Lid up when cooking directly on MEDIUM to LOW settings, including all smoking, the grill.
- Page 18 Cut of Meat Grilling Steak and Ribs Approximate Cooking Times T-bone steak Turn the grill Burners on HIGH, close the Lid Rare: 4-8 minutes Sirloin steak Medium: 10-14 minutes and preheat your grill 3 to 5 minutes. Open Lid and place the meat on the Cooking Grid Beef spare ribs Well done: 15-20 minutes Porterhouse steak...
- Page 19 Cut of Meat Whole Fish and Whole Fillets Approximate Cooking Times Whole fish 10 - 12 minutes per pound or Preheat your grill on HIGH for 2-3 minutes Whole fish fillets with the Lid down. Raise lid and turn until fish is opaque Burners to MEDIUM heat.
- Page 20 An Important Note About Heat Settings Food preparation The suggested heat settings shown are approximate. Trim meat of excess fat. Truss meat and poultry with There are many factors such as outside temperature, cooking string to retain shape if desired. Bacon strips can be used to cover the outside surface of lean meat wind conditions and grill location that affect your grill performance.
- Page 21 Rotisserie Cooking Note: it is our experience that many smoking chip and pellet products do not actually produce a smoke but Rotisserie cooking produces foods that are moist, instead infuses the food with flavor. Please read flavorful and attractive. The optional rotisserie system product labels carefully and if in doubt, ask your is most commonly used for cooking meat or poultry retailer for details.
- Page 22 STIR-FRYING TECHNIQUES DEEP-FRYING TECHNIQUES Thismethod ofcooking is popular a round theworld and A wide variety of foods can be deep-fried outdoors on canbeeasily accomplished outdoors o nyourKenmore your grill, from potatoes, to seafood and chicken. gasgrill.It'sa quick andhealthful wayof preparing a Deep-frying uses a large portion of oil, preferably complete m eal u sing meat, p oultry orseafood in saturated.
- Page 23 teaspoon salt 1 1/2 pounds lean ground beef cups shredded lettuce ONIONBURGERS cup finely shredded cheddar cheese cup dairy sour cream and/or guacamole Ahoney andmustard sauce glazes theonionslices astheycookalongside t hesedelicious burgers. For Preparing the Salsa optimal s weetness, select V idalia or Walta Walla onions.
- Page 24 RIB EYE STEAKS WITH GRILLED GARLIC Preparation As they cook, the garlic cloves mellow in flavor, Combine ketchup, pepper, rosemary, basil and garlic making a delicious sauce for any grilled meat. And for powder. Coat both sides of steak with mixture. Grill an appetizer, spread the softened cloves over toasted steak with lid up, directly over MEDIUM heat for 6 slices of french bread! Makes 4 servings.
- Page 25 MARINATED TU NA STEAK Preparation Experiment with unique dishes, like this tuna steak Combine thawed fish, margarine or butter, lemon recipe boasting a delicious wine marinade! juice, mustard and basil into a cooking pan or Makes 4 servings. aluminum foil rectangle, and cook directly over LOW flame until butter is melted.
- Page 26 SOUTHWEST CHICKEN BREASTS BARBECUEDCHICKEN Thispopular r ecipe canalsobea grilled chicken salad! Another backyard favorite, this recipe includes an Slicechicken intosmall s trips andplace themontop easy to make sweet and spicy sauce. ofshredded l ettuce withavocado dressing a ndtopwith Makes 4 servings. cheese! Makes 6 servings.
- Page 27 TRADITIONAL HOLIDAY TURKEY PIZZA ON THE GRILL Imagine e veryone's surprise w hen youserve yournext You may never want to call out for pizza again! holiday t urkeyicomplete withdressingidelicious Follow this pizza dough recipe, or purchase ready- made pizza dough found in your grocers refrigerated andtender s traight f romthegrill[Serves8 - 10 sectioninext to the biscuits.
- Page 28 FRESH VEGETABLE STIR-FRY GRILLED POTATO SKINS Serve these crispy potatoes as a snack or side dish. Take a trip to the Orient with this easy, and healthy We've included microwave instructions for a timesav- vegetable recipe. Makes 4 - 6 servings. ing short cut.
- Page 29 For repair of major brand appliances in your own home... no matter who made it, no matter who sold it! iHHHHHHH HHHHHHHi 1-800-4-MY-HOME ® Anytime, dayor night (1-800-469-4663) (U.S.A. and Canada) HHHHHHHi www.sears.com www.sears.ca For repair of carry-in products like vacuums, lawn equipment, and electronics, call for the location of your nearest Sears Parts and Repair Center.
Need help?
Do you have a question about the 141.155401 and is the answer not in the manual?
Questions and answers