Garmin GPS III A Owner's Manual
Garmin gps iii a owner's manual
Hide thumbs
Also See for GPS III A:
- Owner's manual (112 pages) ,
- Quick manual (2 pages) ,
- Declaration of conformity (1 page)
Table of Contents
Advertisement
Advertisement
Table of Contents

Subscribe to Our Youtube Channel
Related Manuals for Garmin GPS III A


Summary of Contents for Garmin GPS III A
- Page 1 Owner’s Manual & Reference ®...
- Page 2 GARMIN. Information in this document is subject to change without notice. GARMIN reserves the right to change or improve its products and to make changes in the content without obligation to notify any person or organization of such changes.
-
Page 3: Introduction
Section Three (Reference) provides details about the advanced features and operations of the GPS III by topic. Before getting started with your GPS, check to see that your GARMIN GPS III package includes the following items. If you are missing any parts, please contact your dealer immediately. -
Page 4: Cautions
GPS III over airbag panels or in a place where the driver or passengers are likely to have an impact with it in an accident or collision. The mounting hardware provided by GARMIN is not warranted against collision damage or the consequences thereof. -
Page 5: Fcc Compliance
The GPS III does not contain any user-serviceable parts. Repairs should only be made by an authorized GARMIN service center. Unauthorized repairs or modifications could void your warranty and your authority to operate this device under Part 15 regulations. -
Page 6: Limited Warranty
GARMIN Corporation warrants this product to be free from defects in materials and workmanship for one year from the date of purchase. GARMIN will, at its sole option, repair or replace any components which fail in normal use. Such repairs or replacement will be made at no charge to the customer for parts or labor. The cus- tomer is, however, responsible for any transportation costs. -
Page 7: Table Of Contents
INTRODUCTION About This Manual ....i Cautions ......ii FCC Compliance . - Page 8 INTRODUCTION Table of Contents GOTO ......49 GOTO Options ..... .50 MOB .
-
Page 9: Getting Started
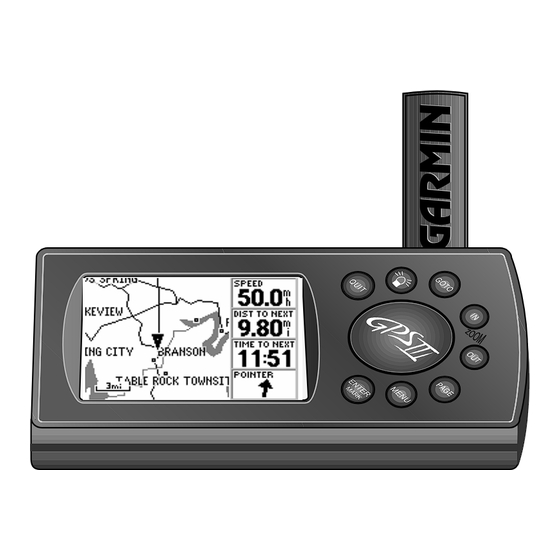
GETTING STARTED Unit Features Antenna (detachable) Function Keys Power/Backlight Key (red) Rocker Keypad LCD Display To change the screen orientation, press and Battery Door hold the PAGE key. -
Page 10: Keypad Usage / Display
GETTING STARTED Keypad Usage / Display (POWER)— Red key turns the unit on and off, and controls three levels of screen backlighting intensity. (PAGE)— Scrolls main pages in sequence and returns display from a menu/options page to a main page. Press and hold this key to change screen orientation. -
Page 11: Battery Installation
The GPS III operates on 4 AA batteries (not included), which are installed at the base of the unit. These batteries provide up to 8 hours of continuous use. Rechargeable NiCad or lithium batteries may also be used. NOTE: The on-screen battery level indicator is calibrated for alkaline batteries, and will not be accurate when using NiCad or lithium batteries (see page 69). -
Page 12: What Is Gps
GPS satellite and use this information to compute your position. Your GPS receiver can only see satellites above the horizon, so it needs to know what satellites to look for at any given time. To use this almanac data, your GPS needs to either be told its general location (“initialized”) or given the opportunity to... -
Page 13: Initialization
“shaded,” the receiver can simply use an alternate satellite to maintain the position fix. Although a GPS receiver needs four satellites to provide a three-dimensional (3D) fix, it can maintain a two-dimensional (2D) fix with only three satellites. A three-dimensional fix means the unit knows its latitude, longitude, and altitude, while a two-dimensional fix means the unit knows only its latitude and longitude. -
Page 14: Troubleshooting
(Contact your local GARMIN dealer and inquire about the GA 26 low-profile remote antenna, part number 010-10052-02.) •... -
Page 15: Main Page Sequence
Satellite Status Page Active Route Page Highway Page To turn the GPS III back on, press and hold the red power key. The GPS III features six main pages which are linked together in a chain. You can quickly scroll through the pages in either direction using the PAGE or QUIT keys. Let’ s briefly tour each of these pages in order to give you some insight into how they help you navigate. -
Page 16: Satellite Status Page
GETTING STARTED Satellite Status Page The signal strength bars give you an indication of what satellites are visible to the receiver, whether or not they’re being used to calculate a posi- tion fix, and the signal quality. If satellite reception is lost, or an insufficient number of satellites are available, you will be alerted with a ‘Poor... -
Page 17: Position Page
The Position Page shows you where you are, what direction you’re heading, and how fast you’re going—and it’ s the page you’ll want to use when you don’t have a destination selected. A graphic compass display at the top of the page shows your direction of travel (track) while you’re moving, while six user-selectable data fields below display your current speed, average speed, trip odometer, trip timer, and sunrise/sunset times at your current position. -
Page 18: Map Page
GETTING STARTED Map Page With the map oriented to ‘track up’, the pointer always points up and the map rotates to your current direction of travel (track). Note the north indicator on the map. You can also select a full- screen map from the Map Page Options. -
Page 19: Compass Page
The GPS III features two different navigation pages: Compass and Highway. The Compass Page is first. This page provides graphic steering guidance to a destination waypoint, with an emphasis on the bearing to your destination and current direction of travel. (The Highway Page places greater emphasis on the straight-line desired course and the distance and direction you are off course.) The middle of the page fea- tures a rotating ‘compass ring’... -
Page 20: Highway Page
GETTING STARTED Highway Page If you move off course the highway display will move, indicating the direction you are off course. To stay on course, simply move toward the center of the highway. As you approach your desti- nation, the graphic highway will stop at the destination waypoint. -
Page 21: Main Menu
The GPS III’ s Main Menu provides access to additional pages (submenus) that are used to create or edit waypoints, create routes, list nearby waypoints, review trip infor- mation and timers or make changes to system settings. These six pages are divided into categories by function. -
Page 22: Marking Waypoint Positions
GETTING STARTED Marking Waypoint Positions Each waypoint stored in memory is identified by a unique name, up to six char- acters long (letters and/or numbers). Each waypoint may also be assigned a custom waypoint symbol, making it easy to identify the waypoint on the Map Page. -
Page 23: Going To A Waypoint
Once you’ve stored a waypoint in memory, you can use the GPS III to guide you to it by using the GOTO feature. A GOTO is really nothing more than a straight-line course from your present position to the destination you’ve selected. A GOTO can be performed several ways: by specifying the destination from the GOTO Page, graphi- cally from the map display or by highlighting the waypoint name on any page (such as the Nearest Waypoints List). -
Page 24: Active Route Page
GETTING STARTED Cancel GOTO/Active Route To cancel the current GOTO destination, select ‘Cancel GOTO’ from the GOTO Options Page. Use the LEFT/RIGHT keys on the rocker keypad to select the desired data item. Available items include course, distance, fuel, and sunrise/sunset times. To cancel the current GOTO destination, simply select another destination. -
Page 25: Simulator Tour
The GPS III is a powerful navigation system providing detailed mapping informa- tion in a convenient, compact package. This simulator tour is designed to show you the basic features of your new GPS III during a simulated trip. The simulator tour assumes that the receiver has been properly initialized as outlined in the Getting Started section of this manual, and that you have not changed any of the factory default settings. - Page 26 SIMULATOR TOUR Selecting Simulator Mode Select ‘Start Simulator’ from the Satellite Status Page Options to enable the built-in simulator. The simulator imitates satel- lite reception and shows that information on the Satellite Status Page. Remember, in this mode the GPS III is not actually tracking satellites.
- Page 27 The GPS III’ s Map Page combines digital charting with a number of user-selectable features. Before we select our destination and begin navigating toward it, let’ s take a look at some of those features. Background Roads and Railways The map display shows your present position using a pointer icon in the center of the screen.
-
Page 28: Creating A Waypoint
SIMULATOR TOUR Creating a Waypoint Use the rocker keypad to pan to other areas on the map display. When panning an on-screen arrow appears for reference, along with a data field above the map. Place the panning arrow over an on-screen item to display a descriptive name. -
Page 29: To Select The Goto Destination
4. Now let’s use a special symbol to identify this location. Highlight the waypoint symbol field, using the rocker keypad, and press ENTER. Use UP/DOWN on the rocker keypad to select the ‘Information’ icon (‘?’) and press ENTER. 5. To save the new waypoint, highlight ‘Done’ with the rocker keypad and press ENTER. Now that we’ve created our new waypoint, let’... -
Page 30: Marking Present Position
SIMULATOR TOUR Marking Present Position To mark your present position and save it as a waypoint, press and hold ENTER. A three-digit name is automati- cally assigned to the waypoint. From the Compass Page you can increase/decrease the simulated speed using the UP/DOWN keys on the rocker keypad. - Page 31 Notice the information on the map display is slowly moving? That’ s how it would look in actual use as well. The background map information and nearby waypoints will move across the screen, while your current position remains fixed in the center. The other primary navigation screens are the Compass and Highway pages, with the Compass Page appearing first in the sequence of main pages.
- Page 32 SIMULATOR TOUR Highway Page Use the LEFT/RIGHT keys on the rocker keypad to move off course / on course. To return to your course, steer toward the highway centerline. When you reach your destina- tion, the highway will end at the waypoint marker.
-
Page 33: Reference
The GPS III’ s Satellite Status Page provides a visual reference of various receiver functions, including current satellite coverage, receiver operating mode, battery level and position accuracy. As the receiver locks onto satellites, a signal strength bar will appear for each satellite in view, with the appropriate satellite number (01-32) under- neath each bar. - Page 34 REFERENCE Satellite Status Page ‘2D Navigation’ means the GPS III has determined a hor- izontal position (latitude/ longitude), but is unable to determine altitude. Additional satellites may be needed. ‘3D Navigation’ means the GPS III has determined a hor- izontal and vertical position (latitude, longitude and alti- tude).
-
Page 35: 'Need To Select Initialization' Prompt
Poor GPS Coverage— the receiver isn’t tracking enough satellites for a 2D or 3D fix due to bad satellite geometry. Not Usable— the receiver is unusable, possibly due to incorrect initialization or abnormal satellite conditions. Turn the unit off and back on to reset, and reinitial- ize the receiver if necessary. -
Page 36: Screen Backlighting
REFERENCE Satellite Status Page When screen backlighting is on, a bulb icon will appear in the lower-left corner of the Satellite Status Page. The Satellite Status Page Options allow you to enable the built-in simulator, change the sky view orientation or initialize the receiver. - Page 37 The following Satellite Status Page options are available: Start Simulator— allows you to activate the GPS III’ s built-in simulator mode. If ‘Start Simulator’ is selected, ‘Stop Simulator’ will appear as an option instead. To activate (deactivate) simulator mode: 1. Highlight ‘Start Simulator’ (or ‘Stop Simulator’) and press ENTER. 2.
-
Page 38: Position Page
REFERENCE Satellite Status Page Options With 2D coverage, you will need to enter your approxi- mate altitude. Without an approximate altitude, your position error can be substan- tial. The Position Page shows you where you are, what direction you’re heading and how fast you’re going. -
Page 39: Position Page Options
Many features of the GPS III are menu driven. Each of the main pages has an options menu, allowing you to custom tailor the corresponding page to your prefer- ences and/or select special features which specifically relate to that page. To display the Position Page Options, press MENU (with the Position Page displayed). - Page 40 REFERENCE Position Page Options ‘Change Fields’ allows you to custom tailor the information that appears on the Position Page. Select the desired data type from the list. ‘Restore Defaults’ will over- ride any data field changes you’ve made to the Position Page, reverting back to the factory default settings.
-
Page 41: Map Page
The GPS III features a powerful real-time moving map that can do much more than just plot your course and route. The Map Page also displays background detail, including geographic names, lakes, rivers, coastlines and highways. An on-screen cur- sor lets you pan ahead to nearby waypoints, determine the distance and bearing to any map position, and mark new waypoints while you navigate. - Page 42 REFERENCE Map Page Use the rocker keypad to pan away from your present posi- tion. Place the arrow on a waypoint and press ENTER to see more information. By placing the panning arrow over an on-screen waypoint and pressing GOTO, you won’t have to manually select your destination from the GOTO Page.
-
Page 43: Map Page Options
Many features of the GPS III are menu driven. Each of the main pages has an options menu, allowing you to custom tailor the corresponding page to your prefer- ences and/or select special features which specifically relate to that page. To display the Map Page Options, press MENU (with the Map Page dis- played). -
Page 44: Map Page Options
REFERENCE Map Page Options ‘Setup Map’ allows you to change map orientation, background map detail, text size, etc. The map settings are orga- nized by a series of ‘file tabs’. Use the rocker keypad to select the desired tab, and to select the desired setting(s). - Page 45 To change a map setup feature: 1. Highlight ‘Map Setup’ and press ENTER. 2. To change map orientation, select the ‘Map’ tab (if not already selected) and press ENTER. Highlight the ‘Orientation’ field and press ENTER. Select ‘North Up’ to fix the top of the map display to a north heading.
-
Page 46: Compass Page
REFERENCE Compass Page The bearing pointer indicates the direction (bearing) to your destination. If the arrow points any direction other than up, turn toward the arrow until it points up. If you pass your destination waypoint, the bearing pointer will swing around 180º and the ‘Dist to Next’... -
Page 47: Compass Page Options
Many features of the GPS III are menu driven. Each of the main pages has an options menu, allowing you to custom tailor the corresponding page to your prefer- ences and/or select special features which specifically relate to that page. To display the Compass Page Options, press MENU (with the Compass Page displayed). -
Page 48: Highway Page
REFERENCE Highway Page Your course is represented by the highway center line. Keep the center line in the middle of the display to stay on course. When using a route, the Highway Page will guide you to each waypoint along the route. -
Page 49: Highway Page Options
Many features of the GPS III are menu driven. Each of the main pages has an options menu, allowing you to custom tailor the corresponding page to your prefer- ences and/or select special features which specifically relate to that page. To display the Highway Page Options, press MENU (with the Highway Page displayed). -
Page 50: Creating Waypoints
REFERENCE Creating Waypoints The ENTER/MARK key allows you to mark your cur- rent position as a waypoint. You can give this waypoint any name you choose—up to six characters long. You can also choose from a list of symbols used to identify the user waypoint on the map display. - Page 51 Marking Waypoints on the Map Page Waypoints can also be quickly created from the Map Page, which allows you to “point and shoot” at any map position to create a new waypoint. To create a new waypoint on the map: 1.
-
Page 52: Waypoint List Options
REFERENCE Creating Waypoints You can choose from a list of symbols used to identify the waypoint on the map display. The Spell ‘n Find option allows you to retrieve way- point information by manual- ly entering the waypoint’s name with the rocker keypad. 4. -
Page 53: Editing Waypoints
Show Map— allows you to view the map area around the highlighted waypoint on the Waypoint List. While viewing the map display, you can also use the IN and OUT zoom keys to see additional detail. To view the map area around a highlight waypoint on the Waypoint List: 1. - Page 54 REFERENCE Editing Waypoints The default waypoint com- ment is the time and date the waypoint was created. You can enter your own comment using the rocker keypad. Edit a waypoint’s position by entering the new position coordinates directly over the old position.
-
Page 55: Waypoint Options
The Waypoint Edit Page also features an options page that allows you to delete the waypoint, view the map area around the waypoint position, define how the waypoint will appear on the map display or average the waypoint position to improve accuracy. To display the Waypoint Edit Options, press MENU (with the Waypoint Edit Page displayed). -
Page 56: Nearest Waypoints
REFERENCE Nearest Waypoints To view the Nearest Waypoint List, select ‘Nearest’ from the Main Menu. The Nearest Waypoint List shows as many as nine nearby waypoints, along with the bearing and distance to each one. To GOTO a nearby way- point, highlight it on the list, press GOTO and ENTER. -
Page 57: Goto Navigation
The GPS III can navigate to a destination using any of four different methods: GOTO— lets you select a waypoint as your destination and quickly plot a direct course from present position to that waypoint. MOB (man overboard)— captures your present position, saves it as a waypoint and sets a course back to the position for quick response in an emergency. -
Page 58: Goto Options
REFERENCE GOTO / GOTO Options By highlighting a waypoint name on a list and pressing GOTO, you won’t have to manually enter the name of your destination waypoint. A GOTO can also be initiated from the map display by plac- ing the panning arrow on the desired target waypoint. -
Page 59: Mob
Cancel GOTO— cancels the current GOTO destination and resumes navigation of any previously selected route. If no route is currently in use; bearing, distance, etc. will remain blank until a destination waypoint is defined. To cancel the current GOTO destination, highlight ‘Cancel GOTO’ and press ENTER. -
Page 60: Tracback
REFERENCE TracBack Clear the old track log before you depart. This defines the starting point for a TracBack route. A TracBack route can also be created from the GOTO Options by pressing GOTO, followed by MENU. The TracBack navigation feature allows you to retrace your path using the track log automatically stored in the receiver’... - Page 61 Once a TracBack has been activated, the GPS III will take one of the track logs cur- rently stored in memory and divide it into route segments, called ‘legs’. Up to 30 track log waypoints (labeled ‘T###’, e.g. ‘T001’) will be created to mark the most significant features of the track log in order to duplicate your path as closely as possible.
-
Page 62: Routes
REFERENCE Routes points which lead you to your final destination. The GPS III will store up to 20 reversible routes, with up to 30 waypoints in each route. Routes can be created and modified by text entry (using the rocker keypad to enter waypoint names) or directly from the map display. -
Page 63: Creating New Routes
To create a route from the map display: 1. Press MENU twice to display the Main Menu. 2. Highlight ‘Routes’ and press ENTER. The Route List is displayed, showing all routes stored in memory. 3. Press MENU to display the Route Options. 4. - Page 64 REFERENCE Route List The Route List shows all routes currently stored in memory. Highlight the desired route and press ENTER to see the Route Plan Page. Activating a route tells the GPS III you wish to use this route for navigation guidance. The GPS III’...
-
Page 65: Route List / Editing
3. Highlight the desired route and press ENTER to display the Route Plan Page. 4. Highlight the name field and press ENTER to begin editing. 5. Use the rocker keypad to enter the desired name and press ENTER when finished. Route Editing Once a route is added to memory you can review and/or edit the route from the Route Plan Page. -
Page 66: Route Editing / Planning
REFERENCE Route Editing / Planning Route Planning entire route. Available information includes desired course, time to waypoint, distance to waypoint, required fuel and sunrise/sunset times at the waypoint location. The ‘Show Map’ option allows you to change the route from the map display. -
Page 67: Route Options
When a route is highlighted on the Route List, additional functions are available from the Route Options. To display the Route Options, press MENU (with the Route List displayed). The following options are available: New Route— allows you to create a new route, as described on page 54. Activate Route—... -
Page 68: Active Route Page
REFERENCE Route Options / Active Route The Active Route Page shows the route currently being used for navigation guidance. The next waypoint in the route is denoted by an arrow on the left-hand side of the screen. Selecting a GOTO destination along the current route will take you directly to that way- point, then continue with the... -
Page 69: Active Route Page Options
Many features of the GPS III are menu driven. Each of the main pages has an options menu, allowing you to custom tailor the corresponding page to your prefer- ences and/or select special features which specifically relate to that page. To display the Active Route Page Options, press MENU (with the Active Route Page displayed). - Page 70 REFERENCE Active Route Page Options ‘Re-evaluate’ will reactivate the current route and select the closest leg. This feature is handy if you stray well off course and later wish to return to the route. To reverse the sequence of waypoints in the active route, select the ‘Invert’...
-
Page 71: Main Menu
The GPS III’ s Main Menu provides access to the waypoint, route, track log, timer and setup features of the receiver. The Main Menu can be accessed at any time using the MENU key. To display the Main Menu, press the MENU key twice. The 6 menu options are divided into categories by function: waypoints/nearest waypoints, routes/track logs, trip computer, and system setups. -
Page 72: Track Log Settings
REFERENCE Main Menu: Track Logs The Track Logs Page shows available memory for the active log (the log currently being recorded) and lists any saved track logs. From the Track Logs Page, press ENTER to view the Track Log Options. Track Log Settings To view the Track Log Options, highlight ‘Active Log’... - Page 73 Track Log Settings (cont.) Delete All allows you to clear all track logs, active and saved, from memory. To delete all track logs from memory: 1. Select ‘Delete All’ from the Track Log Options and press ENTER. 2. Press ENTER again to confirm (or QUIT to cancel). Setup Logging provides a setup screen to define how track log data will be recorded.
-
Page 74: Setup Menu
REFERENCE Main Menu / Setup Menu ter, trip odometer and trip timer. These readouts can be reset from the Trip Computer Options. ‘Trip Computer’ provides readouts for the trip odometer, trip timer, average speed and maximum speed. Options are provided to reset these figures. The ‘Setup’... - Page 75 Position Format (latitude/longitude, UTM/UPS, Maidenhead, regional grids); Map Datum selection Interface Format (NMEA, RTCM, GARMIN proprietary); Mode setting for use with PC or a second unit The following pages describe, in more detail, the available settings for each Setup file tab item.
-
Page 76: Simulator Settings
REFERENCE Setup Menu: Simulator ‘Simulator’ allows you to configure the built-in simulator feature. The ‘Track Control’ setting allows the simulator to automatically “line up” on the correct bearing to a destination waypoint. Simulator Settings Mode lets you turn the built-in simulator on or off. To enable/disable the built-in simulator: 1. -
Page 77: System Settings
System Settings Backlight lets you keep the screen/keypad backlighting on continuously (‘always on’) when selected, or enable the automatic shutoff to preserve battery life. Automatic shutoff times from 15 seconds to 4 minutes (since last key press) are available. To set the backlight timeout: 1. -
Page 78: Units Settings
REFERENCE Setup Menu: Units Select nautical, statute or metric units of measure from the ‘Units’ settings. The ‘User Mag’ option allows you to define the magnetic variation for your area. ‘Auto Mag Var’ is the preferred set- ting in most cases. Units Settings Distance &... - Page 79 Timers Settings User Timer lets you select a count up or count down timer. For a count down timer you may also specify the count down duration. To select a user timer setting: 1. For a count down timer, highlight the ‘User Timer’ field in the right-hand column, press ENTER and enter the count duration using the rocker keypad.
-
Page 80: Time Settings
REFERENCE Setup Menu: Time Enter an offset amount to adjust the time display to your local area. In the United States, all offset amounts will be ‘Behind UTC’. If you’re unsure of the exact offset, select a ‘Local’ time format, then enter offset values until you arrive at the correct local time. -
Page 81: Alarms Settings
Alarms Settings Clock Alarm uses the internal clock to provide an ‘Alarm Clock’ message at the time you set. To enable/disable the alarm clock: 1. Highlight the ‘Clock Alarm’ field and press ENTER. 2. Select ‘On’ or ‘Off’ (as desired) and press ENTER. 3. -
Page 82: Position Settings
REFERENCE Setup Menu: Position Only the latitude/longitude, UTM/UPS and Maidenhead settings apply worldwide. The additional grid settings are only valid for a specific region. Over 100 different datums are provided to allow the GPS III to correspond to various paper charts/maps. Use WGS 84 unless your chart specifies otherwise. -
Page 83: Interface Settings
GPS III or from a PC. 4. If an ‘RTCM’ format is selected, additional fields are provided to control a GARMIN GBR 21 bea- con receiver directly from your GPS III. You can enter the beacon frequency and bit rate on the GPS III and the information will be used to tune the beacon receiver. -
Page 84: Appendix A: Dashboard Mounting
APPENDIX A Dashboard Mounting To mount the GPS III using the Velcro strips: 1. Select a location for the unit that pro- vides a clear and unobstructed view of the sky. 2. Remove the paper strip liners from both pieces of Velcro. 3. -
Page 85: Appendix B: Specifications
If your unit ever needs repair, please take it to an authorized GARMIN service center. The GPS III has no user-serviceable parts. Never attempt any repairs yourself. To protect your GPS III, keep it in its carrying case (optional accessory) when not in use, and never allow gasoline or other solvents to come into contact with the case. -
Page 86: Appendix C: Wiring/Interfacing
(altitude), PSLIB (beacon receiver control) DGPS (Differential GPS) corrections are accepted in RTCM SC-104 version 2.0 format through the Data In line. The GARMIN GBR 21 is the recommended beacon receiver for use with the GPS III. Other beacon receivers with the correct RTCM format may be used, but may not correct- ly display status or allow tuning control from the GPS unit. -
Page 87: Appendix D: Antenna/Remote Mounting
The GPS III’ s antenna may be removed to allow attachment of an optional remote-mounted antenna. In some applications, using a remote-mounted antenna will dramatically increase the number of satellites received. The GPS antenna should be mounted in a location which provides an unobstructed view of much of the sky. A minimum of four satellites are needed to determine a three dimensional position. -
Page 88: Appendix E: Messages
The unit should be taken to an authorized GARMIN service center. Poor GPS Coverage—The unit cannot acquire the nec- essary number of satellites to compute a position. Try another location with a clearer view of the sky. - Page 89 RAM Failed—The GPS III has detected a failure in its internal memory. If the message persists, the GPS III is unusable and should be taken to an authorized GARMIN service center. Received Invalid Waypoint—A waypoint was received during upload transfer that has an invalid identifier.
-
Page 90: Appendix F: Map Datums
APPENDIX F Map Datums Adindan Adindan- Ethiopia, Mali, Senegal, Sudan Afgooye Afgooye- Somalia AIN EL ABD ‘70 AIN EL ANBD 1970- Bahrain Island, Saudi Arabia Anna 1 Ast ‘65 Anna 1 Astro ‘65- Cocos Isl. ARC 1950 ARC 1950- Botswana, Lesotho, Malawi, Swaziland, Zaire, Zambia, Zimbabwe ARC 1960 ARC 1960- Kenya, Tanzania... -
Page 91: Map Datums
Hong Kong ‘63 Hong Kong ‘63- Hong Kong Hu-Tzu-Shan Hu-Tzu-Shan- Taiwan Indian Bngldsh Indian- Bangladesh, India, Nepal Indian Thailand Indian- Thailand, Vietnam Indonesia ‘74 Indonesia 1974- Indonesia Ireland 1965 Ireland 1965- Ireland ISTS 073 Astro ISTS 073 ASTRO ‘69- Diego Garcia Johnston Island Johnston Island Kandawala- Sri Lanka Kerguelen Islnd... - Page 92 APPENDIX F Map Datums Old Hawaiian Old Hawaiian- Mean Value Oman Oman- Oman Ord Srvy GB Old Survey Grt Britn- England, Isle of Man, Scotland, Shetland Isl., Wales Pico De Las Nv Canary Islands Ptcairn Ast ‘67 Pitcairn Astro ‘67- Pitcairn Isl. Prov S Am ‘56 Prov So Amricn ‘56- Bolivia, Chile,Colombia, Ecuador, Guyana, Peru, Venezuela...
-
Page 93: Appendix G: Navigation Terms
Altitude—Height above mean sea level (MSL). Avg Speed—The average of all second-by-second speed readings since last reset. Bearing (BRG)—The compass direction from your present position to a destination waypoint. Course—The desired course between the active ‘from’ and ‘to’ waypoints. Distance (Dist)—The ‘great circle’ distance from present position to a destination waypoint. - Page 94 APPENDIX G WPT 2 Navigation Terms NORTH To Course—The recommended direction to steer in order to reduce course error or stay on course. Provides the most efficient heading to get back to the desired course and proceed along your route. Track—The direction of movement relative to a ground position.
-
Page 95: Appendix H: Index
Active Route Options ..37,62-63 Active Route Page ...16,61 Alarms ....67,73 Almanac . - Page 96 APPENDIX H Index Initialization ... .4-6,27,29 Installation, antenna ... .79 Installation, wiring ... . .78 IN Zoom Key .
- Page 97 Railroads, on Map ...36-37 Receiver Status ... .8,26-27 Reference Waypoints ...44 Rivers, on Map .
- Page 98 APPENDIX H Index Velocity Made Good (VMG) ..86 Warranty .....iv Waypoints ... .14,42-47,63 Comments .
- Page 100 1200 E. 151st Street, Olathe, KS 66062 US Web Site Address: www.garmin.com GARMIN (Europe) Ltd., Unit 5, The Quadrangle, Abbey Park Industrial Estate, Romsey SO51 9AQ UK GARMIN (Asia) Corp., 4th Fl., No. 1, Lane 45, Pao-Hsing Road, Hsin Tien, Taiwan R.O.C.
Need help?
Do you have a question about the GPS III A and is the answer not in the manual?
Questions and answers