Table of Contents
Advertisement
COMPACT DISC STEREO SYSTEM
SISTEMA ESTEREO CON REPRODUCTOR DE DISCOS COMPACTOS
CHAINE STEREO AVEC LECTEUR DE DISQUES COMPACTS
NSX-H90
86-NT1-903-019
951114AKY-U
For Assistance And Information
Call Toll Free 1-800-BUY-AIWA
(United States and Puerto Rico)
U
OPERATING INSTRUCTIONS
MANUAL DE INSTRUCCIONES
MODE D'EMPLOI
En
(English)
E
(Español)
F
(Français)
Advertisement
Table of Contents

Related Manuals for Aiwa NSX-H90


Summary of Contents for Aiwa NSX-H90
- Page 1 SISTEMA ESTEREO CON REPRODUCTOR DE DISCOS COMPACTOS CHAINE STEREO AVEC LECTEUR DE DISQUES COMPACTS NSX-H90 OPERATING INSTRUCTIONS MANUAL DE INSTRUCCIONES (English) MODE D’EMPLOI (Español) (Français) For Assistance And Information Call Toll Free 1-800-BUY-AIWA (United States and Puerto Rico) 86-NT1-903-019 951114AKY-U...
-
Page 2: Table Of Contents
(you will find them on the rear of your set) in the space SETTING THE TIMER ............21 provided below. Please refer to them when you contact your Aiwa SETTING THE SLEEP TIMER .......... 22 dealer in case of difficulty. -
Page 3: Preparations
PREPARATIONS PRECAUTIONS 4 Extension cord — To help prevent electric shock, do not use a polarized AC power plug with an extension cord, receptacle, or other outlet unless the polarized plug can be completely inserted to prevent exposure of the blades of the plug. -
Page 4: Connections
CONNECTIONS IMPORTANT • Connect the speakers, antennas, and all optional equipment first. Then connect the AC cord at the end. • The speaker marked R is the right speaker, and the marked L is the left speaker. Setting up the unit 1 Connect the flat cable of the RX-NH90 to the Two ways of setting up the main units are recommended. - Page 5 Connect the speaker cord to the SPEAKERS R terminals. To stand the AM antenna on a surface Fix the claw to the slot. The speaker cord with the white stripe should be connected To position the antennas to the 0 terminal and the black cord to the 9 terminal. FM feeder antenna: Extend this antenna horizontally in a T-shape and fix its ends to 3 Connect the left speaker to the main unit.
-
Page 6: Before Operation
BEFORE OPERATION REMOTE CONTROL Inserting batteries Detach the battery cover on the rear of the remote control and insert two R6 (size AA) batteries. When to replace the batteries The maximum operational distance between the remote control and the sensor on the main unit should be approximately 5 meters (16 feet). -
Page 7: Setting The Clock
SETTING THE CLOCK DEMO (Demonstration) mode When the AC cord is connected for the first time, the display window demonstrates the functions of the unit. When the power is turned on, the DEMO display is overridden by the operation display. When the power is turned off, the DEMO mode is restored. -
Page 8: Sound
Press the T-BASS button. the speakers. For more details, see "PRINCIPLE OF AIWA’S Each time it is pressed, the level changes. Select one of the FRONT 180 °... -
Page 9: Electronic Graphic Equalizer
ELECTRONIC GRAPHIC FRONT SURROUND SYSTEM EQUALIZER Press the OPEN/CLOSE button to open the control stage if it is closed. Press the OPEN/CLOSE button to open the control stage if it is closed. The front surround system uses a DSP (Digital Signal Processor) This unit provides the following five different equalization curves. -
Page 10: Radio Reception
RADIO RECEPTION MANUAL TUNING When an FM stereo broadcast contains noise Press the REPEAT/MONO TUNER button so that “MONO” appears on the display. Noise is reduced, although reception is monaural. MONO To restore stereo reception, press the button so that MONO disappears. -
Page 11: Presetting Stations
PRESETTING STATIONS PRESET NUMBER TUNING Use the remote control to select the preset number directly. 1 Press the TUNER button to select a band. 2 Press the numeric buttons to select a preset number. Example: To select preset number 25, press the +10, +10 and 5 buttons. To select preset number 10, press the +10 and 0 buttons. -
Page 12: Cd Playing
CD PLAYING BASIC OPERATIONS To stop play, press the s button. To pause play, press the a button. To resume play, press again. To search for a particular point during play, keep the f or g button pressed and release the button at the desired point. To skip to the beginning of a track during play, press the f or g button repeatedly. -
Page 13: Random Play
RANDOM PLAY 3 Press the numeric buttons and the +10 button to program a track. All the tracks on the selected disc or on all the discs can be Example: played randomly. To select the 25th track, press the +10, +10 and 5 buttons. Press the RANDOM button on the remote control. -
Page 14: Tape Playback
TAPE PLAYBACK BASIC OPERATIONS PLAYING BACK A TAPE Insert a tape. 1 Press the DOLBY NR button and turn Dolby NR on or off to match the tape to be played. For tapes recorded with DOLBY B NR, turn on h NR For tapes recorded with DOLBY C NR, turn on h NR For tapes recorded without DOLBY NR, turn off h NR. -
Page 15: Continuous Play
CONTINUOUS PLAY About cassette tapes • To prevent accidental erasure, break off the plastic tabs on the cassette tape after recording with a screwdriver or other pointed tool. Side A Type II tape Tab for side A detection slot To record on the tape again, cover the tab openings with adhesive tape, etc. -
Page 16: Recording
RECORDING BASIC RECORDING To stop recording, press the s button. To pause recording, press the a button. (Applicable when the source is TUNER, VIDEO 1/MD or VIDEO 2/AUX.) To resume recording, press again. This section explains how to record from the tuner, CD player, or To start recording with the remote control external equipment. -
Page 17: Dubbing A Tape Manually
DUBBING A TAPE MANUALLY DUBBING THE WHOLE TAPE This function allows you to make exact copies of both sides of Preparation the original tape. The reverse side of both tapes will start • Set the tape to the point where recording will start. simultaneously as soon as the longer tape has been reversed. -
Page 18: Ai Edit Recording
AI EDIT RECORDING Tape length Selected tracks Tape side A (front side) for side A Remaining time of side A 7 First press the q REC/REC MUTE button and The AI edit function enables CD recording without worrying about then press the d button within 2 seconds to tape length and track length. -
Page 19: Programmed Edit Recording
PROGRAMMED EDIT RECORDING 6 Press one of the DISC DIRECT PLAY buttons to select a disc and press the numeric buttons to program a track. Example: To select the 10th track of disc 2, press DISC DIRECT PLAY 2 and the numeric buttons +10 and 0. 7 Repeat step 6 for the rest of the tracks for side A. -
Page 20: Karaoke
The use of unidirectional type microphones are recommended The sound on the left channel is heard from both speakers to prevent howling. Contact your local Aiwa dealer for details. and the sound on the right channel is muted. MPX R-ch The sound on the right channel is heard from both speakers and the sound on the left channel is muted. -
Page 21: Karaoke Program
When using the remote control To add a reservation during play Press the KARAOKE button. Repeat steps 2 and 3. To check the reserved tracks Press the EDIT/CHECK button repeatedly. Each time it is • The VOCAL FADER functions may not operate correctly with pressed, the disc number and track number are displayed in the the following kinds of CDs or tapes. -
Page 22: Timer
TIMER SETTING THE TIMER 5 Prepare the source. To listen to a CD, load the disc to be played first on tray 1. To listen to a tape, insert the tape into deck 1 or 2. To listen to the radio, tune in to a station. 6 Press the POWER button to turn the unit off after adjusting the volume and tone. -
Page 23: Setting The Sleep Timer
• The connecting cords are not supplied. Obtain the necessary connecting cords. • Consult your local Aiwa dealer for optional equipment. TV OR VIDEO EQUIPMENT The unit can be turned off automatically at a specified time. Use the remote control. -
Page 24: Listening To External Sources
2 Turn the VIDEO 1/MD INPUT LEVEL control until the sound level becomes the same as that of other function sources. Use an Aiwa turntable equipped with an equalizer amplifier. Connect the connection cord of the turntable to the VIDEO 1/ MD IN (L, R) or VIDEO 2/AUX IN (L, R) jacks. -
Page 25: General
GENERAL SPECIFICATIONS General Dimensions 321.5 mm in.) Weight 3.9 kg (8 lbs 10 oz.) STEREO RECEIVER RX-NH90 SPEAKER SYSTEM SX-ANH90 FM tuner section Tuning range 87.5 MHz to 108 MHz Cabinet type 4 way, bass reflex with surround Usable sensitivity (IHF) 13.2 dBf speaker (magnetic sealed type) Antenna terminals... -
Page 26: Care And Maintenance
CARE AND MAINTENANCE TROUBLESHOOTING GUIDE Occasional care and maintenance of the unit and the software If the unit fails to perform as described in these Operating Instructions, check the following guide. are needed to optimize the performance of your unit. GENERAL To clean the cabinet There is no sound. -
Page 27: Parts Index
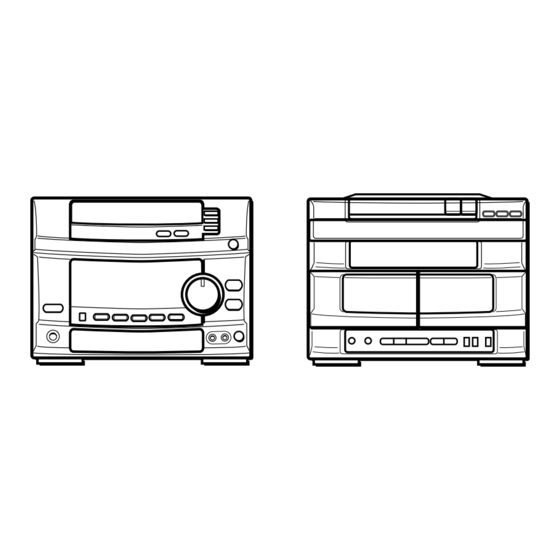
PARTS INDEX REMOTE CONTROL Parts Pages CLOCK Instructions about each part on the main unit or remote control s CLEAR 10,11,13 are indicated on the pages listed below. d DIRECTION PRESET 17,18 DISC DIRECT PLAY EDIT/CHECK 17,18 STEREO RECEIVER RX-NH90 Parts Pages KARAOKE... -
Page 28: Principle Of Aiwa's Front 180° Speaker System
Principle of Aiwa’s Front 180 ° Speaker System Figure 1 Front 180° speaker system 45° Aiwa’s Front 180° Speaker System provides Sound wave excellent sound balance for true stereo emission mouth reproduction from any listening angle. for uni-directional sound In stereo sound reproductions systems up to... - Page 29 Modifications or adjustments to this product, which are not expressly approved by the manufacturer, may void the user’s right or authority to operate this product. For Assistance And Information Call Toll Free 1-800-BUY-AIWA (United States and Puerto Rico) Printed in Malaysia...
Need help?
Do you have a question about the NSX-H90 and is the answer not in the manual?
Questions and answers