Table of Contents
Advertisement
Quick Links
Advertisement
Table of Contents

Related Manuals for Garmin 55 AVD


Summary of Contents for Garmin 55 AVD
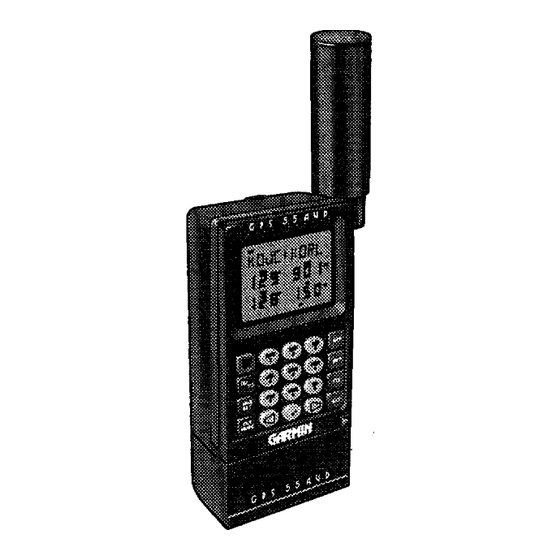
- Page 2 GPS 55 AVD Personal Navigator OWNER'S MANUAL...
- Page 3 GARMIN. Information in this document is subject to change without notice. GARMIN reserves the right to change or improve their products and to make changes in the content without obligation to notify any person or organization of such changes or improvements.
- Page 4 This manual and accompanying quick reference guide provide complete information on safely operating the GPS 55 AVD to its full potential. Two exciting practice trips have been planned for you to practice your navigation skills using the built-in simulator.
- Page 5 The system is under development and is subject to changes which could affect the accuracy and performance of all GPS equipment. Although the GPS 55 AVD is a precision electronic NAVigation AID (NAVAID), any NAVAID can be misused or misinterpreted, and therefore become unsafe.
-
Page 6: Table Of Contents
TABLE OF CONTENTS CHAPTER INTRODUCING THE GARMIN GPS 55 AVD GETTING STARTED BASIC OPERATION 3.10 UNIT CUSTOMIZATION 4.10 BASIC FEATURES Capabilities Aviation Database Operations Front Panel Banners Cursor and Fields Keypad Operation Entering Data Viewing Messages Operating Modes Power On... - Page 7 4.11 ADVANCED FEATURES NAVIGATION PLANNING ROUTES SAMPLE SIMULATED TRIP MESSAGES NAVIGATION TERMS INSTALLATION AND MAINTENANCE MAP DATUMS ABBREVIATIONS FOR DATABASE REGIONS AIRPORT IDENTIFIERS PREFIX CODES INDEX Map Datum Navigation Menu Date and Time Event Timer Trip Planning Sunrise/Sunset Alarm Clock Navigating Using Routes Route Catalog Editing Routes...
-
Page 8: Introducing The Garmin Gps 55 Avd
· Trip Planning: Analyze distance and time requirements for your trip. Compute the time of sunrise and sunset at your destination. · Alarms: An alarm clock and timer allow the GPS 55 AVD to watch the clock for you. Arrival, anchor drag, CDI, and proximity alerts help you safely navigate your craft. -
Page 9: Aviation Database
1.3 OPERATIONS You may use your GPS 55 AVD for both portable and fixed operations. The unit may be operated from external AC power using a battery charger, external 5-40 volt DC power using the power/data cable or cigarette lighter adapter, or using a battery pack. - Page 10 In the event of aircraft power failure, the GPS 55 AVD will automatically switch to battery power. Marine/Land Operation: A universal mount is available for swivel mount installation in a boat or land vehicle. Additionally, a Marine/RV Remote Antenna is available for installations which require an external antenna for an unobstructed view of the sky.
-
Page 11: Getting Started
CHAPTER 2 GETTING STARTED 2.1 FRONT PANEL The front panel consists of a 20-key keypad and a LCD display which includes three lines of information and various banners. Both the display and keypad are illuminated for operating in darkness. 2.2 BANNERS Information displayed on the LCD is commonly referred to as a “page”. -
Page 13: Banners
2.3 CURSOR AND FIELDS Alphanumeric Field Numeric Field The area of the page which is underlined is called the cursor. The cursor may be moved to locations on the page called fields which allow you to enter data. You will encounter four types of fields. ·... - Page 14 Pressing the MSG/SET key allows you to view new messages when the "MSG" banner is flashing. (See Section 2.6 and Appendix A.) Pressing the MSG/SET key also selects the Setup Pages which allow you to view satellite tracking status and customize the unit as you like.
-
Page 15: Entering Data
2.5 ENTERING DATA To enter data you must first move the cursor under the desired field by pressing the right or left arrow key. To enter a number... · Press the key that is labeled with the desired number. The numbers will fill in from the left side of the field similar to a typewriter. -
Page 16: Operating Modes
Important messages will remain on the Message Page after being viewed. If this occurs, the MSG banner will be in view but will not flash (if no messages exist, the MSG banner will not be visible). To review these messages, press the MSG key until the “MESSAGES”... -
Page 17: Basic Operation
3.1 POWER ON After you turn your GPS 55 on, it will conduct a series of self tests and display the following notices: “VER x.xx”, “COPYRIGHT”, “1992”, and “GARMIN”. Following completion of the tests, the Database Page, which indicates the database version (Americas vs International), effective date, and expiration date will now be displayed. -
Page 18: Satellite Status
“SRCH SKY”. Additionally, the “DATA” banner will be displayed. Once satellite orbital data is collected, it will be stored in battery backed up memory. This means the data will not be lost when you turn your GPS 55 off. 3.2 SATELLITE STATUS Satellite Identifier Azimuth... -
Page 19: Present Position
To manually scroll through the visible satellite list... · Use an arrow key to move the cursor under the satellite identifier. · Press MORE to view each visible satellite’s information. · Press ENT to remove the cursor and return to automatic mode. 3.3 PRESENT POSITION The Position Page may be displayed by pressing the NAV key. -
Page 20: Autostore Tm
To change the latitude/longitude... · Use an arrow key to place the cursor under the latitude field. · Check the hemispheric designation (“N” or “S”) of the latitude. If it is correct, go to the next step. If it is incorrect, press the CLR key until the correct hemispheric designation is displayed. -
Page 21: Cdi And Navigation Summary
· With the cursor under “WPT?” (the storage selection field), press ENT. 3.5 CDI AND NAVIGATION SUMMARY Your Position Desired Course Direction ( DTK, BRG, CTS) Direction ( CMG, TRK, TRN) (CDI on line 1) The CDI Page may be displayed by pressing the NAV key. This page displays virtually all the information you need to guide your craft. -
Page 22: Waypoints
navigation data. The CDI Page will indicate this condition by displaying “NO POSN” on line 1 and all navigation data on lines 2 and 3 will be blank. If the GPS 55 is not navigating to a waypoint, the CDI will indicate this condition by displaying “NO ACT WP”... - Page 23 position of such a waypoint will result in the message “ACTV WPT”.) Some waypoints in the database may have the same name. When you have entered a waypoint whose name is not unique, the Duplicate Waypoint Page will be displayed with a waypoint region (see Appendix E for a complete list of the abbreviations for the database regions), type (APT, VOR or USR) and bearing, range and ETE for you to select the desired waypoint: DUPLICATE WAYPOINT PAGE...
- Page 24 waypoint type/action field. · Press MORE until “DEL?” is displayed. · Press ENT, the waypoint is now deleted from memory. (NOTE: If you wish to delete a waypoint that is used in a route, first remove it from all routes before attempting to delete the waypoint. An attempt to delete a waypoint used in a route will result in the message “ROUTE WPT”.) A stored waypoint is used by entering its alphanumeric name on a waypoint name field.
-
Page 25: Nearest Waypoints
To scan waypoints with specified initial characters... · Enter the desired number of initial characters of the waypoint name into a waypoint field as when normally entering a waypoint name. · Press the WPT key to display the first waypoint that begins with the character(s) you have entered. -
Page 26: Navigate To A Waypoint
The GPS 55 provides the waypoint name and bearing/range/estimated time enroute from present position. The entire list of nearest waypoints (indicated by xxx1 through xxx9) may be viewed by pressing the MORE key while the cursor is under the waypoint name. To view nearest waypoint lists... -
Page 27: Proximity Alarm Waypoints
Alternatively, the GOTO function may be quickly activated from any page (e.g. the Nearest Waypoint Page) by placing the cursor under the desired waypoint name and pressing the GOTO key. The Active Route Page will be displayed with the cursor under the GOTO waypoint name. The GOTO function will be activated when the ENT key is pressed. -
Page 28: Sample Trip
(GARMIN is located 109°, 11.8 nautical miles from the initial position). Just for fun, let’s go to GARMIN! Turn on your GPS 55. The power on notices will be displayed followed by the Satellite Status Page as illustrated below. - Page 29 150 knots (you may enter any speed you wish up to 999 knots). The simulation speed is now set. GOTO GARMIN... · Press GOTO. The Active Route Page will be displayed with the cursor under the GOTO waypoint name.
- Page 30 Press MORE to select a different display option. Experiment with your GPS 55! · Now that you are on your way to GARMIN, why don’t you take some time to experiment with the GPS 55? Press each page selection key to become familiar with available pages.
-
Page 31: Unit Customization
CHAPTER 4 UNIT CUSTOMIZATION The GPS 55 is designed for maximum flexibility. The unit features Setup Pages which allow you to customize your unit by setting a wide variety of parameters. You may cycle through the Satellite Status, Setup Menu, and Message Pages as illustrated below by pressing the SET key repeatedly until the desired page is displayed. -
Page 32: Operating Mode
4.2 OPERATING MODE The GPS 55 provides you with the capability to select from three modes which will allow you to operate your unit in the manner which best suits your needs. To select the operating mode... · With the cursor under the mode select field, press MORE until the desired operating mode is displayed (Normal, Battery Saver, or Simulator mode as described in Section 2.7). -
Page 33: Backlighting Timeout
To arm/disarm the anchor drag alarm (marine feature)... · Press MORE until “ANCHR ALR” is displayed. Press the right arrow key to move the cursor to line two. · To arm the anchor drag alarm, enter a non-zero distance. If your boat drifts away from the anchored position more than the specified distance, you will be informed with an alarm tone and the message “ANCHR ALR”. -
Page 34: Audio Settings
The GPS 55 will automatically turn the backlighting off after a specified number of seconds (backlighting is restored by pressing any key). If you are using battery power, this feature will help you extend battery life. To change the timeout period... ·... -
Page 35: Cdi Scale
To select navigation units... · Press MORE to select the desired combination of distance, speed, and altitude units. You may select from Nautical units (nm, kt, ft), Statute units (mi, mh, ft), or Metric units (km, kh, mt). 4.7 CDI SCALE The GPS 55 allows you to set the scale for the CDI displayed on the CDI Page (see Section 3.5). -
Page 36: Filter Settings
To select true heading... · With the cursor under the heading mode select field, press MORE until “TRUE HDG” is displayed. To select automatic magnetic heading... · With the cursor under the heading mode select field, press MORE until “AUTO MAG” is displayed. The computed magnetic variation at the present position will be displayed. -
Page 37: Map Datum
4.10 OUTPUTS You may select the output data format for your interface requirements. To select the GPS 55 output format... · Press MORE until the desired output format is displayed. “NMEA 0180”, “NMEA 0182” (also known as NMEA 0180 Complex) and “NMEA 0183”... - Page 38 To select a standard map datum... · With the cursor under the map datum select field, press MORE or the arrow keys until the desired map datum is displayed. Refer to Appendix C for a list of the standard map datums. To select a user map datum...
-
Page 39: Navigation Planning
NAVIGATION PLANNING The GPS 55 provides a menu page under the NAV key which allows you to select from a menu of time and planning functions. You may cycle through the Navigation Pages by pressing the NAV key repeatedly until the desired page is displayed. -
Page 40: Event Timer
The Date/Time Page displays the date and time in either UTC or local format. In addition, the format you select on this page is used for time displays on other pages. To change the time display... · Press MORE to select either “LCL” (local) or “UTC”. The GPS 55 will keep track of local as well as UTC time. - Page 41 · Press ENT. The timer will start counting down. When the timer reaches zero, you will be informed with the message “TIMER EXP” and the timer will begin to count up showing you the elapsed time since the timer has expired. To stop the count down timer...
-
Page 42: Trip Planning
5.4 TRIP PLANNING From Waypoint Desired Track The Trip Planning Page allows you to calculate the distance, desired track, and time requirement between any two waypoints. To perform trip planning... Enter the from waypoint. If you wish to use your present position, leave •... -
Page 43: Alarm Clock
times for the current date at the waypoint. The sunrise and sunset times will be displayed in local or UTC time based on your selection on the Date/Time Page (see Section 5.2). 5.6 ALARM CLOCK The Alarm Clock Page on the GPS 55 allows you to concentrate on other important tasks while the GPS 55 watches the clock for you! To set the alarm clock... -
Page 44: Routes
CHAPTER 6 ROUTES 6.1 NAVIGATING USING ROUTES KSTL (Active from waypoint) (Active to waypoint) Active Leg KTUL The GPS 55 offers a route navigation feature for you to navigate along a pre- defined sequence of waypoints. The GPS 55 route capability allows you to create and store ten routes, each containing up to nine waypoints. -
Page 45: Route Catalog
You may alternate between the two route pages as illustrated below by pressing the RTE key. Route Catalog Page 6.2 ROUTE CATALOG The Route Catalog Page provides a list of the routes stored in the GPS 55. This page shows the route number, first/last waypoints in the route, and the total distance traversed by the route. -
Page 46: Editing Routes
You may press the MORE key to select route editing, activation, copy and deletion functions. 6.3 EDITING ROUTES From Waypoint Desired Track Number (L0...L8) The Route Review Page displays the waypoints of a route and allows you to create, change, and review routes. It shows the route and leg numbers, the two waypoints composing the leg, and the distance and desired track between the two waypoints. - Page 47 · Press MORE until “EDIT?” is displayed. Press the ENT key. The Route Review Page will be displayed showing the waypoints of the first leg. You may view additional legs by pressing the left or right arrow key while the cursor is under the “to waypoint.” ·...
-
Page 48: Activating Routes
the active route (route A) before activating another route. Also, you may copy a route and then make changes to form a new route. To copy a route... · Select the desired route on the Route Catalog Page and press ENT. ·... - Page 49 Immediately after activating a route, the Active Route Page will be displayed. This page displays the leg number (L1 to L8, meaning legs 1 through 8 of the selected route, or AL meaning the active leg), the two waypoints composing the leg, the desired track between the two waypoints, and the enroute distance and time from your present position to the “to waypoint”.
-
Page 50: Building Routes Using Autostore
6.5 BUILDING ROUTES USING AutoStore GARMIN’s AutoStore capture your position and store it in the route of your choice at the touch of a button. By doing so, you are building a route consisting of waypoints stored along the path you travel. - Page 51 · With the cursor under the storage select field, press MORE until the desired route is displayed (e.g., Route 5 as illustrated below). This route will be the default storage selection for subsequent AutoStore operations until it is changed or the route becomes full. ·...
-
Page 52: Sample Simulated Trip
CHAPTER 7 SAMPLE SIMULATED TRIP Now that you have gained a good understanding of the GPS 55 advanced features, you are ready to embark on a sample route navigation trip! (The sample illustrations in this chapter assume that the factory default settings have not been changed. - Page 53 Select the simulator mode... · Press SET until the Set Menu is displayed. · Press MORE until “OP MODE?” is displayed. · Press ENT to display the Operating Mode Page. · Press MORE until “SIMULATR?” is displayed, then press ENT. You have just selected the simulator mode.
- Page 54 Since your trip starts at Ft. Myers, you need to set your GPS 55 position to that location. Set your GPS 55 position... · Press NAV until the Position Page is displayed. NOTE: The position will be changing by your entered speed. ·...
- Page 55 Create a waypoint named KEYW, the Key West International Airport. (If your GPS 55 contains the Americas version database, KEYW should already be stored as one of the published airports. You will not need to create the waypoint.) · With the cursor under the waypoint name, enter KEYW.
- Page 56 · Enter the waypoint name DRYT, latitude (N24°38.00') and longitude (W082° 55.07'). Create a waypoint named KFMY which is the name for Fort Myers Airport. (This waypoint should already be stored in the Americas version database.) · Move the cursor back under the waypoint name field. ·...
- Page 57 · Enter the waypoint name KFMY followed by the ENT key. You have just entered Ft. Myers as the waypoint from which your trip will start. · Enter DRYT as the second waypoint of the route. · Enter KEYW as the third waypoint of the route.
- Page 58 · With the cursor under “ACTIVATE?”, press ENT to activate the sample route. The Active Route Page will be displayed. The sample route is now active. This page displays the waypoint you are going from (KFMY) and the waypoint you are going to (DRYT) on line one as well as desired track, distance and time information on lines two and three.
- Page 59 · At some point during the simulation, you may wish to try the GOTO function. Suppose severe weather in the Dry Tortugas area was reported over your VHF com. You may wish to shorten your trip by heading directly to Key West, Florida.
-
Page 60: Amessages
ADJST OSC - The GPS 55 has detected excessive drift in its internal crystal oscillator which may result in longer acquisition time. The unit should be taken to an authorized GARMIN service center as soon as possible. ALARM CLK - The alarm clock time has been reached. - Page 61 ROM FAILD - The GPS 55 has detected a failure in its memory. The unit is unusable and should be taken to an authorized GARMIN service center. ROUTE WPT - An attempt has been made to delete a waypoint which is a member of one or more routes.
-
Page 62: B.1 Definitions
APPENDIX B NAVIGATION TERMS B.1 DEFINITIONS This section provides an illustration of and definitions for the navigation terms used in this manual. - Page 63 Velocity/time terms: Ground speed. GS is the speed measured relative to the ground; also known as velocity over ground (VOG). Velocity made good. VMG is velocity in the direction of the desired course. It is the speed at which you are closing on the “active to” waypoint.
-
Page 64: Course To Steer (Cts
B.2 COURSE TO STEER (CTS) Course To Steer is a GARMIN exclusive that recommends an optimal direction to steer that will guide you to the course and proceed efficiently along your route. - Page 65 As an example, suppose you activate the route illustrated above. The GPS 55 chooses the closest leg with a desired track of 45 degrees but your position happens to be two nautical miles off course. The unit will automatically compute the optimal course to steer (which is 15° in this example). Press the NAV key until the CDI Page is displayed, then select “CTS”...
-
Page 66: C.1 Specifications
INSTALLATION AND MAINTENANCE C.1 SPECIFICATIONS —————————————————————————————- PHYSICAL Case: Size: Weight: POWER Input Consumption ENVIRONMENTAL Temperature: Humidity: PERFORMANCE Receiver: Frequency: Acquisition Time: (typical) APPENDIX C GPS 55 SPECIFICATIONS Main Unit: Waterproof Battery Pack: Splash Proof Portable: 3.23"w x 6.26"h x 1.46"d (82mm x 159mm x 37mm) Fixed: 3.23"w x 4.87"h x 1.46"d... - Page 67 Update Rate: Accuracy: Dynamics: INTERFACES NMEA 0180 NMEA 0182 NMEA 0183 (Version 1.5; December 1987) Approved sentences: GPBWC, GPGLL, GPRMB, GPRMC, GPR00, GPWPL, GPXTE Proprietary sentences: PGRMA Transmission rate: GPBWC, GPGLL, GPRMB, GPRMC, GPXTE, and PGRMA transmitted once every two seconds. GPR00 transmitted once every (# of route waypoints + 1) * 2 seconds.
-
Page 68: C.2 Electrical Wiring
C.2 ELECTRICAL WIRING The GPS 55 power/data cable allows you to connect the unit to vehicle power systems, other electronics, and a remote alarm/beeper. The harness will plug into the connector located on the rear panel of the GPS 55. (Note that the white wire and the red/black stripe wire are not functional and should not be connected.) To connect to vehicle power systems... -
Page 69: Surface Mount Installation
data interface. The unit can provide data for up to three NMEA “listeners” simultaneously. Refer to installation instructions of these devices for further information. To connect the GPS 55 to an NMEA electronic device... · Connect the BROWN harness lead to the NMEA “A” line of a two-wire, shielded cable. - Page 70 · Drill an oblong hole in the mounting surface to allow clearance for the power/data cable and connector. · Mount the connector plate to the mounting surface using appropriate screws (#8 flat head screws are recommended). · Slide the cradle onto the connector plate and install the coinslot screw. ·...
- Page 71 to accept the GPS 55 with the battery pack attached: · Loosen the coinslot. · Lower the cradle to its lowest position. · Tighten the coinslot screw. When adjusted properly, the coinslot screw should fit completely into the counterbore in the cradle so that all surfaces are flush.
-
Page 72: Portable Antenna Installation
To remove the GPS 55 from the surface mount... · Disconnect the antenna or antenna cable. · Apply enough force to the release tab to allow the unit to pass as shown above. · Pull the bottom of the GPS 55 out, then rotate the top downward and out. -
Page 73: Battery Pack Operation
C.5 BATTERY PACK OPERATION The GPS 55 is supplied with a 4-cell alkaline battery pack. The battery pack must be removed from the unit in order to replace the cells. To remove the battery pack... · Push down on the spring tab on the right side of the battery pack. ·... -
Page 74: C.7 Customer Support
55 detects a low memory battery, you will be informed with the message “MEM BATT”. You should return your unit to an authorized GARMIN service center as soon as possible for service. Failure to do so may result in loss of data each time you turn your unit off (indicated by the message “DATA... -
Page 75: Map Datums
The following is a list of the GPS 55 map datum selections and the corresponding map datum name (including the area of application): ADINDAN ADINDAN - Ethiopia, Mali, Senegal, Sudan AFGOOYE AFGOOYE - Somalia AIN ELABD AIN EL ABD 1970 - Bahrain Island, Saudi Arabia ANNA1ASTR ANNA 1 ASTRO 1965 - Cocos Islands ARC 1950... - Page 76 EUROPE 79 EUROPEAN 1979 - Austria, Finland, Netherlands, Norway, Spain, Sweden, Switzerland FIN HYFRD FINLAND HAYFORD 1910 - Finland GANDAJIKA GANDAJIKA BASE - Republic of Maldives GEOD 49 GEODETIC DATUM 1949 - New Zealand GUAM 1963 GUAM 1963 - Guam Island GUX ASTRO GUX 1 ASTRO - Guadalcanal Island HJORSY 55...
- Page 77 NAD27 C A NORTH AMERICAN 1927 - Central America (Belize, Costa Rica, El Salvador, Guatemala, Honduras, Nicaragua) NAD27 CUB NORTH AMERICAN 1927 - Cuba NAD27 GRN NORTH AMERICAN 1927 - Greenland (Hayes Peninsula) NAD27 MEX NORTH AMERICAN 1927 - Mexico NAD83 NORTH AMERICAN 1983 - Alaska, Canada, Central America, CONUS, Mexico...
- Page 78 VITI LEVU VITI LEVU 1916 - Viti Levu Island (Fiji Islands) WAK-ENWTK WAKE-ENIWETOK 1960 - Marshall Islands ZANDERIJ ZANDERIJ - Surinam WGS 72 WORLD GEODETIC SYSTEM 1972 WGS 84 WORLD GEODETIC SYSTEM 1984...
-
Page 79: Abbreviations For Database Regions
ABBREVIATIONS FOR DATABASE REGIONS AFGN Afghanistan AILA Anguilla ALBN Albania ALGR Algeria ANGL Angola Antarctica ANTG Antigua ARGN Argentina ARUB Aruba/Neth Antilles AUST Australia Austria AWSM American Samoa/Western Samoa Belgium BELZ Belize Benin BHMS Bahamas BHRN Bahrain BHTN Bhutan BIOT Chagos Archipelago/British Indian Ocean Territory BLGR Bulgaria BNGL Bangladesh... - Page 80 GMBA Gambia GN-B Guinea-Bissau GREC Greece Greenland GRND Grenada GTML Guatemala GUAM Guam/Mariana Islands GUIN Guinea Republic GUYN Guyana HATI Haiti HKNG Hong Kong HNDR Honduras HUNG Hungary INDA India INDN Indonesia IRAN Iran IRAQ Iraq Ireland Iceland ISRL Israel/Jerusalem ITAL Italy Ivory Coast...
- Page 81 PYFR French Polynesia/Society Islands/Tuamotu Islands QATR Qatar ROM Romania RUSS Belorussia/Latvia/Lithuania/ Russia/Estonia/Kazakhstan RWAN Rwanda SAUD Saudi Arabia SENG Senegal SEYC Seychelles SKOR South Korea SLEO Sierra Leone SLOV Slovenia El Salvador SNGP Singapore SOLI Solomon Island SOML Somalia SP/M St Pierre Island/Miquelon Island SPAN Spain ST/P...
-
Page 82: Airport Identifiers Prefix Codes
AIRPORT IDENTIFIER PREFIX CODES Most airport identifiers in the database use the International Civil Aviation Organization (ICAO) assigned prefix. Use the following rules to determine the ICAO prefix for a country’s airport identifiers. Continental U.S. Airport identifiers which contain only alphabetic characters are prefixed with a “K”... - Page 83 Cameroon Canada CU, CW, CY, CZ Canary Island (Spain) Cape Verde Cayman Island (U.K.) Central African Republic Chad Chile China ZB, ZG, ZH, ZL, ZP, ZS, ZU, ZW, ZY Colombia Comoros Congo Cook Islands Costa Rica Croatia Cuba Cyprus Czechoslovakia Democratic Yemen Denmark Djibouti...
- Page 84 Kampuchea (Cambodia) Kazakhstan Kenya Kirgizia Kiribati Kuwait Laos Latvia Lebanon Lesotho Liberia Libyan Arab Jamahiriya Line Islands (U.S.) Lithuania Luxembourg Macau (Portugal) Madagascar Madeira Islands (Portugal) Malawi Malaysia Maldives Mali Malta Mariana Islands (U.S.) Marshall Islands (U.S.) Mauritania Mauritius Mayotte (France) Melilla (Spain) Mexico Micronesia...
- Page 85 Sahara Occidental Samoa San Andres Island (Colombia) SK Sao Tome & Principe Saudi Arabia Senegal Seychelles Sierra Leone Singapore Slovenia Society Islands Solomon Islands Somalia South African Republic South Korea Spain Sri Lanka St. Helena Island (U.K.) St. Kitts and Nevis St.
-
Page 86: Index
Active from waypoint Active route Active Route Page Active to waypoint Alarm Clock Page Alarm Page Alarms Alphanumeric field Altitude manual entry units Anchor drag alarm Arrival alarm Audio Setup Page AutoStore Page Backlighting adjusting timeout Backlighting Page Banners Battery pack AA size Rechargeable Removing... - Page 87 Local date/time Magnetic variation Magnetic Variation Page Maintenance Manual altitude entry Map datum Map Datum Page Message banner Message Page Navigation Navigation Menu Navigation units Nearest Waypoint Page NMEA output Normal mode Numeric field Operating mode Operating Mode Page Output, NMEA Output Page Page Position Page...
- Page 88 GARMIN International, Inc. 9875 Widmer Road Lenexa, KS 66215 1-800-800-1020 (913) 599-1515 190-00030-00 Rev. D...
Need help?
Do you have a question about the 55 AVD and is the answer not in the manual?
Questions and answers