Garmin G60 User Manual
Garmin smartphone user's guide for at&t
Hide thumbs
Also See for G60:
- Quick start manual (45 pages) ,
- Important safety and product information (17 pages) ,
- Owner's manual (100 pages)
Table of Contents
Advertisement
Quick Links
Advertisement
Table of Contents

Related Manuals for Garmin G60


Summary of Contents for Garmin G60
- Page 1 user’s guide...
- Page 2 Garmin. Garmin hereby grants permission to download a single copy of this manual onto a hard drive or other electronic storage medium to be viewed and to print one copy of...
-
Page 3: Table Of Contents
Orient the Screen ... Scroll the Screen ... Lock the Screen... Mount Your nüvifone ... Acquire Satellites ...11 nüvifone G60 user’s guide Use Your Phone ... Dial a Number... Call a Contact ... Set Up Voice Mail ... Call Voice Mail ... - Page 4 View the Trip Computer Page ... Use the Compass ... Take a Detour ... Add a Stop ... About Usage Modes ... View Traffic ... About Traffic ... Understand Traffic on Your Route ... Use the Traffic Menu ... nüvifone G60 user’s guide...
- Page 5 Send a Text Message ... Read a Text Message ... Send a Location Message ... Use Text Messaging Options ... Delete Text Messages ... nüvifone G60 user’s guide Use the Camera ... Take a Picture ... Add Location Information to a Picture ...
- Page 6 Hide/Show Your Location ... View My Details ... View Ciao! Networks ... Disable Ciao! ... Connect to Other Devices About Bluetooth Technology ... Synchronize Your nüvifone ... Transfer Files ... Set Up a Wi-Fi Connection ... nüvifone G60 user’s guide...
- Page 7 Use the Clock ... Check Flight Status ... Use the Converter ... Use Notes ... Work with Checklists ... nüvifone G60 user’s guide Customize Your nüvifone Change General Settings ... Change Security Settings ... Change SIM Card Security Settings ...
- Page 8 Reset the nüvifone... About GPS Satellite Signals ... About the Battery ... Replace the Battery ... Change the Fuse in the Vehicle Power Cable ... Mount on Your Dashboard ... Troubleshooting ... Specifications ... Index ... viii nüvifone G60 user’s guide...
-
Page 9: Set Up Your Nüvifone
See the Important Safety and Product Information guide in the product box for product warnings and other important information. nüvifone G60 user’s guide Power key: press and hold to turn on/off; press and release to lock and unlock the screen. -
Page 10: Understand The Home Screen Icons
Touch to search for locations, including restaurants, hotels, and auto services. Touch to view the map. Call Icon —Missed call icon showing the number of missed calls. —Voice mail icon showing the number of new voice mails. nüvifone G60 user’s guide... -
Page 11: Understand The Scrolling Icons
To quickly return to the Home screen, touch and hold • Touch to see more choices. Quickly tap these buttons to scroll faster. nüvifone G60 user’s guide Set Up Your nüvifone Icons Application Use the camera. Access the tools, such as checklists and the alarm clock. -
Page 12: Understand The Status Bar Icons
The connection types are as follows: G—GPRS, E—Edge, 3G—3G. Wi-Fi connectivity. This icon appears in place of the network ® connectivity icon when the nüvifone is using Wi-Fi. An alarm is set. nüvifone G60 user’s guide... -
Page 13: Icon Description
The nüvifone is connected to a device using Bluetooth wireless ® technology. If the icon is white, Bluetooth wireless technology is enabled but the nüvifone is not connected to a device. Teletypewriter (TTY) mode is activated. Battery charge. See page 7 for more information. nüvifone G60 user’s guide... -
Page 14: Install The Sim Card And The Battery
5. Insert the battery so that the metal contacts on the battery match up with the metal contacts inside the battery compartment. 6. Slide the battery cover onto the back of your nüvifone. nüvifone G60 user’s guide SIM card Battery... -
Page 15: Charge The Battery
USB cable included in the box. • Insert the battery into the battery charger (accessory). For more information about accessories, go to www.garmin.com. nüvifone G60 user’s guide Set Up Your nüvifone Battery Icons Icon Meaning Battery life. The more colored... -
Page 16: Install The Microsd Card
1. On the side of your nüvifone, flip up the rectangular plastic cap and slide it over to reveal the microSD card slot. 2. Push the microSD card in until it clicks. 3. Pull out the microSD card. nüvifone G60 user’s guide... -
Page 17: Orient The Screen
• From horizontal mode, rotate your nüvifone to the left or the right to view in vertical (portrait) mode. nüvifone G60 user’s guide Set Up Your nüvifone Scroll the Screen • Touch and slide your finger to slowly scroll the menu. -
Page 18: Mount Your Nüvifone
If you encounter a problem charging your nüvifone, the battery might have exceeded the maximum charging temperature. If the nüvifone is mounted, remove it from the mount and place it somewhere out of direct sunlight. nüvifone G60 user’s guide... -
Page 19: Acquire Satellites
If you are having trouble acquiring satellites, ensure the data connection is turned on. From the Home screen, Settings Phone Data touch > > Connection > On. nüvifone G60 user’s guide... -
Page 20: Use Your Phone
• Touch Voice • Touch page and hold “1.” • Touch > Phone > Voice Mail Call > Contacts > Voice Call > Contacts > Mail. Call > Dial, and touch Contacts > Voice Mail. nüvifone G60 user’s guide... -
Page 21: Use Call History
1. Touch Call > Call History. 2. Touch > Clear All nüvifone G60 user’s guide Delete a Call 1. Touch 2. Select a call. 3. Touch History. 4. Touch Yes. View Related Calls Related calls are calls made to or received from the same number. -
Page 22: Do A Reverse Lookup
Lookup. • when the screen is locked. • Power call when the screen is locked. • Volume silence a call. ignore will send the —double-tap to answer a call key—press to ignore a down key—touch to nüvifone G60 user’s guide... -
Page 23: Use In-Call Options
• Hold—place the current call on hold. • Call—end the current call. nüvifone G60 user’s guide Use Your Phone End a Call During a call, your nüvifone screen dims and then fades to black. 1. If the screen is dimmed, double-... -
Page 24: Set Your Ringtones
Forward. 3. Touch the button under Forwarding. 4. Touch > OK. 5. Select an option: • History—select a number from your call history. • Contacts—select a number from your contacts. • Enter Number—enter a number. nüvifone G60 user’s guide Call... -
Page 25: Use Call Waiting
Add. 3. Select an option to dial the second phone number. 4. Touch 5. When the caller answers, touch Join. nüvifone G60 user’s guide Speak Privately During a Conference Call 1. While in a conference call, touch Call participating callers. -
Page 26: Search For Locations
7. Touch the address, if necessary. 8. Touch Go!, or touch view the location on the map. Touch send a location message. Spell City, enter the Search View Map to save the location or to nüvifone G60 user’s guide... -
Page 27: Use The Location Page
• —touch to save the location or to send the location in a location message. nüvifone G60 user’s guide Search for Locations Find a Point of Interest The detailed maps loaded in your nüvifone contain millions of points of interest, such as restaurants, hotels, and auto services. -
Page 28: Navigate To A Contact
Choose from Recently Found Go Home To navigate home after you have set your home location, touch Home > go!. Your home location > is also stored in your Favorites. See page 22 for more information. nüvifone G60 user’s guide Search... -
Page 29: Search With Yellowpages.com
TiP: To enter a new home location, Search Set Home touch > > Location. Select an option. nüvifone G60 user’s guide Search with Yellowpages.com Businesses listed with Yellowpages. com include ratings based on Yellowpages.com user reviews. A data connection is required for this Change feature. -
Page 30: Find Favorite Locations
Clear the Recently Found List 1. Touch Found. 2. Touch 3. Touch Yes. This process clears the list of recently found locations. These locations will not be deleted from your nüvifone. Search > Recently Search > Recently > Clear. nüvifone G60 user’s guide... -
Page 31: Search The White Pages
White Pages By Phone Number. 2. Enter the area code and phone number, and touch OK. nüvifone G60 user’s guide Find Movie Times This service is available as a paid subscription. Movie times are not available in all areas. A data connection is required for this feature. -
Page 32: Find Upcoming Events
2. To display prices for a specific fuel type, touch fuel type. to view the to add the Search > Cities. Nearby Spell to find a city by Search > Prices. , and select a nüvifone G60 user’s guide... -
Page 33: Enter Coordinates
Touch Location to send the coordinates in a location message. nüvifone G60 user’s guide Find a Location Using the Map 1. Touch 2. Touch and drag the map to view different parts of the map. 3. Touch anywhere on the map. An arrow appears pointing at the location you selected. -
Page 34: Plan And Save A Route
7. Touch To add additional points to the route, touch add Via To change the order of the points in > your route, touch reorder. Points—select the Points. Points— . The route is saved. Points. nüvifone G60 user’s guide... -
Page 35: Follow Your Route
A speed limit icon could appear as you travel on major roadways. This icon displays the current speed limit of the roadway. Touch anywhere on the Map page to browse the map. nüvifone G60 user’s guide Follow Your Route ➊ ➏ ➍ ➎ ➊... -
Page 36: View The Next Turn Page
View the Entire Route on the 1. From the map, touch the text bar on the top of the screen. 2. Touch Show Map. The map appears with your route marked in a magenta line. nüvifone G60 user’s guide... -
Page 37: View The Trip Computer Page
The trip computer displays your current speed and provides helpful statistics about your trip. From the map, touch the Speed field. nüvifone G60 user’s guide Reset the Trip Computer Reset the trip computer before beginning a trip. 1. From the map, touch the Speed 2. -
Page 38: Use The Compass
2. Touch Detour. Add a Stop 1. While navigating a route, touch > Search. 2. Search for the extra stop. 3. Touch Go!. 4. Touch Add as Via Point add this stop before your final destination. nüvifone G60 user’s guide Compass. -
Page 39: About Usage Modes
• If you are not navigating a route, and the nüvifone is in the cradle, it is in Automobile mode. nüvifone G60 user’s guide Follow Your Route • If you are not navigating a route, and the nüvifone is not in the cradle, it is in Pedestrian mode. -
Page 40: View Traffic
If a non-severe traffic delay occurs on your route, the traffic icon shows how much time the delay has added to your route. This time is already included in your estimated arrival time. nüvifone G60 user’s guide... -
Page 41: Use The Traffic Menu
If there are multiple traffic delays on your route, touch the arrows to view other traffic delays. nüvifone G60 user’s guide Avoid Traffic Manually 1. From the map, touch the traffic to view icon. -
Page 42: Work With Contacts
2. Select a contact. 3. Touch > Edit Contact. 4. Touch the picture of the contact. 5. Select a picture. 6. Touch to adjust the zoom level. 7. Touch and drag to move the picture. 8. Touch Select. nüvifone G60 user’s guide... -
Page 43: Assign A Location To An Existing Contact
1. From the Home screen, touch Contacts. 2. Touch > SIM Phone 3. Select an option. nüvifone G60 user’s guide Delete a Contact 1. From the Home screen, touch Contacts. 2. Select the contact you want to delete. 3. Touch Delete Multiple Contacts 1. -
Page 44: Use Sms/Text Messaging
1. From the Home screen, touch box to Text 2. Touch the conversation to read to enter the the text message. 3. Touch to select a to the message. Message: Message. Reply to compose a reply nüvifone G60 user’s guide... -
Page 45: Send A Location Message
Insert Location. 3. Select a location. 4. Select a recipient. 5. Enter a message, if necessary. 6. Touch Send. nüvifone G60 user’s guide Send a Location Message from an Existing Text Message 1. From the Home screen, touch Text 2. Select an existing message. -
Page 46: Forward A Text Message
The individual message is deleted from the conversation. Delete a Conversation 1. Select a conversation. 2. Touch > Delete Conversation. 3. Touch Yes. Delete All Text Messages 1. Touch Text Message Delete All. 2. Touch Yes. nüvifone G60 user’s guide > >... -
Page 47: Use The Camera
3. Press and hold the Camera until you hear the camera click. The picture is saved. nüvifone G60 user’s guide Add Location Information to a Picture If your nüvifone is receiving GPS signals when you take a picture, the current GPS location can be assigned to the picture. -
Page 48: View A Picture
6. Touch Portrait. 7. Repeat the steps to set up the wallpaper for Landscape mode, and touch The wallpaper image appears when the nüvifone is locked. nüvifone G60 user’s guide key. Set as Wallpaper. to adjust to rotate the picture. Landscape. -
Page 49: Share A Picture
2. Touch 3. Select a picture. 4. Touch Share. Your nüvifone creates an e-mail message with the picture included as an attachment. nüvifone G60 user’s guide Use the Camera Navigate to a Picture 1. Press the Camera key. 2. Touch 3. -
Page 50: Use The Music Player
Playlists are saved as .m3u files on the nüvifone. Play a Playlist 1. From the Home screen, touch Music Player. 2. Touch 3. Touch Playlists. 4. Select a playlist. 5. Select a play mode, if necessary: nüvifone G60 user’s guide Playlist. Select All... -
Page 51: Save The Current Playlist
1. From the Music Player, touch the playlist display. Playlist display > Save. 2. Touch 3. Enter a name, and touch Done. nüvifone G60 user’s guide Use the Music Player Edit a Playlist 1. From the Home screen, touch Music Player. -
Page 52: Browse The Web
—zoom out from the center of the screen. —return to the Home screen. —refresh the current Web page. —stop loading the Web page. —enter a URL. —return to the previous Web page in your history. nüvifone G60 user’s guide... -
Page 53: Set Your Browser Home Page
History—display a list of ◦ Web sites you have visited. ◦ Forward— advance to the next Web page in your History. nüvifone G60 user’s guide Browse the Web Set Your Browser Home Page 1. From the Home screen, touch Settings >... -
Page 54: Use E-Mail
7. If necessary, touch Mail Settings SMTP Settings, and enter the e-mail account information. 8. Touch Test Settings account settings. 9. Touch Save to save the account settings. nüvifone G60 user’s guide to test the... -
Page 55: Send An E-Mail Message
4. Touch to enter recipient information. nüvifone G60 user’s guide To enter additional recipients, including carbon (cc) and blind carbon (bcc) copies, select one or more of the following options: •... -
Page 56: Check E-Mail Messages
1. From the Home screen, touch E-mail. 2. Touch 3. Select the e-mail message you want to delete, or touch Select 4. Touch Delete > E-mail. Settings. Settings. Check > Delete Messages. > All. > Yes. nüvifone G60 user’s guide... -
Page 57: Use E-Mail Options
• Send Later—keep the message in the Outbox until the next time the nüvifone is scheduled to check for e-mail. nüvifone G60 user’s guide Change E-mail Accounts 1. From the Home screen, touch E-mail. 2. Touch > Change 3. -
Page 58: Search For An E-Mail Message
Delete an E-mail Account 1. From the Home screen, touch Settings E-mail. > 2. Select an e-mail account. 3. Touch 4. Touch Yes. > Applications > Settings. SMTP to change e-mail > Applications > > Delete Account. nüvifone G60 user’s guide... -
Page 59: Use Ciao
Ciao! is not available in all areas. nOTE: Use caution when sharing your location information with others. nüvifone G60 user’s guide Register with Ciao! ™ Before you join Ciao! for the first time, you must register your device. nOTE: If you have registered at http://my.garmin.com... -
Page 60: Join Ciao
3. Touch the button under Country, and select a country. 4. Touch Send Manual 5. Select the network your friend is using. If your friend is using Ciao!, you can select any network in the list. Touch OK. Friend’s Invitation. nüvifone G60 user’s guide... -
Page 61: Accept An Invitation
“trusted” friend on your friend’s list, and you can view location information for each other. nüvifone G60 user’s guide View Trusted Friends If your list of friends shows the distance to the friend, that friend is “trusted.”... -
Page 62: View Invited Friends
4. Touch Yes. Hide/Show Your Location 1. From the Home screen, touch Ciao! > > Hide. Your current location is hidden from your friends. 2. To stop hiding, touch > Stop Hiding. nüvifone G60 user’s guide > Select All. Ciao! >... -
Page 63: View My Details
Touch Manual to update your position only when you touch Send Update. nüvifone G60 user’s guide View Ciao! Networks 1. From the Home screen, touch Ciao! > 2. Touch Update. 3. Touch a hyperlink to view a network Web site in the Web browser. -
Page 64: Connect To Other Devices
3. Touch Device. An hourglass icon appears, indicating that the nüvifone is scanning for devices. If you do not see an hourglass icon, touch Scan. 4. Select the device you want to add, and touch Yes. nüvifone G60 user’s guide >... -
Page 65: Deactivate Bluetooth
System > Bluetooth. > 2. Select a paired device, and touch Remove Pairing. nüvifone G60 user’s guide Connect to Other Devices Change Your Friendly Name A friendly name identifies your nüvifone on devices with Bluetooth technology. 1. From the Home screen, touch Settings >... -
Page 66: Synchronize Your Nüvifone
Sync Agent software on your computer. contacts ® 2. Connect the nüvifone to your computer using a mini-USB cable. 3. Touch to enter mass storage mode. 4. Touch when asked if you want Tools > Synchronize. nüvifone G60 user’s guide... -
Page 67: Transfer Files
® the mounted-volume icon (Mac computers) on your computer. 5. Copy and paste the files you want to transfer into the Garmin folder. nüvifone G60 user’s guide Connect to Other Devices nOTE: Your nüvifone cannot send or receive phone calls or text messages while in mass storage mode. -
Page 68: Add A Network
Known Networks. Network Turn Off Wi-Fi 1. From the Home screen, touch Settings 2. Touch 3. Touch > System > Wi-Fi. > Forget this network. > System > Wi-Fi. Wi-Fi > OK. nüvifone G60 user’s guide... -
Page 69: View The Weather Forecast
Weather information is updated periodically. 1. From the Home screen, touch Weather. 2. To view a detailed forecast, select a day. nüvifone G60 user’s guide View the Weather Forecast View a Weather Forecast for Another Location 1. From the Home screen, touch Weather. -
Page 70: Use The Calendar
5. Touch Location, and select an option. 6. Select a start time and an end time. 7. Touch Reminder, and select a time. 8. Select how often you want the appointment to recur: • Touch Repeat, and select an option. nüvifone G60 user’s guide... -
Page 71: View An Appointment
6. If the appointment includes location information, touch > to create a route to the appointment. nüvifone G60 user’s guide Use the Calendar View Free Time 1. From the Home screen, touch Calendar. 2. Select the date on the calendar, and touch Agenda. -
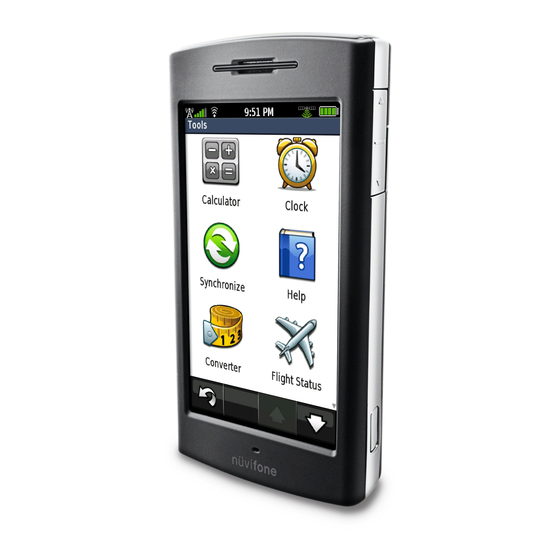
Page 72: Use The Tools
2. Touch a city. 3. Enter all or part of a city name, and touch Done. to view 4. Select the city from the list, and touch Select. To change the time zone displayed on your nüvifone, see page nüvifone G60 user’s guide... -
Page 73: Set An Alarm
Dismiss. Disable an Alarm Touch an alarm in the list, and touch Disabled. nüvifone G60 user’s guide Delete an Alarm Touch an alarm in the list, and touch > Delete >... -
Page 74: Check Flight Status
By Airport Departures. Enter the appropriate data, and select a flight. 5. If your flight has multiple connections, touch Leg, and select the next flight. to view Save Send Arrivals—select an Departures—touch City, Code, or > Next nüvifone G60 user’s guide... -
Page 75: Use The Converter
Automatically Update the Currency Rates This service is available as a paid subscription. A data connection is required for this feature. nüvifone G60 user’s guide 1. From the Home screen, touch Tools > Converter. 2. Touch the button next to Convert. -
Page 76: Use Notes
1. From the Home screen, touch Tools > Checklist. 2. Select a checklist. 3. Touch Add/Remove 4. Edit the checklist: • Touch an item to check it or uncheck it. • Touch Item, enter the new item, and touch Done. nüvifone G60 user’s guide Items. - Page 77 Delete Items. 5. Select the items you want to remove. 6. Touch Delete > Yes. nüvifone G60 user’s guide Add Items From a Different Checklist 1. From the Home screen, touch Tools 2. Select a checklist. 3. Touch 4. Select the list you want to copy from.
-
Page 78: Customize Your Nüvifone Change General Settings
Change Device Security Settings Use these settings to require a PIN to unlock the nüvifone. 1. From the Home screen, touch Miles Settings Device. 2. Change the following settings: Celsius Mode—touch Simulator—touch > System > Security > nüvifone G60 user’s guide... -
Page 79: Change Sim Card Security Settings
2. Reinstall the battery. Your nüvifone will turn on. 3. Touch OK. 4. Touch Emergency Call. nüvifone G60 user’s guide 5. Enter “*GARMIN#1234#” on the touch keypad. 6. Touch restart. You can reinstall your SIM card at any time. -
Page 80: Change Language Settings
Keyboard—select a language for the default keyboard. Change Date/Time Settings 1. From the Home screen, touch Settings 2. Change the following settings: • Date Format • Time Format • Time Zone Selection Preview > System > Date/Time. nüvifone G60 user’s guide... -
Page 81: Change Audio Settings
3. Select a sound category. 4. Touch Preview to listen to the selected sound. 5. Touch OK. nüvifone G60 user’s guide Change Your Ringtone 1. From the Home screen, touch Settings 2. Touch the button under Phone. 3. Touch Ringtones. -
Page 82: Change Phone Settings
ID—select a preference for sending caller ID information when you make phone calls. Touch by Network to send caller ID information according to the settings of your network provider. • My Number • Voice Mail Number nüvifone G60 user’s guide... -
Page 83: Change Navigation Settings
(Only available in Automobile usage mode.) nüvifone G60 user’s guide Customize Your nüvifone • Detail—select the level of detail you want the map to display. More detail may result in slower map drawing. -
Page 84: Change Application Settings
Display Name—enter a display name. This name does not have to match your e-mail address. SMTP Server, SMTP Port, SMTP Username, SMTP Password, SMTP Authentication, SMTP Encryption—enter this information as provided by your e-mail account provider. nüvifone G60 user’s guide... -
Page 85: Change Browser Settings
• Signature—touch to include a signature in messages sent from the selected e-mail account. • Signature—enter an e-mail signature. nüvifone G60 user’s guide Customize Your nüvifone Change Browser Settings 1. From the Home screen, touch Settings > Applications Browser. -
Page 86: Change The Main Menu Order
Auto Lock—select a time. The screen automatically locks if the nüvifone is inactive for the selected length of time. nüvifone G60 user’s guide... -
Page 87: Restore Settings
Shot—activate to take a picture of the nüvifone screen. Touch the key to take a picture of a screen. Screen shots are saved in the Garmin\ Screenshot directory on the nüvifone. Restore Settings Restore Individual Settings 1. From the Home screen, touch Settings. -
Page 88: Appendix
51), you are already registered at http://my.garmin.com. View Software Information 1. From the Home screen, touch Settings. 2. Touch > About. 3. Touch Copyrights to view a list of copyrights. 4. Touch a copyright to view more information. nüvifone G60 user’s guide... -
Page 89: Nümaps Guarantee
Update the Software Go to www.garmin.com the latest software update. nüvifone G60 user’s guide Reset the nüvifone ™ If the nüvifone stops functioning, turn off the nüvifone, and then turn on the nüvifone. -
Page 90: About The Battery
Only use the correct battery type. Using an incorrect battery may present a risk of explosion. If you need to replace the battery in the nüvifone, use a Garmin- approved lithium-ion battery. For more information on purchasing a replacement battery, go to www.garmin.com. -
Page 91: Change The Fuse In The Vehicle Power Cable
3. Ensure that the silver tip is located in the end piece. Screw on the end piece. nüvifone G60 user’s guide Mount on Your Dashboard Use the enclosed mounting disk to mount your device to the dashboard and comply with certain state and local regulations. -
Page 92: Troubleshooting
When the GPS is turned on for the first time, it may take a few minutes to initialize. Charge the battery. Replace the battery. See information. Settings > Phone > Settings > System > Off. page 82 for more nüvifone G60 user’s guide... - Page 93 My nüvifone will not The battery might have exceeded the maximum charge. charging temperature. If the nüvifone is mounted, remove it from the mount and place it somewhere out of direct sunlight. nüvifone G60 user’s guide Settings Airplane Mode > On. > Appendix >...
-
Page 94: Specifications
Usage: 3 W max. gPS receiver: High-sensitivity acquisition times*: Warm: <1 sec. Cold: <38 sec. Factory Reset: <45 sec. *Average acquisition times for a stationary receiver with a clear view of the sky. Frequency Band: 3G 850/1900/2100; 2G 850/900/1800/1900 nüvifone G60 user’s guide... - Page 95 Other connectivity: Wi-Fi, Bluetooth 2.0+EDR; 802.11 b/g; mini USB 2.0 Operating System: Linux Camera/Pictures: 3.0 MP camera Data storage: Internal memory and optional removable microSD card. Data stored indefinitely. Computer interface: Plug-and-play USB mass storage nüvifone G60 user’s guide ® Appendix...
-
Page 96: Index
ID call history call options 15–16 call waiting 17, 74 camera 39–41 screen shot Ciao! 51–55 accept invite disable hide location invite join register remove a friend view invited friends view networks nüvifone G60 owner’s manual... - Page 97 G60 owner’s manual import/export from navigate to set a ringtone for conversion tool coordinates cradle custom avoids customer support custom POIs delete...
- Page 98 27–31 settings 75–76 notes nüMaps Guarantee nüvifone G60 owner’s manual...
- Page 99 42–43 play music Points of Interest (POIs) view proximity point, settings 74–75 proximity points alerts nüvifone G60 owner’s manual recalculate route recently found locations register reply to an e-mail message to text message reset maximum speed trip computer...
- Page 100 44–45 save bookmarks set the home page settings Where Am I? White Pages listings Wi-Fi set up world map Yellowpages.com listings nüvifone G60 owner’s manual...
- Page 103 682...
- Page 104 www.att.com/mobility 1.866.mobility September 2009 Part Number 190-01063-00 Rev. B Printed in China...
Need help?
Do you have a question about the G60 and is the answer not in the manual?
Questions and answers