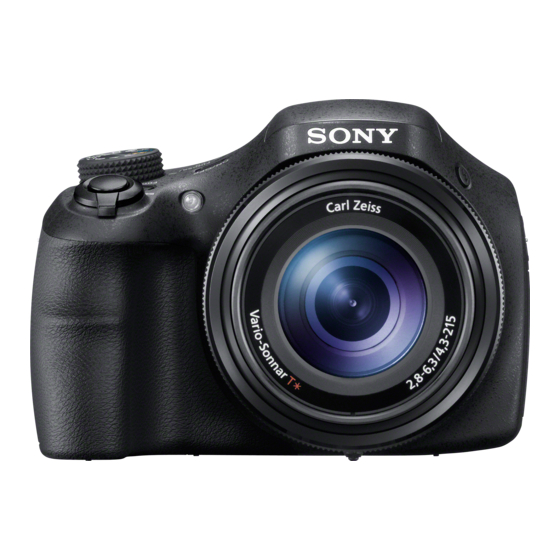
Sony Cyber-shot DSC-HX300 Instruction Manual
Digital still camera
Hide thumbs
Also See for Cyber-shot DSC-HX300:
- User manual ,
- Instruction manual (595 pages) ,
- Service manual (31 pages)

Related Manuals for Sony Cyber-shot DSC-HX300


Summary of Contents for Sony Cyber-shot DSC-HX300
- Page 1 S 0 I_"_E_ 4-4_7-248-21(1 O,o,ta, St,,, Oamera..nstruct,on ,v, anua, GB i!ii Oama_a _otoo_a.a,:,,o,ta,. ,v, anua, ,:,_ ,nst_ucc,on_ _S i!ii LITHIUM AVCI-i i-II_IIPllI| Progressive...
- Page 2 Refer to it for in-depth instructions on the many functions of the camera. (_) Access the Sony support page. http://www.sony.netiSonylnfo/Sul)port/ Select your country or region. Search for the model name of your camera within the support page.
- Page 3 Record the serial number in the space provided below. Refer to these numbers whenever you call your Sony dealer regarding this product. Model No. DS(-HX300 Serial Model No. A(7-UB 10/AC-UB I0B/AC-UB 10(/A(7-UB Serial GB i!! To reduce fire or shock hazard, do not expose the unit to rain or moisture.
- Page 4 The UL Mark on the product means it has been UL Listed. If you have any questions about this product, you may call: Sony (-_ustomer Information (Tenter 1_800-222-SONY (7669). GB The number below is for the FCC related matters only.
- Page 5 Regulatory Information Declaration of Conformity Trade Name: SONY Model No.: DS(-HX300 Responsible Party: Sony Electronics Inc. Address: 16530 Via Esprillo. San Diego. 92127 U.S.A. Telephone No.: 858-942-2230 GB ili This device complies with Patti 5 of the F(C Rules. Operation...
- Page 6 Notice customers in the countries applying EU Directives This product has bccn malmfacturcd by or on behalf of Sony Corporation, l-7q Konan Minato-ku Tokyo, 108-0075 Japan. Inquiries related to product compliance based European Union legislation shall be addressed to the authorized...
- Page 7 Never use the plug without the fuse cover. If you should lose tile fuse cover, please contact your nearest Sony service station.
- Page 8 FOCUS (Focus) button • You can select Ihe focl_s mode by pressing the FOCUS button when the Zoom/Focus switch is set to AF/ZOOM. • If you press the FOCUS button when the Zoom/Focus switch is set to MF, the center of the display will be magnified to allow easier locusing.
- Page 9 [] ON/OFF (Power) button and Power/Charge lamp [] Mode dial: il_ (Intelligent Auto)/ j._+(Superior Auto)/ (Program Auto)/ A (Aperture Priority Shooting)/ S(Shutter Speed Priority GB i!! Shooting)/ M (Manual Exposure Shooting)/ MR(Memory recall mode)/ (iSweep Panorama)/ _(Movie Mode)/ _'_;'](3D Still hnage)/ 8ON(Scene Selection) Jog dial...
- Page 10 Battery eject lever Open the cover. Insert the battery pack. • While pressing Ihe battery eject lever, insert 1he batlery pack as illustrated. Make sure Ihal the battery eject lever locks after inserlien. • Closing the cever with the battery inserted incerrectly may damage...
- Page 11 For customers in the USA and Canada Power/Charge lamp Power cord Lit: Charging (Mains lead) Off: Charging finished Flashing: Charging error or charging paused temporarily because camera is not within the proper temperature range Connect the camera to the AC Adaptor (supplied), using the micro USB cable (supplied).
- Page 12 AC Adaptnr from the wall outlet (wall socket). • Be sure tn use only genuine Sony brand battery packs, micro cable (supplied) and AC Adaptor (supplied). Charging time (Full charge) The charging time is approximately 230 rain.
- Page 13 • The number of images that can be recorded is for shooting under the lollowing conditions: Using Sony "Memory Stick PRO Duo" (Mark2) media (sold separately) -The battery pack is used at an ambient temperature of 25°C (77°F).
- Page 14 The power turns on and off once every ten times. • The numbers of minutes lor movie shooting are based on the CIPA standard, are fnr shooting under tile lollowing conditions: Movie quality: HD HQ Typical movie shooting: Battery life based on repeatedly starting/stnpping shooting,...
- Page 15 GB i !! Ensure the notched corner faces correctly. Open the cover. Insert the memory card (sold separately). • With the nolched corner l'acing as illustrated, insc, rt the memory card until it clicks into place. 3 Close the cover.
- Page 16 Memory cards that you can use Memory Stick XC-HG Duo Memory Stick PRO Duo (Mark2 only) Memory Stick PRO-HG Duo Memory Stick Duo Memory Stick Micro (M2) (Mark2 only) SD memory card "4' (Class 4 or faster) SDHC memory card V' (Class 4 or faster) SDXC memory card (Class 4 or faster)
- Page 17 ON/OFF (Power) button Press the ON/OFF (Power) button. Date & Time selling is displayed when you turn on the camera l_)r the first time. • It may take time l'or the power to turn on and allow operation. 2 Select a desired language.
- Page 18 W: zoom out Shutter button T: zoom in © Mode dial J-l_ll: Intelligent Auto I_:_: Movie Mode MOVIE Shooting still images Press the shutter button halfway down to focus. When the image is in focus, a beep sounds and the • indicator lights.
- Page 19 • If you use the zoom limction while shooting a movie, the sounds of the lens moving and the level', jog dial. and manual ring being operated will be recorded. The sound or" the MOV1E button operating also be recorded wizen movie recording is finished.
- Page 20 Deleting an image Press ?/_ (Delete) butlen. Select [This hn;tge] with • on the control button, then press 0. Returning to shooting images Press the shutter button hail'way down. This camera contains an internal ftmctien guide. This allows you to search the camera's functions according...
- Page 21 Other fuuctions used when shooting or playing back can be operated using the control button, the jog dial or MENU button on the camera. This camera equipped with a Function Guide that allows you to easily select from the functions. While displaying the guide, try the other functions.
- Page 22 g Menu Items Shooting Movie shooting Select movie recording mode. scene Panorama Select recording mode when shnoting panoramic images. Shooting Scene Shoot a still image with an original texture according Picture Effect the desired eltbcl. Scene Selection Select pre=sel settings 1(t match various scene conditions.
- Page 23 Metering Mode Select the melering mode [hal sets which parl ()lille subject lo measure to determine file exposure. Cont. Shooting Select the number of images laken per second lor Burst Interval shooting. Bracket Setting Set file type of the brackel shooting. Scene Recognition Set lo aulomatically...
- Page 24 Viewing Retouch Relouch an image using various etTecls. Picture Effect Add various texture on images. Slideshow Select a melhod of continuous playback. Delete Delete an image. 3D Viewing Sel 1o play back images shol ill 3[) mode on a 3D TV. View Mode Select lhe display formal for images.
- Page 25 Online" or other network services )nay not be available ill some countries or regiolls. • "PlayMemories Home" is not compatible with Macs. Use the applications that are installed on your Mac. For details, visit the following URL: http://v_'ww.sony.co.jp/im sol:/M ac/...
- Page 26 Installing "PlayMemories Home" on a computer Using the Internet browser on your computer, go to the following URL, then click [Install] --* [Run]. www.sony.ncffpm Follow the instructions on the screen to complete the installation. • When the message to connect...
- Page 27 The nmnber of still images and recordable lime may vary depending on the shooting conditions and the memory card. Still images ..6400 16:9/15M) Movies The table belov_ shoves the approximate maximum recording times. These are the total times lbr all movie files. Continuous shooting is possible approximately...
- Page 28 The recordable time also varies depending on the shooting conditions, the subject or the image quality/size settings. Functions built into this camera • This manual describes each of the fimctinns of 1080 60i-comp_tihle devices 11)81) 50i-compatible devices. To check if your camera is a 1080 60i=compatible device or 1080 50i=compatible...
- Page 29 Notes on recording/playback • Before you start recording, make a trial rmJkesure that tile recnrding c_m/em working correctly. • The camera is neither dust-prooL nor splash-proof, nor water-proof. • Avoid exposing tile camera to water. If water enters inside the camera, a malfunction may occur.
- Page 30 No compensation for damaged content or recording failure Sony cannot compensate for failure to record or loss or damage of recoMed content due to a malfnnctiou of the camera or recording media, etc. Cleaning the camera surface Clean tile camera surface with at sofl cloth slightly moistened with water, then wipe tile surlhce with a dry cloth.
- Page 31 File format: Camera Still images: JPEG (DCF, Exif, MPF Baseline) compliant, DPOF [System] compatible Image deqce: 7.82 mm (1/2.3 tM_e) 3D still images: MPO (MPF Exmor R CMOS sensor GB i!! Extended (Disparity hnage)) Total pixel number of camera: compliant Approx.
- Page 32 AC Adaptor AC-UB10/UB10B/ [Input and Output connectors] UB10C/UB10D HDMI connector: HDMI micro jack Power requirements: AC 100 V to multi/Micro USB Terminal': 240 V, 5(1 Hz/60 Hz, 70 mA USB communication Output voltage: DC 5 V, 0.5 A USB communication: Hi-Speed USB Operating temperature: () °C to 40 °C...
- Page 33 Trademarks • The lollowing marks are tn_demm'ks of Sony Corporation. Cub_p-sho{:, "Cyber-shot," "Memory Stick XC-HG Duo," Add fi.mher enjoyment widl your "Memory Stick Duo," PlayStation 3 by downloading "Memory Stick PRO-HG Duo," application li/r PlayStation 3 from "Memory Stick Duo,"...
- Page 34 (_) Aeceda a la pfigina de atencidn al clieme de Sony. http://www.sony.net/Sonylnfo/Support/ Seleccione su pals o regi6n. Busque el hombre del modelo de su cfimara en la pfigina de atenci6n al cliente.
- Page 35 Jones de litio dafiadas o con fugas. • Asegfirese de cargar la baterfa con un cargador de baterfas original de Sony o con un dispositivo que pueda cargarla. • Mantenga la baterfa fuera del alcance de nifios pequefios. • Mantenga la baterfa seca.
- Page 36 UE Este producto ha sido f:,bricado por, o _'n hombre de Sony (orporation, 1-7-1 Konan Minato-ku Tokyo, 108-0t)75 Jap6n. Las consultas relacionadas con la conl\)rmidad producto basadas en la legislaci6n...
- Page 37 Tratamiento de las baterfas al final de su vida Otil (aplicable en la Union Europea y en parses europeos sistemas tratamiento selectivo de residuos) proporcionad_l con esk, l_roduclo no puedc set Iratada L'olno Lilt l-csiduo d()m_slico nom_al. Estc sfinbolo En algunas baterfas cn la bak'rfa esle sfmbolo...
- Page 38 Bot6n FOCUS (Enfoque) • Puede seleccionar el modo de enfoque pulsando el bot(m FOCUS cuando el imerruptor Zoom/Enfoque estd ajustado en AF/ZOOM. • Si pulsa el bot6n FOCUS cuando el interruptor Zoom/Enloque estd ajustado en MF, el centro de la pantalla se ampliarfi para que el enfoque resulte sencillo.
- Page 39 •Cuando el i nterruptor zoom/ Palanca de expulsidn de la enfoque estd ajustado en MF, gire baterfa larueda manual para ajustar en Lfimpara de acceso enfoque. Ranura de tarjeta de memoria Micr6fono estdreo Rosca para trfpode Visor • Use un trfpode con un tornillo de Botdn MOVIE (Pelfcula) menos de 5.5 mm de largo.
- Page 40 Palanca de expulsion de la bateda Abra la tapa. Inserte la bateria. • Micntras pulsa la palanca de expulsidn de la baterfa, inserte la baterfa como se muestra en la ilustracidn. Asegt_rese de que la palanca expulsidn de la baterfa se bloquea despuds de insertarla.
- Page 41 Para clientes en EE. UU. y Canada Lb.mpara de encendido/ carga alimentacion Iluminada: cargando Apagada: la carga ha terminado Parpadea: ha ocurrido un error en la carga o esta se ha detenido temporalmente debido a que la oamara no se enouentra dentro de[ intervalo de temperatura adecuado Conecte la camara al adapta.dor de alimentaci6n de ca...
- Page 42 (suministrado) adaptador de alimentaci6n de ca (FUENTE DE AL1MENTAC1ON) (suministrado) de la marca Sony genuinos. Tiempo de carga (Carga completa) El tiempo dc carga es de aproximadamente rain utilizando el adaptador alimentacidn de ca (FUENTE ALIMENTACION) (suministrado).
- Page 43 Carga mediante la conexi6n de un ordenador La baterfa se pucde cargar conectando la cfimara atm ordenador utilizando cable micro USB. A una toma USB • Tenga en cuenta los puntos siguientes cuando cargue a travds de tin ordenador: Si cnnecta la cfimara a un ordenador pc>rtfitil que no estfi conectado a la fuente tie corriente, el nivel tie la baterfa del pnrtfitil disminuirfi.
- Page 44 • E1 nOmero de im_genes que se puede grabar es cuando las tomas se hacen en las condiciones siguientes: Si se utiliza un "Memory Stick PRO Duo" (Mark2) de Sony (se vende por separado). Si la baterfi_ se utiliza a una temperamra ambiente de 25 °C...
- Page 45 • La alimentaci6n no se puede suministrar cuando la baterfa no estli insertada en la cfimara. • No es posible grabar cuando la cfimara estfi conectada directamente al ordenador o a una toma de corriente udlizando el adaptador de alimentaci6n de ca (FUENTE DE ALIMENTACION) suministrado.
- Page 46 Tarjetas de memoria que puede utilizar _flias a _ 9e Gu as;_ Memory Stick XC-HG Duo _g" Memory Stick PRO Duo (Mark2 solamente) Memory Stick PRO-HG Duo Memory Stick Duo "_¢' Memory Stick Micro (M2) (Mark2 solamente) Tmjeta de memoria SD (Clase 4 o mils rfipida) Tmjeta de memoria SDHC...
- Page 47 • No extraiga mmca la taljela de memoria/baterfa cuando la lfimpara de acceso (pfigina 6) esld encendida. Eslo podrfa ocasionar dafio a los dalos en la tatjela de memoria/memoria interna. Bot6n ON/OFF (Alimentaci6n Esi!! Bot6n de control Seleccione elementos: ,AfV/41iI_ Ajuste: •...
- Page 48 W: alcjar con ZOOI]fl Boton del disparador © Dial de modo i_ll: lnteligente Auto Modo pelfcula MOVIE Toma de imagenes fijas Pulse el bot6n del disparador hasta la mitad para enfocar. Cuando la imagen est5 enl'ocada, suena un pitido y se ilumina el indicador Pulse el bot6n del disparador a fondo para tomar una imagen.
- Page 49 • Si u61iza la funci6n de zoom mientras graba tma pelfcula, se grabarfin los sonidos del objetivo en movimiento y de la palanca, el disco selector y la rueda manual. posible que tambidn se grabe el sonido del botdn MOVIE funcionando cuando termine...
- Page 50 Seleccibn de la imagen siguiente/anterior Seleccione una imagen pulsando I1_(siguiente)/'_l (anterior) del botdn de control o girando el disco selector. Pulse • en el centro del bot6n de control para ver pelfculas. Eliminaei6n de una imagen (_) Pulse el bot6n ?/_ (Borrar).
- Page 51 Utilizando el botdn de control, el disc() selector o el botdn MENU de la c_hnara se puede hacer uso de otras funciones durante la toma o reproduccidn imfigenes. Esta c_hnara est_i equipada con una gufa de funciones que le permite seleccionar fficilmente entre las funciones.
- Page 52 En modo de reproducci(m, puede girar el disco selector para ver la imagen anterior o la siguiente. Elementos del mend Toma de imagen Escena toma Selecciona el modo de grabaci6n de pelfcula. pelicula Escena de toma Selecciona el modo de grabaci6n al lomar imfigenes panor_.mica panorfimicas.
- Page 53 Efecto Cuando esffi seleccionado [lluslraci6n] en Efecto de loto, ilustraciOn establece el nivel de efecto. Balance Blanco Ajusta los lonos de coM" de una imagen. Desplazam. Ajusta los lonos de color en funci6n del valor de ajusle balance blancos establecido segdn el lono seleccionado de Balance...
- Page 54 Regislra los modos deseados o los ajustes de la cfimara. Registrar ajuste Ajusta el modo de dial en MR(Modo recuperaci6n memoria) para recuperar los ajusles regislrados. de la Cal]flurade gtlsCa lUllCiOlles acl.lerdo COil StlS; Guia en la camara necesidades. Visionado Retocar Reloca una imagen utilizando varios eti_clos.
- Page 55 _-_ Elementos de ajuste Si pulsa el bot6n MENU mientras toma una imagcn o durante la reproducci6n, se proveerfi _ (Ajustes) como selecci6n final. Puede cambiar los ajustes )redeterminados en la pantalla _ (Ajustes). Formato de pelfcula/lluminador AF/Cuadrfcula/Zoom hnag. Clara/Zoom digital/Reducc, ruido viento/Nivel Ajustes de Toma relerencia...
- Page 56 Online" u otros servicios de red no estdn disponibles en algunos parses o regiones. • "PlayMemories Home" no es compatible con ordenadores Mac. Utilice las aplicaciones que estfin instaladas en su ordenador Mac. Para mils detalles, visite la direccidn URL siguiente: http://www.sony.co.j p/imso fl/M ac/...
- Page 57 Home" en un ordenador A trav6s del navegador web de su ordenador, vaya a la direcci6n URL siguiente y, a continuaci6n, haga clic en [Instalaci6n] --* [Ejecutar]. www.sony.netlpm Siga las instrucciones de la pantalla para completar la Es iiii instalaci6n. • Cuando...
- Page 58 El mhnero de im_igenes fijas y el tiempo que se puede grabar podrfin variar dependiendo de las condiciones de la toma y de la tarjeta de memoria. Imagenes fijas (Unidades: imfigenes) ([;;[ ! Ta ........ 6400 16:9(15M) Peliculas La tabla de abajo muestra los tiempos de grabaci6n mfiximos aproximados.
- Page 59 •E1 t iempo grabable de pelfculas varfa porque la cimara esti equipada con V BR (Velocidad de bits v ariable), que ajusta automfiticamente la calidad de imagen dependiendo de la escena que se e sti tomando. Cuando grabe un motivo que se mueve r_'ipidamente,...
- Page 60 Notas sobre la grabacion/reproduccibn • Antes de comenzar _ grabm', h_ga una gr_d_acidn _ modo de prueh_ para asegurarse de que 1_c_imara est_i fimcionando correctamente. • La cfimara no estfi hecha a prueba de polvo, ni a prueba de salpicaduras, ni a prueba de agua.
- Page 61 Acerca de la temperatura de la camara Es posible que la cfimara y la baterfa se sobrecalienten debido al uso contimm, pero no se trata de un fallo de funcionamiento. protecci6n Acerca contra recalentamiento Dependiendo de la temperatura de la cfimara y de la baterfa, es posible que no pueda...
- Page 62 Nota sobre la eliminacion y la transferencia de la camara Purtt proteger los datos personales, sigu los pusos a continuttci6n cuando elimine o transfiera la c_'imara. • Formatee la memoria interna (p_gina 23), grabe im_igenes hasta la capacklad total de la memoria interna con el objetivo tapado y, a continuaci6n, vuelva a formatear la memoria interna.
- Page 63 Formato de archivo: C_mara lmfigenes fijas: cumple con JPEG (DCF, Exit', MPF Baseline), [Sistema] compatible con DPOF Dispositivo de imagen: sensor CMOS lmfigenes fijas 3[): compatible Exmor R de 7,82 mm (tipo 1/2,3) MPO (MPF Extendido (hnagen Nfimero total de pfxeles de la cfimara: con disparidad)) aprox.
- Page 64 Adaptador de alimentacion [Pantalla] ca (FUENTE Pantalla LCD: 7,5 cm (tipo 3,0) unidad ALIMENTACION) AC-UB10/ UB10B/UB10C/UB10D Nfimero total de puntos: 921 600 Requisitos tie alimentacidn: ca de pUlltOS 100 V a 240 V 50 Hz/60 Hz 70 mA Tensi6n de salida: cc 5 V 0,5 A [Alimentaci6n, general] Temperatura de flmcionamiento:...
- Page 65 • LIs ilrarc;is siguientes r'_l_trc;is son, el1 general, marcas comerciales comerciales de Sony Corporation. marcas comerciales registradas de sus Cuber-shot, "Cyber-shot", respectivos desarrolladores "Memory Stick XC-HG Duo", f:_bricantes. Silt embargo, las marcas "Memory Stick PRO Duo", _' o ®...
- Page 67 Esi!!
- Page 68 © 2013 Sony Corporation Printed in China 4457248210...
Need help?
Do you have a question about the Cyber-shot DSC-HX300 and is the answer not in the manual?
Questions and answers