Table of Contents
Advertisement
K9-Mundial
K9-Mundial
K9-Mundial
K9-Mundial
K9-Mundial
COPYRIGHT: OMEGA RESEARCH & DEVELOPMENT 2000
Introduction
Congratulations on the purchase of your vehicle security system. In learning to
operate your security system, please become familiar with the following three
principal components: the Transmitter, the LED Status Indicator light, and the
Valet/Override Switch.
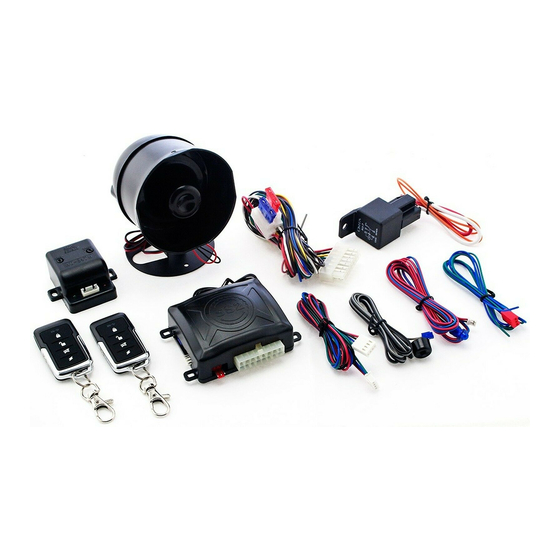
The Transmitter: Each security system comes with two pre-learned transmitters,
but can learn up to 4 different transmitters. Every transmitter has its own unique,
invisible code, which changes with each use. Thus, your transmitter cannot be
duplicated. The transmitter has two buttons: one large button and a smaller button.
Refer to pages 4-8 for detailed transmitter operating instructions.
The Valet/Override Switch: This switch can be used to turn "Off" the alarm portion
of the system, including the programmable Automatic Last Door Arming and
Automatic Rearming features, by placing the system into "Valet Mode". The Valet/
Override Switch can also be used in conjunction with the vehicle's ignition key to
perform an "Emergency Override" of the system should the transmitter be lost.
Both of these are explained on pages 8-10.
The LED Indicator Light: The LED Indicates the status of the alarm and serves
as a visual deterrent to break-ins and theft. Refer to pages 11-12.
Page 3
Table of Contents
Owner's Guide
Introduction .................................................................................................................. 3
Arming & Disarming the System ............................................................................... 4-6
Remote Panic Operation ............................................................................................. 7
The Auxiliary Channel .................................................................................................. 8
LED Status Indicator ............................................................................................. 11-12
Auxiliary Sensor .................................................................................................... 12-13
Programmable Anti-Carjacking Protection ........................................................... 13-14
Programmable Features ...................................................................................... 15- 18
How to Program the Features ............................................................................... 19-20
How to Program Transmitters to the System ........................................................ 20-21
Limited Lifetime Warranty ........................................................................... Back Cover
Installation Instructions
Installation .................................................................................................................. 21
Wiring Connections ............................................................................................... 22-39
Rewired Plug-in Features ..................................................................................... 40-47
Wiring Diagram Overview ..................................................................................... 24-25
Arming & Disarming the System
The system may be "Armed" by one of two methods. The first method involves the
use of a remote transmitter to "Actively" arm the system, provided the ignition
switch is "off" and the system is not in Valet Mode. The second method is a
programmable feature called "Last Door Arming" in which the alarm will "Passively"
or "self" arm. The system simply reverses its armed/disarmed status when the
transmitter is used. If it is disarmed when the transmitter signal is received, it arms;
if it is armed when the signal is received, it will disarm.
To Actively Arm/Disarm the System:
Upon Arming: • The siren will chirp one time.
• The parking lights will flash once.
• The doors will lock.
• The starter interrupt will engage.
• The LED Status Indicator will begin to flash slowly.
Page 2
Press & Release the Large
Transmitter Button.
(If an optional interface is connected)
Page 4
Advertisement
Table of Contents

Related Manuals for Omega K9-Mundial


Summary of Contents for Omega K9-Mundial
-
Page 1: Table Of Contents
K9-Mundial K9-Mundial K9-Mundial K9-Mundial Wiring Diagram Overview ..................24-25 COPYRIGHT: OMEGA RESEARCH & DEVELOPMENT 2000 Page 2 Introduction Arming & Disarming the System Congratulations on the purchase of your vehicle security system. In learning to The system may be "Armed" by one of two methods. The first method involves the operate your security system, please become familiar with the following three use of a remote transmitter to "Actively"... -
Page 2: Remote Panic Operation
Please see your Omega dealer for details on available options. To Activate Panic: Press & Hold the Large Button for 3 Seconds. To Activate the Auxiliary Channel: Press &... -
Page 3: Led Status Indicator
3 Flashes /pause = 3 remote transmitters are programmed to operate the system. sensors, glass tampering sensors, and microwave/radar sensors which can 4 Flashes /pause = 4 remote transmitters are programmed to operate the system. detect motion inside and outside the vehicle. Your Omega dealer can provide Page 11 Page 12... -
Page 4: Programmable Anti-Carjacking Protection
2: Anti-Carjacking activated by a door: details on the complete line of sensors and help determine which sensor or sensors If programmable feature 14 is “On”, the system will initiate the Anti-Carjacking are best suited for your needs. Currently many sensors feature dual zone operation every time a vehicle door is opened and closed while the ignition is “On”. -
Page 5: How To Program The Features
9. System Activation Cycle Duration: (•30 / 60 Seconds) due to the remote starting operation. When this feature is set for the Start - Configures the system’s activation duration cycle to be either 30 seconds or Mode, and the Auxiliary Channel is activated, the system will bypass the current sensing and sensor zones if the system is armed. -
Page 6: Limited Lifetime Warranty
Connection locations can be at the supply wire at the ignition switch, the supply wire year and thereafter all parts to be repaired will be free with only a nominal charge for Omega Research behind the fuse block or the fuse/junction block. Never just insert the Red wire or and Development, Inc.'s labor and return shipping, to the original owner during the lifetime of the car in... - Page 7 Relay Relay Starter LED Status Right Parking Lights Door Lock Port Motor 1 2 3 4 5 6 7 8 9 0 1 2 3 4 5 6 7 8 9 0 Indicator 1 2 3 4 5 6 7 8 9 0 1 2 3 4 5 6 7 8 9 0 1 2 3 4 5 6 7 8 9 0 1 2 3 4 5 6 7 8 9 0...
- Page 8 Connect the starter disable socket's Red wire to the ignition switch side, and its Mounting The Siren: Find a location in the engine compartment away from the White wire to the starter solenoid side. Be sure that good, solid electrical connec- extreme heat of the engine and manifold.
- Page 9 vehicle; use a digital multimeter (DMM) to identify the horn wire first. Probing an Connecting directly to Left & Right Parking Lights. airbag circuit with a standard test light can cause the Airbag to deploy! 1 2 3 1 2 3 Connect the test light clip to - Ground, and probe the wire.
- Page 10 Also be aware of vehicles which diode-isolate each door. Typically, this is usually Opening a door during Automatic Rearming will also suspend that feature. If the encountered with dash displays that indicate individual doors being ajar. The system has been programmed to lock and unlock the doors with the ignition switch being turned "on"...
-
Page 11: Rewired Plug-In Features
DLS connector plugs have existing power doorlocks. If not present, power doorlocks may be added to operate the vehicle's relays into control the vehicle by utilizing one of several Omega power doorlock kits. The vast majority are - Ground pulses. Relay Relay... - Page 12 3 Wire +12 Volts Pulse Systems: This power doorlock system is very similar to the 3 wire - Ground pulse system except the vehicle's doorlock switches use +12 Relay Relay DLS connector plugs Volts pulses to operate the doorlock relays/control unit. Examine the wires on the into control module.
Need help?
Do you have a question about the K9-Mundial and is the answer not in the manual?
Questions and answers