
Subscribe to Our Youtube Channel
Related Manuals for T-Mobile 27-00 16-02


Summary of Contents for T-Mobile 27-00 16-02
- Page 1 Sidekick Reference Guide 27-0016-02 Rev. 01 Copyright © 2003 Danger, Inc. All rights reserved.
-
Page 2: Table Of Contents
Contents Welcome 4 Device Controls 6 Opening and Closing the Display 6 Control Buttons 7 Registration 8 III. Device Basics 12 Battery Charger 12 USB Port 13 Wrist Strap 13 The Jump Screen 14 Title Bar and Indicators 15 Menus 16 Device Settings 17 Customization 20 Default Language Setting 21... - Page 3 Import Contacts from Your SIM Card 29 Send a Text Message 29 Browse the Web 30 Bookmark a Web Page 30 Sign On to the AOL Instant Messenger™ Service 31 Send an Instant Message 31 Switch Between Conversations 32 Send an Email Message 32 Fetch Email from External Accounts 33 Fetch Email Using Your Device’s Web Browser 35 Send a Photo 36...
-
Page 4: Welcome
Welcome! Thank you for buying a Sidekick. Your Sidekick will change the way you communicate, get organized, and stay connected. Your Sidekick connects seamlessly to wireless networks, which gives you the ability to browse the Internet, exchange instant messages, and send and receive email with image attachments. - Page 5 Here’s what you’ll find in the box: Sidekick device SIM card Battery charger Hands-free headset Wrist strap Carrying case Start Here Reference Guide T-Mobile Welcome Guide If any of these items are missing, please contact T-Mobile’s Customer Care department at 1 (800) 937-8997. Now, let’s get started! Welcome!
-
Page 6: Device Controls
Device Controls Opening and Closing the Display To open the display, press your left thumb on the lower-left corner of the display and gently push in a clockwise direction. The display will spring smoothly into the open position. Normal operating position of the device is horizontal, with the wheel on the right side, as shown above. -
Page 7: Control Buttons
Control Buttons MENU DIRECTIONAL PAD JUMP WHEEL POWER BACK... -
Page 8: Registration
Registration Before you can start using your Sidekick, you must complete the registration steps, as explained in step 3 in the Start Here guide. This section of the Reference Guide takes you through the registration process in more detail. Note that these instructions are for new users (not returning users). Returning users can simply sign in using their existing username and password. - Page 9 Select a username. The username you select will be the first part of your email address (for example, username@example.com). Before you select a username, read the following guidelines: Usernames must start with an alphabetic character (A-Z), but can include numbers and underscores ( _ ), but no other punctuation. Usernames must be at least 2 but no more than 32 characters long.
- Page 10 Select your time zone. Open the pop-up menu to see a list of time zones. Select yours from the list, then select Next. Select a “secret question” and type your answer. If you ever forget your password, you’ll need to contact your carrier’s Customer Care representative.
- Page 11 Wait while data transmits. Wait while the data you entered in Registration is transmitted to your carrier. The carrier’s service will check to see if your username has already been taken. If it has, we will provide you with alternate suggestions.
-
Page 12: Device Basics
III. Device Basics Battery Charger Your Sidekick comes with a built-in rechargeable lithium ion (Li-Ion) battery. The battery should be fully charged when you receive your device, but if it isn’t, follow the instructions below to charge the battery. Warning Only use the battery charger provided with your Sidekick to charge your battery, or you risk damaging your device. -
Page 13: Usb Port
Let the device charge for at least four (4) hours. Rest the device in a safe place and let the battery charge for at least four hours, or overnight, to ensure maximum battery life. As the device is charging, you will see the bars in the battery icon fill repeatedly from left to right in an animated fashion. -
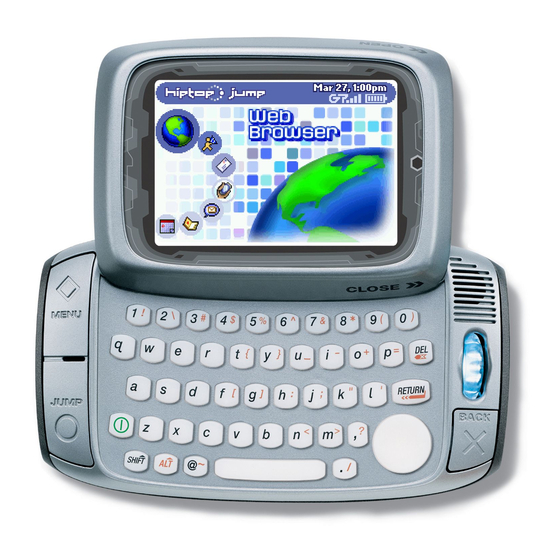
Page 14: The Jump Screen
The Jump Screen The Jump screen is your entry point to all the Sidekick applications: Web Browser, Instant Messaging, Email, Phone, Phone Messages, Address Book, Calendar, To Do, Notes, Camera, Rock & Rocket, and Catalog. Go to the Jump screen from any screen by pressing . -
Page 15: Title Bar And Indicators
Title Bar and Indicators The device display indicators appear at the top of your screen at all times. -
Page 16: Menus
Sound Profile Setting. When you have sound turned off (“Mute”), the title bar will indicate whether you have flash or vibration set. From left to right, the icons indicate: total mute (no flash or vibrate), flash only (no vibrate), vibrate. Communication Services Notifications. -
Page 17: Device Settings
Device Settings Sound and Display Controls To mute your device and adjust the system and phone sound volume, open the Sound Controls by pressing . Select a sound “profile” from MENU BACK the list. Customize profiles from the Jump Settings > Sound Profiles screen. To adjust the display brightness, open the Display Control by pressing . - Page 18 Key Guard Mode You can effectively lock the controls by entering key guard mode. By default, your device is set to go into key guard mode after five minutes of idle time. To enter key guard mode, do the following: Press to open the Jump screen.
- Page 19 In the first section of the screen, Key Guard, the key guard idle time pop- up is selected by default. Press the wheel to open the pop-up. Highlight a “guard” time, then press the wheel to select it. Press to save your settings and dismiss the Key Guard & Security BACK screen.
-
Page 20: Customization
Customization Your device is designed so you can set up many of its features to suit your preferences. You specify device-wide preferences using the Settings screens accessed from the Jump screen menu. You can also customize many of the applications. Ways you can customize applications include: Setting your favorite Web home page (Web Browser) Selecting individual caller-ID icons (Phone) -
Page 21: Default Language Setting
Default Language Setting If, at any time, you must change the default language used on your device, you can do so from the Languages screen: Press to open the Jump screen. Press to open the menu, JUMP MENU then select Settings > Language. The Language screen appears. All available languages/locales are listed in the pop-up menu. - Page 22 Deleting Text To delete a character to the left of the cursor, press the DEL key To delete a character to the right of the cursor, press SHIFT + To delete all the characters on one line, press ALT + Entering Special Unicode Characters + Spacebar.
- Page 23 Cut, Copy, Paste To cut, copy, or paste text you have typed, follow these instructions: Position your text cursor next to the text you want to cut or copy. (Use the D-pad’s arrows to position the text cursor.) Hold down the Shift key while pressing a D-pad arrow. As you select text, it is shown highlighted.
-
Page 24: The Desktop Interface
The Desktop Interface The data you store in the Email, To Do, Calendar, Address Book, Notes, and Camera applications are also available for viewing or editing on the Web from any computer connected to the Internet. Information in your account is stored on secure servers in a data center protected by extensive physical security and firewalls. - Page 25 Desktop Interface Jump Page The Desktop Interface...
-
Page 26: Using The Applications
Using the Applications Phone Make a Phone Call Press to open the Jump screen, then press the wheel to open the JUMP Phone application. Enter the number you want to dial by using one of the following dialing methods: Open the display, then type your number using the keyboard. Select to place the call. -
Page 27: Answer A Phone Call
Answer a Phone Call When your device signals there is an incoming phone call, the display will show the name of the caller (assuming caller ID is not disabled on the incoming phone and the phone number is available). Press the wheel to select the Answer button. Your call connects. To hang up, select , or press BACK... -
Page 28: Change Your Phone Ringtone
Change Your Phone Ringtone Press to go to the Jump screen, then press the wheel to open the JUMP Phone application. to open the Phone menu. Select Settings > Ringtones. Press MENU On the Set Up Ringtones screen, highlight the Incoming phone call ring pop-up menu, then press the wheel. -
Page 29: Import Contacts From Your Sim Card
Import Contacts from Your SIM Card If you already have a SIM card from your wireless carrier, you can import the phone numbers you have stored on the SIM into your device’s Address Book. First, insert the SIM with the contacts into your device, then: to go to the Jump screen. -
Page 30: Browse The Web
Web Browser Browse the Web to go to the Jump screen. Scroll to highlight Web Browser, Press JUMP then press the wheel to open the application. Start typing the address of the Web page you wish to visit. (You don’t have to type the “www”... -
Page 31: Sign On To The Aol Instant Messenger Service
AOL Instant Messenger™ Service Sign On to the AOL Instant Messenger Service Press to go to the Jump screen. Scroll to highlight AOL Instant JUMP ® Messenger (AIM ), then press the wheel to open the application. The Sign On screen appears. If you already have an AIM account, type your screen name and password (passwords are case-sensitive), then select the Sign On button. -
Page 32: Switch Between Conversations
Switch Between IM Conversations You can have up to 10 IM conversations open at the same time. If you do have more than one IM conversation open, you can quickly switch between conversations by doing one of the following: Menu - Press to open the IM Conversations submenu, which MENU lists all your open conversations. -
Page 33: Fetch Email From External Accounts
Scroll to the Subject field and type the subject of your email. Scroll to the message body and type your message. To delete text in the forward direction, press the SHIFT+DEL keys together. To delete the current line of text, press the ALT+DEL keys together. When ready to send, either select the Send button at the bottom of the + M. - Page 34 Type your email account information in the fields on this New Account screen. Read the sections below for more details on each field. Mail Server field - The first thing you must provide on the New Account screen is the name of the mail server. Many people don’t know the name of their mail server.
-
Page 35: Fetch Email Using Your Device's Web Browser
Username and Password fields - Type your email account username and password. Email Folder pop-up menu - Select the folder to which you want your account email delivered. When you’ve filled in all the fields on the screen, save your information by scrolling to the bottom of the screen and selecting Create;... -
Page 36: Send A Photo
Send a Photo (You may have to purchase the camera accessory separately.) to go to the Jump screen. Scroll to highlight Email, then Press JUMP press the wheel to open the application. Press to go to the Compose screen. Complete the To, MENU Subject, and Message fields. - Page 37 To select an icon, rotate the wheel up to highlight , then press the wheel to open the icon selector. Rotate the wheel to highlight the icon you want, then press the wheel to select it. Done. When finished with the Identity screen, select You advance to the next New Contact screen, in which you can type or select additional contact information.
-
Page 38: Import Address Book Contacts
Import Address Book Contacts If you have a SIM card from your carrier with contact information stored on it, you can import that information to your device by following the instructions in “Import Contacts from Your SIM Card” on page 29 of this guide. If you have existing contact information stored in a Personal Information Management (PIM) application, you can import that data to your Address Book on the device and Web. -
Page 39: Add An Event To Calendar
Calendar Add an Event to Calendar You can create and store up to 1000 events in Calendar. Press to go to the Jump screen. Scroll to highlight Calendar, then JUMP press the wheel to open the application. to open the menu. New Event is selected by default. Press MENU Press the wheel to go to the Event Details screen. -
Page 40: Add A Task
To Do Add a Task You can create and store up to 50 To Do tasks. to go to the Jump screen. Scroll to highlight To Do, then Press JUMP press the wheel to open the application. Press to open the menu. New Task is selected by default. MENU Press the wheel to open a blank task screen. -
Page 41: Take A Photo
Take a Photo You can create and store up to 36 photos in your Gallery. Press to go to the Jump screen. Scroll to highlight Camera, then JUMP press the wheel to open the application. Insert the camera into your device’s headset/camera jack, as explained in the previous section. -
Page 42: Purchase Items From The Catalog
Catalog Purchase Items from the Catalog Download ringtones, applications, games, and more from the Catalog! You’ll find that browsing the Catalog and purchasing items is easy and fun: Press to go to the Jump screen. Scroll to highlight Catalog, then JUMP press the wheel to open the application. -
Page 43: Manage Your Purchases
Once purchased, your item will be downloaded to your device, network connectivity permitting. You’ll be notified once the download is complete. Note that applications require “installation”, an automatic process that does involve an automatic restart of your device. If your item is not delivered immediately, you can check the download process from the Purchases screen, described below. -
Page 44: Keyboard Shortcuts
Keyboard Shortcuts Press and hold the speed dial number on the Call a speed dial number keyboard while in the Phone application or on the Jump screen. Press the wheel. Answer an incoming call Send an incoming call directly BACK to voice mail BACK Hang up active call... -
Page 45: Troubleshooting
VII. Troubleshooting How do I know when my account has been activated? Once your account has been activated by your wireless carrier, you will see a “Welcome” message on your screen. If the Welcome message doesn’t appear on your device after 48 hours after registering, contact your carrier’s Customer Care department. - Page 46 My device won’t power on even though I’ve been charging it for some time. What should I do? Perform a “hard reset” by pressing the power button and inserting a paper clip into the reset hole at the same time. The power button is located on the lower left-hand side of the keyboard, and closing or opening the screen slightly exposes the reset hole.
- Page 47 Why do the Web pages I open using the device’s Web Browser application appear different from the pages I open on my desktop computer? The Web pages displayed on your device have been reformatted so they are easier to read on a small display. The same information displays, it’s just laid out on the screen so that it’s easier to view from your device.
- Page 48 Why is there an infrared port on my device? The IR port is currently not used, but is provided for future functionality. How secure is my account data on the Desktop Interface? There may be sensitive information stored in contact information (credit card numbers for example) that must be secure! Information in your account is stored on secure servers in a data center protected by extensive physical security and firewalls.
-
Page 49: Customer Care
VIII. Customer Care T-Mobile’s Customer Care offers responsive and knowledgeable customer support 24 hours a day, seven days a week. It’s a free call anytime. Just dial 611 using the Phone application or 1-800-937-8997 from any other phone. You can also contact Customer Care through our Web site, by email, or regular mail: Web site: www.t-mobile.com Email: customercare@t-mobile.com... -
Page 50: Legal Information
Web site operated by Danger (the “Service”). Your use of the Service and the Software (as defined below) in the course of operating your Device is subject to the terms and conditions of this Agreement. - Page 51 Third-Party Software. Ownership. The Software is licensed to you, not sold. Danger and its licensors retain exclusive ownership of all proprietary rights, including all patent, copyright, trade secret, trademark and other intellectual property rights worldwide, in and to the Service and the Software (including any corrections, bug fixes, enhancements, updates or other modifications thereto).
- Page 52 In addition, Danger reserves the right to disclose all content that you upload, post, email, transmit or otherwise make available via the Service (whether or not directed to Danger) if required to do so by law or in the good...
- Page 53 Service. Further, you agree that Danger shall not be liable to you for any termination of your access to the Service hereunder.
- Page 54 This Agreement constitutes the complete and exclusive agreement between you and Danger with respect to the subject matter hereof, and supersedes all prior oral or written understandings, communications or agreements. If for any reason a court of competent jurisdiction finds any...
-
Page 55: Limited Product Warranty
Limited Product Warranty Limited Product Warranty. Danger, Inc., through the manufacturer of the Device, (hereinafter “Warrantor”) rep- resents and warrants that, for a period of one (1) year from your date of purchase (the “Warranty Period”), the Sidekick Device (the “Device”) shall (i) be free from all defects in workmanship and materials, and (ii) perform in material accordance with the documentation regarding the Device. - Page 56 Device and the services provided by Danger to owners of the Device, including Danger’s limitations of liability and warranty disclaimers with respect to such software and services, are set forth separately in the Danger Ser- vice and End-User License Agreement, a copy of which is included on the Device and in this T-Mobile Sidekick Reference Guide on page 44.
-
Page 57: Handling And Safety Precautions
Handling and Safety Precautions The Sidekick is a mobile computing device that is susceptible to breaking if dropped or subjected to severe shock. The wrist strap and the carrying case are included and should be used to minimize the risk of accidental dropping. Before using your device, please read the precautions listed below carefully as they provide essential information for the safe handling of the product, and for the protection of the users and others from possible harm. -
Page 58: Battery Charger Handling
Battery Charger Handling • Never place the battery charger on any surface that can be marred by exposure to heat; always place the battery charger on a heat-insulating surface. • Never place the battery charger adjacent to any heat source. •... - Page 59 Device Handling • Never attempt to disassemble, repair, or modify your device. Such action may result in bodily injury, or damage to the unit or other property. • Never touch liquid that might leak from a broken liquid crystal display (LCD), as doing so may cause a skin rash.
Need help?
Do you have a question about the 27-00 16-02 and is the answer not in the manual?
Questions and answers