
Related Manuals for Dialogue Flybook V5 V5W1BB (without 3G)


Summary of Contents for Dialogue Flybook V5 V5W1BB (without 3G)
- Page 1 Flybook V5_User's Guide_V1.0.book Page i Thursday, February 8, 2007 3:44 PM Flybook V5 User’s Manual V5W1BB (without 3G) V5W1BBHA (with 3G) Dialogue Technology Corporation Version 1.0, Jan.. 2007...
- Page 2 Flybook V5_User's Guide_V1.0.book Page ii Thursday, February 8, 2007 3:44 PM...
-
Page 3: Preface
Flybook V5_User's Guide_V1.0.book Page i Thursday, February 8, 2007 3:44 PM Preface Copyright and Safety Notices Please read this section before using your computer. Retain this manual for future reference. Copyright This publication, including all photographs, illustrations and software, is protected under international copyright laws, with all rights reserved. - Page 4 SIG, Inc. USA. BlueSoleil is a trademark of IVT Cor- poration. Dialogue Technology Corporation is a registered trademark. FlyBook is a trademark of the Dialogue Technol- ogy Corporation. Windows is a registered trademark or trademark of Microsoft Corporation in the United States and/or other countries.
-
Page 5: Declaration Of Conformity
Flybook V5_User's Guide_V1.0.book Page iii Thursday, February 8, 2007 3:44 PM Preface Shielded interconnect cables and a shielded AC power cable must be employed with this equipment to ensure compliance with the pertinent RF emission limits governing this device. Changes or modifications not expressly approved by the system's manufacturer could void the user's authority to operate the equipment. -
Page 6: Fcc Radiation Exposure Statement
Flybook V5_User's Guide_V1.0.book Page iv Thursday, February 8, 2007 3:44 PM Preface FCC Radiation Exposure Statement This equipment complies with FCC radiation exposure lim- its set forth for an uncontrolled environment. This equip- ment should be installed and operated with a minimum distance of 20 cm (8 inches) between the radiator and your body. -
Page 7: Safety Information
Flybook V5_User's Guide_V1.0.book Page v Thursday, February 8, 2007 3:44 PM Preface Your notebook computer is a precision instrument that should be handled with care. Use common sense and fol- low the guidelines below, and your computer will last you for many years. - Page 8 Flybook V5_User's Guide_V1.0.book Page vi Thursday, February 8, 2007 3:44 PM Preface • Read and follow all instructions marked on the Flybook V5 and in the user manual before operating the V5. Store all safety information in a secure place for future reference.
- Page 9 The Flybook V5 has been dropped, or the case is bro- ken open. • Flybook V5 performance is seriously degraded. If service is required, contact a sales representative or a local service center, or go to http://www.dialogue.com.tw for service information.
- Page 10 Flybook V5_User's Guide_V1.0.book Page viii Thursday, February 8, 2007 3:44 PM Preface Cleaning the Flybook V5 Warning! Before cleaning the com- Follow these instructions when cleaning the Flybook V5. puter, turn it off, unplug the AC • Wipe the display with a clean soft cloth. adapter, and then •...
-
Page 11: Table Of Contents
Flybook V5_User's Guide_V1.0.book Page ix Thursday, February 8, 2007 3:44 PM Table of Contents Preface ........................i Copyright and Safety Notices ................i About This Manual ..................... iv Taking Care of the Flybook V5 ................ iv Introducing the Flybook V5 ............... - Page 12 Flybook V5_User's Guide_V1.0.book Page x Thursday, February 8, 2007 3:44 PM Opening the Control Center ................30 Using the Control Center ................. 31 Customizing the V5 Display ..............35 Connecting Devices ..................37 Connecting Audio Devices ................37 Connecting USB Devices ................
- Page 13 Flybook V5_User's Guide_V1.0.book Page xi Thursday, February 8, 2007 3:44 PM Customizing the System BIOS .............. 65 Accessing the BIOS Setup ................65 Updating the BIOS Firmware ................66 Troubleshooting ..................... 67 Identifying Problems ..................67 General Hardware Problems ................. 68 Having the V5 Serviced ..................
- Page 14 Flybook V5_User's Guide_V1.0.book Page xii Thursday, February 8, 2007 3:44 PM...
-
Page 15: Introducing The Flybook V5
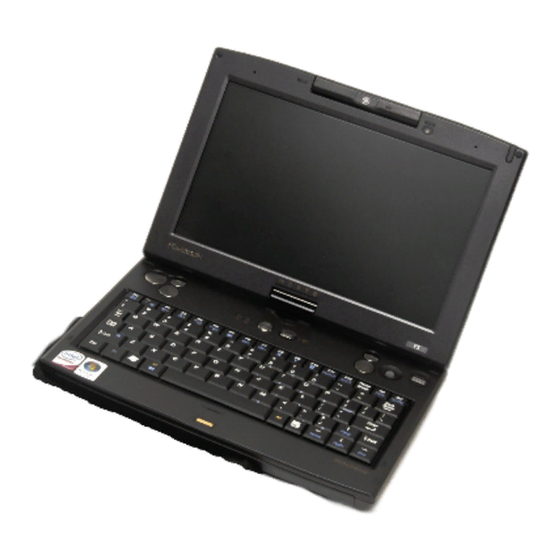
Flybook V5_User's Guide_V1.0.book Page 1 Thursday, February 8, 2007 3:44 PM Introducing the Flybook V5 Congratulations on purchasing the Flybook V5! The Flybook V5 sup- ports both Win- dows XP and the newest member of the Windows oper- ating system fam- ily, Windows Vista. - Page 16 Flybook V5_User's Guide_V1.0.book Page 2 Thursday, February 8, 2007 3:44 PM Introducing the Flybook V5 The Flybook V5 uses a pointing device with mouse buttons on both sides of the unit and a clickable scroll bar for added convenience. The LCD monitor can be rotated and laid flat to enable you to use the Flybook V5 as a tablet computer.
-
Page 17: Taking A Tour Of The Flybook V5
Flybook V5_User's Guide_V1.0.book Page 3 Thursday, February 8, 2007 3:44 PM Taking a Tour of the Flybook V5 This section describes the major components of your new Flybook V5. Front-Left View 14 14 13 13... - Page 18 Flybook V5_User's Guide_V1.0.book Page 4 Thursday, February 8, 2007 3:44 PM Taking a Tour of the Flybook V5 Status LEDs – These LEDs display when the AC adapter is con- nected, when the HDD is being accessed, or when the WWAN, WLAN, or Bluetooth is activated. Pointing device buttons (right) –...
- Page 19 Flybook V5_User's Guide_V1.0.book Page 5 Thursday, February 8, 2007 3:44 PM Taking a Tour of the Flybook V5 Power button – Press and hold the power button for two seconds to turn on the computer. Left speaker – Stereo speakers are built into the computer. The right speaker is on the opposite side of the V5.
- Page 20 Flybook V5_User's Guide_V1.0.book Page 6 Thursday, February 8, 2007 3:44 PM Taking a Tour of the Flybook V5 Ambient light sensor – This sensor detects ambient light and reduces screen brightness to adjust for optimum display qual- ity. Stylus slot –...
-
Page 21: Rear View
Flybook V5_User's Guide_V1.0.book Page 7 Thursday, February 8, 2007 3:44 PM Taking a Tour of the Flybook V5 Rear View RJ-11 modem jack – Connect a phone line to this jack to use the internal modem. Ethernet connector – Connect the computer to your home or office network (LAN) with the Ethernet connector. - Page 22 Flybook V5_User's Guide_V1.0.book Page 8 Thursday, February 8, 2007 3:44 PM Taking a Tour of the Flybook V5 Microphone jack – Connect a microphone to the microphone jack. USB connectors – Connect USB devices such as printers or flash drives to the USB connectors.
-
Page 23: Using The V5 In Clamshell Mode And Tablet Mode
Flybook V5_User's Guide_V1.0.book Page 9 Thursday, February 8, 2007 3:44 PM Using the V5 in Clamshell Mode and Tablet Mode The Flybook V5 can be operated in Clamshell mode as a standard notebook or in tablet mode, enabling you to use the V5 as you would a tablet computer. -
Page 24: Using The V5 In Tablet Mode
Flybook V5_User's Guide_V1.0.book Page 10 Thursday, February 8, 2007 3:44 PM Using the V5 in Clamshell Mode and Tablet Mode Using the V5 in Tablet Mode Follow the steps below to use the V5 as a tablet computer. Take Caution: care when adjust- Open the display. - Page 25 Flybook V5_User's Guide_V1.0.book Page 11 Thursday, February 8, 2007 3:44 PM Using the V5 in Clamshell Mode and Tablet Mode Twist Caution: Do NOT twist the display the dis- counterclock- play wise. You will clock- damage the LCD wise 180 display.
- Page 26 Flybook V5_User's Guide_V1.0.book Page 12 Thursday, February 8, 2007 3:44 PM Using the V5 in Clamshell Mode and Tablet Mode The Flybook V5 can now be used as a tablet computer.
-
Page 27: Getting Started With The Flybook V5
Flybook V5_User's Guide_V1.0.book Page 13 Thursday, February 8, 2007 3:44 PM Getting Started with the Flybook V5 This chapter explains how to install and charge the battery, how to connect the AC adapter, and how to power up the V5 for the first time. Battery Installation When your Flybook V5 ships, the battery is not installed. -
Page 28: Getting Started With The Flybook V5
Flybook V5_User's Guide_V1.0.book Page 14 Thursday, February 8, 2007 3:44 PM Getting Started with the Flybook V5 The battery lock must be manually closed. The battery Warning! Always close the battery release is spring loaded and closes automatically when you lock after inserting insert the battery. -
Page 29: Removing The Battery
Flybook V5_User's Guide_V1.0.book Page 15 Thursday, February 8, 2007 3:44 PM Getting Started with the Flybook V5 Removing the Battery Slide the battery lock to the unlocked position While holding the battery release in the open position , remove the battery. Charging the Battery The first time you charge the battery, you should charge it for eight hours. -
Page 30: Connecting The Ac Adapter
Flybook V5_User's Guide_V1.0.book Page 16 Thursday, February 8, 2007 3:44 PM Getting Started with the Flybook V5 Connecting the AC Adapter Connect the AC cable (A) to the AC adapter. Connect the other end of the AC cable (B) to an electri- cal outlet. -
Page 31: Led Descriptions
Flybook V5_User's Guide_V1.0.book Page 17 Thursday, February 8, 2007 3:44 PM LED Descriptions The following describes the V5 LED indicators. Battery Warning! If no bat- tery is installed, (V5 is running) then the battery – LED off: No battery LED is always off. –... - Page 32 Flybook V5_User's Guide_V1.0.book Page 18 Thursday, February 8, 2007 3:44 PM LED Descriptions Bluetooth – Slow blinking: The Bluetooth module is on standby. – Fast blinking: Data is being transmitted or received. Num lock – Lights when the numeric keypad is enabled. Caps lock –...
-
Page 33: Using The Fingerprint Reader
Flybook V5_User's Guide_V1.0.book Page 19 Thursday, February 8, 2007 3:44 PM Using the Fingerprint Reader The fingerprint reader allows you to control access to your computer system and applications. To enroll your finger and use the fingerprint applications, see the bundled Quick Start Guide and Fingerprint Reader Utility Guide or the online help for the fingerprint reader util- ity. - Page 34 Flybook V5_User's Guide_V1.0.book Page 20 Thursday, February 8, 2007 3:44 PM...
-
Page 35: Using Flybook V5 Input Devices
Flybook V5_User's Guide_V1.0.book Page 21 Thursday, February 8, 2007 3:44 PM Using Flybook V5 Input Devices The Flybook V5 incorporates several ways to interact with the operating system and applications. The V5 has a key- board that emulates a standard keyboard with the addition of Fn hotkeys. -
Page 36: Using The Pointing Devices
Flybook V5_User's Guide_V1.0.book Page 22 Thursday, February 8, 2007 3:44 PM Using Flybook V5 Input Devices Using the Pointing Devices The pointing device consists of a stick pointer and two sets of dual click-buttons located on the left and right side above the keyboard. -
Page 37: Using The Stylus
Flybook V5_User's Guide_V1.0.book Page 23 Thursday, February 8, 2007 3:44 PM Using Flybook V5 Input Devices Using the Stylus The stylus not only emulates a mouse when the V5 is in tablet mode, it also enables you to interact with the Flybook V5 as you would with paper and pen. -
Page 38: Using The Keyboard
Flybook V5_User's Guide_V1.0.book Page 24 Thursday, February 8, 2007 3:44 PM Using Flybook V5 Input Devices Using the Keyboard The V5 keyboard emulates a standard-sized computer key- board by incorporating function keys, a numeric keypad, and the Fn key. Using Function (Fn) Keys Using function keys is a quick way to carry out commands or... - Page 39 Flybook V5_User's Guide_V1.0.book Page 25 Thursday, February 8, 2007 3:44 PM Using Flybook V5 Input Devices The Fn key functions are described as follows. – Fn + Esc: Repeatedly pressing the buttons outputs Note: Pressing some function key the display signal to one of the following: combinations (for –...
- Page 40 Flybook V5_User's Guide_V1.0.book Page 26 Thursday, February 8, 2007 3:44 PM Using Flybook V5 Input Devices – Fn + F9: Enables or disables the built-in wireless wide area networking (WWAN) feature. – Fn + F10: Enables or disables the built-in Bluetooth feature.
-
Page 41: Using The Numeric Keypad
Flybook V5_User's Guide_V1.0.book Page 27 Thursday, February 8, 2007 3:44 PM Using Flybook V5 Input Devices Using the Numeric Keypad The keyboard has an embedded numeric keyboard. When you enable it, the Num Lock LED lights. To enable or disable the numeric keypad, press Fn + Num Lk. - Page 42 Flybook V5_User's Guide_V1.0.book Page 28 Thursday, February 8, 2007 3:44 PM...
-
Page 43: Using Flybook Control Center
Flybook V5_User's Guide_V1.0.book Page 29 Thursday, February 8, 2007 3:44 PM Using Flybook Control Center The Flybook Control Center lets you quickly enable or dis- able wireless options and change settings such as volume and display mode. You can also check system health with this utility. -
Page 44: Opening The Control Center
Flybook V5_User's Guide_V1.0.book Page 30 Thursday, February 8, 2007 3:44 PM Using Flybook Control Center Opening the Control Center Right-click the Flybook icon in the System Tray select Restore. The Control Center Opens. Click the left arrow button to open/close the left side pane, and click the right arrow button to open/close the right side pane. -
Page 45: Using The Control Center
Flybook V5_User's Guide_V1.0.book Page 31 Thursday, February 8, 2007 3:44 PM Using Flybook Control Center Using the Control Center Function pane When the Control Panel displays: Move the pointer over the buttons on the Control Center panel. Click function icons to start (or stop) the functions. - Page 46 Flybook V5_User's Guide_V1.0.book Page 32 Thursday, February 8, 2007 3:44 PM Using Flybook Control Center The following table briefly describes each available func- tion. Icon Description Turns the volume on and off. Turns the automatic light sensor on and off. Click to increase the volume.
- Page 47 Flybook V5_User's Guide_V1.0.book Page 33 Thursday, February 8, 2007 3:44 PM Using Flybook Control Center Icon Description Click to enable or disable the wireless WAN. Click to enable or disable the wireless LAN (WiFi). Click to enable or disable the Bluetooth. Click to disable all wireless communications devices.
- Page 48 Flybook V5_User's Guide_V1.0.book Page 34 Thursday, February 8, 2007 3:44 PM...
-
Page 49: Customizing The V5 Display
Flybook V5_User's Guide_V1.0.book Page 35 Thursday, February 8, 2007 3:44 PM Customizing the V5 Display You can customize the V5 display by using the Windows Display utility. To open the Display utility: Note: Alternatively, right-click the desk- 1. Click Start | Control Panel top and select Properties to cus- 2. - Page 50 Flybook V5_User's Guide_V1.0.book Page 36 Thursday, February 8, 2007 3:44 PM...
-
Page 51: Connecting Devices
Flybook V5_User's Guide_V1.0.book Page 37 Thursday, February 8, 2007 3:44 PM Connecting Devices This section covers peripheral devices that you can use with the V5. Connecting Audio Devices Your computer has a built-in microphone and speaker. You can also connect an external microphone and headset. Connecting Headphones Connect speakers or headphones to the headphone jack. -
Page 52: Connecting A Microphone
Flybook V5_User's Guide_V1.0.book Page 38 Thursday, February 8, 2007 3:44 PM Connecting Devices Connecting a Microphone Connect a microphone to the microphone jack. About the Realtek Sound Manager Note: The built-in Your V5 comes with the Realtek Sound Manager, which speakers and micro- enables you to configure connected audio devices. -
Page 53: Connecting Usb Devices
Flybook V5_User's Guide_V1.0.book Page 39 Thursday, February 8, 2007 3:44 PM Connecting Devices Connecting USB Devices There are two Universal Serial Bus (USB) connectors on the Flybook V5. You can connect USB devices such as printers or flash drives to either connector. Connect the USB device to one of the USB connectors Caution: Be sure... -
Page 54: Connecting An External Display
Flybook V5_User's Guide_V1.0.book Page 40 Thursday, February 8, 2007 3:44 PM Connecting Devices Connecting an External Display You can connect an external monitor, projector or LCD to Caution: You can permanently your computer with a resolution up to 1800 x 1440. Check damage a dis- the user manual of the display to be sure it supports this play if it does not... -
Page 55: Connecting To A Tv
Flybook V5_User's Guide_V1.0.book Page 41 Thursday, February 8, 2007 3:44 PM Connecting Devices Connecting to a TV Note: Before You can connect a TV to the Flybook V5 to use as an exter- outputting the nal monitor. display to a Plug the 3.5 mm TV cable adapter into the TV cable video device, jack at the rear of the Flybook V5. -
Page 56: Using An Expresscard
Flybook V5_User's Guide_V1.0.book Page 42 Thursday, February 8, 2007 3:44 PM Connecting Devices Using an ExpressCard You can use 34 mm-wide and 54 mm-wide ExpressCards with your Flybook V5. Installing an ExpressCard Caution: Do not install or remove an Find the notched edge on the card as shown in the fol- ExpressCard when lowing illustration. - Page 57 Flybook V5_User's Guide_V1.0.book Page 43 Thursday, February 8, 2007 3:44 PM Connecting Devices Press and release the dummy card inserted in the ExpressCard slot. The card pops out. Remove the dummy card from the slot. 54 mm-wide ExpressCard installation...
-
Page 58: Removing An Expresscard
Flybook V5_User's Guide_V1.0.book Page 44 Thursday, February 8, 2007 3:44 PM Connecting Devices Insert the ExpressCard into the slot. Removing an ExpressCard Click Safely Remove Hardware in the taskbar. Select the card and click Stop. Push and release the card to eject it. -
Page 59: Securing Your V5
Flybook V5_User's Guide_V1.0.book Page 45 Thursday, February 8, 2007 3:44 PM Securing Your V5 Before You Go Online Connecting your computer to the Internet opens the way to potential threats such as viruses and spyware. To best secure your computer purchase security software (or down- load it from a secure system), and then install it on your computer before you connect it to the Internet. -
Page 60: Installing A Spyware Blocker
Flybook V5_User's Guide_V1.0.book Page 46 Thursday, February 8, 2007 3:44 PM Securing Your V5 Installing a Spyware Blocker Spyware typically retrieves information about your Web- surfing habits. It can be secretly installed on your computer with a free download and can even be installed just by visit- ing a Web site. -
Page 61: Connecting Local Area Networks
Flybook V5_User's Guide_V1.0.book Page 47 Thursday, February 8, 2007 3:44 PM Connecting Local Area Networks Your computer has an Ethernet connector that you can use Note: For assis- tance with local net- to connect to a wired network at home or in the office. If you work connections, have a wireless access point, you can also get online using consult your net-... -
Page 62: Connecting A Wireless Lan (Wlan)
Flybook V5_User's Guide_V1.0.book Page 48 Thursday, February 8, 2007 3:44 PM Connecting Local Area Networks Connect the other end of the cable to your router or switch. It takes a few minutes for your router to assign an IP address to your computer. When your computer is con- nected, the following message appears over the LAN icon in the System Tray. -
Page 63: Using The Built-In Modem
Flybook V5_User's Guide_V1.0.book Page 49 Thursday, February 8, 2007 3:44 PM Using the Built-in Modem The built-in fax/data modem module enables you to con- nect the V5 to a remote network or the Internet or fax docu- ments. Making a Dial-up Connection Before making a dial-up connection, you must install con- nection components in Windows and create a dialing profile for the connection. - Page 64 Flybook V5_User's Guide_V1.0.book Page 50 Thursday, February 8, 2007 3:44 PM Using the Built-in Modem Making a modem dial-up connection To make a modem dial-up connection: Connect a phone jack to the RJ-11 jack at the rear of the Flybook V5 to use the built-in modem. In the Network Connections panel, double-click the icon of the component you wish to use to make the connec- tion.
-
Page 65: Sending And Receiving A Fax
Flybook V5_User's Guide_V1.0.book Page 51 Thursday, February 8, 2007 3:44 PM Using the Built-in Modem Sending and Receiving a Fax The built-in fax/data modem module supports faxing. You can use Windows Fax or other fax applications to send and receive faxes. Windows also provides a fax printer service transferring from printer function of programs. - Page 66 Flybook V5_User's Guide_V1.0.book Page 52 Thursday, February 8, 2007 3:44 PM...
-
Page 67: Using The Built-In Wwan Module
Flybook V5_User's Guide_V1.0.book Page 53 Thursday, February 8, 2007 3:44 PM Using the Built-in WWAN Module The optional built-in WWAN module uses cellular carriers Note: The V5 accommodates vari- for transmission. It enables you to connect your Flybook V5 ous 3.5G WWAN to the Internet or use the V5 to make phone calls. -
Page 68: Installing The Sim Card
Flybook V5_User's Guide_V1.0.book Page 54 Thursday, February 8, 2007 3:44 PM Using the Built-in WWAN Module Installing the SIM Card Remove the battery (refer to “Battery Installation” on page 13. Locate the SIM card. Push and slide the SIM holder in the direction of the arrow to release the holder. -
Page 69: Connecting The V5 To A Wireless Wan
Flybook V5_User's Guide_V1.0.book Page 55 Thursday, February 8, 2007 3:44 PM Using the Built-in WWAN Module Insert the SIM card making sure it is inserted all the way to the bottom of the slot. Close the SIM card holder and lock it in place. - Page 70 Flybook V5_User's Guide_V1.0.book Page 56 Thursday, February 8, 2007 3:44 PM...
- Page 71 Flybook V5_User's Guide_V1.0.book Page 57 Thursday, February 8, 2007 3:44 PM Using the Built-in Bluetooth Module Using the built-in Bluetooth module the computer can com- municate with Bluetooth-equipped devices such as com- puters, cellular phones, printers, faxes, keyboards, and pointing devices. The module also enables you to take advantage of the following versatile Bluetooth services: •...
- Page 72 Flybook V5_User's Guide_V1.0.book Page 58 Thursday, February 8, 2007 3:44 PM...
-
Page 73: Using Gps
Flybook V5_User's Guide_V1.0.book Page 59 Thursday, February 8, 2007 3:44 PM Using GPS The Flybook V5 optionally comes with GPS (Global Posi- tioning System) capability. GPS is a satellite-based radio navigation system. Signals from at least four satellites com- pute the current latitude, longitude and elevation of a GPS receiver anywhere on earth to within a few meters. - Page 74 Flybook V5_User's Guide_V1.0.book Page 60 Thursday, February 8, 2007 3:44 PM...
-
Page 75: Using The Built-In Webcam
Flybook V5_User's Guide_V1.0.book Page 61 Thursday, February 8, 2007 3:44 PM Using the Built-in Webcam Your computer features a built-in webcam that is already Note: When a web- cam enabled appli- set up and ready to use with most of web applications that cation is open, the support video messaging, such as MSN Messenger or webcam LED lights... -
Page 76: Adjusting The Webcam Orientation
Flybook V5_User's Guide_V1.0.book Page 62 Thursday, February 8, 2007 3:44 PM Using the Built-in Webcam Adjusting the Webcam Orientation The webcam rotates up to 225 degrees, enabling you to Caution: Be care- ful to follow the adjust it in clamshell and tablet mode for optimum use. instructions in this Refer to the following instructions to adjust the webcam ori- section when... -
Page 77: Managing System Power
Flybook V5_User's Guide_V1.0.book Page 63 Thursday, February 8, 2007 3:44 PM Managing System Power The computer controls its power activities through an ACPI power management unit. The unit employs a set of power management schemes to maximize power conservation and optimize system performance. Windows manages all power-saving features and provides a Power Options utility in customizing the computer’s power system. - Page 78 Flybook V5_User's Guide_V1.0.book Page 64 Thursday, February 8, 2007 3:44 PM...
-
Page 79: Customizing The System Bios
Flybook V5_User's Guide_V1.0.book Page 65 Thursday, February 8, 2007 3:44 PM Customizing the System BIOS The BIOS setup utility enables you to you change core set- Caution: Be sure you understand any tings on your Flybook V5 such as the system time, boot changes you make order, and auto-repeat rate for your keyboard. -
Page 80: Updating The Bios Firmware
You can download updated BIOS from the manufacturer's Web site and upgrade the BIOS on your computer. New BIOS may provide support for new peripherals, improve- ments in performance or fixes for known bugs. To download firmware, please go to http://www.dialogue.com.tw. -
Page 81: Troubleshooting
Flybook V5_User's Guide_V1.0.book Page 67 Thursday, February 8, 2007 3:44 PM Troubleshooting In each problem-specific section, try the steps in the order suggested. This may help you to solve the problem more quickly. Try to pin point the problem and thus avoid replacing non- defective parts. -
Page 82: General Hardware Problems
Flybook V5_User's Guide_V1.0.book Page 68 Thursday, February 8, 2007 3:44 PM Troubleshooting If failure is detected in an area other than the mainboard, an error message is displayed on the screen and testing is stopped. If your system does not successfully start, but displays a blank screen, emits a series of beeps, or displays an error code, consult your dealer. - Page 83 Flybook V5_User's Guide_V1.0.book Page 69 Thursday, February 8, 2007 3:44 PM Troubleshooting If the computer is using the AC adapter, ensure that the AC outlet, airplane seat jack, or car cigarette lighter are working. If the AC outlet power is working, the AC adapter may be faulty.
- Page 84 Flybook V5_User's Guide_V1.0.book Page 70 Thursday, February 8, 2007 3:44 PM Troubleshooting No audio output The audio system is closed or the volume of audio sys- tem is too low. Use hot keys or Flybook Control Center to open the audio system and adjust the volume. The audio output is disabled or too low for the audio application.
-
Page 85: Having The V5 Serviced
Flybook V5_User's Guide_V1.0.book Page 71 Thursday, February 8, 2007 3:44 PM Troubleshooting connection). Also, check the wave condition in the Wire- less Network Connection Status window. Check if the wireless LAN module is turned on. Verify that Disable Radio is not checked in the Network setting window. - Page 86 Flybook V5_User's Guide_V1.0.book Page 72 Thursday, February 8, 2007 3:44 PM...
-
Page 87: Specifications
Flybook V5_User's Guide_V1.0.book Page 73 Thursday, February 8, 2007 3:44 PM Specifications Intel® Centrino® Duo ULV Processor Mobile Intel® 945 GM Express Chipset Chipset Main Memory DDR2 SO-DIMM, up to 4GB BIOS and Flash Phoenix® TC BIOS Operating System Genuine Microsoft® Windows® Vista / XP Wireless WAN 3.5G (HSDPA / UMTS / EDGE / GPRS / GSM) (optional) -
Page 88: Electrical Specifications
Flybook V5_User's Guide_V1.0.book Page 74 Thursday, February 8, 2007 3:44 PM Specifications Hard Drive 1.8” Ultra Slim Hard Disk, 40/60/80 GB (4200 rpm) Input devices Touch Panel; Landscape and Portrait dual mode Pointing device with 2 sets of Mouse buttons and a clickable scroll bar 80 Key standard keyboard (Multiple languages support) with hot keys... - Page 89 Flybook V5_User's Guide_V1.0.book Page 75 Thursday, February 8, 2007 3:44 PM Specifications Battery • Battery Pack: 6 cell 3S2P 103450 Li-Ion rechargeable battery pack. • Charging: Direct DC charging.
- Page 90 Flybook V5_User's Guide_V1.0.book Page 76 Thursday, February 8, 2007 3:44 PM...
-
Page 91: Index
Flybook V5_User's Guide_V1.0.book Page 77 Thursday, February 8, 2007 3:44 PM Index Bluetooth enabling ......26, 57 AC adapter LED ........18 connecting ......16 using ........57 connector, location ....5 brightness access account ......53 decreasing ......25 air vent, location ......8 increasing ...... - Page 92 Flybook V5_User's Guide_V1.0.book Page 78 Thursday, February 8, 2007 3:44 PM Index do’s and don’ts ......v introduction ......1 display powering on ......16 clamshell mode ......9 tour ........... 3 connecting external ....40 fn key resolution ....... 40 function description ....
- Page 93 Flybook V5_User's Guide_V1.0.book Page 79 Thursday, February 8, 2007 3:44 PM Index firewall ........45 turning on and off ....26 spyware blocker ..... 46 memory ........73 keyboard microphone using ........24 built-in, location ......5 keys connecting ......38 application key .......
- Page 94 Flybook V5_User's Guide_V1.0.book Page 80 Thursday, February 8, 2007 3:44 PM Index SIM card ........53 installing ......... 54 pointing device speakers, location ......5 buttons, location ....4, 5 specifications ........ 73 customizing ......22 spyware blocker, installing ... 46 location ........
- Page 95 Flybook V5_User's Guide_V1.0.book Page 81 Thursday, February 8, 2007 3:44 PM Index front-left ........3 rear .......... 7 volume decreasing ......25 increasing ......25 muting ........25 webcam adjusting orientation ....62 enabling ......... 61 location ........5 turning on and off ....26 using, ........
- Page 96 This publication, including all photographs, illustrations and software, is protected under international copyright laws, with all rights reserved. Neither this manual, nor any of the material contained herein, may be reproduced without written consent of the manufacturer. © Copyright 2007 Dialogue Technology Corporation...
Need help?
Do you have a question about the Flybook V5 V5W1BB (without 3G) and is the answer not in the manual?
Questions and answers