Table of Contents
Advertisement
Advertisement
Table of Contents

Related Manuals for Teac DR-H358i


Summary of Contents for Teac DR-H358i
- Page 1 41008477 DR-H358i DVD Receiver OWNER’S MANUAL...
-
Page 2: Important Safety Instructions
IMPORTANT SAFETY INSTRUCTIONS 1) Read these instructions. 2) Keep these instructions. CAUTION: TO REDUCE THE RISK OF ELECTRIC SHOCK, DO NOT 3) Heed all warnings. REMOVE COVER (OR BACK). NO USER-SERVICEABLE PARTS INSIDE. REFER SERVICING TO QUALIFIED SERVICE PERSONNEL. 4) Follow all instructions. The lightning flash with arrowhead symbol, within an 5) Do not use this apparatus near water. - Page 3 DivX and the associated DivX logos are registered trademarks of DivX, < IF YOU ARE EXPERIENCING PROBLEMS WITH THIS PRODUCT, Inc. CONTACT TEAC FOR A SERVICE REFERRAL. DO NOT USE THE PRODUCT UNTIL IT HAS BEEN REPAIRED. MPEG Layer-3 audio coding technology licensed from Fraunhofer IIS and Thomson.
-
Page 4: Table Of Contents
Contents Thank you for choosing TEAC. Read this manual carefully to get the best performance from this unit. Before Use ........... . 5 Settings (Introduction) . -
Page 5: Before Use
Before Use Connecting Antennas (1) Read this before operation DAB/FM Indoor Antenna < Depending on the electromagnetic waves used by a television Connect the T-type DAB/FM antenna to the DAB/FM antenna terminal. broadcast, if a TV is turned on near this unit while it is also on, lines Extend the lead vertically and attach it to a window frame or wall with might appear on the TV screen. - Page 6 Connecting Antennas (2) FM Outdoor Antenna DAB Outdoor Antenna In an area where FM signals are weak, it will be necessary to use a In an area where DAB signals are weak, it will be necessary to use an 75 Ω unbalanced-type outdoor FM antenna. Generally, a 3-element outdoor DAB antenna.
-
Page 7: Speaker Connection
Speaker Connection Subwoofer Caution: How to connect To avoid damaging the speakers with a sudden high-level signal, be 1. Turn the terminal cap counterclockwise to loosen it. The speaker sure to switch the power off before connecting the speakers. terminal caps cannot be fully removed from the base. Before connection 2. -
Page 8: Connection To A Tv
Connection to a TV Caution: < Switch off the power to all equipment before making connections. < Read the instructions of each component you intend to use with this unit. < Be sure to insert each plug securely. To prevent hum and noise, avoid bundling the signal interconnection cables together with the AC power cord or speaker cables. -
Page 9: Composite Video Output Terminal
Component video output terminals < Adjust the video aspect ratio to match that of the television (page 37) . Use commercially available component video cables to connect the unit to the component video inputs of a suitably equipped < This unit adopts analog copy protection features. If the unit is television or monitor to enjoy a high-quality picture. -
Page 10: Connection To Audio Equipments Etc
Connection to Audio Equipments etc. Caution: < Switch off the power to all equipment before making connections. < Read the instructions of each component you intend to use with this unit. < Be sure to insert each plug securely. To prevent hum and noise, avoid bundling the signal interconnection cables together with the AC power cord or speaker cables. -
Page 11: Remote Control Unit
Remote Control Unit Digital audio output terminal The provided Remote Control Unit allows the unit to be operated from a distance. Digital audio from DVD-Video, CD and video CD is output from When operating the remote control unit, point it towards the remote this terminal. -
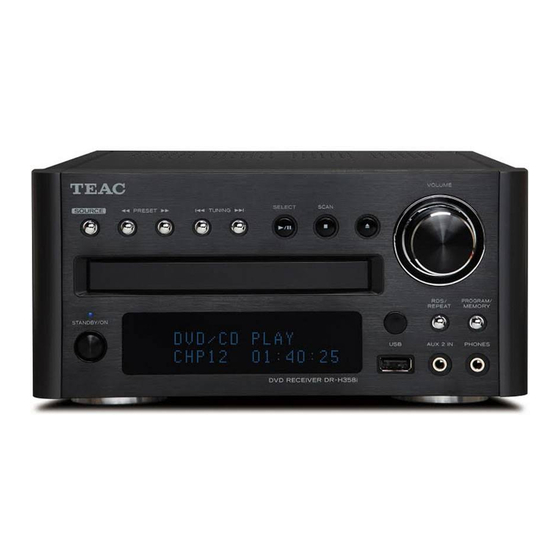
Page 12: Identifying The Parts (Main Unit)
Identifying the Parts (Main Unit) - Page 13 SOURCE INFO/REPEAT Use this button to select a source. In FM mode, use this button to select an RDS mode. In DAB mode, use this button to change the information on the second line of the display. Search ( m / , )/PRESET In DISC, USB or iPod mode, use this button for repeat playback.
-
Page 14: Identifying The Parts (Remote Control Unit)
Identifying the Parts (Remote Control Unit) STANDBY/ON Use this button to turn the unit on and standby. The indicator lights blue when the unit is turned on. The indicator lights orange when the unit is in the standby mode. The equipment draws nominal non-operating power from the AC outlet with its STANDBY/ON in the standby position. - Page 15 TONE Stop ( H )/SCAN Use this button to adjust bass and treble together with the In tuner mode, use this button to preset stations automatically. VOLUME buttons. In DISC or USB mode, use this button to stop playback. DVS (Dolby Virtual Speaker) Play/Pause ( G / J )/SELECT/FM MODE In DISC or USB mode, use this button to select the listening In FM mode, use this button to select stereo or monaural.
-
Page 16: Discs
Copy-protected discs, DualDiscs and other discs that do not conform to the CD standard may not play back correctly in this player. If you use such discs in this unit, TEAC Corporation and its subsidiaries cannot be responsible for any consequences or guarantee the quality of reproduction. - Page 17 Playable file format Caution: This unit can play following files recorded on a CD-R, CD-RW, DVD-R, < Do not play any disc that is warped, deformed or damaged. Playing DVD-RW or USB memory device: such discs may cause irreparable harm to the playing mechanisms. <...
-
Page 18: Usb Memory Device Compatibility
< To remove the adapter, hold its left and right sides and gently pull it up. Compatible iPod Software If your iPod will not work with the DR-H358i or with the remote control unit, software update might solve the problem. Visit the Apple website and download the latest iPod software. -
Page 19: Setting The Clock
Setting the Clock If the unit is on, press the STANDBY/ON button to turn it Press the Volume buttons (+ or –) to set the current standby. minute. Press the CLOCK button. Press the CLOCK button. “RDS/DAB Sync Off” or “RDS/DAB Sync On” appears on the display. -
Page 20: Basic Operation
Basic Operation Play the source, and adjust the volume using the VOLUME knob. Press the STANDBY/ON button to turn the unit on. The volume is adjustable from MIN to MAX. You can hold down the VOLUME – or + buttons on the remote control unit to reduce or bring up the volume continuously. -
Page 21: Adjusting The Bass And Treble
Muting DVS (Dolby Virtual Speaker) (DISC/USB mode only) Dolby Virtual Speaker technology simulates a highly realistic 5.1- speaker surround sound listening environment from as few as two speakers. Dolby Virtual Speaker technology also creates a wider two- channel environment during playback of stereo CDs and MP3 content, and when combined with Dolby Pro Logic II processing, delivers a virtual surround listening experience from any high-quality stereo source. -
Page 22: Listening To An Ipod
< Make sure to use an appropriate dock adapter (page 18). < The iPod is recharged when it is plugged into the dock and the DR-H358i is on. While the unit is on standby, the iPod is not recharged because the unit’s power consumption is minimized to meet the regulation of IEA. -
Page 23: Menu Operations
Menu operations Repeat playback Going back to the previous menu Each time the REPEAT button is pressed, the repeat mode of iPod changes as follows: Press the MENU button. Repeat 1 (repeat one song) This button has the same functions as its iPod counterpart. Repeat All (repeat all the songs in the list) Selecting the menu item Repeat Off... -
Page 24: Listening To A Disc
DVD VCD MP3 WMA JPEG DIVX Listening to a Disc Press the SOURCE button to select “DISC Source”. Press the Open/Close button ( L ) again to close the tray. The tray will close. Take care that you do not catch your fingers <... -
Page 25: Listening To An Usb Memory Device
< Hard disk drives, CD/DVD drives, and others connected via USB cannot be used. < The DR-H358i cannot copy, move, or delete files. < Playable format: FAT12, FAT16, FAT32 < NTFS, HFS, HFS+ cannot be used. - Page 26 VCD MP3 WMA JPEG On-screen Menu (2) Video CDs with PBC MP3 and Windows Media-formatted audio files When a Video CD (Version 2.0) or Super Video CD with Playback When a disc or USB is loaded, a list of directories appears on the Control functions (PBC) is loaded, a menu will appear on the screen.
-
Page 27: Basic Operations For A Disc And Usb Memory Device
Basic Operations for a Disc and USB Memory Device JPEG files Pausing playback (Freezing the picture) Choose a picture in the directory list by pressing the 5/b buttons. Press the Play/Pause button (y/J) to pause audio playback. Any After a short wait a thumbnail of the picture will appear on the DVD or video CD image is frozen. -
Page 28: Skipping Playback
DVD VCD MP3 WMA JPEG DIVX DVD VCD MP3 WMA JPEG DIVX Skipping Playback Selecting a Chapter or Track Use the Number buttons to select tracks or chapters for playback. For instance, to select track number 35, press “10”, “10”, “10” and “5”. Press the Skip button (.//) repeatedly until the desired chapter or track is found. -
Page 29: Selecting Subtitles
DVD VCD JPEG DIVX Selecting Subtitles Picture Zoom Repeated presses of the SUBTITLE button cycle through available To zoom the picture, press the ZOOM button during playback. languages on a disc. Each time the ZOOM button is pressed, the magnification level <... -
Page 30: Repeat And Shuffle Playback
DVD VCD MP3 WMA JPEG DIVX Repeat and Shuffle Playback Each time the REPEAT button is pressed, the mode is changed as Repeat chapter/Repeat track/Repeat one follows: The currently selected chapter/track/file will be played repeatedly. If another chapter/track/file is selected during repeat playback, the newly-selected chapter/track/file will repeat. -
Page 31: A-B Repeat Playback
DVD VCD MP3 WMA DIVX DVD VCD DIVX A-B Repeat Playback Changing the Display Mode You can Repeat Playback of a designated section. Each time the OSD (On Screen Displays) button is pressed during playback, following information appears on the screen. Start playback and designate the point at which the A-B repeat should start (point A) by pressing the A-B button. -
Page 32: Time Search (Vcd/Cd)
MP3 WMA Time Search (VCD/CD) Time Search (MP3/WMA) You can start playback from the specified hour/minute. You can start playback from the specified hour/minute. During playback, press the TIME button. During playback, press the TIME button twice. To search within the entire disc Press the TIME button once. -
Page 33: Chapter Search/ Time Search (Dvd)
DIVX Chapter Search/ Time Search (DVD) Chapter Search/ Time Search (DivX) Chapter Search Chapter Search You can start playback from the beginning of the specified chapter. You can start playback from the beginning of the specified chapter. During playback, press the TIME button. During playback, press the TIME button. -
Page 34: Programmed Playback (Dvd, Vcd, Cd)
DVD VCD Programmed Playback (DVD, VCD, CD) Up to 20 chapters/tracks can be programmed in the desired order. When the selection of chapter/track numbers is completed, select “START” using the Cursor buttons and press the Enter button to start programmed playback. If another source is selected, press the DISC button to select “DISC Source”. -
Page 35: Programmed Playback (Mp3, Wma, Divx)
MP3 WMA DIVX Programmed Playback (MP3, WMA, DIVX) If another source is selected, press the SOURCE button to Highlight the first file in the programme list using the select “DISC Source” or “USB Source”. Cursor buttons. < You can also select “DISC Source” or “USB Source” by using the SOURCE button on the main unit. -
Page 36: Settings (Introduction)
Settings (Introduction) This chapter describes how to use the SETUP menu. Most settings and Enter the menu item with the right Cursor button ( t ). adjustments are required to be set when you first use the system. Using the SETUP menu, you can adjust the picture size, set a preferred language for audio, the OSD (On Screen Displays), and limit playback by children, etc. -
Page 37: Settings (General Setup)
OSD (On Screen Display) LANGUAGE The shape of the television or monitor may not match the shape of Select the desired language for onscreen menus of DR-H358i from the movie frame. To avoid distortion on older televisions, you may the following: need to change the way in which the image is displayed. -
Page 38: Settings (Audio Setup)
Right channel is output from the front left and right speakers. an image to appear after video signals are input, causing the image to appear after the sound coming from the DR-H358i is heard. If this happens or audio and video synchronization creates a less... -
Page 39: Settings (Video Setup) (1
In case you select “PROGRESSIVE” by mistake, disconnect the CONTRAST connection of the DR-H358i and the TV, and then connect in This adjusts the picture contrast. again. And change the setting to “INTERLACE” in the Video Setup Use the left and right buttons to change the value, and press the menu. -
Page 40: Hdmi
Settings (Video Setup) (2) Settings (Preference) HDMI TV TYPE AUTO (default) PAL (Default) Select this to have the signal output when your TV or monitor is Select this when the unit is connected to a PAL TV. connected to the HDMI out terminal. AUTO Select this when the unit is connected to a MULTI TV. -
Page 41: Parental (Parental Control)
Settings (Password Setup) PARENTAL (Parental control) PASSWORD MODE Playback of some DVD discs can be limited depending on the age of You can temporarily unlock discs for playback according to the level. the users. The parental control system allows the playback limitation level to be set by the parent. -
Page 42: Listening To The Dab Radio
Listening to the DAB Radio SCAN Manual Tuning SELECT While listening to DAB radio, press the SELECT button. TUNING MEMORY The signal strength is displayed. Check the antenna adjustment or positioning for the best reception. Auto Scan (Local Scan) Select “DAB Radio” using the SOURCE button. Press the SELECT button again to display the band name and frequency. -
Page 43: Display Setting Of The Dab
Display Setting of the DAB You can choose the type of information displayed in the second line Ensemble name of the display while listening to or tuning in a DAB station. This displays the name of the Ensemble that is broadcasting the programme. -
Page 44: Using The Dab Menu
Using the DAB Menu (1) In DAB mode, use the DAB menu to access various functions. Local scan (Auto scan) The unit will scan the DAB bands between 10A to 13F and add the Each time the INFO/REPEAT button is pressed, the options change channels found to the channel list. - Page 45 Manual tune This option allows you to manually tune in a channel and view a Use this option to set the Dynamic Range Control (DRC) value to continuously updated indication of the strength of the signal. This be applied to received broadcasts. DRC is used to reduce the range could be useful when adjusting or positioning an antenna for better between high and low volumes of audio and is sometimes applied reception.
-
Page 46: Main Menu
Using the DAB Menu (2) Station order Main menu You can select the order in which stations are listed. You can check the DAB software version and initialize the DAB settings. In DAB menu mode, select “Station order” (page 44). In DAB menu mode, select “Main menu”... -
Page 47: Listening To The Fm Radio
Listening to the FM Radio Select “FM Radio” using the SOURCE button. FM MODE Button Pressing this button alternates between Auto (Stereo) mode and Mono mode. Auto Mode < You can also select “FM Radio” by pressing the TUNER button on FM stereo broadcasts are received in stereo. -
Page 48: Preset Tuning (Dab/Fm)
Preset Tuning (DAB/FM) You can store up to 20 FM and 20 DAB stations. Manual Memory Presetting (DAB/FM) Automatic Memory Presetting (FM only) Select “FM Radio” using the SOURCE button. Tune in a station you want to listen to (page 44). Press the MEMORY button. -
Page 49: Rds (Display Setting Of The Fm)
RDS (Display Setting of the FM) The Radio Data System (RDS) is a broadcasting service which allows How to select preset stations (DAB/FM) stations to send additional information along with the regular radio programme signal. Select “FM Radio” or “DAB Radio” using the SOURCE button. -
Page 50: Listening To An External Source
DR-H358i, use the supplied stereo mini plug cable. < Turning the volume of the mini player up too high may cause the sound from your DR-H358i to be distorted. If this is the case, reduce the volume of the mini player until the distortion Press the SOURCE button to select “AUX1 Source”... -
Page 51: Sleep Timer
Sleep Timer Wake Up Timer (1) The power can be switched off after a specified amount of time. The unit can be programmed to turn on at a specified time. Press the SLEEP button repeatedly until desired time appears on the display. - Page 52 Wake Up Timer (2) Press the Volume buttons to set the start time (minute), Turn the unit on and prepare the source. and then press the TIMER button. To play a disc, select “DISC Source” using the SOURCE button and set a disc. To play an USB memory device, select “USB Source”...
-
Page 53: Troubleshooting
TV image, minimize the volume level of the DR-H358i and output the sound from the TV. Cannot access some setup menu items. e Although it is possible to enter the setup screen while playback... - Page 54 This may occur if a broadcaster changes the label of a service or button (y/J). removes a label whilst you are listening to it. The DR-H358i will try to retune to this station, or alternatively follow the procedure for Auto Tuning on page 42.
-
Page 55: Specifications
Specifications DVD Player General Pickup ... . Semiconductor laser, Wave length 650/790 nm Power requirements ....AC 220 V - 230 V, 50 Hz - 60 Hz Signal system . - Page 56 7733 Telegraph Road, Montebello, California 90640 U.S.A. Phone: (323) 726-0303 TEAC CANADA LTD. 5939 Wallace Street, Mississauga, Ontario L4Z 1Z8, Canada Phone: (905) 890-8008 TEAC MEXICO, S.A. DE C.V. Río Churubusco 364, Colonia Del Carmen, Delegación Coyoacàn, CP 04100, México DF, México Phone: (5255)5010-6000 TEAC UK LTD.
Need help?
Do you have a question about the DR-H358i and is the answer not in the manual?
Questions and answers