Table of Contents
Advertisement
Advertisement
Table of Contents

Related Manuals for FujiFilm Zoom Date 160ez


Summary of Contents for FujiFilm Zoom Date 160ez
- Page 1 Owner’s Manual...
- Page 2 About This Owner’s Manual Details of Operation ☞ : Operation of the camera, helpful information ➜ : see page Note: The circled numbers show the details for items above where there might be ques- tions.
-
Page 3: Table Of Contents
/Menus & Modes ... 6 How to Use the MENU/SET Button ... 7 and Four-direction Button /Quick Start Guide ... 8 An Easy Introduction to Automatic Photography with Your FUJIFILM ... 8 Camera ... 9 AF Lamp ... 10 Viewfinder... -
Page 4: Important Safety Notice
Important Safety Notice This product has been made to be as safe as possible. This product will provide long, safe service when handled correctly. It is important that this product is handled properly and used only to take pictures. For your ease and safety, please follow what is written in this manual. - Page 5 Use only the type of batteries specified in your camera’s instructions. Failure to do this may result in excessive heat buildup or fire. Make sure batteries are stored in a safe, secure place and well out of the reach of any infants, young children or pets. Improper storage could result in a child swallowing a battery.
-
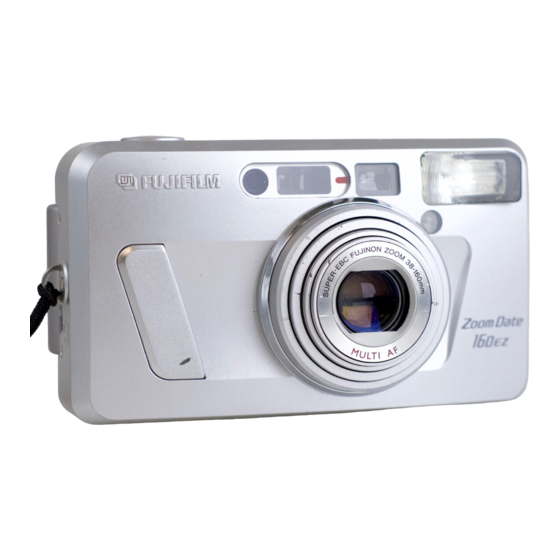
Page 6: Part Names
Part Names AF (Auto-focus) Window Remote Controller Sensor Shutter Release Button ( ➜ p.12) Battery Cover ( ➜ p.11) Strap Lug Battery Cover Release ( ➜ p.12) Knob Film Take-up Spool (➜p.18) FILM TIP Mark (➜p.18) Tripod Socket Mid-roll Rewind Button ( ➜... - Page 7 AF Lamp (green) (➜p.9) Viewfinder Eye-piece (➜p.10) Viewfinder Diopter Correction Dial (➜p.10) Camera Back Lock (➜p.17, 25) Liquid Crystal Display (➜p.6) Battery Status (➜p.13) Power Button (➜p.13) Zoom Button (➜p.20) MENU/SET Button (➜p.7) Four-direction Button (➜p.7) Picture Counter (➜p.18)
-
Page 8: Menus & Modes
3 continu- ous shots When you are far from the camera and want to press the shutter release button. Mode /A FUJIFILM remote controller is required. Used for general photography. Mode Used when taking landscape pictures. /The flash does not fire. -
Page 9: How To Use The Menu/Set Button And Four-Direction Button
How to Use the MENU/SET Button and Four-direction Button /The LCD backlight is green when the power is turned on and when a mode has been set (goes out after 10 seconds). /The LCD backlight is orange while the mode is being selected (goes out after 10 seconds of no operation). -
Page 10: Quick Start Guide
Quick Start Guide An Easy Introduction to Automatic Photography with Your FUJIFILM Camera. Press the POWER button to turn the power on. ☞ a, s and d are displayed on the LCD and the camera is set for automatic mode. -
Page 11: Af Lamp
●AF Lamp ■AF Lamp Status and Meaning Status Photography is possible (Focus and exposure settings com- plete). Out of focusing range. Check that the subject is at least 0.75m (2.5ft.) from the cam- Rapid blinking era. ✽The shutter lock operates in the q mode. Check that the subject is 0.65 –... -
Page 12: Viewfinder
Quick Start Guide ●Viewfinder AF (Auto-focus) Frame ●Viewfinder Diopter Adjustment Parallax Framing Area Correction Compose the picture within this area. Guides AF (Auto-focus) Frame Framing Position this frame over the main sub- Area ject in your picture. Parallax Correction Guides When taking pictures at close dis- tances (closer than 1.3m/4.3ft.), use these guides to compose the picture... -
Page 13: Attaching The Strap
ATTACHING THE STRAP /Do not use a strap made for cellular phones or other products. These straps are usually too weak to hold your camera securely. For safety, use only straps made for cameras. Slip the thin piece of the camera strap through the small hole on the left side of the camera and leave a loop. -
Page 14: Loading The Battery
LOADING THE BATTERY /One new lithium battery should be enough for about 200 pictures (based on our test conditions). /When traveling, take extra batteries in the event the batteries stop working. This is important if you visit areas where new batteries may be difficult to get. Your camera requires one 3V lithium battery, type CR2/DL CR2. -
Page 15: Turning On And Off The Camera
TURNING ON AND OFF THE CAMERA/ CHECKING THE BATTERY CHECKING THE BATTERY /When you are finished using the cam- era, turn the power off to keep the bat- tery working longer. If the power sup- ply is left on for more than 7 minutes without the camera being used, the camera will turn itself off. -
Page 16: Setting The Date
SETTING THE DATE Setting the Date When Loading or Changing the Battery /You can set: Year: '02 to '32 (2002 to 2032) Month: 1 to 12 Day : 1 to 31 Time: 0 to 23 Hours: 00 to 59 minutes (Based on a 24-hour clock) Turn the camera on and press the MENU/SET button. - Page 17 Changing the Date After Setting It When the date has been set, press the MENU/SET button. ☞ The LCD changes to green and the date set is shown. ☞ To set the time (hour or minute) by the radio, press the MENU/SET button when the time signal indicates zero.
-
Page 18: Selecting The Date Mode
SELECTING THE DATE MODE Turn the camera on and press the MENU/SET button. ☞ The LCD lights orange and the menu selection mode is entered. Press the zx buttons to make the DATE menu blink. ☞ The date selection mode is entered. Press the cv buttons and select the date mode. -
Page 19: Loading The Film
LOADING THE FILM Number of Pictures DX Code Symbol Film Speed (sensitivity to light or ISO rating) /If non-DX coded film is used, the cam- era’s automatic exposure system sets itself to ISO 100. /Always load and remove film from the camera away from direct sunlight. - Page 20 LOADING THE FILM FILM TIP Mark Film Take-up Spool 5Hold the film down so that it does not pop out. 5Make sure the end of the film is cor- rectly threaded onto the spool. 5If the film should be pulled out too far, remove the film and turn the longer end of the spool slowly to rewind some of the exposed film and adjust the end...
-
Page 21: Using The Camera
USING THE CAMERA When the camera is turned on, the camera is set for automatic mode. How to take pictures with the automatic mode is explained here. /Refer to “Advanced Techniques” (➜p.28) for details how to use the other modes. <Holding the Camera>... - Page 22 USING THE CAMERA <Zooming> <Composing the Picture> 2The focusing range for clear pictures in the d mode is a minimum of 0.75m (2.5ft.) with no maximum. Change the focus mode in the following cases. /Long distance photography: hmode (➜p.38) /Macro photography (focusing range 0.65 – 1.3m/2.1 – 4.3ft.): q mode (➜p.39) To use the zoom lens, press the e mark until you see your subject in the viewfinder.
- Page 23 <Pressing the Shutter Release Button Down Halfway> <Pressing the Shutter Release Button Down Completely> 4If you are closer than 75cm (30in.) to the subject, the AF lamp will start blink- ing rapidly to warn you that the subject cannot be focused. If you are closer than 30cm (12in.) to the subject, the AF lamp is blinking slowly and the sub- ject cannot be focused (➜p.9).
-
Page 24: Close-Up Photography
USING THE CAMERA ●Close-up Photography Viewfinder When photographing a subject that is closer than about 1.3m (4.3ft.) from the camera, the area within the guide will be in the picture (see the diagram above). Compose the picture so that the subject that you want is within the guide. - Page 25 ●Subjects not Suitable for Auto-focus There are a few conditions when the camera’s auto-focus system may not work well. At these times, use the “Auto-focus Lock” settings (➜p.24) or the “Landscape Mode” setting (➜p.38). Here are some examples: /A bright light source within the picture such as the sun near the sub- ject, a strong light reflection such as from water or from the wind- shield of a car;...
-
Page 26: Using The Auto-Focus Lock
USING THE AUTO-FOCUS LOCK In the example shown at left, the AF frame is off the subject (in this case, the people). In this case the lens will not focus on the subject but the background. Move the camera to position the AF frame over the subject. -
Page 27: Taking Out The Film
TAKING OUT THE FILM Taking Out the Film /When taking out the film, take care not to touch the lens, and prevent dust or other debris form getting in the camera. /Sometimes more photographs can be taken than the stated number of pic- tures, but the final frame may not be printed. - Page 28 TAKING OUT THE FILM Taking Out the Film in Mid-roll /Film cannot be reused once it has been rewound. Do not press the n button except when taking out the film for developing. /Do not press the n button with any object that has a sharp point such as a pin, needle or a very sharp pencil.
- Page 29 ●Cautions to Be Handled When the Film is Loaded in the Camera /Do not open the camera back while the film in mid-roll is loaded in the camera. ☞ If the camera back is opened while the film in mid-roll is loaded in the camera, the film may be exposed to the light and your pictures lost.
-
Page 30: Flash Modes
SELECTING THE FLASH MODE ●Flash Modes Intelligent Multi- Flash programmed mode Flash Mode /Unless the d mode is set, the a mode is set when the power is turned off. The d mode is kept even when the power is turned off. /The w mode is cancelled after each shot. -
Page 31: Effective Flash Range
●Effective Flash Range The flash distance will vary depending upon the film speed (sensitivity to light or ISO rating). When using the flash, keep the subject within the flash range indicated in the chart below. Film speed ISO 100 ISO 400 ISO 800 ISO 1600 /When the a, d, f or w mode is... - Page 32 SELECTING THE FLASH MODE a Intelligent Multi-programmed Flash Mode Red-eye Reduction Flash Mode ●Dealing with Red-eye When you photograph a person in dim light using the flash, the eye will sometimes appear red in the finished photo. Under low light, the pupils of the eye get bigger for better vision.
- Page 33 f Fill-in Flash Mode g Flash-off Mode w Night Portrait (Slow Sync) Mode Use this mode to avoid deep shadows against the light. For example a person standing in front of a window or under a tree with a very bright background. This pro- duces more natural looking photographs.
-
Page 34: Selecting The Self-Timer Mode
SELECTING THE SELF-TIMER MODE ●Self-timer Modes Self-timer/ Self-timer Remote Controller Off Mode mode (Normal Mode) q¡ q™ Self-timer Self-timer Mode Mode 2 continuous 1 shot shots Turn the camera on and press the MENU/SET button. ☞ The LCD lights orange and the menu selection mode is entered. - Page 35 /You can select the auto-focus lock mode also (➜p.24). /The s mode is set when the power is turned off. /This mode is cancelled after each shot. Compose the picture and press the shutter release button. The camera focuses on the sub- ject that the AF frame is positioned over.
-
Page 36: Selecting The Remote Controller Mode
/The battery life is about 3 years (based on our test conditions). If the remote con- troller no longer works, contact your local retailer where you bought your camera or a FUJIFILM service center. A replacement battery will be available at only a small cost. - Page 37 /This mode is not cancelled after shooting. It is cancelled when the power is turned off. Turn the camera on and press the MENU/SET button. ☞ The LCD lights orange and the menu selection mode is entered. Press the zx buttons to make the SELF-TIMER menu blink/light.
- Page 38 SELECTING THE REMOTE CONTROLLER MODE 20° 20° 3.5m (11.5ft.) /A tripod is useful when taking pictures by remote controller. /The remote controller may not work well when direct sunlight enters the camera’s light sensor from behind your subject. Use the q mode (➜p.32) in this case. Aim the AF frame at your subject and compose the picture.
-
Page 39: Selecting The Focus Mode
SELECTING THE FOCUS MODE /The d mode is set when the power is turned off. /When the h and q modes are cancelled after each shot. When you want to use this mode continuously, hold the MENU/SET button down for 2 seconds or longer after choosing the mode (The chosen mode will continue to blink even after it is set). - Page 40 SELECTING THE FOCUS MODE ●Available Flash Modes in the Focus Mode Focus mode Available flash mode ✽1 When the h mode is selected, the g is set. ✽2 When the q mode is selected while setting the d or w mode, the a mode is selected.
-
Page 41: Macro Mode
q Macro Mode Parallax Correction Guides /The focusing range for clear pictures in this mode is from 0.65m (2.1ft.) to 1.3m (4.3ft.). /Since the close-up photography, compose the picture so that the subject is within the parallax correction guides. /When the subject is out of the focusing range, the AF lamp blinks rapidly and the shutter cannot be released (➜p.9). -
Page 42: Intelligent Multi-Programmed Flash
Intelligent Multi-programmed Flash A word on intelligent multi-programmed flash Distanse Distanse Brightness of Brightness of the subject the subject Focal length of Focal length of the lens the lens A new function allows the camera to adjust the amount of light put out by the flash by looking at the brightness of the subject, the distance, and the length of the lens. - Page 43 ●Portrait photography under very bright light When a person is photographed in bright daylight, his (her) face is likely to be spotted with shadows of the hair and nose. Even in such a case, the intelligent multi-programmed flash fires to reduce the shadows. Compare a pic- ture taken with the special flash and a picture taken without using this special flash.
-
Page 44: Trouble Shooting
Trouble Shooting During operation Problems q Is “ The shutter can- not be released. w Doesn’t the power turn e Is “f” blinking on the r Is “´” displayed on the t Is the AF lamp blinking in /Is the film pulled out to After loading the film and closing the camera back,... - Page 45 Problems Possible Causes /The camera is broken. “q” blinks and the shutter can- not be released. Printed picture Problems Possible Causes q Was your finger on the Picture is not sharp. AF windows when shoot- ing? w Did you aim the subject properly? e Was the lens dirty? r Was your camera mov-...
- Page 46 Trouble Shooting Problems Printed date/time /Didn’t you set correct is incorrect. The date is not q Did you select the “ printed on the front./The date is not printed clear- w Was there something Possible Causes date and time after replacing with the bat- tery? ”...
-
Page 47: Common Sense Camera Care
Common Sense Camera Care 1. Although your camera is designed for many years of service, it is electronic and requires careful handling. Avoid exposing it to shock, moisture or physical abuse. 1) If you use your camera at the beach or in a light rain, protect it from moisture. Do not let your camera get wet. -
Page 48: Specifications
Specifications Film 135 (35mm) DX roll film 24mm × 36mm Picture Size Lens Super EBC Fujinon zoom lens, 6 components, 7 elements, f=38 – 160mm 1:5.8 – 1:12.5 Real image zoom finder, 0.40 – 1.52 × magnification, with AF Viewfinder frame, parallax correction guides, AF lamp, Viewfinder diopter adjustment (Diopter: –2.5 to +0.5) Focusing... - Page 49 108.0 × 61.0 × 45.0mm/4.3 × 2.4 × 1.8in. (main unit), Dimensions & Weight 185g/6.5oz. (without battery) ✽Specifications are subject to change without notice.
- Page 50 Memo...
- Page 51 1-324 UETAKE, KITA-KU, SAITAMA CITY, SAITAMA 331-9624, JAPAN Printed in Indonesia FGS-204110-Ci-01...
Need help?
Do you have a question about the Zoom Date 160ez and is the answer not in the manual?
Questions and answers