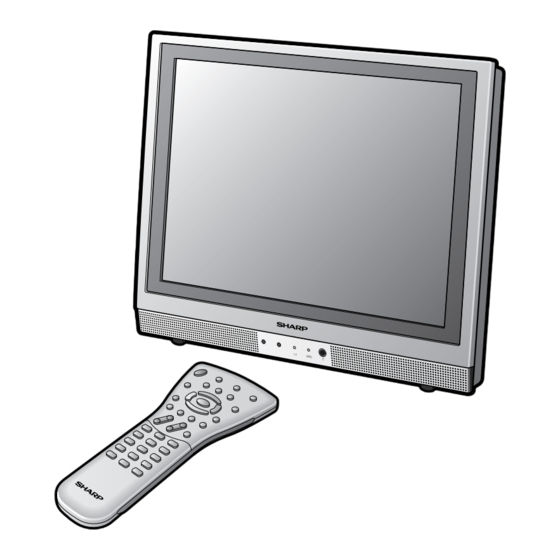
Sharp Aquos LC-13S1E Operation Manual
Lcd colour television
Hide thumbs
Also See for Aquos LC-13S1E:
- Service manual (69 pages) ,
- Service manual (43 pages) ,
- Operation manual (48 pages)
Table of Contents
Advertisement
SHARP CORPORATION
LC-13/15S1E-Cover1-4
1
Printed in Spain
Gedruckt in Spanien
Printed on environmentally friendly paper
Imprimé en Espagne
Auf ökologischem Papier gedruckt
Stampato in Spagna
Imprímé sur papíer écologique
Impreso en España
Stampato su carta ecologica
Tryckt i Spanien
Impreso en papel ecológico
Gedrukt in Spanje
Tryckt på miljövänligt papper
TINS-A839WJZZ
Afgedrukt op ecologisch papier
09-2003
LC-13S1E
LC-15S1E
LCD COLOUR TELEVISION
LCD-FARBFERNSEHGERÄT
TÉLÉVISION COULEUR À ÉCRAN
À CRISTAUX LIQUIDES (LCD)
TELEVISORE A COLORI LCD
TELEVISIÓN EN COLOR LCD
LCD-FÄRG-TV
LCD-KLEURENTELEVISIE
OPERATION MANUAL
BEDIENUNGSANLEITUNG
MODE D'EMPLOI
MANUALE DI ISTRUZIONI
MANUAL DE MANEJO
BRUKSANVISNING
GEBRUIKSAANWIJZING
03.7.17, 1:18 PM
Advertisement
Table of Contents

Related Manuals for Sharp Aquos LC-13S1E


Summary of Contents for Sharp Aquos LC-13S1E
- Page 1 LC-13S1E LC-15S1E LCD COLOUR TELEVISION LCD-FARBFERNSEHGERÄT TÉLÉVISION COULEUR À ÉCRAN À CRISTAUX LIQUIDES (LCD) TELEVISORE A COLORI LCD TELEVISIÓN EN COLOR LCD LCD-FÄRG-TV SHARP CORPORATION LCD-KLEURENTELEVISIE OPERATION MANUAL BEDIENUNGSANLEITUNG MODE D’EMPLOI MANUALE DI ISTRUZIONI MANUAL DE MANEJO BRUKSANVISNING GEBRUIKSAANWIJZING Printed in Spain...
- Page 2 This equipment complies with the requirements of Directive 89/336/EEC and 73/23/EEC as amended by 93/68/EEC. Dieses Gerät entspricht den Anforderungen der EG-Richtlinien 89/336/EWG und 73/23/EWG mit Änderung 93/68/EWG. Ce matériel répond aux exigences contenues dans les directives 89/336/CEE et 73/23/CEE modifiées par la directive 93/68/CEE. Dit apparaat voldoet aan de eisen van de richtlijnen 89/336/EEG en 73/23/EEG, gewijzigd door 93/68/EEG.
-
Page 3: Table Of Contents
LCD COLOUR TELEVISION ENGLISH OPERATION MANUAL Contents Page Page Dear SHARP Customer ........ 2 Useful Features ........... 15 Important Safety Precautions ..... 2 Adjusting Picture Settings ...... 15 Supplied Accessories ........4 Adjusting Sound Settings ....... 15 Preparation ............ 5 Hi-fi Sound Settings ....... -
Page 4: Dear Sharp Customer
Dear SHARP Customer Thank you for your purchase of the SHARP LCD Colour TV product. To ensure safety and many years of trouble-free operation of your product, please read the Important Safety Precautions carefully before using this product. Important Safety Precautions Electricity is used to perform many useful functions, but it can also cause personal injuries and property damage if improperly handled. - Page 5 Important Safety Precautions (Continued) I Cleaning—Unplug the power cord from the AC outlet before cleaning the product. Use a damp cloth to clean the product. Do not use liquid cleaners or aerosol cleaners. I Water and moisture—Do not use the product near water, such as bathtub, washbasin, kitchen sink and laundry tub, swimming pool and in a wet base- ment.
-
Page 6: Supplied Accessories
Supplied Accessories Make sure the following accessories are provided with the product. Wireless remote control (×1) R-03 (“AAA” size, UM/SUM-4) dry battery (×2) AC adapter (×1) AC cord (×1) *Product shape varies in some countries. Operation manual (×1) Cable clamp (×1) LC-13/15S1E(E)-01-10 03.7.17, 0:10 PM... -
Page 7: Preparation
Preparation Installing Batteries in the Remote Control Before using the LCD TV set for the first time, install the two R-03 (“AAA” size, UM/SUM-4) batteries supplied in the remote control. When the batteries become depleted and the remote control fails to operate, replace the batteries with new R-03 (“AAA”... -
Page 8: Power Connection
Preparation (Continued) Power Connection Connect to the DC input terminal of the product. X (MAIN POWER) Household power outlet To POWER INPUT terminal Plug into an AC outlet. AC cord * Product shape varies in some countries. AC adapter Push in the tabs to slide open the cover. -
Page 9: First Installation
Preparation (Continued) First Installation When you turn on the LCD TV set for the first time, the First Installation routine, which makes installation easier, is activated. Using this routine, you can select the on-screen display language, and automatically search for and store all the receivable channels. -
Page 10: Part Names Of Main Unit
Part Names of Main Unit Controls Upper control panel i (–)/(+) (Volume) CH ( )/( ) MENU TV/VIDEO X (MAIN POWER) The screen can be adjusted backwards to an angle between 12 degrees and 35 degrees. The screen cannot be set up straight. - Page 11 Part Names of Main Unit (Continued) Terminals POWER INPUT DC 12V Antenna AV-IN 1 (21-pin Euro-SCART) AUDIO OUT (R) AUDIO OUT (L) Rear View Carrying handle Round lock for Kensington Security Standard Slot. Stand G The screen can be adjusted back- wards to an angle between 12 and 35 degrees.
-
Page 12: Part Names Of Remote Control
Part Names of Remote Control SUBPAGE BRIGHT Displays the Teletext Selects the brightness Subpage directly. and OPC of the display. (P. 33) (P. 22) TEXT HOLD Displays the Teletext mode Temporarily holds the screen. (P. 32) current Teletext page. (P. 34) REVEAL Displays hidden information such as solutions to riddles... -
Page 13: Basic Operation
Basic Operation Turning On and Off the Main Power G Press the X (MAIN POWER) switch. The On-screen display X (MAIN POWER) POWER/STANDBY/Remote sensor indicator instantaneously changes from blinking red to green and the main unit is turned on. • The On-screen indicator disappears after a few seconds. -
Page 14: Sound Volume
Basic Operation (Continued) Sound Volume To adjust the volume G Press i (+) to increase the sound volume. The numerical value increases. SUBPAGE SUBPAGE G Press i (–) to decrease the sound volume. The numerical value decreases. MENU SOUND SOUND MENU MENU To mute the sound... -
Page 15: Selecting Menu Items
Basic Operation (Continued) Selecting Menu Items c/ d • The menus can be used to adjust the various settings of your LCD TV set. Select the desired menu item by following the steps below. SUBPAGE SUBPAGE I Using TV Menus MENU Press MENU on the remote control to SOUND... - Page 16 Basic Operation (Continued) Selecting Menu Items (Continued) I TV Menu Setting Screens (Page 15) For details on using each setting screen, refer to the page number indicated. (Page 15) (Page 17–20) (Page 29) (Page 21–26) (Page 7) (Page 27–28) (Page 7) •...
-
Page 17: Useful Features
-30 – 30 Higher colour intensity Black level Less brightness -30 – 30 More brightness Sharpness Soft picture -5 – 5 Sharp picture Tint Towards purple -30 – 30 Towards green Reset Reset value (Press OK.) Adjusting Sound Settings SUBPAGE... -
Page 18: Hi-Fi Sound Settings
Useful Features (Continued) Hi-fi Sound Settings This programme allows you to enjoy higher sound quality when connecting the AUDIO OUT terminals to an external amplifier using an audio cord. SUBPAGE SUBPAGE When switching “Sound via” to “Hi- fi” in the Sound menu on page 15, the sound from the built-in speakers will be turned off. -
Page 19: Programmes
Useful Features (Continued) Programmes [1] Automatic search Perform the procedure below to search for and store new programmes after the First Installation routine. Press MENU to display the TV menu. SUBPAGE SUBPAGE Press a/b to select “Programmes”, MENU and then press OK to display the SOUND SOUND MENU... - Page 20 Useful Features (Continued) Programmes (Continued) [2] Manual adjustment Individual settings of programmes can be adjusted. Perform steps 1 and 2 in [1] Automatic search to display the “Programmes” screen. SUBPAGE SUBPAGE Press a/b to select “Manual adjustment”, and then press OK to display the “Manual adjustment”...
- Page 21 Useful Features (Continued) Programmes (Continued) [3] Sort The programme positions for individual programmes can be freely changed. Perform steps 1 and 2 in [1] Automatic search to display the “Programmes” screen. Press a/b to select “Sort,” and SUBPAGE SUBPAGE then press OK to display the “Sort”...
- Page 22 Useful Features (Continued) Programmes (Continued) [5] Enter/change name The name of an individual programme can be entered or changed. Perform steps 1 and 2 in [1] Automatic search to display the “Programmes” screen. SUBPAGE SUBPAGE Press a/b to select “Enter/ change name”, and then press OK to display the “Enter/change MENU...
-
Page 23: Features
Useful Features (Continued) Features The Features items can be set by the user. Press MENU to display the TV menu. Press a/b to select “Features”, and then SUBPAGE SUBPAGE press OK to display the “Features” screen. MENU SOUND SOUND MENU MENU MENU Press a/b to select the desired... - Page 24 Useful Features (Continued) Features (Continued) You can change the setting screen of Brightness and Rotate directly. BRIGHT [1] Directly Setting the Brightness ROTATE Press BRIGHT to display the Brightness screen. SUBPAGE SUBPAGE B r i g h t n e s s : b r i g h t Each time you press BRIGHT, the mode changes as follows.
-
Page 25: On-Screen Display
Useful Features (Continued) On-screen Display SUBPAGE SUBPAGE You can adjust various settings for on-screen displays. MENU SOUND SOUND MENU MENU Perform steps 1 and 2 in Features to Cyan display the “Features” screen. Press a/b to select “On-screen display” and then press OK to display the “On- screen display”... - Page 26 Useful Features (Continued) Child Lock (Continued) [2] Changing/Cancelling a PIN To change a PIN Perform steps 1 to 3 in [1] Defining a PIN SUBPAGE SUBPAGE to display the PIN input screen. Enter your four-digit PIN (e.g. 1234) with MENU SOUND SOUND MENU...
- Page 27 Useful Features (Continued) Child Lock (Continued) [3] Setting a Child Lock There are four different ways of activating a child lock: 1. General child lock for all programmes immediately 2. General child lock for all programmes with daily time limit 3.
- Page 28 Useful Features (Continued) Child Lock (Continued) [3] Setting Child Lock (Continued) To set a Child Lock for individual programmes without time limit Perform steps 1 to 3 in SUBPAGE SUBPAGE [2] Changing/Cancelling a PIN to display the “Child lock” screen. MENU Press a/b to select “For individual SOUND...
-
Page 29: Av Connections
Useful Features (Continued) AV Connections It is possible to manually adjust various settings for connections with external devices on the “AV connections” screen. [1] AV1/AV2 Select the appropriate signal type and colour standard for the signals from the video equipment connected to the AV1or AV2 terminal. Press MENU to display the TV menu. - Page 30 Useful Features (Continued) AV Connections (Continued) [2] For programmes • The influence of the AV control voltage and of fast blank at programme positions from 0 to 199 can be set. • When connecting a video device to the AV1 terminal, you need to adjust the decoder programme settings.
-
Page 31: Timer Functions
Useful Features (Continued) Timer Functions Press Yellow to display the “Timer functions” screen. SUBPAGE SUBPAGE • The “Timer functions” screen can also be displayed by selecting “Timer functions” in the TV menu. (See pages 13 and 14.) MENU SOUND SOUND MENU MENU Press a/b to select “Time”, and then... -
Page 32: Nicam Broadcast Selection
Useful Features (Continued) NICAM Broadcast Selection This enables the selection of the reception mode when receiving a NICAM-I or NICAM-B/G signal. To let you enjoy NICAM broadcasting, this LCD TV set receives NICAM stereo system, bilingual, and monaural broadcasts. Stereo The LCD TV set is receiving a stereo broadcast. -
Page 33: A2 Stereo Broadcasts
Useful Features (Continued) A2 stereo Broadcasts This enables the selection of the reception mode when receiving an A2 stereo-B/G signal. To let you enjoy A2 stereo broadcasting, this LCD TV set receives A2 stereo system and bilingual broadcasts. Stereo The LCD TV set is receiving a stereo broadcast. •... -
Page 34: Teletext
Teletext is activated with TEXT on the remote control and is also closed with it. 3 6 9 SHARP - T EXT 0 2 : 5 2 : 2 1 The LCD TV set can be controlled in Teletext mode directly by inputting commands with the remote control and indirectly through the on-screen display (menu system). - Page 35 Press SUBPAGE. The control line with 3 6 9 SHARP - T E X T 0 2 : 5 2 : 2 1 the subpage numbers is displayed on line 24, and the number of the currently SUBPAGE selected subpage is displayed in blue.
- Page 36 Teletext (Continued) [5] Using Teletext menu To select the character set HOLD Press MENU to display the “Character Character set set” screen. TEXT West Europe East Europe Press a/b to select the desired Turkish/Greek character set. REVEAL SUBPAGE SUBPAGE • The colour of the letters will turn to yellow. Cyrillic When selecting the character set, pressing OK will change the letters to grey for an...
-
Page 37: Connecting External Devices
Connecting External Devices It is possible to enjoy video and sound by connecting a VCR and home video game system to the terminals located on the rear of the main unit. When connecting an external device, turn off the power of the main unit and connecting device to prevent any possible damage. -
Page 38: 21-Pin Euro-Scart (Rgb)
Connecting External Devices (Continued) Connecting a Decoder through the 21-pin Euro-SCART (AV-IN 1/RGB) 21-pin Euro-SCART (RGB) 1. Audio right output 8. Audio-video control 15. RED input 2. Audio right input 9. Earth for green 16. RED/GREEN/BLUE control 3. Audio left output 10. -
Page 39: How To Fix The Cables
Connecting External Devices (Continued) Connecting a VCR or a home video game system (AV-IN 2) To S-VIDEO To AV-IN 2 To AV-IN 2 input terminal terminals terminals S-Video cord Audio/video cord Audio/video cord To S-Video To audio/video To audio/video output terminal output terminals output terminals Video Audio... -
Page 40: Troubleshooting
Troubleshooting Before calling for repair services, make the following checks for possible remedies to the symptoms encountered. LCD TV set Reference Problem Check item page • Make sure the AC adapter is properly inserted in the power outlet. Picture Sound •... -
Page 41: Specifications
Cable clamp I As a part of policy of continuous improvement, SHARP reserves the right to make design and specification changes for product improve- ment without prior notice. The performance specification figures indicated are nominal values of production units. There may be some deviations from these values in individual units. -
Page 42: Dimensional Drawings
Dimensional Drawings I LC-13S1E Unit: mm LC-13/15S1E(E)-37-43 03.7.17, 0:22 PM... - Page 43 Dimensional Drawings I LC-15S1E Unit: mm LC-13/15S1E(E)-37-43 03.7.17, 0:22 PM...
- Page 44 LC-13/15S1E(E)-37-43 03.7.17, 0:22 PM...
- Page 45 IMPORTANT NOTE ON DISENGAGING ADVANCED CHILD LOCK We suggest removing the following instruction respectively with page 41 and 43. As this Operation Manual is multilingual, we also suggest the same with each language. If you have forgotten your personal code number and cannot disengage ADVANCED CHILD LOCK, follow the procedure below. 1.
- Page 46 LC-13/15S1E(E)-37-43 03.7.17, 0:22 PM...
- Page 47 AVISO IMPORTANTE SOBRE LA DESACTIVACIÓN DE LA PROTECCIÓN PARA NIÑOS AVANZADA Se sugiere retirar las siguientes instrucciones respectivamente con las páginas 41 y 43 en inglés. Como este manual de manejo es multilingüe, también sugerimos lo mismo para cada idioma. Si ha olvidado su número de código personal (PIN) y no puede desactivar la PROTECCIÓN PARA NIÑOS AVANZADA, siga el procedimiento siguiente.
Need help?
Do you have a question about the Aquos LC-13S1E and is the answer not in the manual?
Questions and answers