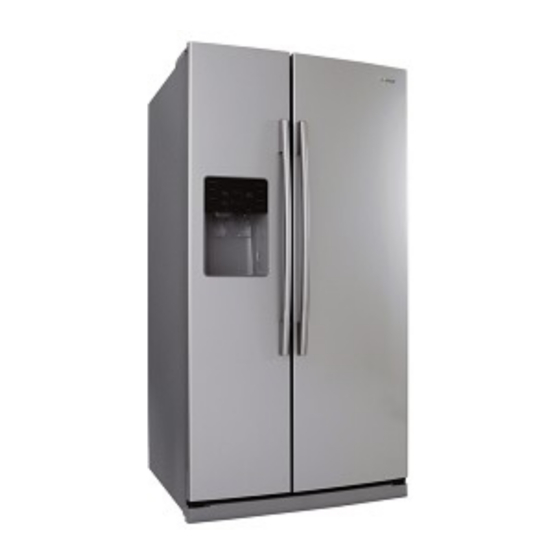
Samsung RS263B Series User Manual
Hide thumbs
Also See for RS263B Series:
- Owner's manual and installation (32 pages) ,
- Owner's manual & installation (64 pages) ,
- Owner's manual and installation (4 pages)
Table of Contents
Advertisement
Write the model and serial number here:
Model #
Serial #
Find these numbers on a label of the
refrigerator's cabinet on the left hand-side wall.
OWNER'S MANUAL AND INSTALLATION
Register your product at www.samsung.com/global/register
CONTENTS
...............................................................2
........................................................4
SETTING UP THE REFRIGERATOR.........................................................4
MAJOR FEATURES .....................................................................................4
CONTROL PANEL........................................................................................5
DIGITAL PANEL...........................................................................................6
TEMPERATURE CONTROL .......................................................................7
ICE and COLD WATER DISPENSER .........................................................7
SHELVES and BINS.....................................................................................8
FOOD STORAGE GUIDE ...........................................................................9
TM
Drawer GUIDE.............................................................11
REMOVING THE FREEZER ACCESSORIES..........................................13
REMOVING THE REFRIGERATOR ACCESSORIES..............................13
CLEANING THE ACCESSORIES .............................................................14
CHANGING THE INTERIOR LIGHT .........................................................15
WATER FILTER ..........................................................................................16
DOORS.......................................................................................................16
INSTALLATION INSTRUCTIONS
INSTALLATION OF THE REFRIGERATOR .............................................17
REMOVING THE REFRIGERATOR DOORS ...........................................18
REATTACHING THE REFRIGERATOR DOORS......................................21
LEVELING THE REFRIGERATOR............................................................24
ADJUSTING THE CLEARANCE BETWEEN THE DOORS ....................25
CHECKING THE WATER DISPENSER LINE...........................................26
INSTALLATION OF THE WATER DISPENSER LINE...............................27
TROUBLESHOOTING ...............................................................................29
....................................................................30
WARRANTY ...............................................................................................30
In the U.S. for questions about features,
operation/performance, parts, accesories or service, call:
1-800-726-7864 (1-800-SAMSUNG)
www.samsung.com
SIDE BY SIDE
REFRIGERATOR
RS263B **
RS265B **
RS267B **
RS264A **
................................................17
DA99-01278A REV(0.4)
RS265L **
RS267L **
RS269L **
Advertisement
Table of Contents

Subscribe to Our Youtube Channel
Related Manuals for Samsung RS263B Series


Summary of Contents for Samsung RS263B Series
-
Page 1: Table Of Contents
CHECKING THE WATER DISPENSER LINE...........26 INSTALLATION OF THE WATER DISPENSER LINE.......27 TROUBLESHOOTING ................29 CONSUMER SUPPORT ..............30 WARRANTY ....................30 In the U.S. for questions about features, operation/performance, parts, accesories or service, call: 1-800-726-7864 (1-800-SAMSUNG) www.samsung.com Register your product at www.samsung.com/global/register DA99-01278A REV(0.4) -
Page 2: Safety Warning Signs
SAFETY WARNING SIGNS • Before operating the appliance, please read and retain this manual thoroughly for your reference. • Because these following operating instructions cover various models, the characteristics of your refrigerator may differ slightly from those described in this manual. •... - Page 3 • Take off the doors Safety Caution section • Leave the shelves in places so that children may • Samsung does not recommend 3rd party modifica- not easily climb inside. tion, therefore Samsung is not responsible for safety issues that result from 3rd party modifications.
-
Page 4: Operating Instructions
SETTING UP THE REFRIGERATOR Once you have performed the following steps, your refrigerator should be fully operational. If not, check the power supply and electricity source. If you have any questions, contact your SAMSUNG service center. Place the refigerator in an appropriate... -
Page 5: Control Panel
CONTROL PANEL RS263B ** /RS265L ** /RS264A ** RS265/RS267B ** /RS267/RS269L ** FREEZER BUTTON To set the freezer temperature, press the FRIDGE BUTTON button repeatedly to change the set tem- To set the fridge temperature, press the button perature in sequence between repeatedly to change the set temperature in 8°F and -14°F. -
Page 6: Digital Panel
DIGITAL PANEL RS263B ** / RS265L ** / RS264A ** RS265/RS267B ** /RS267/RS269L ** Freezer indicates the current freezer temperature. Fridge indicates the current refrigerator temperature. Quick Cool, Thaw, and Select show the status of the CoolSelect Zone Drawer Power Freeze •... -
Page 7: Temperature Control
TEMPERATURE CONTROL Freezer Refrigerator • The refrigerator temperature can be set between • The freezer temperature can be set between 46°F and 34°F. 8°F and -14°F. • Press the Fridge. button repeatedly until the desired • Press the Freezer. button repeatedly until the desired temperature is shown in the temperature display. -
Page 8: Shelves And Bins
SHELVES AND BINS Freezer Xtra Space Door Bin Ice Maker Light Ice Chute Glass Shelf Wire Shelf Light Switch Tilt Pockets Plastic Drawers Wire Drawers Front Leg Cover RS263B ** /RS265L ** / RS265/RS267B ** / RS264A ** Model RS267/RS269L ** Model Refrigerator Dairy Compartment Water Filter Compartment... -
Page 9: Food Storage Guide
FOOD STORAGE GUIDE FROZEN FOOD STORAGE IN FREEZER Ice chute Do not put your fingers, hands or any other unsuitable objects in the chute or ice-maker bucket, as this may result in personal injury or material damage. WARNING Door Bin (Tilt Pocket, RS265 / RS267B ** / RS267/ RS269L ** ) •... - Page 10 FOOD STORAGE GUIDE CHILLED FOOD STORAGE IN REFRIGERATOR Wine Shelf (RS265 / RS267B ** / RS267/ RS269L**/RS264A**) • Place your wine bottles on the shelf to maintain their taste. Tempered Spill Proof Glass Shelf • Can be used to store all types of chilled food. •...
-
Page 11: Coolselect Zone
CoolSelect Zone Drawer GUIDE RS265/RS267B ** /RS267/RS269L ** “Quick Cool” Button • You can use the Quick Cool feature with the CoolSelect Zone • “Quick Cool” allows 1~3 canned beverages to cool within 60 min. • To cancel this option, press the “Quick Cool” button again. CoolSelect Zone returns to the previous temperature. - Page 12 CoolSelect Zone Drawer GUIDE “Select” Button Soft Freeze • When “Soft Freeze” is selected, the temperature on the digital panel displays 23°F(-5 C), regardless of the set temperature of the refrigerator. • “Soft Freeze” temperature helps keep meat and fish fresh for longer.
-
Page 13: Removing The Freezer Accessories
REMOVING THE FREEZER ACCESSORIES Glass Shelf Ice Maker Bucket • Remove the bucket by lifting up and pulling out. • Pull the shelf out as far as it goes. Then lift it up and remove it. Door Bin Front Leg Cover •... -
Page 14: Cleaning The Accessories
CLEANING THE ACCESSORIES Interior • Clean the accessories with a mild detergent, then wipe out with a dry cloth. • After washing the accessories, make sure that they are dry before using them again. Exterior • Wipe the digital panel and display panel with a clean cloth. •... -
Page 15: Changing The Interior Light
CLEANING THE ACCESSORIES Twin Deodorizer (on some models) • Remove the cover with a flat blade screw driver as shown. • Take out the cartridge from the cover and soak it in clean and warm water for at least 4 hrs. Completely dry out the cartridge in sunlight for at least 8 hrs in an open area. •... -
Page 16: Water Filter
Ordering Replacement Water Filter • For replacement waster filter you can visit your local home center or contact the Samsung Parts distributor. Be sure the replacement water filter has the SAMSUNG logo on the box and the water filter. Link : http://www.samsungparts.com... -
Page 17: Installation Of The Refrigerator
INSTALLATION OF THE REFRIGERATOR Checking the Dimensions of your Entrance Door Check the dimensions of your entrance door to determine whether the refrigerator can pass through it. Model RS263/RS264/RS265/RS267/RS269 26.1 Capacity (Cu. Ft) Width 35.9 without Hinge 68.8 Case Height Dimension with Hinge (inches) -
Page 18: Removing The Refrigerator Doors
REMOVING THE REFRIGERATOR DOORS Removing the Front Leg Cover Open the freezer and refrigerator doors, and then take off the front leg cover by turning the three screws counter-clockwise. FRONT LEG COVER SCREW Separating the Water Supply Line from the Refrigerator Remove the water tube by pressing the coupler ( ➁... -
Page 19: Removing The Freezer Door
REMOVING THE REFRIGERATOR DOORS • Lift the door straight up. • Be careful not to pinch the water tubing and wire harness on the door. NOTE • Place doors on a protected surface. Removing the Freezer Door 1) With the door closed, remove the upper hinge cover (➀) using a screwdriver, and then disconnect the wires (➁). -
Page 20: Removing The Refrigerator Door
REMOVING THE REFRIGERATOR DOORS Removing the Refrigerator Door 1) With the door closed, remove the upper hinge cover (➀) using a screwdriver 2) Remove hinge screws ( ) and ground screw ( ) counter-clockwise, and take off the upper hinge ( ) in the direction of the arrow ( ). -
Page 21: Reattaching The Refrigerator Doors
REATTACHING THE REFRIGERATOR DOORS Reattaching the Freezer Door 1) Insert the lower hinge ( ➀ ) in the bracket lower 2) Reattach the freezer door by inserting the hose ( ➂ ) in the lower side of the door into the hole in hinge (➁). -
Page 22: Reattaching The Refrigerator Door
REATTACHING THE REFRIGERATOR DOORS Reattaching the Refrigerator Door 1) Insert the lower hinge ( ➀ ) in the bracket lower 2) Place the hole in the refrigerator door (➂) over hinge (➁). the lower hinge (➃). 3) Insert the upper hinge shaft (➄) into the hole (➅). After levelling between the upper hinge hole (➆) and the hole of the cabinet (➇). -
Page 23: Reattaching The Water Supply Line
REATTACHING THE REFRIGERATOR DOORS Reattaching the Water Supply Line 1) While pressing the front face of coupler (➁), insert the water line (➀) in the coupler. Push the "A" collar to the "B" body and hold. Tube must be fully inserted to the marked line to avoid leaks. -
Page 24: Leveling The Refrigerator
LEVELING THE REFRIGERATOR Make sure the refrigerator is level before adjusting its doors. The doors will be uneven if the refrigerator is not level. The front of refrigerator is adjustable. NOTE Insert a flat-blade screwdriver (-) ( ➀ ) into a slot of Case 1) Freezer door is lower than the control lever (➁), turn it clockwise and level the that of the refrigerator... -
Page 25: Adjusting The Clearance Between The Doors
ADJUSTING THE CLEARANCE BETWEEN THE DOORS Adjust Leveling first. NOTE Making small adjustments between doors. If the door of the freezer is lower than that of the If the door of freezer is higher than that of the refrigerator. refrigerator. Adjustment part Adjustment part Please open the doors and adjust them as follows:... -
Page 26: Checking The Water Dispenser Line
CHECKING THE WATER DISPENSER LINE 1) In order to operate the ice maker properly, water pressure of 20 ~125 psi is required. In this range a 170 cc (5.74 ounces) paper cup can be filled in 10 secs. 2) The water filter removes particles. It does not sterilize or destroy any micro-organisms. 3) If the refrigerator is installed in an area with low water pressure (below 20psi), you should install a booster pump to compensate. -
Page 27: Installation Of The Water Dispenser Line
INSTALLATION OF THE WATER DISPENSER LINE Connect the water line to the refrigerator. 1) Slip the compression nut through the provided Refrigerator plastic tubing. Ferrule 2) Tighten the compression nut onto the 1/4” Compression Nut (1/4 (Purchased) compression fitting. (Provided) Do not overtighten the compression nut. -
Page 28: Check Amount Of Water
INSTALLATION OF THE WATER DISPENSER LINE Remove any residual matter inside the water supply line after installing filter. 1) Turn on the main water supply & shut-off the valve of the water supply line. WATER 2) Run water through the dispenser until the water runs clear (6~7 minutes). -
Page 29: Troubleshooting
TROUBLESHOOTING The refrigerator does not work at all or it does not Ice is not dispensed chill sufficiently • Did you stop the ice making function? • Check that the power plug is properly connected. • Is there any ice in the ice storage unit? •... -
Page 30: Consumer Support
SAMSUNG or SAMSUNG's authorized service center. SAMSUNG will repair or replace any part found to be defective, at our option and at no charge as stipulated herein, with new or reconditioned parts during the limited warranty period specified above. All replaced parts and products become the property of SAMSUNG and must be returned to SAMSUNG. - Page 31 MEMO...
- Page 32 If you have any questions or comments relating to Samsung products, please contact the SAMSUNG customer care centre. Samsung Electronics America, Inc. 105 Challenger Road Ridgefield Park, NJ 07660-0511 1-800-SAMSUNG(1-800-726-7864) www.samsung.com...
Need help?
Do you have a question about the RS263B Series and is the answer not in the manual?
Questions and answers