Table of Contents
Advertisement
Advertisement
Table of Contents

Related Manuals for Samsung DVD-P480


Summary of Contents for Samsung DVD-P480
-
Page 1: Dvd Player
DVD Player DVD-P480 www.samsung.com AK68-01510A... -
Page 2: Precautions
PRECAUTIONS PRECAUTIONS 1. Setting up - When condensation forms inside the player due to sharp changes in temperature, the - Refer to the identification label located on player may not operate the rear of your player for its proper operat- correctly. -
Page 3: Table Of Contents
BEFORE ABLE OF BEFORE ABLE OF CONTENT CONTENT Precautions....... 2 Before you start . -
Page 4: Setup
CD Ripping REGARDING YOUR TV SET COMPATIBILITY This feature lets you to copy audio files from disc to WITH THIS MODEL 525p DVD PLAYER, PLEASE USB device into MP3 format (only audio CD CONTACT SAMSUNG'S CUSTOMER SERVICE (CD DA)). CENTER.”... -
Page 5: Disc Type And Characteristics
Disc Type and Characteristics This DVD player is capable of playing the following types of discs with the correspond- ing logos: Disc Types (Logos) Recording Types Disc Size Max. Playing Time Characteristics - DVD contains excellent sound Single-sided 240 min. 12 Cm and video due to Dolby Digital Double-sided 480 min. -
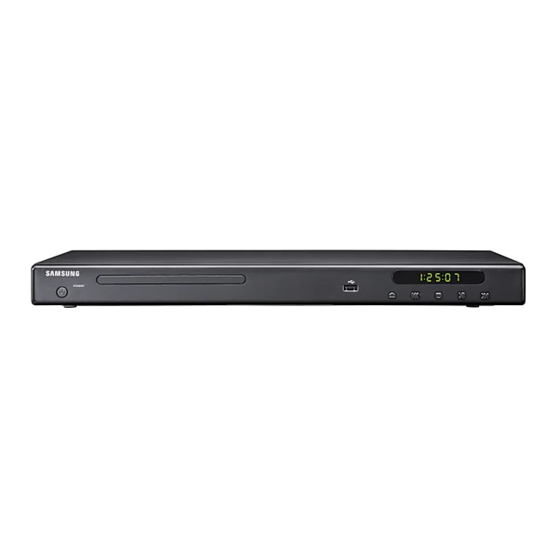
Page 6: Description
Description Front Panel Controls 1. STANDBY/ON ( 5. OPEN/CLOSE When STANDBY/ON is pressed on, the indicator Press to open and close the disc tray. goes out and the player is turned on. 6. SKIP ( ) SEARCH 2. STANDBY indicator Allow you to search forward/backward through When the unit is first plugged in, this indicator a disc. - Page 7 Rear Panel 5.1CH ANALOG AUDIO OUT 4. COMPONENT VIDEO OUT JACKS JACKS - Connect to an amplifier with 5.1ch analog input - Use these jacks if you have a TV with jacks. Component Video in jacks. These jacks pro- vide P and Y video.
-
Page 8: Tour Of The Remote Control
Tour of the Remote Control TV VOL (+, -) Buttons Control volume. SKIP Buttons ( Use to skip the title, chapter or track. STOP Button ( MENU Button Brings up the DVD player’s menu. œ / ƒ ƒ , ¦ ¦... -
Page 9: Connections
CONNECTIONS CONNECTIONS Choosing a Connection The following shows examples of connections commonly used to connect the DVD player with a TV and other components. Before Connecting the DVD Player - Always turn off the DVD player, TV, and other components before you connect or disconnect any cables. - Refer to the user’s manual of the additional components you are connecting for more information on those particular components. - Page 10 Connection to a TV (Interlace) - Connecting to your TV using Component video cables. - You will enjoy high quality and accurate color reproduction images. Component video separates the pic- ture element into black and white(Y), blue(P ), red(P ) signals to present clear and clean images. (Audio signals are delivered through the audio output.) Using component video cables (not included), connect the COMPONENT VIDEO OUT terminal on the rear of the...
- Page 11 Connection to a TV (Progressive) Using component video cables (not included), connect the COMPONENT VIDEO OUT terminal on the rear of the DVD player to the COMPONENT IN terminal of TV. BLUE GREEN Using the audio cables, connect the AUDIO (red and white) OUT terminals 5.1 CH (Front L-R) on the rear of the DVD player to the AUDIO (red and white) IN terminals of TV.
- Page 12 Connection to an Audio System (2 Channel Amplifier) Using the audio cables, connect the AUDIO (red and white) OUT terminals of 5.1 CH (Front L-R)on the rear of the DVD player to the AUDIO (red and white) IN termi- nals of the Amplifier. Using the video signal cable(s), connect the VIDEO or COMPONENT OUT terminals on the rear of the DVD play- er to the VIDEO or COMPONENT IN terminal of your TV.
- Page 13 Connection to an Audio System (Dolby digital, MPEG2 or DTS Amplifier) If using a coaxial cable (not included), connect the DIGI- TAL AUDIO OUT (COAXIAL) terminal on the rear of the DVD player to the DIGITAL AUDIO IN (COAXIAL) termi- nal of the Amplifier.
- Page 14 Connection to a 5.1CH Analog Amplifier If using audio cables for 5.1 CH Analog Amplifier (not included) connect the 5.1CH ANALOG AUDIO OUT termi- nals on the rear of the DVD player to the 5.1CH ANALOG AUDIO IN terminals of the 5.1CH Analog Amplifier. Using the video signal cable(s), connect the VIDEO or COMPONENT terminals on the rear of the DVD player to the VIDEO or COMPONENT terminals of your TV as...
-
Page 15: Basic Functions
BASIC FUNCTIONS BASIC FUNCTIONS Playing a Disc 4. Stopping Play Press the STOP ( ) button during play. Before Play 5. Removing Disc - Turn on your TV and set it to the correct Video Press the OPEN/CLOSE ( ) button. Input by pressing TV/VIDEO button on the TV 6. -
Page 16: Using The Search And Skip Functions
2. Press the œ/ƒ¤buttons to select the desired item. Using the Search and Skip - Only Menu Off is available for VCD2.0. Each press of Functions the DISC MENU button toggles between Menu On and Menu Off. During play, you can search quickly through a chap- ter or track, and use the skip function to jump to the 3. -
Page 17: Repeat Play
Using the A-B Repeat function Note 1. Press the REPEAT button on the remote control. - Depending on a disc, the Disc Menu may not work. 2. Press the ¦/‹ buttons to Select A-B button. - You can also use the Disc Menu, using the DISC 3. -
Page 18: Advanced Functions Adjusting The Aspect Ratio (Ez View)
f you are using a 4:3 TV ANCED ANCED For 16:9 aspect ratio discs - 4:3 Letter Box FUNCTIONS FUNCTIONS Displays the content of the DVD title in 16:9 aspect ratio. The black bars will appear at the top and bottom of the screen. Adjusting the Aspect Ratio - 4:3 Pan&Scan The left and right portions of the screen are cut off and the... -
Page 19: Selecting The Subtitle Language
MPEG4 Note - You have to change the desired subtitle in the Disc Menu, according to discs. Press the DISC PCM 1/2 MENU button. - This function depends on what subtitles are encoded on the disc and may not work on all 2. -
Page 20: Using The Bookmark Function
Using the Bookmark 5. Press the PLAY/PAUSE ( ) button to skip to the marked Function scene. Clearing a Bookmark This feature lets you bookmark sections of a DVD or VCD (Menu Off mode) so you can quickly find them 1~3. -
Page 21: Cd Audio/Mpeg4
Clips Menu for - To select the Sub-Folder Press the ¦/‹ buttons to highlight right window. MP3/WMA/JPEG/CD Press the œ œ /ƒ ƒ buttons to select the desired folder, Audio/MPEG4 then press ENTER. CD Audio or discs with MP3/WMA/JPEG/MPEG4 R oot contain individual songs and/or pictures that can be organized into folders as shown below. -
Page 22: Mpeg4 Playback
ISO 9660 format and Joliet MP3 or WMA files are 1. Open the disc tray. Place the disc on the tray. compatible with Microsoft's DOS and Windows, and with Close the tray. 2. Press the œ œ /ƒ ƒ or ¦ ¦ /‹ ‹ ¤ ¤ buttons to select an avi file Apple's Mac. -
Page 23: Playing Media Files Using The Usb Host Feature
Note Skip Forward/Back - Some MPEG4 files created on a personal com- During playback, press the ( ) button. puter may not be play back. That is why Codec Type, Version and Higher res- • When there is more than one file, when you press the olution over specification is not supported. -
Page 24: Cd Ripping
• CBI (Control/Bulk/Interrupt) is not supported. 3. Press the œ œ /ƒ ƒ buttons to select START, then press the • Digital Cameras that use PTP protocol or require additional ENTER button. program installation when connected to a PC are not sup- File copy begins. -
Page 25: Changing Setup Menu
• : When this icon is selected and ENTER is CHANGING SETUP CHANGING SETUP pressed, the pictures change automatically with about a 6 second interval. MENU MENU • : The pictures change automatically with about a 12 second interval. • : The pictures change automatically with Using the Setup Menu about a 18 second interval. -
Page 26: Setting Up The Language Features
Setting Up the Language Using the Audio Language Features 1. With the unit in Stop mode, press the MENU button. 2. Press the œ œ /ƒ ƒ buttons to select Setup, then press the ‹ If you set the player menu, disc menu, audio and or ENTER button. -
Page 27: Setting Up The Audio Options
❶ Dolby Digital Out Using the DivX Subtitle Language - PCM : Converts to PCM(2CH) audio. 1. With the unit in Stop mode, press the MENU button. - Bitstream : Outputs Dolby Digital via the digital output. 2. Press the œ œ /ƒ ƒ buttons to select Setup, then press the ‹ Select Bitstream when connecting to a or ENTER button. -
Page 28: Setting Up The Display Options
Note AUDIO SETUP Dolby Digital Out :PCM To make the Setup menu disappear or return to MPEG-2 Digital Out :PCM menu screen during set up, press RETURN but- Dynamic Compression :On PCM Down Sampling ton. Output Channel :5.1CH ‹ ‹ Speaker Setup •... -
Page 29: Setting Up The Parental Control
❷ Still Mode • If the Yes/No selection in the Display Setup These options will help prevent picture shake in sub Menu is not made within 10 seconds, still mode and display small text clearer. the screen returns to the previous menu. - Auto : When selecting Auto, Field/Frame mode will be automatically converted. -
Page 30: Changing The Password
PARENTAL SETUP 4. Press the œ œ /ƒ ƒ button to select Change Password, then Rating level : Kids Safe press the ‹ or ENTER button. Enter your password (default Change Password password). Enter the new password again. PARENTAL SETUP Rating Level :Kids Safe Change Password... -
Page 31: Reference
REFERENCE REFERENCE Firmware upgrade Introduction Samsung will often support the software upgrade to improve the performance of this unit to the latest status, through Samsung Internet Site (www.samsung.com). Because the specially new MPEG4 codec continues - In the middle of the writing, the tray will open and it is appearing. -
Page 32: Troubleshooting
Troubleshooting Before requesting service (troubleshooting), please check the following. Page Action Problem • Check the batteries in the remote control. They may need replacing. No operations can be • Operate the remote control at a distance of no more than 20 feet. performed with the •... -
Page 33: Usb Host Feature Supported Products
128 MB MP3 Player Dimage X21 Minolta Digital Camera Iriver H320 Iriver 20G HDD MP3 Player Coolpix4200 Nikon Digital Camera YH-920 Samsung 20G HDD MP3 Player Coolpix4300 Nikon Digital Camera YP-T7 Samsung MP3 Player Coolpix 2200 Nikon Digital Camera YP-MT6... -
Page 34: Specification
96 kHz Sampling : 4 Hz to 44 kHz 110 dB *S/N Ratio *Dynamic Range 100 dB *Total Harmonic Distortion 0.004 % *: Nominal specification - Samsung Electronics Co., Ltd reserves the right to change the specifications with out notice. - Weight and dimensions are approximate. - Page 35 Contact SAMSUNG WORLD WIDE If you have any questions or comments relating to Samsung products, please contact the SAMSUNG customer center care...
- Page 36 Contact SAMSUNG WORLD WIDE If you have any questions or comments relating to Samsung products, please contact the SAMSUNG customer care centre. ☎ 3030-8282/1800-110011/www.samsung.com AK68-01510A...
Need help?
Do you have a question about the DVD-P480 and is the answer not in the manual?
Questions and answers