Table of Contents
Advertisement
&
OPERATING INSTRUCTIONS IN BRIEF
The remote control
RECORD/OTR n Record
STANDBY m Standby
SELECT Function selector
TIMER k 'VIDEOPlus' / 'TIMER' programming
CLEAR (CL) Reset, clear
0-9 Digit buttons 0-9
MONITOR TV monitor function
OK Confirm button
P r Down, number minus
P q Up, number plus
PLAY G Playback
H
Rewind/Reverse scanning
I
Forward wind/ Forward scanning
STOP h Pause/Stop, Tuner-mode
INDEX E Index search
SP/LP SP/LP selection
STILL R Still picture
SYSTEM Special function
Additional TV functions: Only function with televisions with the same
remote control code.
Sq TV volume plus
Sr TV volume minus
m Switch off TV
TV q Programme number +
TV r Programme number -
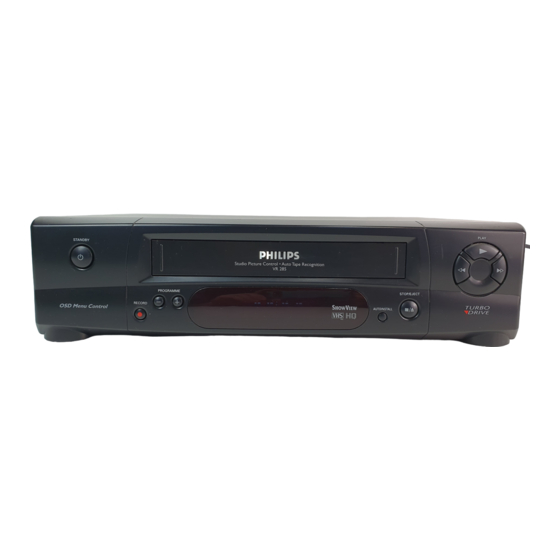
Front of the video recorder
STANDBY m
Standby
RECORD n
Record
PROGRAMME r
Down/Minus, number
PROGRAMME q
Up/Plus, number
AUTOINSTALL
Installation
STOP/EJECT ?
Stop/Cassette eject
H
Rewind/Reverse scanning
PLAY G
Playback
I
Forward wind/ Forward scanning
Advertisement
Table of Contents

Related Manuals for Philips VR285/07


Summary of Contents for Philips VR285/07
- Page 1 & OPERATING INSTRUCTIONS IN BRIEF The remote control Front of the video recorder RECORD/OTR n Record STANDBY m Standby STANDBY m Standby RECORD n Record PROGRAMME r SELECT Function selector Down/Minus, number TIMER k ’VIDEOPlus’ / ’TIMER’ programming PROGRAMME q Up/Plus, number CLEAR (CL) Reset, clear AUTOINSTALL...
- Page 2 & Programming with ’VIDEOPlus+’ How to programme a recording manually All the information required for a programming is encoded in the VIDEOPlus+ code. Switch on the TV set. Press the TIMER k button twice. Switch on the TV set. Select a free TIMER block, using the or the button.
-
Page 3: Table Of Contents
OPERATING INSTRUCTIONS PHILIPS VR 285 Congratulations on the purchase of one of the most sophisti- Contents Page cated and simple-to-use video recorders (VCR) on the market. With this VCR you can record and play VHS-standard INSTALLATION ........ -
Page 4: Installation
INSTALLATION Important for the United Kingdom Connecting VCR with scart cable This apparatus is fitted with an approved moulded 13 Amp plug. To change a fuse in this type of plug proceed as follows: Remove fuse cover and fuse. Fix new fuse which should be a BS1362 3A, A.S.T.A. or BSI If your television does not have a scart (AV-Euro) socket, approved type. -
Page 5: Connecting Vcr Without Scart Cable
Switch the video recorder to standby with the Connecting VCR without scart cable STANDBY m button. Note: This modulator frequency (583MHz or UHF-channel 35) might already be being used by another TV station in your reception area, e.g. ’Channel 5’. In this case the picture quality on your TV set will be poor when receiving one or more TV channels. -
Page 6: Saving Energy
Saving energy User guide With OSD (On Screen Display) the corresponding functions You can choose between two methods of switching to appear on the TV screen. The most important button-functions standby. are displayed at the bottom of the screen. For instance: Normal method: Switch to standby using the STANDBY m but-... -
Page 7: Setting The Clock
How to search for a TV channel manually, you can read in Use the button to select the TV channel on chapter 4 ’SPECIAL FEATURES’, ’Manual channel search’. the TV screen to which you wish to give a programme number (starting with ’P 01’). Note: With the button you can interrupt the automatic chan-... -
Page 8: Playback Functions
PLAYBACK FUNCTIONS Insert the cassette into the cassette slot. appears in the Still picture display. Press the STILL R button. You see a still picture. Inter- ference stripes will appear on the screen. Each time you press STILL R again, the picture will move on one step. -
Page 9: Continuous Playback
Continuous playback Eliminating picture interference/ Cleaning function You can continuously repeat the replay of a cassette. When the end of the tape has been reached, it rewinds and begins During playback, hold the button until ’TRAC’(track- again. ing) appears in the display. Press the PLAY G button. -
Page 10: Recording Functions
RECORDING FUNCTIONS • Erase protection: So that you don’t accidentally delete an Insert a cassette into the video recorder or switch the important recording, you can remove the special tab video recorder on with the button. (erase protection) on the narrow side of the cassette with a screwdriver or slide the special tab to the left. -
Page 11: Programming With 'Videoplus
Make sure that a cassette without erase protection has Programming with ’VIDEOPlus+’ been loaded. Switch to standby with the STANDBY m but- ton. All the information required for a programming is encoded in A programmed recording will only function when the video the VIDEOPlus+ code. -
Page 12: Important Programming Notes
Important programming notes • When recordings have been programmed, appears in the display. • The programmed recording will always be made at the recording speed (SP/LP) that at the time has been selected on the video recorder. • You cannot operate the video recorder manually while a programmed recording is being made. -
Page 13: Special Features
SPECIAL FEATURES Tuner mode On Screen Display (OSD) You can also use your video recorder as a TV receiver (tuner). You can switch the On Screen Display (OSD) on or off. Hold the STOP h button, until appears in the display. Switch on the TV set. -
Page 14: Manual Channel Search
Manual channel search In certain cases the ’Automatic channel search’ may not be able to find all of the TV channels (e.g. coded TV channels). In that case, use this manual method to set the TV channels. Switch on the TV set. Press the button on AUTOINSTALL the video recorder. -
Page 15: Before You Call An Engineer
Picture or sound interference on TV reception e.g. when Before you call an engineer tuned to ’CH5’: • Turn to Chapter 1 ’INSTALLATION’ and read in the section ’Connecting VCR without scart cable’ the note ’Adjusting the If, contrary to expectation, you experience any difficulty in modulator frequency’... - Page 16 ( W w n n N N N w w n w N N n w n W w n N w N n n W N n w w N ) 3103 166 21201 VR 285 8203/001...
Need help?
Do you have a question about the VR285/07 and is the answer not in the manual?
Questions and answers