Table of Contents
Advertisement
Quick Links
PLEASE READ
This manual is provided as a free service
by Projector.com.
We are in no way responsible for the
contents of the manual. We do not guarantee
its accuracy and we do not make any claim
of copyright. The copyright remains the
property of their respective owners.
ABOUT PROJECTOR.COM
Projector.com (http://www.projector.com) is
your review and buying guide resource for
DLP and LCD video projectors.
Visit the site to read the latest projector
news and reviews, read and comment on
projector specifications, download user
manuals and much more.
Advertisement
Table of Contents

Related Manuals for Polaroid SVGA 270


Summary of Contents for Polaroid SVGA 270
- Page 1 PLEASE READ This manual is provided as a free service by Projector.com. We are in no way responsible for the contents of the manual. We do not guarantee its accuracy and we do not make any claim of copyright. The copyright remains the property of their respective owners.
-
Page 2: Lcd Projector
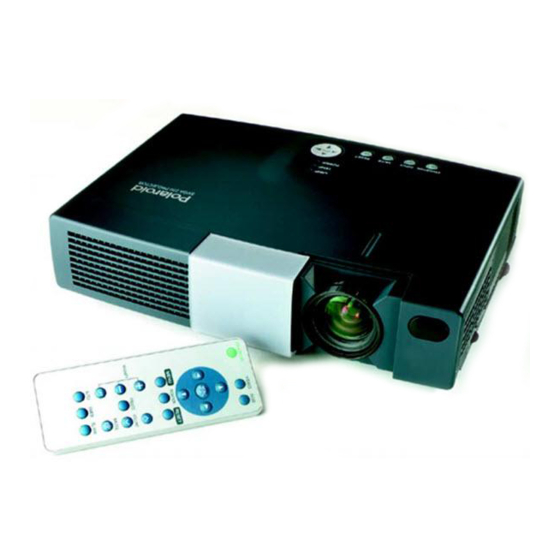
SVGA 270 LCD Projector User Guide... - Page 3 Liquid Crystal Projector SVGA 270 USER'S MANUAL Thank you for purchasing this HITACHI liquid crystal projector. Please read the accompanying manual “SAFETY INSTRUCTIONS” and this “USER'S MANUAL” thoroughly to ensure correct usage through understanding. After reading, store this instruction manual in a safe place for future reference.
-
Page 4: Before Use
FEATURES This liquid crystal projector is used to project various computer signals as well as NTSC / PAL / SECAM video signals onto a screen. Little space is required for installation and large images can easily be realized. • Outstanding brightness The UHB lamp and high-efficiency optical system assure a high level of brightness. -
Page 5: Part Names
B B E E F F O O R R E E U U S S E E ( ( c c o o n n t t i i n n u u e e d d ) ) Part Names ZOOM knob FOCUS ring... -
Page 6: Remote Controller
B B E E F F O O R R E E U U S S E E ( ( c c o o n n t t i i n n u u e e d d ) ) Part Names (continued) VIDEO Button STANDBY/ON... -
Page 7: Top View
INSTALLATION Installation of the Projector and Screen Install the projector in a suitable environment according to instructions of the accompanying manual “SAFETY INSTRUCTIONS” and this manual. Refer to the drawing and table below for determining of the screen size and projection distance. a: Distance from the LCD projector to the screen. -
Page 8: Power Connection
I I N N S S T T A A L L L L A A T T I I O O N N ( ( c c o o n n t t i i n n u u e e d d ) ) Cabling Before connecting, read the instruction manuals of the devices to be connected, and make sure that the projector is compatible with the device, and turn off to all devices to be... -
Page 9: Example Of System Setup
I I N N S S T T A A L L L L A A T T I I O O N N ( ( c c o o n n t t i i n n u u e e d d ) ) Example of system setup AC Input Video tape recorder with S jack... -
Page 10: Power On/Off
OPERATIONS Read the "SAFETY INSTRUCTIONS" of this calligraphy and the separate volume well surely and use it for the safety before the use after attention. Power On/Off Power On 1. Confirm that power cord is connected properly. 2. Push "I" of the power switch. Standby mode is set up and power source indicator burns in the orange. -
Page 11: Basic Operation
O O P P E E R R A A T T I I O O N N S S ( ( c c o o n n t t i i n n u u e e d d ) ) Basic Operation Basic manipulation to show in the table 1-2 can be done easily by the control panel of projector and ⊕... - Page 12 O O P P E E R R A A T T I I O O N N S S ( ( c c o o n n t t i i n n u u e e d d ) ) Table 1.2 Basic Operation (continued) Item Description...
-
Page 13: Setup Menu
O O P P E E R R A A T T I I O O N N S S ( ( c c o o n n t t i i n n u u e e d d ) ) Setup Menu SETUP INPUT... -
Page 14: Input Menu
O O P P E E R R A A T T I I O O N N S S ( ( c c o o n n t t i i n n u u e e d d ) ) Input Menu The following functions are available when INPUT is selected on the SETUP... -
Page 15: Image Menu
O O P P E E R R A A T T I I O O N N S S ( ( c c o o n n t t i i n n u u e e d d ) ) Image Menu The following adjustments and settings are available when IMAGE is SETUP... -
Page 16: Options Menu
O O P P E E R R A A T T I I O O N N S S ( ( c c o o n n t t i i n n u u e e d d ) ) Options Menu The following adjustments and settings are available when OPTIONS is SETUP... -
Page 17: No Signal Menu
O O P P E E R R A A T T I I O O N N S S ( ( c c o o n n t t i i n n u u e e d d ) ) No Signal Menu VOLUME KEYSTONE... -
Page 18: Maintenance
MAINTENANCE Lamps Electric shock High temperature Mechanical shock Contact your dealer before replacing the lamp. (Product name: Projector lamp /Model name: DT00301) Before replacing the lamp, switch power OFF, remove the power cord from the power outlet, and wait approximately 45 minutes until the lamp has cooled. The lamp may explode if handled at high temperatures. -
Page 19: Replacing The Lamp
M M A A I I N N T T E E N N A A N N C C E E ( ( c c o o n n t t i i n n u u e e d d ) ) Replacing the Lamp 1. -
Page 20: Air Filter Maintenance
M M A A I I N N T T E E N N A A N N C C E E ( ( c c o o n n t t i i n n u u e e d d ) ) Air Filter Maintenance Switch power OFF and remove the power cord from the power outlet, before beginning maintenance work. -
Page 21: Troubleshooting
TROUBLESHOOTING OSD Message A message like the bottom table sometimes displays it with this opportunity at the time of power source on. Cope in accordance with the bottom table if message appears on the screen. Table 1-8. Mssage display list. Message Contents Left message is displayed when ramp use time is 1700 hours. - Page 22 T T R R O O U U B B L L E E S S H H O O O O T T I I N N G G ( ( c c o o n n t t i i n n u u e e d d ) ) Indicators Message The POWER indicator, LAMP indicator and TEMP indicator light or blink in the following cases.
- Page 23 T T R R O O U U B B L L E E S S H H O O O O T T I I N N G G ( ( c c o o n n t t i i n n u u e e d d ) ) Symptom Before requesting repair, check in accordance with the following chart.
-
Page 24: Specifications
SPECIFICATIONS NOTE : These specifications are subject to change without notice. Table 1-11. Specifications Item Specification Product name Liquid crystal projector Model CP-S220W Panel size 1.8 cm (0.7 type) Liquid crystal Drive system TFT active matrix panel Pixels 485,616 pixels (604 horizontal x 804 vertical) Lens Zoom lens F=2.0 ~ 2.3 f=18 ~ 21 mm Lamp... -
Page 25: Dimension Diagram
S S P P E E C C I I F F C I ICA A T T I I O O N N S S ( ( c c o o n n t t i i n n u u e e d d ) ) Dimension Diagram 45.6 74.5... -
Page 26: Regulatory Notices
REGULATORY NOTICES FCC Statement Warning WARNING: This equipment has been tested and found to comply with the limits for a Class B digital device, pursuant to Part 15 of the FCC Rules. These limits are designed to provide reasonable protection against harmful interference in a residential installation. -
Page 27: Example Of Computer Signal
TECHNICAL Example of computer signal Resolution H Display fH (kHz) fV (Hz) Rating Signal mode Note 1 × V mode 640 × 350 37.9 85.1 VESA VGA-1 Zoom in 640 × 400 37.9 85.1 VESA VGA-2 Zoom in 720 × 400 37.9 85.0 VESA... - Page 28 T T E E C C H H N N I I C C A A L L ( ( c c o o n n t t i i n n u u e e d d ) ) Initial set signals The following signals are used for the initial settings.
- Page 29 PLEASE READ This manual is provided as a free service by Projector.com. We are in no way responsible for the contents of the manual. We do not guarantee its accuracy and we do not make any claim of copyright. The copyright remains the property of their respective owners.
Need help?
Do you have a question about the SVGA 270 and is the answer not in the manual?
Questions and answers