Philips FW-C250 User Manual
Hide thumbs
Also See for FW-C250:
- User manual (28 pages) ,
- Specifications (2 pages) ,
- Service manual (72 pages)

Related Manuals for Philips FW-C250


Summary of Contents for Philips FW-C250
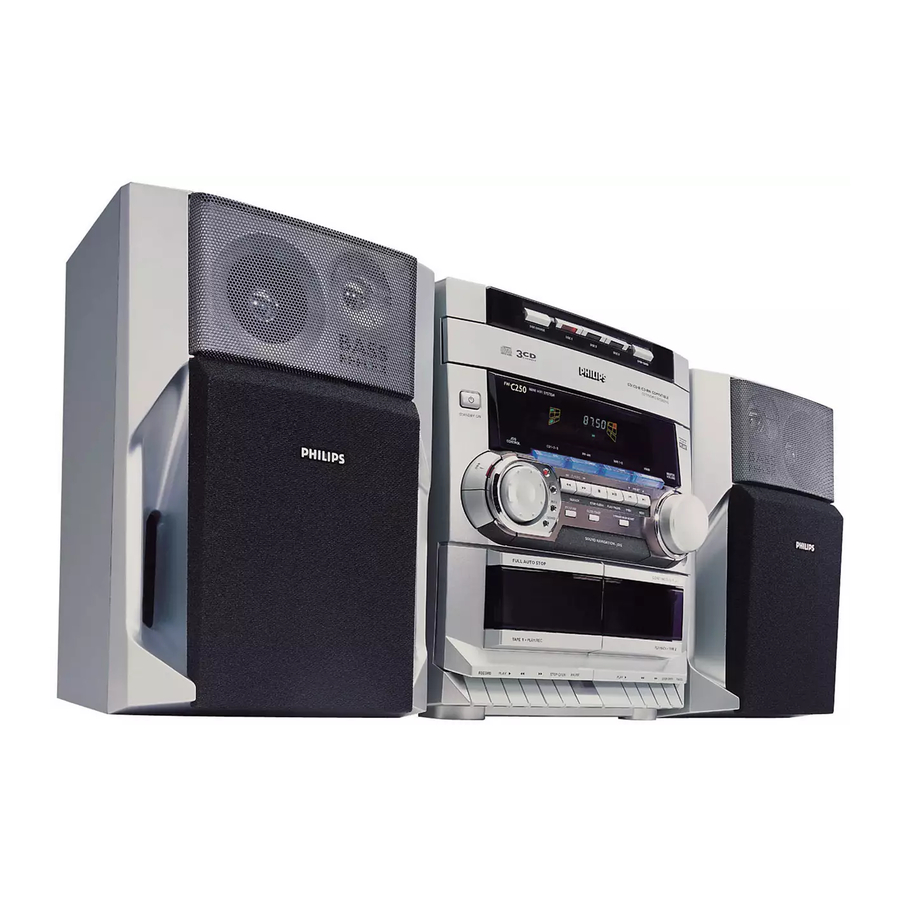
- Page 1 C250 Mini HiFi System 3139 115 20433 pg 01-28/C250/21-Eng 29/05/2001, 10:26 AM...
- Page 2 Modelo : FW-C250/21 Alimentación: 110–127 / 220–240V~; 50–60 Hz Consumo: 70 W Importador: Philips Mexicana, S.A. de C.V. Domicilio: Norte 45, # 669, Col. Industrial Vallejo Localidad y Tel: C.P. 02300 México D.F., Tel. 5728-4200 Exportador: Philips Electronics HK, Ltd.
- Page 3 DISC 1 DISC 2 DISC 3 DISC CHANGE OPEN • CLOSE • 3 CD ROTARY CHANGER SYSTEM 3 CD ROTARY CHANGER SYSTEM • CD REWRITABLE COMPATIBLE C H A N G E R CD REWRITABLE COMPATIBLE • CD SYNCHRO RECORDING CD SYNCHRO RECORDING MINI HIFI SYSTEM STANDBY-ON...
- Page 4 3139 115 20433 pg 01-28/C250/21-Eng 29/05/2001, 10:26 AM...
- Page 5 Index English ------------------------------------------------ 6 Français -------------------------------------------- 29 Español --------------------------------------------- 52 -------------------------------------------------------- 75 Warranty ------------------------------------------ 97 Australia/New Zealand/Mexico 3139 115 20433 pg 01-28/C250/21-Eng 29/05/2001, 10:26 AM...
-
Page 6: Table Of Contents
Contents General Information Tape Environmental Information ........ 7 Loading a tape ............. 19 Supplied Accessories ........... 7 Tape Playback ............19 Rewind/Fast Forward ........19 Safety Information ..........7 Continuous Playback From Tape Deck 2 to Tape Deck 1 ..............20 Preparation Rear Connections .......... -
Page 7: General Information
General Information Safety Information IMPORTANT: PLEASE NOTE THAT THE VOLTAGE ¶ Before operating the player, check that the SELECTOR LOCATED AT THE REAR operating voltage indicated on the typeplate (or OF THIS SYSTEM IS PRESET AT 220V the voltage indication beside the voltage FROM THE FACTORY. -
Page 8: Rear Connections
Preparations FM AERIAL 75Ω AM ANTENNA – – VOLTAGE VOLTAGE VOLTAGE SELECTOR SELECTOR SELECTOR 220V- 110V- 110V- 240V 127V 127V 220V- 220V- 110V- 240V 240V 127V MAINS AUX IN AUDIO OUT Rear Connections Speakers Connection ¶ Connect the right speaker to Front terminal R, with the colored wire to + and the black wire AM Loop Antenna Connection to -. -
Page 9: Controls On The Player And Remote Control
Preparation Inserting batteries into the Connecting other equipment to your player Remote Control You can connect the audio left and right OUT ¶ Insert the batteries (not supplied) into the terminals of a TV, VCR, Laser Disc player, DVD remote control as shown in the battery player or CD Recorder to the AUX IN terminals compartment (Type R06 or AA). - Page 10 Controls MODE SELECTION SEARCH à á (TUNING à á ) • 3 CD ROTARY CHANGER SYSTEM • CD REWRITABLE COMPATIBLE for CD ....to search backward/forward. ≥ • CD SYNCHRO RECORDING for TUNER ..to tune to a lower or higher radio frequency.
-
Page 11: Operating The System
Operating the System • 3 CD ROTARY CHANGER SYSTEM • CD REWRITABLE COMPATIBLE • CD SYNCHRO RECORDING MINI HIFI SYSTEM TAPE 1/2 TUNER STANDBY-ON SLEEP CD1 • 2 • 3 BAND TAPE 1 • 2 VIDEO CD DIRECT CONTROL TUNER TAPE PAUSE REPEAT... -
Page 12: Switching On
Operating the System To enable the demonstration mode DIM mode ¶ Press and hold Ç (on the system only) for 5 You can select the desired brightness for the seconds when the system is in standby mode. display. ➜ The demonstration will begin. ¶... -
Page 13: Sound Control
Operating the System DYNAMIC BASS BOOST (DBB) Sound Control The DBB mode enhances the bass response. VOLUME ADJUSTMENT ¶ Press DBB to switch on bass response. Adjust VOLUME to increase or decrease the ➜ The DBB button lights up. sound level. ➜... -
Page 14: Compact Disc
Compact Disc DISC 1 DISC 2 DISC 3 OPEN • CLOSE DISC CHANGE TAPE 1/2 TUNER SLEEP C H A N G E R CD DIRECT PAUSE REPEAT SHUFFLE MINI HIFI SYSTEM Å VOLUME É STANDBY-ON í ë Ç CD1 • 2 • 3 BAND TAPE 1 •... -
Page 15: Playing A Disc
Compact Disc Playing a Disc Searching for a particular passage during playback PressÉ to start playback. ➜ The disc tray, track number and elapsed ¶ Press and hold à or á until the desired playing time of the current track appear on the passage is located. -
Page 16: Playing The Programme
Compact Disc Playing the programme Shuffle (only on remote control) Press É to start programme playback. In shuffle mode, the system plays all the available ➜ “PLAY PROGRAM” will be displayed. discs and their tracks in random order. Shuffle ➜ The track number and elapsed playing time of may be used also when tracks are programmed. -
Page 17: Tuner
Tuner • 3 CD ROTARY CHANGER SYSTEM • CD REWRITABLE COMPATIBLE • CD SYNCHRO RECORDING MINI HIFI SYSTEM TAPE 1/2 TUNER STANDBY-ON SLEEP CD DIRECT CD1 • 2 • 3 BAND TAPE 1 • 2 VIDEO CONTROL TUNER TAPE PAUSE REPEAT SHUFFLE Å... -
Page 18: Tuning To Preset Radio Stations
Tuner Notes: Tuning to Preset Radio Stations – You can cancel the automatic programming by ¶ Press 4 or 3 to select the desired preset pressing PROGRAM or Ç (on the system only). number. – If you want to reserve a section of preset ➜... -
Page 19: Tape
Tape • 3 CD ROTARY CHANGER SYSTEM • CD REWRITABLE COMPATIBLE • CD SYNCHRO RECORDING MINI HIFI SYSTEM STANDBY-ON C D 1 • 2 • 3 BAND TAPE 1 • 2 VIDEO CONTROL TUNER TAPE OPTIMAL TUNING DEMO STOP PRESET JAZZ SEARCH STOP•... -
Page 20: Continuous Playback From Tape Deck 2 To Tape Deck 1
Tape Notes: Continuous Playback From Tape – During rewinding or fast forwarding of a tape, it Deck 2 to Tape Deck 1 is also possible to listen to another source (e.g. CD, Press TAPE to select TAPE mode. TUNER or AUX). Load the tapes in tape deck 1 and 2. -
Page 21: Aux
• 3 CD ROTARY CHANGER SYSTEM • CD REWRITABLE COMPATIBLE • CD SYNCHRO RECORDING MINI HIFI SYSTEM TAPE 1/2 TUNER STANDBY-ON SLEEP CD DIRECT CD1 • 2 • 3 BAND TAPE 1 • 2 VIDEO CONTROL TUNER TAPE REPEAT PAUSE SHUFFLE Å... -
Page 22: Recording
Recording • 3 CD ROTARY CHANGER SYSTEM • CD REWRITABLE COMPATIBLE • CD SYNCHRO RECORDING MINI HIFI SYSTEM STANDBY-ON CD1 • 2 • 3 BAND TAPE 1 • 2 VIDEO CONTROL TUNER TAPE OPTIMAL TUNING DEMO STOP PRESET JAZZ SEARCH STOP•... -
Page 23: Cd Synchro Start Recording
Recording CD Synchro Start Recording Recording from other sources (only on tape deck 1) During CD synchro start recording, ¶ Do not fast forward/rewind your tape in tape Load a blank tape into tape deck 1. Press CD, TUNER or AUX. deck 2. -
Page 24: Clock/Timer
Clock/Timer • 3 CD ROTARY CHANGER SYSTEM • CD REWRITABLE COMPATIBLE • CD SYNCHRO RECORDING MINI HIFI SYSTEM TAPE 1/2 TUNER STANDBY-ON SLEEP CD DIRECT BAND TAPE 1 • 2 CD1 • 2 • 3 VIDEO CONTROL TUNER TAPE REPEAT PAUSE SHUFFLE Å... -
Page 25: Timer Setting
Clock/Timer ¶ Before selecting CD, make sure a disc is loaded Sleep Timer (only on remote control) in the CD changer tray. This feature allows you to select a length of time Press à or á on the system to set the hour after which the system will switch to the standby for the timer to start. -
Page 26: Specifications
Specifications AMPLIFIER TAPE DECK Output power ......... 2 x 35 W RMS Frequency response ................1300 PMPO Normal tape (type I) ..80 – 12,500 Hz (8 dB) Signal-to-noise ratio ......≥ 67 dBA (IEC) Signal-to-noise ratio Normal tape (type I) ........≥ 48 dBA Frequency response .. -
Page 27: Maintenance
Cleaning the DISC lens ¶ After prolonged use, dirt or dust may accumulate at the disc lens. To ensure good playback quality, clean the disc lens with Philips CD Lens Cleaner or any commercially available cleaner. Follow the instructions supplied with cleaner. -
Page 28: Troubleshooting
Troubleshooting Cannot tune to station – Wrong tuning grid. Recording or playback cannot be – Dirty tape heads, capstans or pressure made or there is a decrease in audio rollers, refer to section under Maintenance. level. – Magnetic build-up in the record/playback head, use demagnetizing tape.
Need help?
Do you have a question about the FW-C250 and is the answer not in the manual?
Questions and answers