
Related Manuals for Philips HDR3800


Summary of Contents for Philips HDR3800
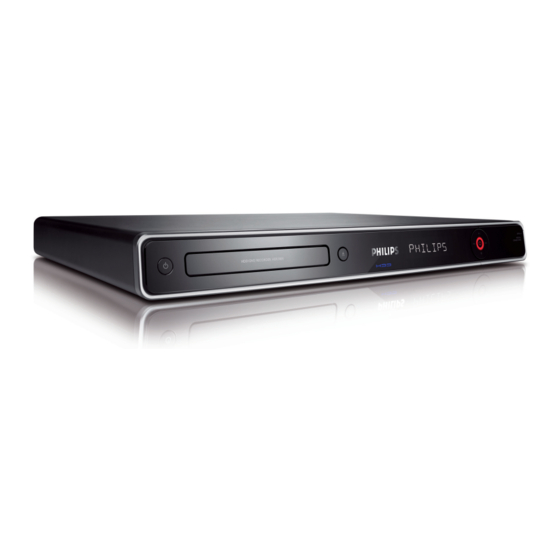
- Page 1 Register you product and get support at www.philips.com/welcome HDR3800 HDR3810 HDD/ DVD Recorder...
- Page 2 If we are unable to provide a solution, Philips will be pleased to pick-up your DVD Recorder from your home; and provide a service replacement set, within 7 days. That’s the Philips ‘Premium Home Service’ commitment to you. This service comes free-of-charge (except for Consumer Care Helpline) and applies to all Philips DVD Recorders during the Philips warranty period.
- Page 3 Italia DICHIARAZIONE DI CONFORMITA’ Si dichiara che l’apparecchio HDR3800, HDR3810, Philips risponde alle prescrizioni dell’art. 2 comma 1 del D.M. 28 Agosto 1995 n. 548. Fatto a Eindhoven Philips Consumer Electronics Philips, Glaslaan 2 5616 JB Eindhoven, The Netherlands Norge Typeskilt fi...
-
Page 4: Table Of Contents
Contents 6 Use GUIDE Plus+ GUIDE Plus+ menu options Important 7 Record Safety Notice Before you record Record settings Record live TV 2 Your product Schedule a timer recording Region codes Record from other devices Features highlight Simultaneous record and play Product Overview 8 Play 3 Connect... - Page 5 11 Adjust Settings Tuner Settings Disc Settings Playback Settings Recording Settings Audio Settings Video Settings System settings Manage Easylink settings Adjust HDMI video and audio 12 Additional Information Upgrade software Care About DivX subtitle font TV System Guide Specifi cations Display panel symbols/ messages 13 Troubleshooting 14 Glossary...
-
Page 6: Important
1 Important Notice Recycle notice Safety Disposal of your old product. Your product is Warning! designed and manufactured with high quality materials and components, which can be Risk of fi re or electric shock! • recycled and reused. When this crossed-out Ensure that air can circulate freely through the ventilation holes on this unit. - Page 7 Copyright in the U.K. Important notes for users in U.K. Recording and playback of material may require consent. See Copyright Act 1956 and The Performer’s Protection Acts 1958 to 1972. Mains plug This apparatus is fi tted with an approved 13 Amp plug.
- Page 8 Trademark notice HDMI, and HDMI logo and High-Defi nition Multimedia Interface are trademarks or registered trademarks of HDMI licensing LLC. GUIDE Plus+, S , VIDEO Plus+, G-LINK are (1) registered trademarks or trademarks of, (2) manufactured under license Manufactured under license from Dolby from and (3) subject to various international Laboratories.
-
Page 9: Your Product
Features highlight Congratulations on your purchase and welcome Pause Live TV to Philips! To benefi t from the support that You can pause any live TV programme by Philips offers, register your product at pressing the PAUSE LIVE TV button. Resume www.philips.com/welcome. - Page 10 Note • Philips does not guarantee 100% interoperability with all HDMI-CEC devices. One touch play When you press PAUSE LIVE TV to turn on this unit and start disc play (if a video disc is...
-
Page 11: Product Overview
Product Overview Main Unit Note • These connections are located under the fl ap on the 2 (Standby-on) right corner of the front panel. • Turns on this unit or switches to standby mode. Disc tray • To connect a USB device, USB card (Open/Close) ç... - Page 12 • Starts recording the current TV channel or video source. • Press repeatedly to set the recording length in 30-minute increments. x (Stop) • Stops play or recording. TV VOL+/ - • Adjusts the volume of the TV (Philips TV only).
- Page 13 GUIDE Plus+/ TIMER • Enters or exits the GUIDE Plus+ TV programme menu. Numeric keypad • Selects a chapter/track number. • Selects the preset TV channel of the recorder. SUBTITLE • Selects a subtitle language during play of a DVD or DivX Ultra Video disc. LIVE TV •...
-
Page 14: Connect
3 Connect Connect antenna or cable To watch and record TV programmes, connect This section describes the basic connections this recorder to an antenna or a cable box/ required for this recorder before it can be used. satellite receiver. Look for the highest quality connection based on the type of devices you have and make the best connection for this recorder. -
Page 15: Connect Video/Audio Cables
Connect video/audio cables Option 1: Connect to SCART socket To view the playback from this recorder, connect the recorder to the TV. Before you start, select the best video connection. EXT 1 TO TV • Option 1: Connect to SCART socket (for a standard TV). - Page 16 Option 2: Connect to S-Video socket Option 3: Connect to VIDEO (CVBS) socket S-VIDEO IN Connect an S-video cable (not supplied) Connect a composite video cable (yellow from the S-VIDEO OUT socket to the end - not supplied) from the CVBS OUT S-Video input socket on the TV.
-
Page 17: Connect Other Devices
Connect other devices Option 4: Connect to HDMI socket HDMI (High Defi nition Multimedia Interface) is To connect this recorder to other devices, you a digital interface that supports both audio and can use these suggested connections for video transmission through a single cable. common used cases. - Page 18 Connect the G-Link cable Connect to satellite receiver/ cable With the G-link cable, you can control the satellite receiver/ cable box for timer recording through the GUIDE Plus+ system. Ensure that the device is connected to the TV with an antenna cable. EXT 2 TO VCR/SAT TO TV...
- Page 19 Connect to VCR or similar device Connect to digital video/digital 8 camcorder You can record from a video tape to a recordable DVD or use the VCR when the recorder is turned off. DV OUT DV-IN EXT 2 TO VCR/SAT Flip down the cover on the right hand corner of this recorder.
- Page 20 Connect to an analogue camcorder Connect to a USB device or digital camera VIDEO OUT AUDIO OUT Connect a video cable (yellow - not supplied) from the CVBS IN socket and to Flip down the cover on the right hand the S-VHS or video output socket on the corner of this recorder.
-
Page 21: Get Started
4 Get Started Navigate through the menu Point the remote control directly at the remote sensor on the front panel and select a function. Prepare the remote control Use the following buttons on the remote control to navigate through the on-screen menus, enter characters or numbers and confi... -
Page 22: First Time Settings
Press to select an on-screen display First Time Settings language, then press the Green button [ Next ]. When you turn on this recorder for the fi rst The country selection screen is time, follow the instructions on the TV and displayed. - Page 23 Press (or the numeric buttons) to Press the Green button [ Next ]. enter the correct time, then press the Green button [ Next ]. GUIDE Plus+ setup The eco mode selection page is To install interactive TV program guide, it is Start setup displayed.
-
Page 24: Guide Plus+ Setup
Once complete, press the Red button GUIDE Plus+ Setup [ Back ] to return to the setup screen. The GUIDE Plus+ system offers a free interactive programme guide that lists all the TV ‘Setup’ allows you to define your language, country programmes available in your area. - Page 25 Once complete, press GUIDE Plus+ to exit the menu. Switch the recorder to standby mode during the night to load the TV listing data. Notes • In standby mode, some noise and heat will be generated during the download of EPG information. •...
-
Page 26: Watch Live Tv
5 Watch live TV About Time Shift Buffer - temporary HDD storage Time Shift Buffer (TSB) is a temporary hard disk storage in your recorder. It stores up to the Watch live TV through your last 6 (six) hours of TV programmes since the recorder recorder was turned on The Time Shift video bar displays the status and... -
Page 27: Control Live Tv
Control live TV Clear the Time Shift Buffer To control live TV, switch the recorder to LIVE Note TV mode. • If you access DV-IN mode, the Time Shift Buffer will be cleared. Action Button Pause live TV or resume play. Press HOME. -
Page 28: Use Guide Plus
6 Use GUIDE For other actions, use the following keys: Plus+ Action Button Go to GUIDE Plus+ Home menu. (Blue button) View the programme listing of GUIDE Plus+ menu options a selected channel. Press to scroll up a page. The menu bar is displayed at the top panel of the screen. - Page 29 View GUIDE Plus+ TV listing Search TV listings The Grid screen is the main TV listings screen The Search screen helps you to locate of the GUIDE Plus+ system. You can view TV programme listings by category. You can easily listings for the next seven days.
- Page 30 Setup personal profi le View more information The [ Info ] screen displays additional Defi ne your preferred settings by channels, categories and/or by keywords. You can easily information such as news, weather reports, fi nd programmes of your interest to watch or stock quotes, etc.
- Page 31 Manage your GUIDE Plus+ channels Adjust GUIDE Plus+ settings You can assign programme numbers to the TV Set the GUIDE Plus+ system according to your channels, switch a channel on or off and select a preference (Region, TV reception). You can also set up your [ Host Channel Setup ] and channel source (Tuner, External Receiver).
-
Page 32: Record
7 Record • High storage capacity. • TV programmes are recorded to the hard disk before it can be copied to a recordable DVD. (except for manual Before you record recording) DVD±RW • Recordings can be erased and the space can be Record media used for new recordings. -
Page 33: Record Settings
Number of hours that can be recorded Record settings (HDR3800) Record Mode Select the recording quality (high quality) 1 hr 55 mins (standard play) 3 hrs 40 mins Before you record, select the record mode. (standard play plus) 4 hrs 35 mins... - Page 34 Select the recording language Set chapter markers Some TV programmes are broadcast with an Note additional language. To ensure the correct language is recorded, select the default language • For DVD+R DL discs, select the option of [ 10 mins ] or longer. before recording.
-
Page 35: Record Live Tv
Record live TV Record a TV programme that you have watched Each recording can contain up 6 (six) hours of a Once you switch to live TV, the programme TV programme. If a recording exceeds six will be stored in the Time Shift Buffer. You can hours, it is recorded as another new title. -
Page 36: Schedule A Timer Recording
Schedule a timer recording Schedule a GUIDE Plus+ recording Schedule your recordings in advance and you Press GUIDE Plus+. can watch your favourite programmes at your Press the Blue button [ Home ]. convenience. Select [ Grid ], then press Note •... - Page 37 Use the numeric buttons to enter the Schedule a VIDEO Plus+/ S / PlusCode programme number recording (e.g. 5-312-4 or 5,312 4, key in ‘53124’), then press OK. Press GUIDE Plus+. Press the Blue button [ Home ]. Please select the Source and the Programme Number you wish to record from and press OK.
- Page 38 To change the default record settings: Schedule a manual recording Action Button Press GUIDE Plus+. [ Frequency ] : Select the repeat recording setting Press the Blue button [ Home ]. (Red button) (Once, Weekly, Mon~Fri, to select [ Schedule ]. Press , then press Weekend).
- Page 39 When ‘TUNER 01’ is displayed, select the Note input source and enter a channel. • If the recorder is not in standby mode, a notifi cation • To select an external input channel, message appears before the timer recording begins. highlight ‘TUNER’...
-
Page 40: Record From Other Devices
Record from other devices Edit a scheduled recording Press GUIDE Plus+. Press the Blue button [ Home ]. Record from a digital video to select [ Schedule ]. Press , then press camcorder You can record the content from a digital video camcorder when you connect it to the DV-IN socket. - Page 41 Record from an external device Synchronise recording from a satellite receiver (Analogue Camcorder/ Satellite Receiver/ VCR/ DVD Player) This feature is only applicable to the satellite receiver (or any similar devices) with timer You can record from the external device to a function.
-
Page 42: Simultaneous Record And Play
Watch other TV programme Simultaneous record and play Use the TV remote control to select a TV channel. To view play from the recorder, switch the Navigate the programme during TV back to its correct viewing channel for recorder. recording During recording, press on the remote control to go to the beginning of the... -
Page 43: Play
8 Play Control play When you watch a recorded title, control play with the following options: Action Button • Skip to the previous/ next íë Play recorded TV chapter. programmes • Press and hold for fast backward search. • Press and hold for fast Press HOME. -
Page 44: Play From Media Storage
Play from media storage Create your playlist Press HOME. The Home menu provides access to the various play media supported by this recorder. Select [ Media Jukebox ], then press OK. Select the media folder and press B. Press HOME. Select a fi... -
Page 45: Play From Usb
Play from USB Play from a USB card reader View the contents of a USB drive, USB memory Flip down the fl ap on the front panel. card reader or digital camera through this Connect the USB device to the recorder. -
Page 46: Play From Disc
Play from disc Notes • DVDs and DVD players are designed with regional restrictions. Before you play a disc, make sure it is for the same region zone as your device (indicated on its rear). Playable discs • If the inhibit icon ( X ) is displayed when a key is pressed, it means the function is not available. -
Page 47: Play Video
Play video Play a DivX fi le Play the DivX fi les which you have copied from your computer onto a CD-R/RW, recordable DVD or USB device. Play a recorded title Press HOME. Press DISC MENU. Select the media source ( [ Media Jukebox ], The content menu is displayed. - Page 48 Select a subtitle language Control video play For DVDs and DivX Ultra discs with multiple ® subtitle languages. Select a chapter When a disc contains more than one title or chapter, follow the options below to select a specifi c title or chapter. ZOOM During play, use the remote control: Action...
- Page 49 Search by time Slow motion play Skip to a specifi c point on the disc. To pause during play, press u. Play pauses and displays a still picture. During play, press OPTIONS. Action Button Select the time search icon, then press To move the picture forward The elapsed play time is displayed.
- Page 50 Select repeat play options Resume play from the last stopped point Select various repeat functions during play. The repeat play options vary depending on the disc This option is available during play of DVDs/ type. VCDs. The recorder is able to resume disc playback from its last stopped point.
-
Page 51: Play Music
To start playback from the beginning Play music Press ç on the front panel of the recorder. Insert a disc, then press ç to close the Play an audio disc tray. Playback starts from the last stopped point. Play a track. If play does not start, press DISC •... - Page 52 Play MP3/ WMA fi les Control audio play This recorder can play most MP3/ WMA audio fi les recorded on a recordable DVD, Shuffl e play audio commercial discs or USB fl ash drive. Play CD tracks or audio fi les in random order. Press HOME.
-
Page 53: View Photos
View photos Control photo playback During playback, press INFO. The control options are displayed at the Play a picture disc ( slideshow) bottom of the screen. You can view JPEG pictures as a slideshow. Index Repeat Transitions Rotate Press HOME. Use the remote control to control the photo slideshow. - Page 54 Play musical slideshow Notes • Play MP3/WMA audio fi les and JPEG photo It may require a longer time for the recorder to display the disc content on the TV due to the large fi les simultaneously to create musical slideshow. number of songs/photos compiled onto one disc.
-
Page 55: Edit Recordings
9 Edit Recordings Edit title name Press HOME. Select [ Recorded Titles ], then press OK. Edit titles in the hard disk Select a title, then press the Yellow button [ Edit ]. The HDD edit menu is displayed. You can: •... - Page 56 Hide an unwanted scene in a title Divide a title Note Press HOME. • Select [ Recorded Titles ], then press OK. Once a scene is hidden, the scene is removed permanently. Select a title, then press the Yellow button [ Edit ].
- Page 57 Protect/ Unprotect a title Delete a title You can protect the recorded title to prevent Press HOME. any accidental loss of recordings. Select [ Recorded Titles ], then press OK. Press HOME. Title: Select [ Recorded Titles ], then press OK. 18 / 01 01:32 Select a title, then press the Yellow button...
-
Page 58: Manage Titles By Genre
Manage titles by genre Display format You can assign each HDD title to a genre To set sort format group and search for it by its genre later. You can also create your personal genre groups. Press HOME. Select [ Recorded Titles ], then press OK. Select a title, then press the Yellow button Assign a genre [ Edit ]. - Page 59 To sort by genre Create a new genre Press HOME. Press HOME. Select [ Recorded Titles ], then press OK. Select [ Recorded Titles ], then press OK. Select a title, then press the Yellow button [ Edit ]. The list of recorded titles is displayed. Select [ Sort Format ] >...
-
Page 60: Edit Titles On A Recordable Dvd
Edit titles on a recordable Edit a genre name Note • Only genre names beginning with [ Pre-defi ned _ ] Note can be edited. • If a DVDR has been fi nalised, it cannot be edited. Press HOME. The disc edit menu provides to disc editing Select [ Recorded Titles ], then press OK. - Page 61 Select the key to enter, then press OK. Edit the disc name • Use the following options to edit. The disc name is automatically generated by the Option Action recorder. You can edit the disc name. [ Space ] Insert a space between the characters.
- Page 62 To unhide a hidden scene (DVDRW only) Hide an unwanted scene in a title Press DISC MENU. (DVDRW only) Select the title and press the Yellow button [ Edit ]. Press DISC MENU. Select [ Title ] > [ Unhide ], then press Select a title and press the Yellow button [ Edit ].
- Page 63 Press u to start play. Delete a title • To make a fast forward or reverse search, press the buttons. Press DISC MENU. • In pause mode, to move frame by Select a title and press the Red button frame, press the buttons.
-
Page 64: Play Your Recordings On Other Players
Play your recordings on other Prepare a DVDRW for playback players Press HOME. To play this recorded DVDR or DVDRW on Select [ Settings ], then press OK. another DVD player, you have to either fi nalise the disc or make it compatible. Select [ Disc ] >... -
Page 65: Copy Files
10 Copy Files Copy data fi les Copy data fi les to Media Jukebox Copy recorded titles Copy your media fi les (MP3, WMA, DivX and jpeg fi les) to the hard disk recorder. These fi les Copy your HDD titles onto a recordable DVD are stored in the Media Jukebox. - Page 66 To copy several fi les at once: Repeat steps 4 and 5 until you have fi nished your selection. Select a title and press the Yellow button • You can mark several fi les before adding to the [ Edit ]. copylist.
-
Page 67: Adjust Settings
11 Adjust Settings Select [ Tuner ] > [ Manage Presets ] and press OK. Select a channel and press Select [ NICAM ], then press OK repeatedly to toggle between: Tuner Settings [ On ] Enable NICAM mode. [ Off ] Sort preset channels Disable NICAM mode. - Page 68 Rename a channel Tune/ Modify a channel manually Press HOME. Press HOME. Select [ Settings ], then press OK. Select [ Settings ], then press OK. Select [ Tuner ] > [ Manage Presets ] and Select [ Tuner ] > [ Manage Presets ] and press OK.
-
Page 69: Disc Settings
Disc Settings Change country of residence Press HOME. Select [ Settings ], then press OK. Format a recordable DVD disc Select [ Tuner ] > [ Country Setting ], Some DVD VR, DVDR SL/DL and DVDRW then press discs need to be formatted before it can be Select an option and press OK. - Page 70 Lock/ Unlock a disc View disc information Prevent recordings from being accidentally Displays the current disc information. erased or edited by locking the recordable DVD. Press HOME. Note Select [ Settings ], then press OK. • If the disc is locked, this option will change to Select [ Disc ] >...
-
Page 71: Playback Settings
Playback Settings Set TV display format The TV format refers to the aspect ratio of display according to the type of TV you have connected. Select language options Press HOME. Select [ Settings ], then press OK. Notes • Select [ Playback ] > [ TV Shape ], then If the selected language is not available on the disc, the default disc language will be used instead. - Page 72 View DivX(R) VOD registration code Set DivX(R) subtitle font Select to view the DivX® VOD (Video On Press HOME. Demand) registration code that allows you to rent or purchase videos using DivX® VOD Select [ Settings ], then press OK. services.
-
Page 73: Recording Settings
Recording Settings Audio Settings Select the recording quality Set audio downmix See chapter ‘Record – Before you record’. Select a suitable audio downmix when you are playing a DVD recorded in Dolby Digital format. Select the recording language Press HOME. See chapter ‘Record –... - Page 74 Set digital output Enable night mode Select a suitable setting if you have connected Night mode optimises playback of sound at low an audio/video device to the COAXIAL socket volumes on the recorder. Press HOME. Press HOME. Select [ Settings ], then press OK. Select [ Settings ], then press OK.
-
Page 75: Video Settings
Video Settings System settings Set HDMI video Change system menu language See the chapter ‘Adjust Settings – Adjust HDMI Press HOME. video and audio’. Select [ Settings ], then press OK. Select [ System ] > [ Menu Language ], then press Select SCART video input Select an option and press OK. - Page 76 1) The message on the front panel display switches Select [ Settings ], then press OK. from the current time to ‘PHILIPS’. 2) Once the update completes, the recorder Select [ System ] > [ Screen Saver ], then...
-
Page 77: Format Hard Disk
Set energy saving mode View hard disc information This an energy saving mode. Displays the hard disk information. Press HOME. Press HOME. Select [ Settings ], then press OK. Select [ Settings ], then press OK. Select [ System ] > [ Eco mode ], then Select [ System ] >... -
Page 78: Manage Easylink Settings
• Your TV and other connected deivices must be Note compliant with HDMI CEC. • Philips does not guarantee 100% interoperability • After the reset, the initial setup is required. with all HDMI-CEC devices. Press HOME. Select [ Settings ], then press OK. -
Page 79: Adjust Hdmi Video And Audio
To exit the setup menu, press the Blue Adjust HDMI video and audio button [ Exit ]. Before you start... Adjust HDMI audio Ensure that the recorder is connected to a HDMI TV. (See chapter “Connect – Connect video/audio cables – Option 4”). Note •... -
Page 80: Additional Information
The software installed in your recorder is continuously being refi ned for greater stability Press HOME. and compatibility of the set. Periodically, Philips Select [ Settings ], then press OK. issues upgrades for the software which you can copy onto your USB fl ash drive to install on Select [ Misc ] >... -
Page 81: Care
Care About DivX subtitle font Most of the DivX® videos embedded with multiple subtitles. In order to display the Energy saving subtitle correctly on the screen, you may need to change the character set to which supports In order to minimise the power consumption in the selected DivX®... -
Page 82: Tv System Guide
TV System Guide COUNTRY DVD REGIONS AFGHANISTAN PAL/SECAM B ALBANIA PAL B PAL G ALGERIA PAL B PAL G ANGOLA PAL I ARGENTINA PAL N PAL N AUSTRALIA PAL B PAL H AUSTRIA PAL B PAL G AZORES PAL B BAHAMAS NTSC M BAHRAIN... - Page 83 COUNTRY DVD REGIONS LIBYA SECAM B SECAM G LITHUANIA PAL D (was SECAM) PAL K LUXEMBOURG PAL B/SECAM L PAL G/SEC L MADAGASCAR SECAM K1 MADEIRA PAL B MALAGASY SECAM K1 MALAWI PAL B PAL G MALAYSIA PAL B MALI SECAM K1 MALTA PAL B...
-
Page 84: Specifi Cations
Power supply: 230 - 240V; 50 Hz • Hard Disk capacity: • Consumption: 30 W (typical) • Standby power consumption: < 4W • HDR3800 - 160 GB • HDR3810 - 250 GB • Eco standby power consumption < 2.2 W Tuner/Reception/Transmission Cabinet •... -
Page 85: Display Panel Symbols/ Messages
• The disc tray is blocked from opening. FULL • Disc is full. There is no more space for new recordings. PHILIPS • The recorder has been turned on. LOAD • Disc is being recognised by the recorder. NO DISC MENU •... -
Page 86: Troubleshooting
To keep the warranty valid, never try to repair the system yourself. If you encounter problems when using this recorder, check the following points before requesting service. If the problem remains unsolved, register your product and get support at www.philips.com/welcome. Main Unit No power. - Page 87 Picture No picture • Check the video connections. See chapter “Connect”. • Turn on the TV to the Video In channel. • Use the TV remote control to select the channel until you see the DVD screen. See chapter “Get Started”. •...
- Page 88 No surround sound output • It depends on your TV audio capabilities. In this case, connect on HDMI connection. COAXIAL DIGITAL OUT of this recorder to your TV or AV amplifi er receiver. Disable the HDMI audio output. Play Disc does not play. •...
- Page 89 Recording A TV channel installed • Check the video connection between the DVD recorder and during the DVD recorder’s the TV. automatic TV channel • Press P+/- to search for the same TV channel which may search is fuzzy or distorted. have a clearer picture.
-
Page 90: Glossary
14 Glossary DivX The DivX code is a patent pending, MPEG-4 based video compression technology, Analogue sound developed by DivX Inc., that can shrink digital video to sizes small enough to be transported Sound that has not been converted into over the internet, while maintaining high visual numbers. - Page 91 PBC - Playback Control Refers to the signal recorded on video CDs or SVCDs for controlling playback. By using menu screens recorded on a Video CD or SVCD that supports PBC, you can enjoy interactive playback and searching. PCM Pulse Code Modulation A digital audio encoding system.
- Page 92 0800 004537 free Spain 902 888 784 € 0.10/ min Sweden 08 5792 9100 pstn Switzerland 0844 800 544 pstn United Kingdom 0870 900 9070 pstn © 2008 Koninklijke Philips Electronics N.V. All right reserved 12nc: 3139 245 29522 sgpjl-0829/31-1...
Need help?
Do you have a question about the HDR3800 and is the answer not in the manual?
Questions and answers