
Subscribe to Our Youtube Channel
Related Manuals for FujiFilm FinePix 2600 Zoom


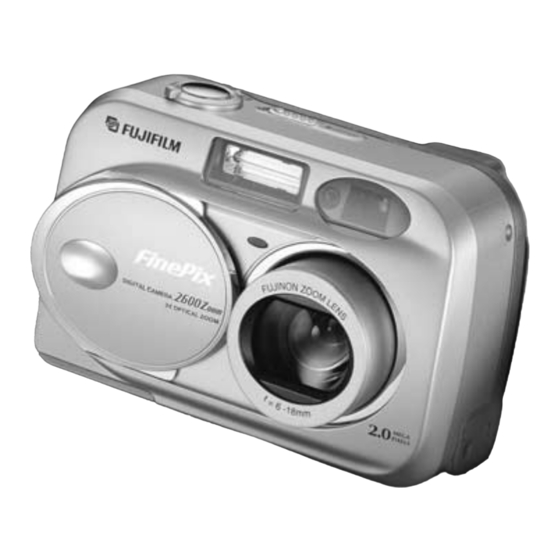
Summary of Contents for FujiFilm FinePix 2600 Zoom
- Page 1 This manual will show you how to use your FUJIFILM DIGITAL CAMERA BL00022-200 ( 1 ) FinePix2600 ZOOM correctly. Please follow the instructions carefully.
-
Page 2: Warning
CAUTION : TO REDUCE THE RISK OF ELECTRIC SHOCK. This symbol is intended to alert the user product must be used with a Fujifilm-specified installed and used in accordance with the DO NOT REMOVE COVER (OR BACK). -
Page 3: Table Of Contents
Contents 4 Advanced Features Playback 6 PC Connection PLAYBACK MODE Warning ............2 VIEWING YOUR IMAGES (PLAYBACK) ..32 Preface ............. 6 PLAYING BACK MOVIES ........50 IN PC CONNECTION ......... 63 PLAYBACK ZOOM ..........33 Camera Features and Accessories ....7 DSC Mode ............ -
Page 4: Preface
Preface Camera Features and Accessories I Test Shots Prior to Photography I Notes on Electrical Interference Features Accessories For particularly important photographs (such as weddings If the camera is to be used in hospitals or aircrafts, please and overseas trips), always take a test photograph and view note that this camera may cause interference to other h Superb image quality provided by the high-resolution h AA-size Nickel-Metal... -
Page 5: Nomenclature
Nomenclature ✽ Refer to the pages in parentheses for information on using the camera features. Mode Switch Still image mode (P.22) Select this mode for still photography. Viewfinder (P.24) Playback mode (P.32) DISP button(P.31, 34) This mode provides playback zoom and multi-frame playback as well as normal single-frame playback. -
Page 6: Getting Ready
Nomenclature PREFACE Getting Ready Example of LCD Monitor Text Display : Still image Selecting the Language Attaching the Strap Self-timer Macro White balance Flash Number of remaining shots Photography mode File size / Image quality Battery low warning Zoom Bar Camera shake warning AF frame AF warning... -
Page 7: Charging And Loading The Batteries
Lithium, manganese or nickel-cadmium (Ni-Cd) batteries cannot be used. Batteries that Can Be Charged hAA-size Ni-MH batteries Fujifilm HR-3UF: 2 (supplied with the camera or Charge lamp sold separately) Attempting to charge batteries other than those specified for use with the charger (such as Load the rechargeable batteries into the battery ✽... -
Page 8: Loading The Smartmedia
Operation of this camera is only guaranteed when it switched on, the camera is automatically switched charged Ni-MH batteries (sold separately) in reserve. is used with Fujifilm SmartMedia. off to protect the SmartMedia. Take care not to drop the batteries when opening Some 3.3V SmartMedia are labelled as “3V”... -
Page 9: Removing The Smartmedia
™ REMOVING THE SmartMedia SWITCHING ON AND OFF Carefully grasp and remove the SmartMedia. When you slide the “POWER” switch sideways Take care to avoid spilling the batteries. to switch the camera on, the green viewfinder lamp lights. To switch the camera off, slide the “POWER”... -
Page 10: Setting The Date And Time
SETTING THE DATE AND TIME SWITCHING ON AND OFF Blank Blinking If the date/time setting has been cleared, a With the LCD monitor on, you can check the confirmation message appears on the LCD remaining charge in the battery. monitor. To set the date/time, press the 1Battery has ample charge (No indicator “MENU/OK”... -
Page 11: Using The Optional Ac Power Adapter
USING THE OPTIONAL AC POWER ADAPTER SETTING THE DATE AND TIME AC power adapter ( optional ) Always use a FUJIFILM AC Power Adapter AC- Use the AC power adapter in situations when a loss of power will cause problems, such as during file downloading (via the USB connection). -
Page 12: Basic Photography
Basic q TAKING PICTURES ( AUTO MODE ) STILL IMAGE MODE Photography Ensure that your fingers or the camera strap do not obscure the lens or flash control sensor. Zoom bar 1Set the Mode switch to “ ”. 2Open the lens cover. Loop the strap over your wrist, brace your 3Slide the “POWER”... - Page 13 q TAKING PICTURES ( AUTO MODE ) STILL IMAGE MODE Beep AF frame To take the picture, press the shutter button LCD monitor down fully without lifting your finger off it. The camera beeps and takes the picture, and the When you are using the viewfinder to take a data is then recorded.
-
Page 14: Iviewfinder Lamp Display
q TAKING PICTURES ( AUTO MODE ) STILL IMAGE MODE I Viewfinder lamp display Number of Available Frames Display Status The number of available shots appears on the Lit green Ready to shoot. LCD monitor. Blinking green AF/AE in progress or camera shake/AF warning. See P.60 for information on changing the File Size Lit orange Image being recorded onto the SmartMedia. -
Page 15: Using Af/Ae Lock
USING AF/AE LOCK Beep In a shot with this type of composition, the Move the camera slightly so that one of the subjects (two people in this case) are not in the subjects in the AF frame. AF frame. If the shot is taken at this point, the subjects will not be in focus. -
Page 16: Digital Zoom
DIGITAL ZOOM FRAMING GUIDELINE FUNCTION Zoom bar display Scene Digital zoom Use this frame when you want to position your main subject in the center of the frame or when you want to align your shot with the horizon. Optical zoom This feature allows you to compose a shot that captures the moment while focusing on the subject size and the overall balance of the... -
Page 17: Playback Mode
You can use this camera to view (excluding some uncompressed data) images recorded on a FinePix2600 ZOOM or images recorded onto a 3.3V SmartMedia using a FUJIFILM FinePix series, MX This is useful for such things as checking the Pressing “d ”... -
Page 18: Multi-Frame Playback
MULTI-FRAME PLAYBACK ERASING SINGLE FRAME Normal playback No text displayed Multi-frame playback In playback mode, the display shown on the LCD monitor switches each time you press the “DISP” button. Press the “DISP” button until the multi-frame playback screen (9 frames) appears. You cannot display text during multi-frame playback. -
Page 19: Advanced Features Photography
Advanced Features ADVANCED FEATURES PHOTOGRAPHY ERASING SINGLE FRAME Photography The Advanced Features Photography section introduces a range of camera functions that you can access by setting the Mode switch to “ ” or “ ”. I Photography mode specifications Factory Shared menu Mode swich Photography mode... -
Page 20: Photography Menu
PHOTOGRAPHY MENU OPERATION/SELECTING q AUTO OR q MANUAL y FLASH PHOTOGRAPHY MENU PHOTOGRAPHY MENU When you are in still image mode (with the Mode This mode can be selected in the “ • ” still Setting display AUTO Auto Flash Mode image modes. -
Page 21: Red-Eye Reduction
y FLASH PHOTOGRAPHY MENU : Red-Eye Reduction y Forced Flash u Suppressed Flash ; Slow Synchro Use this mode to ensure that the subject’s eyes Use this mode to photograph backlit scenes, Use this mode for photography using indoor This is a flash mode that uses a slow shutter appear natural when photographing people in such as a subject against a window or in the lighting, for shots taken through glass, and for... -
Page 22: Macro ( Close-Up ) Photography
5 MACRO ( CLOSE-UP ) PHOTOGRAPHY o SELF-TIMER PHOTOGRAPHY PHOTOGRAPHY MENU PHOTOGRAPHY MENU Selecting Macro mode specifies the following camera settings: h The lens is fixed to the wide-angle zoom setting and only digital zooming is available. h The LCD monitor is fixed to the ON setting. h Switching the camera off cancels Macro mode. -
Page 23: Ev (Exposure Compensation)
a EV ( EXPOSURE COMPENSATION ) o SELF-TIMER PHOTOGRAPHY PHOTOGRAPHY MENU PHOTOGRAPHY MENU Subjects for Which Exposure Adjustment is Particularly Effective Guide to using + (positive) compensation h Copying of printed text (black characters on white paper) (+1.5 EV) h Backlit portraits (+0.6 EV to +1.5 EV) h Very bright scenes (such as snowfields) and highly reflective subjects (+0.9 EV) h Shots made up predominantly of sky. -
Page 24: White Balance (Selecting The Light Source)
s WHITE BALANCE ( SELECTING THE LIGHT SOURCE ) e MOVIE ( VIDEO ) PHOTOGRAPHY MENU MOVIE MODE AUTO: Automatic adjustment (Shooting to show the ambience of the light source) : Shooting outdoors in fine weather x : Shooting in shade : Shooting under “Daylight”... -
Page 25: Movie (Video)
e MOVIE ( VIDEO ) MOVIE MODE Press the shutter button down fully to start During shooting, “hREC” appears on the LCD shooting the movie. monitor and the remaining time is displayed in the top-right corner. Zoom bar In Movie mode, the lens is locked in the wide- If you press the shutter button again during When you press the shutter button, there is a very angle setting and only the digital zoom can be... -
Page 26: Advanced Features Playback
The FinePix2600 ZOOM can play back movie files shot on a FinePix2600 ZOOM and movie files up to 20 seconds long that were shot on a FUJIFILM digital camera and stored on a 3.3V SmartMedia. However, If the subject of the movie is very bright, white this camera cannot play back sound. -
Page 27: Playback Menu
g ERASING SINGLE ALL FRAMES/FORMATTING • PLAYBACK MENU FRAME Erase only the selected file. ™ The file for which “ ” was displayed cannot be erased. Unprotect the frame using the camera on which the protection was first applied. “ ¢... -
Page 28: How To Specify Print Options (Dpof)
f HOW TO SPECIFY PRINT OPTIONS ( DPOF ) DPOF DATE SETTING PLAYBACK MENU PLAYBACK MENU DPOF stands for Digital Print Order Format and refers to a format that is used for recording printing specifications for images shot using a digital camera on media such as the SmartMedia. -
Page 29: Dpof Set Frame
f DPOF SET FRAME PLAYBACK MENU When you have finished specifying the DPOF settings, always press the “MENU/OK” button to confirm the settings. If you press the “BACK” button, no DPOF settings are specified. You can only specify one print per frame (image) 1If you select a frame for which DPOF settings 1Use “d”... -
Page 30: Settings
IN SETTINGS USING THE OPTION MENU Settings The “Settings” chapter looks at functions available from “ OPTION” in the “ ” still Image, “ ” movie Using SET–UP and “ ” playback. I List of Settings q Still Image mode e Movie mode 3 Playback mode AUTO... -
Page 31: Dj Setting The File Size And Quality (Compression Ratio)
dj SETTING THE FILE SIZE AND QUALITY ( COMPRESSION RATIO ) d LCD MONITOR BRIGHTNESS You can choose any combination of 3 file sizes and 3 image quality settings. Use the table below as a guide to the best settings for your shots. File size FINE NORMAL... -
Page 32: Set-Up Power Save
POWER SAVE IN PC CONNECTION SET–UP PC Connection PC Connection describes how to set up a USB connection and provides an overview of the functions available using a USB connection. Refer also to the Software Quick Start Guide booklet. PC CAM ( camera ) Mode DSC Mode This mode provides a simple way to read images This function allows you to conduct videoconferencing... -
Page 33: Connecting At Dsc Mode
CONNECTING AT DSC MODE Camera Operation Computer Operation (USB) socket i FinePixViewer automatically starts up. DC IN 3V (USB) socket socket Camera 1Switch your computer on. ✽ Screen for Windows 98 SE 2Use the special USB cable to connect the camera to your computer. -
Page 34: Connecting At Pc-Camera Mode
CONNECTING AT PC-CAMERA MODE Camera Operation Computer Operation (USB) socket i FinePixViewer automatically starts up and the Picture Hello window opens (Windows only). DC IN 3V (USB) socket socket Camera 1Switch your computer on. 2Use the special USB cable to connect the camera to ✽... -
Page 35: Disconnecting From The Pc
DISCONNECTING FROM THE PC ( Important — always use this procedure. ) Perform the steps shown below before you Windows 2000 Professional switch the camera off. This procedure differs depending on the operating system Left-click the Eject icon in the taskbar and eject (USB) software (or PC) you are using. -
Page 36: System Expansion Options
System Expansion Options Accessories Guide e By using the FinePix2600 ZOOM together with other optional FUJIFILM products, your system can e The optional accessories (sold separately) can make taking pictures with the FinePix2600 ZOOM be expanded to fill a wide range of uses. -
Page 37: Explanation Of Terms
Explanation of Terms Accessories Guide AF/AE Lock: images and sound as a single file. Images in the file are h FD-A2 Floppy Disk Adapter (FlashPath) On the FinePix2600 ZOOM, pressing the shutter button down recorded in JPEG format. Motion JPEG can be played back This adapter is the same size and shape as a 3.5-inch floppy disk. -
Page 38: Notes On Using Your Camera Correctly
Places affected by smoke or steam. alkaline batteries. the camera is left with the batteries removed, the time lens cleaning liquid to a piece of FUJIFILM lens h Places subject to strong magnetic fields (such as and date settings are cleared.) cleaning paper and wipe gently. -
Page 39: Notes On Using The Battery Charger
Ni-MH batteries self-discharge even when they are not become warm due to the power stored inside the Applicable FUJIFILM HR-3UF (Ni-MH, 1600 mAh or being used. Always charge Ni-MH and Ni-Cd batteries batteries. This is normal and does not indicate a fault. -
Page 40: Notes On The Smartmedia
™ Notes on the SmartMedia ISmartMedia INotes on Using SmartMedia with a PC ✽ When the SmartMedia cover is opened or the h Do not use or store SmartMedia in very hot, humid or SmartMedia removed, or when the camera is The SmartMedia card supplied with your FinePix2600 corrosive environments. -
Page 41: Warning Displays
SmartMedia. i The photographed image i Use a new SmartMedia. i Camera fault. i Contact your FUJIFILM dealer. cannot be recorded as it is too large to fit in the available i The SmartMedia terminals are i Wipe the contact area on the SmartMedia with a space on the SmartMedia. -
Page 42: Troubleshooting
Troubleshooting Warning Displays e If you think the camera is faulty, check the following once more. Warning Displayed Explanation Remedy Problem Cause Remedy There is a print order specified for To erase the image, specify “RESET” as the No power. i The battery is exhausted. - Page 43 Troubleshooting Problem Cause Remedy Problem Cause Remedy Can’t use the flash to The ERASE ALL function i The flash is set to Suppressed Flash i Set the flash to Auto, Red-eye Reduction i The frame is protected. i Unprotect the frame using the camera on take pictures.
-
Page 44: Specifications
8 1600 ✕ 1200 9 1280 ✕ 0 640 ✕ Movie Use one of the following: FUJIFILM shall not be held liable for damages resulting Quality Mode FINE NORMAL BASIC FINE NORMAL NORMAL — from errors in this Owner’s Manual. -
Page 45: Safety Notes
Circular icons with a diagonal bar notify the impacts. Never attempt to modify or disassemble The charger is designed for Fujifilm HR-AA user that the action indicated is prohibited Do not attempt to recharge lithium or the camera. (Never open the casing.) NiMH batteries. -
Page 46: Ec Declaration Of Conformity
AC power adapter. Bij dit produkt zijn batterijen geleverd. Wanneer deze leeg zijn, moet u ze niet h Contact your FUJIFILM dealer to This can damage the power cord or request internal cleaning every 2 years. - Page 47 Printed on recycled paper. 26 - 30, Nishiazabu 2 - chome, Minato - ku, Tokyo 106 - 8620, Japan FGS - 103107 - FG Printed in Japan...
Need help?
Do you have a question about the FinePix 2600 Zoom and is the answer not in the manual?
Questions and answers