Table of Contents
Advertisement
Quick Links
MICROWA VE OVEN
OPERATING
INSTRUCTIONS
Before operating this oven, please read these instructions completely.
KOR-164H
M/W
DEF
TIMER
LOCK
Ib
Ons Touch & Easy Cook
FRESH
BEVERAGE
POPCORN
VEGETABLE
FROZEN
FROZEN
DINNER
VEGETABLE
PIZZA
PLATE
MORE
LESS
MEAT
POULTRY
FISH
POWER
DEFROST
1
2
3
4
5
6
7
8
9
KICHEN
0
CLOCK
TIMER
STOP/CLEAR
START
/SPEEDY COOK
Advertisement
Table of Contents

Related Manuals for Daewoo KOR-164H


Summary of Contents for Daewoo KOR-164H
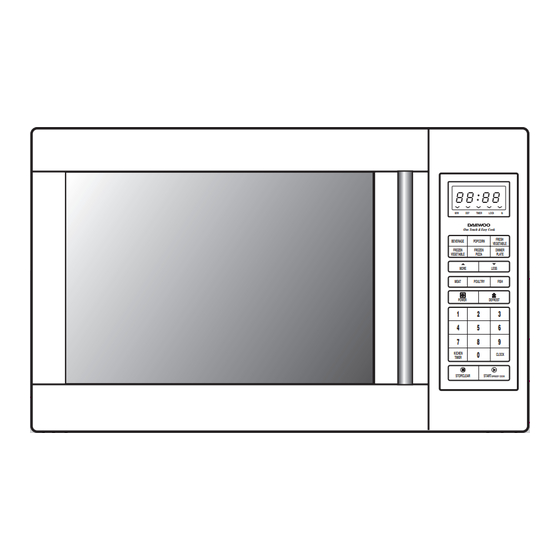
- Page 1 MICROWA VE OVEN KOR-164H OPERATING TIMER LOCK Ons Touch & Easy Cook INSTRUCTIONS FRESH BEVERAGE POPCORN VEGETABLE FROZEN FROZEN DINNER VEGETABLE PIZZA PLATE MORE LESS MEAT POULTRY FISH POWER DEFROST KICHEN CLOCK TIMER STOP/CLEAR START /SPEEDY COOK Before operating this oven, please read these instructions completely.
-
Page 3: Important Safety Instructions
IMPORTANT SAFETY INSTRUCTIONS When using electrical appliances, basic safety precautions should be followed, including the following: WARNING-To reduce the risk of burns, electric shock, fire, injury to persons or exposure to excessive microwave energy: 1. Read all instructions before using the 13. -
Page 4: Federal Communications Commission Radio Frequency Interference Statement
FEDERAL COMMUNICATIONS COMMISSION RADIO FREQUENCY INTERFERENCE STATEMENT (U.S.A ONLY) WARNING: This equipment generates and uses ISM frequency energy and if not installed and used properly, that is in strict accordance with the manufacturer’s instructions, may cause interference to radio and television reception. -
Page 5: Installation
INSTALLATION Examine the oven after unpacking. check fork damage such as a misaligned door, broken door or dent in the cavity. If any damage is visible, DO NOT INSTALL, and notify your dealer immediately. Level, flat location. Install the microwave oven on a level, flat surface. Ventilation Do not block air vents. -
Page 6: Specifications
SPECIFICATIONS POWER SUPPLY 120V AC 60 Hz SINGLE PHASE WITH GROUNDING POWER CONSUMPTION 1400 W MICROWAVE OUTPUT POWER 1000 W FREQUENCY 2450 MHz OUTSIDE DIMENSIONS (W X H X D) 589 X 339 X 486 mm (23.2X13.3X19.1 in.) CAVITY DIMENSIONS (W X H X D) 399 X 263 X 426 mm (15.7X10.4X16.8 in.) NET WEIGHT APPROX. -
Page 7: Features Diagram
FEATURES DIAGRAM TIMER LOCK Ons Touch & Easy Cook FRESH BEVERAGE POPCORN VEGETABLE FROZEN FROZEN DINNER VEGETABLE PIZZA PLATE MORE LESS MEAT POULTRY FISH POWER DEFROST KICHEN CLOCK TIMER STOP/CLEAR START /SPEEDY COOK 1. Door latch - When the door is closed it will 6. - Page 8 FEATURES DIAGRAM (continued) TIMER LOCK Ons Touch & Easy Cook FRESH BEVERAGE POPCORN VEGETABLE FROZEN FROZEN DINNER VEGETABLE PIZZA PLATE MORE LESS MEAT POULTRY FISH POWER DEFROST KICHEN CLOCK TIMER STOP/CLEAR START /SPEEDY COOK 1. Time set pad - Used to set the cooking time 7.
-
Page 9: Operation Procedure
OPERATION PROCEDURE This section includes useful information about oven operation. 1. Plug power supply cord into a standard 3- pronged 15 Amp, 120V AC 60Hz power outlet. 2. After placing the food in a suitable container, open the oven door and put it on the glass tray. The glass tray and roller guide must always be in place during cooking. -
Page 10: Setting The Clock
CONTROLS SETTING THE CLOCK When the oven is first plugged in, the display will flash ":0" and a tone will sound. If the AC power ever goes off, the display shows ":0" when the power comes back on. 1. Touch CLOCK pad. NOTE: This oven has multiple clock This is a 12 hour clock system. -
Page 11: Weight Defrosting
WEIGHT DEFROSTING WEIGHT DEFROSTING lets you easily defrost food by eliminating guesswork in determining defrosting time. Follow the steps below for easy defrosting. 1. Touch MEAT pad. The g indicator light and "500" is displayed. MEAT The display will show what you touched. 2. -
Page 12: Cooking In One Stage
COOKING IN ONE STAGE 1. Touch POWER pad. The M/W indicator lights. (Select desired power level.) The display will show what you touched. POWER NOTE: If steps 1nd 2 are omitted, the oven will cook at full power. 2. Touch the number pads for the cooking time. This example shows power level 5. -
Page 13: Kitchen Timer Mode
KITCHEN TIMER MODE Timer operates as a minute timer, can be set to delay cooking and used as a hold setting after cooking.However delay cooking can not be programmed for defrost. Timer operates without microwave energy. HOW TO USE AS A MINUTE TIMER 1. -
Page 14: Speedy Cook
SPEEDY COOK SPEEDY COOK allows you to reheat for 30 seconds at 100% (full power) by simply touching the SPEEDY COOK pad. By repeatedly touching the SPEEDY COOK pad, you can also extend reheating time to 5 minutes by 30 second increments. 1. - Page 15 ONE TOUCH COOKING (CONTINUED) 1. Touch BEVERAGE pad once When you touch BEVERAGE pad once, "1" BEVERAGE for 1 cup, twice for 2 cups or is displayed. three times for 3 cups. After 1.5 seconds, the display changes into cooking time of quantity and the oven starts cooking.
-
Page 16: Child Safety Lock
LESS, MORE To alter one touch cooking or cooking time whilst oven is in operation, use LESS or MORE.(except for defrosting) Press LESS/MORE to decrease/increase the one touch cooking time in multiples of 10 seconds. The overall one touch cooking time can be increased to a maximum of 99 minutes 50 seconds. Press LESS/MORE to decrease/increase the cooking time in multiples of 1 minute. -
Page 17: Microwave Utensils
UTENSIL TEST Dishes that do not absorb microwave energy are best for microwave cooking. Lock on the label to verify that particular cups, glasses, plates are indeed suitable, especially paper goods. If you are not sure, try this utensil test to check. ¥... -
Page 18: Care Of Your Microwave Oven
CARE OF YOUR MICROWAVE OVEN Turn the oven off before cleaning. It is occasionally necessary to remove the glass tray for cleaning. Wash the tray in warm sudsy water or in a dishwasher. Keep the inside of the oven clean. When food spatters or spilled liquids adhere to oven walls, wipe with a damp cloth. -
Page 19: Before You Call For Service
BEFORE YOU CALL FOR SERVICE Refer to following checklist, you may prevent an unnecessary service call. * The oven doesn’t work; 1. Check that the power cord is securely plugged in. 2. Check that the door is firmly closed. 3. Check that the cooking time is set. 4.
Need help?
Do you have a question about the KOR-164H and is the answer not in the manual?
Questions and answers