Table of Contents
Advertisement
Quick Links
Advertisement
Table of Contents

Related Manuals for Shiro CX2


Summary of Contents for Shiro CX2
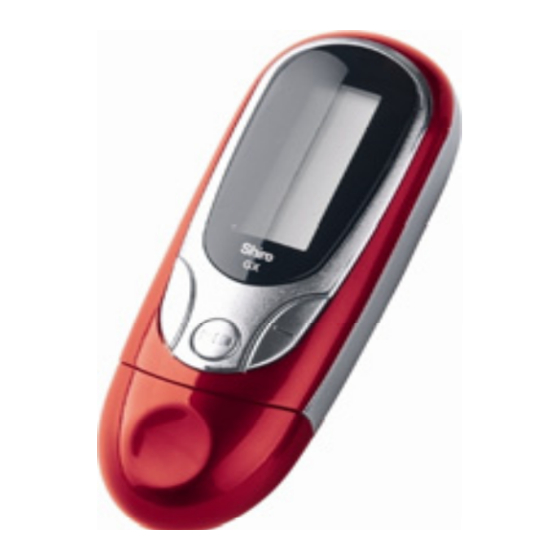
- Page 1 CX2 MP3 Digital Audio Player User Guide Version 1.0...
-
Page 2: Table Of Contents
Table of Contents Notice Operation Buttons Package Includes LCD Information Power On & Off Playing Music Operating in FM TUNER Mode Operating in FM Radio Mode Operating in Voice Record Mode Operating in Voice Playback Mode Using Delete Music (or Voice) Mode Operating in the Settings Mode Using About Mode Connect with the PC... -
Page 3: Notice
Notice If the player is not used for a long duration, please remove the battery to avoid battery leakage. Do not use the player in extreme hot, cold, dusty or wet environment. Do not drop the player from great heights. Under normal volume condition, the player can last up to 10 hours on a single AAA battery. -
Page 4: Operation Buttons
Operation Buttons Package Includes • Installation CD • USB Cable • Earphone • User Guide • AAA Battery... -
Page 5: Lcd Information
LCD Information The Play Mode includes Normal, Repeat All, Repeat track, Shuffle Once, Shuffle Repeat, and Preview. -
Page 6: Power On & Off
Power On & Off To power on the player, please press and hold the Play/Pause button for about 3 seconds. To power off the player, please press and hold the Play/Pause button until all the indication on the LCD disappears. Playing Music When pressing Play/Pause button, you will see the below picture showing the player in Music mode. -
Page 7: Operating In Fm Tuner Mode
While playing, press the MODE button once to select the Point A of the repeat segment, “A-”mark will show on the screen. Press the MODE button again to select the Point B. ”A-B” mark will show on the screen. The music will be repeatedly played between Point A and Point B. - Page 8 Scroll the MODE button forward or backward to select the previous channel or the next channel. Press the button to decrease the volume. Press the button to increase the volume. Scan the Channel In the FM tuner mode, press the MODE button repeatedly until the LCD screen display the Scan icon, press the PLAY button to start scanning.
-
Page 9: Operating In Voice Record Mode
Record the FM content In the FM tuner mode, press the MODE button repeatedly until the LCD screen display the Rec mark, press the PLAY button to start FM content recording. The screen will display the recording file name (e.g. /FM/F002.WAV) and the recording time and the remaining record time. -
Page 10: Operating In Voice Playback Mode
The screen will display the record file name and the recording time and the remaining record time. Pause the recording by press the PLAY button once. And press PLAY button again to resume the recording. Stop the recording by press the MODE button once. Begin playback the record file by press the PLAY button once. -
Page 11: Using Delete Music (Or Voice) Mode
Using Delete Music( or Voice) Mode Press and hold the MODE button for 2 seconds to active the main menu. Scroll the MODE button forward or backward to highlight the “Del” menu. Press the MODE button again to enter. Scroll the MODE button forward or backward to highlight the “Delete Music files” or “Delete voice files”... -
Page 12: Operating In The Settings Mode
Operating in the Settings Mode Press and hold the MODE button for 2 seconds to active the main menu. Scroll the MODE button forward or backward to highlight the Settings menu. Press MODE button to active There are 9 sub-menus and corresponding sub-menus in the Settings menu, which are listed as below: EQ Set 7 selection: Natural, Rock, Jazz, Classical, Pop, Soft, DBB. -
Page 13: Using About Mode
Record Set setting the recording parameters. Scroll the MODE button forward or backward to select the desired option or press the MODE button to toggle select its sub-option. Use this option to choose the quality of recording. Higher quality means less recording time. If select the Exit option, it will return to the Setting Mode menu. -
Page 14: Connect With The Pc
The screen will display as below: The player’s firmware version Ver: 2.521 The total memory space INT: 256MB The free memory space. FREE: 238MB Connect with the PC Use a USB cable to connect the player with the PC. The player will power on automatically. Then a connecting picture will be shown at the LCD screen of the player. -
Page 15: Troubleshooting Guide
Win98/SE OS will prompt that it find a new device and will search for its driver, select the directory to the F:\ Driver For Win98 (F is the letter of CD-ROM drive) Click “Next” and “Next” button to finish the installation. Click “Yes”... - Page 16 Power is too low. 4 I lost the data? Answer: Data is lost because the voltage is not stabilize when download file. (Strongly advice: user backup all data, our company will not answer for the data loss) 5 Why do the different music have different volume? Answer: MP3 music have different volume because parameter different.
-
Page 17: Technical Specifications
Technical Specifications Built-In Memory 128MB/256MB/512MB/1GB/2GB Battery 1xAAA Alkaline or Ni-MH LCD Resolution 128x32 pixels dot-matrix, EL Backlight Signal Noise Ratio >90dB Earphone output 5mW+5mW Music Format MP3, WMA, WAV Record Format IMPCM, MSPCM, PCM USB2.0, compatible with USB1.1 Created on 22 Jan 2007. - Page 18 LIMITATION OF LIABILITY AND DAMAGES. IN NO EVENT WILL MANUFACTURER AND MANUFACTURER’S RESELLERS (COLLECTIVELY REFERRED TO AS “THE SELLERS”) BE LIABLE FOR DAMAGES OR LOSS, INCLUDING BUT NOT LIMITED TO DIRECT, INDIRECT, SPECIAL WILLFUL, PUNITIVE, INCIDENTAL, EXEMPLARY, OR CONSEQUENTIAL, DAMAGES, DAMAGES FOR LOSS OF BUSINESS PROFITS, OR DAMAGES FOR LOSS OF BUSINESS OF ANY CUSTOMER OR ANY THIRD PARTY ARISING OUT OF THE USE OR THE INABILITY TO USE THE PRODUCT OR THE SOFTWARES, INCLUDING BUT NOT LIMITED TO THOSE RESULTING FROM DEFECTS IN THE PRODUCT OR SOFTWARE OR DOCUMENTATION, OR LOSS OR INACCURACY OF DATA OF ANY KIND, WHETHER BASED ON CONTRACT, TORT...
Need help?
Do you have a question about the CX2 and is the answer not in the manual?
Questions and answers