
Related Manuals for Vizio VBR140


Summary of Contents for Vizio VBR140
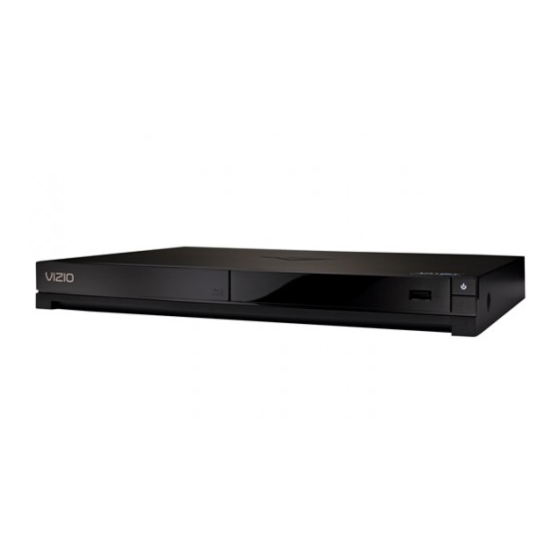
- Page 1 MOdeL MODELS E3D320VX VBr140 E3D420VX E3D470VX USER GUIDE INSTALLING The BLu-rAy pLAyer CONTrOLS & CONNeCTIONS BASIC OperATION AdjuSTING The pLAyer’S SeTTINGS TrOuBLeShOOTING & SuppOrT heLp, SpeCS, wArrANTy & LeGAL...
- Page 2 This product qualifies for ENERGY STAR in the “factory default” setting and this is the setting in which power savings will be achieved. Changing the factory default picture settings or enabling other features will increase power consumption that could exceed the limits necessary to qualify for ENERGY STAR rating.
-
Page 3: Table Of Contents
Table of Contents Installing the Blu-ray Player ......3 Adjusting the Deep Color Setting ........18 Adjusting the Audio Settings ..........19 Inspecting the Package Contents ........3 Changing the PCM Downsampling Rate ......19 Connecting the Player to an Electrical Outlet ....3 Adjusting the Digital Audio Output ......... - Page 4 Table of Contents Using Internet Apps ............31 Using the Netflix App............31 Opening a Netflix Account ..........31 Using the VUDU App ............31 Opening a VUDU Account ..........31 Using the Pandora App ............32 Opening a Pandora Account .......... 32 Using the HULU Plus App .............
-
Page 5: Installing The Blu-Ray Player
Your Blu-ray player will easily connect to your TV. Before you inspect the package contents. Use the images below to ensure begin the installation, ensure your TV has an available HDMI port. nothing is missing or damaged. VIZIO Blu-Ray Player HDMI HDMI Quick Start Guide... -
Page 6: Connecting The Player To Your Home Audio System
3. Turn the player on by pressing the Power button on the remote, or by pressing the Power button on the front of the player. 4. Turn your home audio system on. VIZIO Blu-ray Player Home Audio Receiver Optical (SPDIF) Cable OPTICAL... -
Page 7: Connecting The Player To Your Tv And Home Audio System With Hdmi
4. Turn your TV and home audio system on. 5. When you are ready to use the player, set your home audio system’s input to the player’s connection. Set your TV’s input to the proper HDMI connection. HDMI VIZIO Blu-ray Player Home Audio Receiver HDMI Cable HDMI HDMI... -
Page 8: Setting Up Your Network Connection
Network and press OK. Then highlight Connection Type, Ethernet cables are available from many retailers in press OK and select Ethernet. lengths of up to 50 feet. Router / Modem VIZIO Blu-ray Player Ethernet Cable Setting Up Your Network Connection... -
Page 9: Connecting To A Wireless Network
Connecting to a Wireless Network Connecting to a Wireless Network with WiFi Protected Setup (WPS) For the most reliable network performance, a wired connection is recommended. Ethernet cables are available from many retailers in lengths of up to 50 feet. To connect to a wireless network: Wi-Fi Protected Setup is an easy way to connect the Player to your 1. -
Page 10: Controls & Connections
Controls and Connections front Panel Disc Tray USB Port To insert a disc, press the Eject Button first then Insert USB thumb drive to play photos and music. place a disc onto the tray. Supported files include .jpg and .mp3. Eject Button Press to eject the disc tray. -
Page 11: Rear Panel
rear Panel Digital Optical Audio Out Power Cord Connect an optical cable* to an external audio device. Ethernet Connect an Ethernet cable* to your router or modem. HDMI Out Connect an HDMI cable* to your TV. RCA Stereo Audio Out Connect an RCA cable* to an external audio device. -
Page 12: Remote Control
Control Internet Apps and other disc functions. Press Red to exit V BUTTOn apps. Open the Player main menu. VIzIO TV VOlUME Adjust volume or mute a VIZIO TV. SUBTITlE Enable picture-in-picture.* Change disc subtitle track.* InFO AUDIO Open disc info window. -
Page 13: Replacing The Batteries
Replacing the Batteries Replacing Batteries 1. Remove the battery cover. 2. Insert two batteries into the remote control. Make sure that the (+) and (-) symbols on the batteries match the (+) and (-) symbols inside the battery compartment. 3. Replace the battery cover. • Use only good quality batteries. -
Page 14: Basic Operation
Basic Operation In this chapter, you will learn how to: Playing a Disc • Navigate the On-Screen Menu Your player can play several kinds of discs. Use this table to ensure • Play a Disc your disc is compatible with the player: • View USB Media Navigating the On-Screen Menu Type of Disc... -
Page 15: Basic Playback Functions
To play a disc: Basic Playback Functions When playing a disc, you can use buttons on the remote to manipulate the playback in several ways: 1. Press the Eject button on the remote or touch the Eject control on the front of the player. -
Page 16: Advanced Playback Functions
Advanced playback functions Viewing USB Media - aUdiO and iMageS Your player also features advanced playback functions. Your player features a USB port where you can connect and share a USB thumb drive containing your photos and music. The player supports the following file types: Subtitle Media Type File Types... -
Page 17: Usb Media Playback Controls
USB Media Playback Controls Playing USB Photos and Audio When listening to USB audio, you can control the playback using To play USB media, you must first save your music or images onto buttons on the remote. a USB thumb drive. Remember: • The USB thumb drive must be formatted as FAT32. - Page 18 3. Use the Arrow buttons on the remote to highlight My Media, then press OK. 4. Use the Up/Down Arrow buttons to highlight the media type you want to play, then press OK. 5. Use the Arrow and OK buttons on the remote to locate your media file in the file browser.
-
Page 19: Adjusting The Player's Settings
Adjusting the Player’s Settings Your player is preset to work with most setups out of the box, but if 1. From the Display menu, use the you would like to adjust any of the player’s settings, you can use Up/Down Arrow buttons on the remote to highlight Output to the on-screen menu to do so. -
Page 20: Adjusting The Aspect Ratio
Adjusting the Aspect Ratio Activating Film Mode If video displayed from the player appears distorted or otherwise Movies are recorded on film at a rate of 24 pictures, or frames, per incorrect, you may need to adjust the aspect ratio of the player second. -
Page 21: Adjusting The Audio Settings
AdjuSting the Audio SettingS Changing the PCM Downsampling Rate This setting should be adjusted if your home audio receiver can The settings in the Audio Menu configure the player’s digital process high-bitrate PCM signals over the Optical/SPDIF port. audio outputs (HDMI or Optical/SPDIF). To access the Audio Menu: If you are unsure about how to adjust this setting, leave the PCM Downsampling rate at 48 kHz. -
Page 22: Adjusting The Digital Audio Output
Adjusting the Digital Audio Output Activating or Deactivating Dynamic Range Control (DRC) This setting changes the type of digital audio data the player When activated, this setting normalizes the volume of a disc’s outputs over HDMI and Optical/SPDIF. Depending on your setup, audio track. -
Page 23: Changing Language Settings
ChAnging lAnguAge SettingS Changing the Disc’s Menu Language Using this setting, you can change the language that is displayed when a disc’s main menu is displayed. Changing the On-Screen Menu Language To access the Language menu: Not all languages are available on all discs. Most discs have only one menu language available. -
Page 24: Changing The Audio Language
Changing the Audio Language bd-live StorAge This setting changes the spoken language on a played disc. When a USB storage device is connected to the USB port, the player can use its memory for BD-Live storage. Not all languages are available on all discs. Most discs have only one or two audio languages available. -
Page 25: Setting The Parental Controls
Setting the PArentAl ControlS Setting the Parental Country Because countries have their own rating systems, if you are going The player’s parental controls allow you to prevent the player to use the Parental Controls, you should set the parental country from displaying certain rated content without a password. -
Page 26: Activating Or Deactivating The Parental Controls
Activating or Deactivating the Parental Controls Changing the Parental Code Use this setting to turn the parental controls on or off and restrict If you use the parental controls, you should change the passcode playback of discs encoded with a rating level equal to or higher from the default to prevent children from accessing inappropriate than the level you choose. -
Page 27: Changing The System Settings
ChAnging the SyStem SettingS Activating or Deactivating the Screen Saver The screen saver features a floating Vizio logo that will appear The System menu allows you to customize autoplay function, after a period of inactivity. This can prevent image “burn in” on power options, and the screen saver. -
Page 28: Activating Or Deactivating Disc Autoplay
Activating or Deactivating Disc Autoplay Setting Power Down Mode When this option is activated, the player will automatically play The player has two Power Down Modes for you two choose from. an inserted disc. To select the different Power Down Modes: When this option is deactivated, you will need to select Play Disc 1. -
Page 29: Updating The Player's Firmware
Updating the Player’s Firmware Restoring the Player’s Factory Default Settings To ensure your player has the most current firmware, you should This setting allows you to restore menu and Internet App options occasionally update via Disc, USB Storage device, or Network. to their factory defaults. -
Page 30: Adjusting The Network Settings
In order to access BD-Live or Internet Apps, your player must be cable, the player will automatically detect the connection. You connected to your home network and to the internet. can manually adjust the settings, but VIZIO recommends this for advanced users only. To access the Network menu: To adjust the wired settings: 1. -
Page 31: Setting Up A Wireless Connection Manually
Setting Up a Wireless Connection Manually Setting Up a Wireless Connection Using WPS If you have a wireless home network, including a wireless router Many newer routers feature WiFi Protected Setup, which allows or modem and an internet connection, you can set up the player you to setup a wireless network without manually entering to connect wirelessly. -
Page 32: Viewing The Info Screen
viewing the info SCreen The info screen displays the following information: • Software Version • Interface • MAC Address • IP Address To access the info screen: 1. Turn on the player and your TV. Use the Arrow buttons on the remote to highlight Settings and press OK. -
Page 33: Using Internet Apps
Using Internet Apps buttons on the remote to highlight No and press OK on the remote. Then highlight Start your FREE trial and press OK on the remote. Follow the on screen instructions to begin your free trial. For Netflix support, go to www.netflix.com/help or call 1-866-579-7113. -
Page 34: Using The Pandora App
To open a Pandora account: Code. 7. Turn on your player and the TV. 3. On your home computer, go to www.HULU.com/plus/vizio and follow the account setup instructions. Using the Arrow buttons on the remote, highlight Pandora and press the OK button on the remote. -
Page 35: Troubleshooting & Technical Support
Troubleshooting & Technical Support do you have questions? Let us heLP! youR PRoduCt inCLudes FRee LiFetiMe teCh suPPoRt The VIZIO support team is highly trained and is based in the United States. We can help with: • New Product Setup •... - Page 36 I cannot connect the Player to my network. There is no power. • Unplug the modem/router and the Player. Wait 10 seconds, then • Ensure the power cord is securely connected to a working turn them back on. electrical outlet. •...
-
Page 37: Specifications
Specifications 12.6 x 1.4 x 8.2 inches Dimensions: 320 x 36 x 209 mm 2.7 lbs Weight: 1.2 kg Blu-ray Disc Resolutions of 1080p (HDMI Out) 1080i / 720p / 480i / 480p (HDMI) Resolutions DVD, DVD-R, DVD-RW Selectable Resolutions Supported: of 1080p (HDMI) 1080i / 720p / 480i / 480p (HDMI) -
Page 38: Limited Warranty
Product covered by this warranty is determined to be defective within the OF MERCHANTABILITY AND FITNESS FOR A PARTICULAR PURPOSE, SHALL BE warranty period, VIZIO will either repair or replace the Product at its sole LIMITED IN DURATION TO THE PERIOD OF TIME SET FORTH ABOVE. VIZIO’S TOTAL option and discretion. -
Page 39: Legal & Compliance
Legal & Compliance FCC Class B Radio Interference Statement DHHS and FDA safety certification This product is made and tested to meet safety standards of the FCC, NOTE: This equipment has been tested and found to comply with the limits requirements and compliance with safety performance of the U.S. - Page 40 This offer is valid for a period of three (3) years from the date of the distribution • “DVD Logo” is a trademark of DVD Format/Logo Licensing of this VIA device by VIZIO. You can obtain a copy of the GPL, LGPL licenses Corporation.
- Page 41 VIA services or to continue to connect to the having explicit language. Nevertheless, you agree to use the VIA Services VIA Services. at your sole risk and that VIZIO shall have no liability to you for content that...
- Page 42 You agree that you will not use any third-party materials in a manner that would infringe or violate the rights of any other party, and that VIZIO is not in any way responsible for any such use by you.
- Page 43 MODELS E3D320VX E3D420VX E3D470VX © 2012 VIZIO INC. All rIghts reserVed. 120605OC-A...
Need help?
Do you have a question about the VBR140 and is the answer not in the manual?
Questions and answers