Table of Contents
Advertisement
Quick Links
Advertisement
Table of Contents

Related Manuals for TerraTec AXON AIX 101


Summary of Contents for TerraTec AXON AIX 101
- Page 1 TERRATEC PRODUCER/AXON AIX 101/103 English Manual Version 1.0, status: October 05...
- Page 2 CE Declaration TerraTec Electronic GmbH, Herrenpfad 38, D-41334 Nettetal, Germany hereby declare that the product: AXON AIX 101 and AXON AIX 103 to which this declaration refers is in compliance with the following standards or standardiz- ing documents: EN 55013(2001)+A1(2003), EN 55020(2002).
-
Page 3: Table Of Contents
Contents AXON AIX 101/103 Guitar/Bass Pickup ................4 Safety notes ........................5 Parts list ..........................6 Connectors and controls....................8 Installation ......................... 9 Installing the controller....................10 Determining the optimal location................10 Selecting the mounting method.................. 10 Mounting with screws and/or adhesive strips/pads............ 11 Mounting with Velcro.................... -
Page 4: Axon Aix 101/103 Guitar/Bass Pickup
The AXON AIX 101 is the pickup for six-string guitars, while AXON AIX 103 designates the pickup for bass guitars with up to 6 strings. The illustrations in the following instructions all show the AIX 101. -
Page 5: Safety Notes
The AIX-101/103 does not contain any user-serviceable parts. Opening the housing or other tampering may result in electrical shock or irreparable damage. Please refer all servicing work to TerraTec technicians. TerraTec cannot be held liable for damage resulting from installation and operation errors or improper use. AXON AIX 101/103 (English) -
Page 6: Parts List
12 ea. (AIX 103) reusable adhesive pads, small screws, 3x6 mm small screws, 2 ea. (AIX 101) with washers, 3x6, 3x8 and 3x12 mm, 8 ea. (AIX 103) 2 ea. (AIX 103) 2 ea. (AIX 103) AXON AIX 101/103 (English) - Page 7 1 button-head screw 3 double-sided adhesive strips reusable adhesive pads (3x16 mm) (AIX 101) 3 ea. (AIX 101) 6 ea. (AIX 103) 1 Velcro set 1 bracket 6 spacers (with double-sided adhesive, AIX 101) 3 suction cups AXON AIX 101/103 (English)
-
Page 8: Connectors And Controls
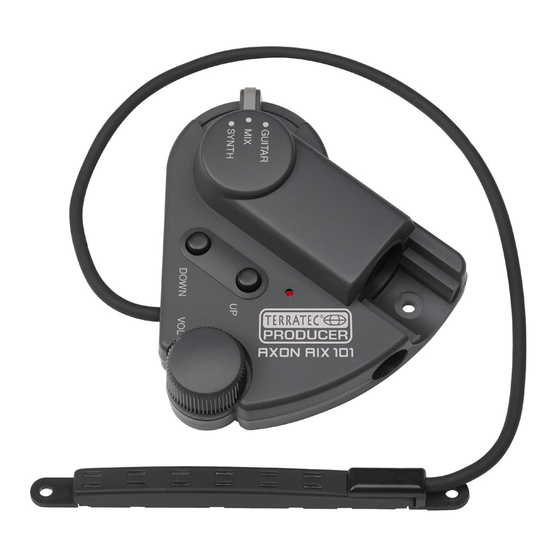
Use the short cable supplied with the AIX 101/103 to connect this socket to the 1/4" output socket of the instrument. 4. Operation LED: this LED indicates that the AIX 101/103 is receiving power from the AXON via the 13-pin cable. AXON AIX 101/103 (English) -
Page 9: Installation
The AIX 101/103 pickup must be fitted between the bridge and rear pickup of the gui- tar. Installation is not possible if there is not enough room between the bridge and rear pickup or the body and the strings. AXON AIX 101/103 (English) -
Page 10: Installing The Controller
Permits the mounting of the controller on a curved top in conjunction with adhesive strips. The bracket can also be attached to the strap button of the instrument. This requires a certain amount of care to prevent damage to the strap button mounting screw, how- ever. AXON AIX 101/103 (English) -
Page 11: Mounting With Screws And/Or Adhesive Strips/Pads
(if drilled) is aligned with the hole in the controller. Press the con- troller firmly – but carefully – into place to ensure proper adhesion. Finally, insert the self- tapping button-head screw (3x6 mm) through the hole in the controller and into the hole AXON AIX 101/103 (English) -
Page 12: Mounting With Velcro
3. The controller can now be gently pulled off and reattached to the body as needed. Note: This is not the most secure mounting method and should only be used if no other op- tion is suitable, or if the pickup will be used often on different instruments. AXON AIX 101/103 (English) -
Page 13: Mounting With Bracket
(using spacers if possible to avoid scratches). Loosen the strap button of the in- strument by unscrewing it a couple of turns and insert the slot of the bracket under the button. Tighten the screw to secure the bracket to the body. AXON AIX 101/103 (English) -
Page 14: Mounting With Suction Cups
Regardless of the mounting method, the optimal position of the pickup must be determined first. AXON AIX 101/103 (English) -
Page 15: Marking The Optimal Mounting Position
Once the pickup is correctly aligned, mark the centers of the screw holes with a sharp pencil or punch on the guitar top. If you do not want traces of the marking to remain on the top, use small pieces of marking tape instead of a pencil. AXON AIX 101/103 (English) - Page 16 [B, E, A, D, G], the magnet pair opposite the ca- ble end, for [E, A, D, G, C] the magnet pair at the cable end is unused, as shown below. 4 strings 5 strings AXON AIX 101/103 (English)
-
Page 17: Selecting The Mounting Method
Once you have determined the optimal mounting position, prepare the installation. How- ever, please note that the spacing between the strings and the pickup magnets are an important factor. As the heights of the pickup magnets are not individually adjustable, you AXON AIX 101/103 (English) - Page 18 If the mounting surface is not level – when applying the pickup to a guitar with a curved top, for example – add pieces of spacer shortened to one quarter or one third of their original length at either end of the pickup. The spacers can be cut easily with scissors. AXON AIX 101/103 (English)
- Page 19 Should it become necessary to change the height of the pickup, remove the strings and release the pickup from the instrument by inserting a thin, flat object such as the blade of a small knife between the pickup and the top spacer. Gently lever the pickup off of the spacer. AXON AIX 101/103 (English)
-
Page 20: Mounting With Screws And Springs
2. Mounting the pickup Insert the self-tapping button-head screws (3x25 mm) through the screw holes in the pickup and the springs under the pickup. Fasten the pickup by threading the screws into the holes in the guitar top. AXON AIX 101/103 (English) -
Page 21: Installation With Mounting Plates (Aix 103 Only)
Drill holes with a diameter of 2 mm vertically into the guitar body at the mounting point. Attach the mounting plates to the guitar body with one countersunk screw (3x10 mm) each. AXON AIX 101/103 (English) - Page 22 (3x6, with washer) small screw (3x6, with washer) spring multichannel Step 3 pickup pickup holder (left) mounting plate (left) countersunk self-tapping screw (3x10) mounting plate (right) mounting plate (right) double-sided adhesive strip Step 1 for mounting plate AXON AIX 101/103 (English)
-
Page 23: Getting Ready To Play
1/8" jack into the input socket of the AIX 101/103. guitar cable Note: connect the instrument cable even if you will not be using the conventional pickup sound. This connection is important for grounding the instrument to prevent noise and electric shock. AXON AIX 101/103 (English) - Page 24 (13-pin) To unplug the 13-pin cable from the AXON or the AIX 101/103, press the unlock but- ton on the plug body. AXON AIX 101/103 (English)
-
Page 25: Technical Data
The system is ready to play when the AXON, the synthesizer and other devices are prop- erly connected and set up as described in their respective manuals. Technical data Dimensions (WxHxD): 85.1 mm x 75.9 mm x 28.8 mm Weight: 30g (AIX 101), 78g (AIX 103) AXON AIX 101/103 (English)
Need help?
Do you have a question about the AXON AIX 101 and is the answer not in the manual?
Questions and answers