Table of Contents
Advertisement
Advertisement
Table of Contents

Related Manuals for Apricorn Aegis Bio 3.0


Summary of Contents for Apricorn Aegis Bio 3.0
- Page 1 Aegis User’s Manual...
- Page 2 Copyright © Apricorn, Inc 2012. All rights reserved. Windows is a registered trademark of Microsoft Corporation. All other trademarks and copyrights referred to are the property of their respective owners. Distribution of modified versions of this document is prohibited without the explicit permission of the copyright holder.
-
Page 3: Table Of Contents
Contents About the Aegis Bio Package contents Fingerprint Sensor Swiping your Finger Basic LED States Aegis Bio - Connections Before you begin Connecting the Aegis Bio Connecting the Aegis Bio with USB Y-Cable Getting Started - Out of the Box Unlocking the Aegis Bio Locking the Aegis Bio Complete Re-set... -
Page 4: About The Aegis Bio
About the Aegis Bio When security matters, trust your data to the Aegis Bio. Designed for those that demand the highest level of protection for their data, the Aegis Bio fuses leading edge technology in biometric authentication and encryption with a rugged, portable design to produce a truly remarkable drive. -
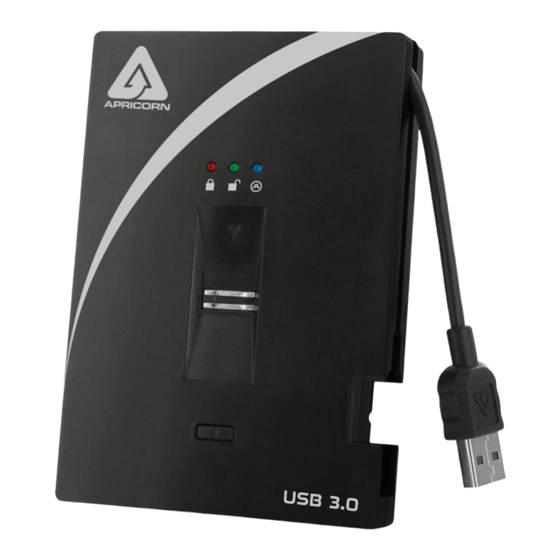
Page 5: Fingerprint Sensor
Fingerprint Sensor LOCK UNLOCK GREEN ADMIN BLUE ENROLL Button Start swipe here Swiping your Finger To successfully swipe your finger, start your swipe by placing your fingertip on the downward facing arrow at the top of the biometric sensor. Swipe your finger in a downward motion across the sensor. -
Page 6: Aegis Bio - Connections
Aegis Bio - Connections Before you begin Be sure to review the following information before you begin to use the Aegis Bio. Attention: Use only the included cables with your Aegis Bio. You might damage the drive if you use a cable not included with the Aegis Bio. -
Page 7: Connecting The Aegis Bio With Usb Y-Cable
Connecting the Aegis Bio with USB Y-Cable If none of the Aegis Bio LEDs power on a single USB connection, use the included USB Y-cable. Attach the Aegis Bio’s integrated USB cable to the female connector of the USB Y-cable. Connect the two male USB connectors to two available USB ports on your computer. -
Page 8: Getting Started - Out Of The Box
Getting Started - Out of the Box TIP: We highly recommend that you enroll at least three different fingers to ensure access to the drive in the case that your primary finger cannot be used. Attach the integrated USB cable of the Aegis Bio to an available USB port on your computer. -
Page 9: Unlocking The Aegis Bio
Unlocking the Aegis Bio Once your fingerprints are enrolled, you can unlock the Aegis Bio using the directions below. Attach the integrated USB cable of the Aegis Bio to an available USB port on your computer. The Aegis Bio LED will show Solid indicating that the drive is locked and is in Standby mode. -
Page 10: Formatting The Aegis Bio After A Complete Re-Set
Formatting the Aegis Bio After a Complete Re-set After a complete re-set, follow the instructions on page 8 “Getting Started” to enroll your fingerprints. Once your fingerprints are enrolled follow the directions below to format and partition your Aegis Bio. Formatting for Windows Right-click My Computer, and then click Manage from the Windows desktop. -
Page 11: Formatting For Mac
Select the Aegis Bio from the list of drives and volumes. Each drive in the list will display its capacity, manufacturer, and product name, such as 232.9 Apricorn Bio. Click the ‘Erase’ tab. Enter a name for the drive. The default name is Untitled. The drive’s name will eventually appear on the desktop. -
Page 12: Enrolling A New Finger
Enrolling a new finger If there are less than 5 fingerprints enrolled and you want to enroll a new finger, follow the instructions below. Plug in the Aegis Bio to a USB port on your computer. The LED should be Solid indicating that the drive is Standby mode. -
Page 13: Hibernating, Suspending Or Logging Off From The Os
Hibernating, Suspending or Logging off from the OS Be sure to save and close all the files on your Aegis Bio before hibernating, suspending, or logging off from the Windows operating system. It is recommended that you log off the Aegis Bio manually before hibernating, suspending, or logging off from your system. -
Page 14: Troubleshooting
Troubleshooting This section contains troubleshooting information for the Aegis Bio. If you encounter any of the following problems when using the Aegis Bio, refer to the corresponding answers. Q: Is there any other way to access the drive without using the fingerprint scanner? A: No. -
Page 15: Technical Support
NO OTHER WARRANTY, EITHER EXPRESS OR IMPLIED, INCLUDING ANY WARRANTY OR MERCHANTABILITY AND FITNESS FOR A PARTICULAR PURPOSE, HAS BEEN OR WILL BE MADE BY OR ON BEHALF OF APRICORN OR BY OPERATION OF LAW WITH RESPECT TO THE PRODUCT OR ITS INSTALLATION, USE, OPERATION, REPLACEMENT OR REPAIR. - Page 16 © Apricorn, Inc. 2013. All rights reserved. 12191 Kirkham Road Poway, CA, U.S.A. 92064 1-858-513-2000 www.apricorn.com...
Need help?
Do you have a question about the Aegis Bio 3.0 and is the answer not in the manual?
Questions and answers