Table of Contents
Advertisement
CD Receiver
CR-555
CR-555DAB
Instruction Manual
Thank you for purchasing an Onkyo CD receiver.
Please read this manual thoroughly before
making any connections and plugging it in.
Following the instructions in this manual will
enable you to obtain optimum performance and
listening enjoyment from your new CD receiver.
Please retain this manual for future reference.
Getting Started .......................... 2
Connections ............................ 13
Basic Operations .................... 16
Playing CDs ............................. 18
iPod / iPhone Playback ........... 22
Using USB interface ................ 23
Listening to the Radio ............ 25
Advanced Operations ............. 30
Miscellaneous .......................... 31
E
n
Advertisement
Table of Contents

Related Manuals for Onkyo CR-555


Summary of Contents for Onkyo CR-555
-
Page 1: Table Of Contents
/ iPhone Playback ... 22 Using USB interface ....23 Listening to the Radio .... 25 Thank you for purchasing an Onkyo CD receiver. Please read this manual thoroughly before making any connections and plugging it in. Following the instructions in this manual will enable you to obtain optimum performance and Advanced Operations ..... -
Page 2: Getting Started
WARNING: WARNING AVIS TO REDUCE THE RISK OF FIRE OR ELECTRIC RISK OF ELECTRIC SHOCK RISQUE DE CHOC ELECTRIQUE DO NOT OPEN NE PAS OUVRIR SHOCK, DO NOT EXPOSE THIS APPARATUS TO RAIN OR MOISTURE. The lightning flash with arrowhead symbol, within an equilateral triangle, is intended to alert the user to the CAUTION: presence of uninsulated “dangerous voltage”... -
Page 3: Precautions
If water or any other liquid gets – A heater is turned on, or cold air from an air inside this unit, have it checked by your Onkyo conditioner is hitting the unit. dealer. – In the summer, when this unit is moved from an air conditioned room to a hot and humid place. -
Page 4: Declaration Of Conformity
Refer servicing to qualified ELECTRONICS GmbH personnel. LIEGNITZERSTRASSE 6, 82194 GROEBENZELL, GERMANY declare in own responsibility, that the ONKYO product described in this instruction manual is in compliance with the corresponding technical standards such as EN60065, EN55013, EN55020 and EN61000-3-2, -3-3. GROEBENZELL, GERMANY K. -
Page 5: Features
Features Amplifier • WRAT (Wide Range Amplifier Technology) VLSC™ is a trademark of Onkyo Corporation. • Symmetrical Designed Power Amplifier Circuitry • 2 Digital Inputs (1 Optical/1 Coaxial) • 3 Audio Inputs and 1 Output • Optimum Gain Volume Circuitry Windows Media, and the Windows logo are trademarks, or •... -
Page 6: Supplied Accessories
Remote controller (RC-849S) and two batteries (AAA/R03) (Note for China: The battery for the remote controller is not supplied for this unit.) Indoor FM antenna (CR-555) Indoor FM/DAB antenna (CR-555DAB) AM loop antenna (CR-555) Power cord In catalogs and on packaging, the letter at the end of the product name indicates the color. - Page 7 Setting MP3/WMA Preferences......21 iPod / iPhone Playback iPod / iPhone Playback ........... 22 Playing an iPod/iPhone via USB ......22 iPod/iPhone Playback via Onkyo Dock ....22 Displaying Music File Information......22 Using USB interface Using USB interface..........23...
-
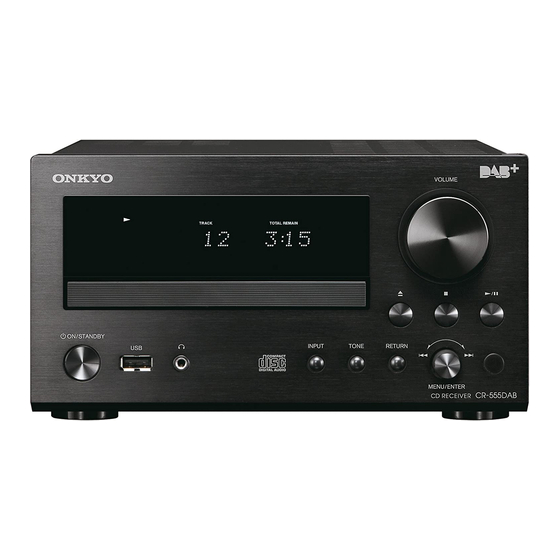
Page 8: Getting To Know The Cd Receiver
Play and pause indicators (18) DIGITAL, ANALOG indicators Tuning indicators (25) Playback mode indicators (20, 24) AUTO indicator 1FOLDER indicator TUNED indicator MEMORY indicator AM indicator (CR-555) RANDOM indicator FM STEREO indicator indicator DAB indicator (CR-555DAB) 1 indicator RDS indicator (European models) -
Page 9: Rear Panel
DIGITAL IN COAXIAL and OPTICAL LINE IN DAB/FM ANTENNA (CR-555DAB) These analog audio inputs are for connecting Onkyo RI Dock and cassette deck, etc. See pages 13–15 for connection information. FM ANTENNA AM ANTENNA (CR-555) -
Page 10: Remote Controller
Getting to Know the CD receiver—Continued Remote Controller The page numbers in parentheses show where you can find the main explanation for each item. On/Standby [ ] button (16) DISPLAY button Used to change the information shown on the display. DIMMER button (17) INPUT SELECTOR buttons (16) Pause [ ] button (18) -
Page 11: Disc Notes
Disc Notes Precautions for Playback Note: • A disc recorded with a recorder or personal computer Compact discs (CDs) with the following logo on the may not play in some cases. (Cause: Disc’s label surface can be used. Do not use discs designed for characteristics, damaged or dirty disc, dirt on player’s purposes other than audio, such as CD-ROMs for PC lens, dew condensation, etc.) -
Page 12: Handling Discs
Disc Notes—Continued Handling Discs Caring for Discs Hold discs by the edge, or by the center hole and edge. If the disc is dirty, the CD receiver will have a hard time Avoid touching the playback surface (surface with reading signals, and the audio quality may drop. If the nothing printed on it). -
Page 13: Connecting Antennas
• If you cannot achieve good reception with the supplied indoor FM antenna, try a commercially available outdoor FM antenna instead. • (CR-555) If you cannot achieve good reception with the supplied indoor AM loop antenna, try using it with a commercially available outdoor AM antenna. -
Page 14: Connections
Connecting Speakers ■ Screw-type speaker terminals Connecting Your Speakers Strip 12 to 15 mm of insulation from the ends of the • Connect the right speaker to the CD receiver’s right speaker cables, and twist the bare wires tightly, as (R) SPEAKERS terminals. -
Page 15: Connecting An Onkyo Ri Dock (Remote Interactive Dock)
Connecting Other Components—Continued Connecting an Onkyo RI Dock (Remote Interactive Dock) The following diagram shows how to connect an optional Onkyo RI Dock (Remote Interactive Dock). Connect either of them. ANALOG AUDIO OUT RI Dock Digital Media Transport What can you do with •... -
Page 16: Basic Operations
Basic Operations Adjusting the Tone This manual describes the procedure for using the remote controller, unless otherwise specified. Press the [TONE] button repeatedly. Turning On the CD receiver Setting will change in the following orders: Bass, Treble, Balance, PM.Bass, Direct To turn on the CD receiver, press the On/Standby [ ] Use the Arrow [ ]/[ ] buttons to adjust the button on the remote controller. -
Page 17: Setting The Display Brightness
Basic Operations—Continued Setting the Display Brightness Muting the Sound You can adjust the brightness of the CD receiver’s To mute the output of the CD receiver, press the remote display. controller’s [MUTING] button. The MUTING indicator appears on the display. Press the [DIMMER] button repeatedly to To unmute the CD receiver, press the [MUTING] button cycle through the following patterns:... -
Page 18: Playing Cds
Playing CDs Displaying CD Information Press the Open/Close [ ] button to open the disc tray. During playback, press the remote controller’s Place the CD on the tray with the label-side [DISPLAY] button repeatedly to display the following facing up. CD information. -
Page 19: Displaying Mp3/Wma Information
Playing CDs—Continued ■ Cancelling Navigation or All Folder Mode To access files or subfolders inside another To cancel Navigation mode or All Folder mode while folder, select the folder, and then press Play selecting MP3/WMA files, return to upper hierarchy and ] button. -
Page 20: Memory Playback
Playing CDs—Continued Memory Playback Random Playback With memory playback, you can create a playlist of up With random playback, all of the tracks on the disc are to 25 tracks. played in random order. This mode can only be used while playback is stopped. This mode can only be used while playback is stopped. -
Page 21: Setting Mp3/Wma Preferences
Playing CDs—Continued ID3 VER.2 Setting MP3/WMA Preferences This preference determines whether or not version With the MP3/WMA preferences, you can change the 2.2/2.3/2.4 tags are read and displayed. When set to “Not way MP3/WMA file information is displayed and the Read”, version 2.2/2.3/2.4 ID3 tags will not be way MP3/WMA CDs are played. -
Page 22: Ipod / Iphone Playback
/ iPhone Playback Playing an iPod/iPhone via USB iPod/iPhone Playback via Onkyo Dock • Before using the Onkyo Dock components, update your iPod/iPhone with the latest software, available from the Apple web site. • Set the CD receiver’s Input Display to “DOCK”. -
Page 23: Using Usb Interface
Using USB interface The CD receiver can play back MP3 and WMA files that Use the [USB] buttons to select “USB”. have been stored on USB flash drives and MP3 players. The USB indicator lights. • When no USB flash drive is connected, “No USB” Supported Audio File Formats will be displayed. -
Page 24: Resume Playback
Using USB interface—Continued Note: Press the [REPEAT] button repeatedly to select • Do not connect the CD receiver’s USB port to a USB the type of repeat playback. port on your computer. Music on your computer • Repeat playback (default): cannot be played through the CD receiver in this way. -
Page 25: Listening To The Radio
Listening to the Radio Tuning into Radio Stations Presetting FM Stations Automatically (Auto Preset) With the Auto Preset function, you can automatically preset all of the FM radio stations available in your area in one go. Presets make it easy to select your favorite Band Frequency stations and eliminate the need to tune the radio... -
Page 26: Presetting Am/Fm Stations Manually
Listening to the Radio—Continued Selecting Preset Stations Use the Arrow [ ]/[ ] buttons to select “Normal” or “Strong”. You must store some presets before you can select them Press [ENTER]. (see pages 25 and 26). “Complete” appears on the display. Use the [TUNER] button to select “AM”... -
Page 27: Copying Presets
Listening to the Radio—Continued Copying Presets Erasing Presets With the Preset Copy function, you can organize your Select the preset you want to erase (see presets in the order you want. When you copy a preset, page 26). its name is also copied. Press the [MENU] button, and then use the Select the preset you want to copy (see Arrow [... -
Page 28: Naming Presets
Listening to the Radio—Continued Naming Presets Space: Enters a space character. You can name presets for easy identification. The preset Shift name may contain of up to eight characters. Toggles between lower and upper case Select the preset you want to name (see characters. -
Page 29: Listening To Dab Digital Radio (Cr-555Dab)
Listening to the Radio—Continued Preferences Listening to DAB Digital Radio (CR-555DAB) Use the following functions and settings to set up DAB digital radio. Press the [TUNER] button repeatedly to select Press the [MENU] button, and then use the “DAB”. Arrow [ ] buttons to select “TunerSetting”. -
Page 30: Advanced Operations
Custom Setup Sel Change Setting Common Preferences When you connect an Onkyo -capable component, The common setting for each input selector is explained it’s important that you select the input source name that below. Go through the following steps for setup. -
Page 31: Miscellaneous
If you have any trouble using the CD receiver, look for a solution in this section. If you can’t resolve the issue yourself, try resetting the CD receiver before contacting your Onkyo dealer. Note that resetting the CD receiver will delete your radio presets and custom settings. - Page 32 Troubleshooting—Continued CD Playback Playback jumps. • The CD receiver is being subjected to vibration or the disc is scratched or dirty (see page 11). Can’t add tracks to the playlist for memory playback. • Make sure there’s a disc in the CD receiver. Also, you can only add valid track numbers. For example, if the CD contains 11 tracks, you cannot add track #12.
- Page 33 USB Mass Storage Class may not be supplied power. Onkyo is not responsible for damages (such as CD rental fees) due to unsuccessful recordings caused by the unit’s malfunction. Before you record important data, make sure that the material will be recorded correctly.
-
Page 34: Specifications
2 ch × 22 W at 4 ohms, 1 kHz, 2 ch driven of 0.4% (IEC) No-sound Power Consumption 22 (Front, 1 kHz, 8 Ω) Damping Factor (CR-555) 30 (USB 1ALoad) W (CR-555DAB) 35 (USB 1ALoad:DAB) THD+N (Total Harmonic Distortion+Noise) 0.4% (1 kHz, 1 W) Stand-by Power Consumption Input Sensitivity and Impedance (Unbalance) (CR-555) 0.26 W... - Page 36 1301, 555 Tower, No.555 West NanJin Road, Jin an, Shanghai, China 200041, Tel: 86-21-52131366 Fax: 86-21-52130396 http://www.cn.onkyo.com/ Y1207-2 SN 29401160A (C) Copyright 2012 Onkyo Corporation Japan. All rights reserved. * 2 9 4 0 1 1 6 0 A *...
Need help?
Do you have a question about the CR-555 and is the answer not in the manual?
Questions and answers