Table of Contents
Advertisement
Advertisement
Table of Contents

Related Manuals for Aiphone TL-2000


Summary of Contents for Aiphone TL-2000
- Page 1 1012 Distributed by Aiphone INSTALLATION AND OPERATION MANUAL...
-
Page 2: Table Of Contents
TABLE OF CONTENTS TL-2000 Connection diagram TL-2000 Basic setup instructions for Installer Installation (starting up program, changing time and date) Installations screen (existing installation, new installation) Details of Installation screen (parameters) Configuration of Installation screen Relay configuration Communication Time Speaker / Microphone Volume... - Page 3 Uploading to Panel Downloading to PC General info General information Keypad Codes Comments Printing Printing data Exit Exit installation Help Help with install Update Menu – General Screen Clock change – Daylight savings time Holidays Managing Agent Keypad Code Installation Company Keypad Code Update Installations Change passcodes Update time...
-
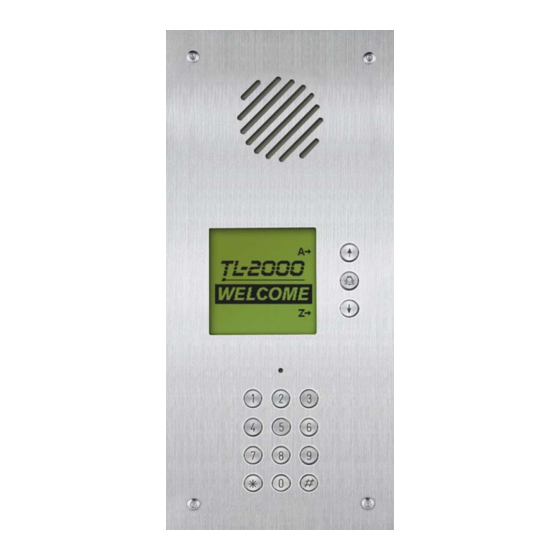
Page 4: Tl-2000 Connection Diagram
TL-2000 Connection diagram Speaker Not used Telephone line Arrow & Bell buttons Microphone REX inputs & Relay outputs* 12 button keypad 12VDC input Not used DB9 – RS232 programming input RJ45 – RS485 connection Direct call button input** CN2 connections... -
Page 5: Tl-2000 Basic Setup Instructions For Installer
TL-2000 Basic set up instructions for Installer Install program from CD. Refer to page 6. Run program and choose Supervisor from the start up screen. Default password is “super”. Refer to page 6. Select Installation from the general menu, and click on the new icon. -
Page 6: Installation (Starting Up Program, Changing Time And Date)
Installation Install the TL-2000 installation program from the provided CD. Open the TL-2000 program. Once open choose one of the three available user types. Supervisor – Allows for full access of all aspects of the program, including the ability to change the parameters of the size of the system. -
Page 7: Installations Screen (Existing Installation, New Installation)
The New Installation window will appear. Fill in the appropriate information. Please note the Serial number is on a white sticker located on the back of the TL-2000 entrance panel. The Passcode is the last 4 digits of the Serial number. -
Page 8: Details Of Installation Screen (Parameters)
Details of Installation Screen: Upon clicking OK on the new installation window or opening an existing installation, the Details of Installation screen will be displayed. This allows you access to change parameters of a specific installation. Click on Parameters Click on Configuration Configuration of Installation Screen: A) Relay 1, allows you to adjust the time E) Period, allows you to select 1 of 5... -
Page 9: Communication Time
J) Camera 5VDC / Relay 3, allows you to entrance panel will ring a telephone activate the CN5 connector. Not number. (min 10, max 300 sec.) recommended to use, contact Aiphone for additional information. O) Clocks Change displays the dates specified in the Installation screen under... -
Page 10: Period Types
Period Types: Period Types allow you to change the access parameters based on a time schedule. The TL-2000 has 5 different periods that can be scheduled, Group A, B, C, D, and Door Panel. A period type is a 7 day week schedule, with 1 time zone, 2 time zones, or a combination of both. -
Page 11: Call Activation Rules During Periods
Period Types (continued): Select the Door Panel tab. J) Operation Mode, allows you to choose L) Scroll Display of Residents, allows between the different modes available. you to choose between displaying or not Active Periods are the times between displaying the resident’s information during Open and Close during Period 1 and the specified period when Free Access is Period 2. -
Page 12: Screens & Keypad Parameters
Screens & Keypad Parameters: Click on Parameters Click on Screens & Keypad A) Backlight Activation, brightens the Checking the Speed dialing box enables display screen between the start and end the speed dial feature, allowing visitors to times set. When installed in a bright area, dial tenants by either their apartment you may want to adjust the time so that it is number or personal number. -
Page 13: Pre-Recorded Message Description
Messages (Continued): Message # Pre-recorded Message Event Type Message 1: “Please wait, your call is in progress” Each time a call is made. Message 2: “Your correspondent cannot be reached at this time. Please try again.” When a visitor presses the bell button to call a resident outside of Periods 1 &... -
Page 14: Caretaker
Caretaker: Click on Parameters Click on Caretaker Enter the Caretaker information if applicable. If Caretaker needs to be accessed by the entry panel, check the “Is a Resident” box. When the “Is a Resident” box is checked, the Caretaker Details window will open. If you need to make changes to this information after you close the window, open it through the Residents tab. -
Page 15: Managing Agent
Managing Agent: Click on Parameters Click on Managing Agent Click on the Add Managing Agt. button to open a new window that will allow you to enter in the Managing Agent’s information. Click on the Persons button to open a new window that will allow you to enter in contacts for the managing agent. -
Page 16: Call-Buttons
A maximum of 5 TL-2000 panels can be connected together via an RS485 bus. Connect to CN5 on PCB. Do not check the Network On for Modules box. -
Page 17: Residents And Access
Residents and Access: Click on Residents Click on Tel+Access Click on New to add a Resident The Resident’s Details screen will display. Enter the relevant information and click OK when finished. Check Hidden if you wish no details regarding this resident to be displayed on the door panel. - Page 18 Residents and Access (Continued): The residents and all of their details will be displayed on this screen. Use the scroll bar to move through the listing. You can list the residents alphabetically by clicking on Correspondent name. The Caretaker information entered previously will be displayed on this screen if “Is a Resident”...
-
Page 19: Access Only
Access Only: Click on New to add a Resident Click on Residents The Resident’s Details screen will display. Enter the relevant information and click OK when finished. Click on Access only Access Only is used to provide access into the building via a keypad code. -
Page 20: Call Log
Call Log: Click on Residents The Call Log screen displays the quality and duration of calls made to each resident in the building. Click on Call Log You have the choice of saving the Call Log data in Excel or Word formats. -
Page 21: Software
This is used to update installations with the latest software releases. Loading: All programming changes made using the TL-2000 application software must be uploaded from the PC to the panel to take effect. Click on Loading The Data Transfer screen opens. -
Page 22: Uploading To Panel
Uploading / Updating Panel: The programming information must be sent (uploaded) to the Panel to take effect. Click on Parameters to upload all settings and configurations programmed in all of the Parameter sub-menus and sections. Click OK. Follow the same procedure when uploading the Residents, Screens, Messages, and Program. -
Page 23: General Information
General Information: Click on Installation Click on General The Installation window will display. This screen will display all of the general installation information for the particular job / installation you are logged into. Keypad codes: Click on Installation Click on Keypad codes The Keypad code list window will display. -
Page 24: Printing
Printing: Click on Print The Printing window will display Select Preview to preview the document and choose the program you would like to save the file to (Word, Excel, HTML, PDF). Select Print to have the document sent directly to your printer for a hard copy. -
Page 25: Help
Help: Click on the Question Mark (?) This will open an HTMP Help window. You can use this help window for assistance on how to program the different features of the TL-2000 panel. Pg. 25... -
Page 26: Update Menu - General Screen
Update Menu – General Screen: Click on Update Click on Summer/Winter Clock Change The Clocks Change window will display. Enter the date when Daylight Savings Time begins. Enter the date when Daylight Savings Time ends. Click Update Database to update the program on the PC with the dates entered. -
Page 27: Installation Company Keypad Code
Update Menu – General Screen (Continued): Click on Update Click on Update Installation Company Keypad Code The Update Installation Company Keypad Code window will display. Select the appropriate Installation Company by clicking on the drop down box. Enter the new Keypad Code. Click Update Database to update the program on the PC with the code entered. -
Page 28: Change Passcodes
Update Menu – General Screen (Continued): Click on Update Click on Change Passcodes The Update of Passcode window will display. Select the appropriate installation as explained on page 25. Click on the relevant cell in the New Passcode column and ender the new 4 digit Passcode number. -
Page 29: Options Menu - General Screen
Options Menu – General Screen: Click on Options then Password Click on the level for which you wish to change the password. The Change Password screen will display Enter the existing password for the level you have chosen, then type the new password and retype it to confirm. -
Page 30: Specifications
Request to Exit 2 (N/O contacts) Programming PC running Windows 98, ME 2000, XP, Vista, or Windows 7. TL-2000 software is available on CD-ROM. 1) From COM Port of a Laptop or PC to connector CN6 on the back of unit (RS232 bus, 38,400 bps). -
Page 31: Default Parameters
Default Parameters Relay No. 1 activated by: Telephone handset code Operation time (sec) Relay No. 2 activated by: Telephone handset code Keypad on panel code 4444 Operational time (sec) Operational mode Controlled access – 24 hrs Managing Agent keypad code Installation Company keypad code Communication time (sec) Handset rings for (sec) - Page 32 AIPHONE CO., LTD, NAGOYA, JAPAN AIPHONE CORPORATION, BELLEVUE, WA, USA AIPHONE S.A.S., LISSES-EVRY, FRANCE...
Need help?
Do you have a question about the TL-2000 and is the answer not in the manual?
Questions and answers