Niles SI-1230 Installation & Operation Manual
Systems integration amplifier
Hide thumbs
Also See for SI-1230:
- Installation & operation manual (34 pages) ,
- Installation manual (32 pages) ,
- Features and specifications (2 pages)

Related Manuals for Niles SI-1230


Summary of Contents for Niles SI-1230
- Page 1 I N S T A L L A T I O N & O P E R A T I O N G U I D E Systems Integration Amplifier ® ® ® L E N D I N G I G H I D E L I T Y A N D...
-
Page 2: Table Of Contents
Thank you for purchasing the award winning Niles SI-1230, one of the most versatile and powerful multi-channel amplifiers ever offered. Like all Niles prod- ucts, the SI-1230 is built to the highest standards of quality and reliability. With proper installation and operation, you’ll enjoy years of trouble-free use. -
Page 3: Introduction
INTRODUCTION We call the SI-1230 a Systems Integration Amplifier because, for the first time, a power amplifier has been specifically designed to solve the problems of interfacing with different brands and models of equipment, different acoustic environments in different rooms, and different kinds of applications: home theater, stereo, and back- ground music. -
Page 4: Features And Benefits
FEATURES AND BENEFITS Real World Power The SI-1230 is a 12-channel amplifier that delivers a solid 30 watts per channel RMS into 8 ohms and 37 watts per channel RMS into 4 ohms. The massive Multi- Tap Toroid power transformer features six independent secondary transformers for each of the six amplifier modules. - Page 5 Turn-On Modes The SI-1230 features three turn-on modes: 1. Manual turn-on via the front panel switch, 2. Audio Sense and 3. External Voltage trigger. Audio Sense and External Voltage trigger modes enable allow you to configure the SI-1230 to interface with any kind of system and turn on automatically.
-
Page 6: Applications And System Design Considerations
A zone can consist of just one room or a group of rooms. To achieve different volumes and greater convenience in different rooms within a zone, individual volume controls can be used. Niles makes volume controls in various styles and colors. Consult your local Niles dealer for more information. - Page 7 By connect- ing an SI-1230 to the preamplifier outputs of your stereo receiver (or preamp) you dedicate a robust 30 watts to each speaker in your multi-room system. Since each channel has its own level control, you can compensate for architectural differences that create sonic imbalances.
- Page 8 If your system is remote controlled, or if you think that some of the users like to play the stereo too loudly, you can choose to calibrate the system so that it is limited to a volume level you assign. The SI-1230 allows you to set different volume levels for different rooms.
- Page 9 For the first time, the SI-1230’s BusMatrix enables you to route mono to one speaker without affecting the quality of the stereo in the rest of the system.
- Page 10 You connect the variable output of the CD player to the SI-1230 channels for a particular room where you are willing to listen only to CD’s. The fixed outputs remain connected to the main preamp or receiver so that you can listen to CD’s in the rest of the house.
- Page 11 Adding Preamps to Create More Listening Zones In the ultimate multi-zone system you would connect six stereo preamplifiers (or a single component multi-zone or matrix preamp) to one SI-1230 and create six completely independent stereo systems. A system like this allows six people to simultaneously listen to different sources.
- Page 12 You can easily add a second room of surround sound speakers by connecting five of the SI-1230 channels to the pre-outs of your surround system. If there is a pre- out/main-in loop, use a “Y” connector as shown so that the internal power ampli- fier can still be used in the main surround sound room.
-
Page 13: Configuring Your System
Draw a block diagram of your system and use the Configuration Worksheet on page 29 to record how you plan to connect your SI-1230. Here is an example filled out according to the block diagram on page 11. Sample Configuration Worksheet BUS INS &... -
Page 14: Installation Considerations
(see Figure 2). Place the SI-1230 so that there is at least 5” of free air space above the chassis. If the amplifier is located on a carpeted surface, place a board under the amplifier’s feet. - Page 15 Turn-On Modes The SI-1230 draws more current than a preamplifier’s switched AC outlet can safely supply. Also, your preamplifier may “thump” at dangerous volumes if the amplifier is already on when the preamp turns on. It is usually best to turn the amplifier on only when it is needed.
- Page 16 BusMatrix™ of chain multiple amplifi ers. the SI-1230. “Turn-On” Mode Switch 3.5 mm Jack for 3.5 mm Jack for 12v DC Control Input.
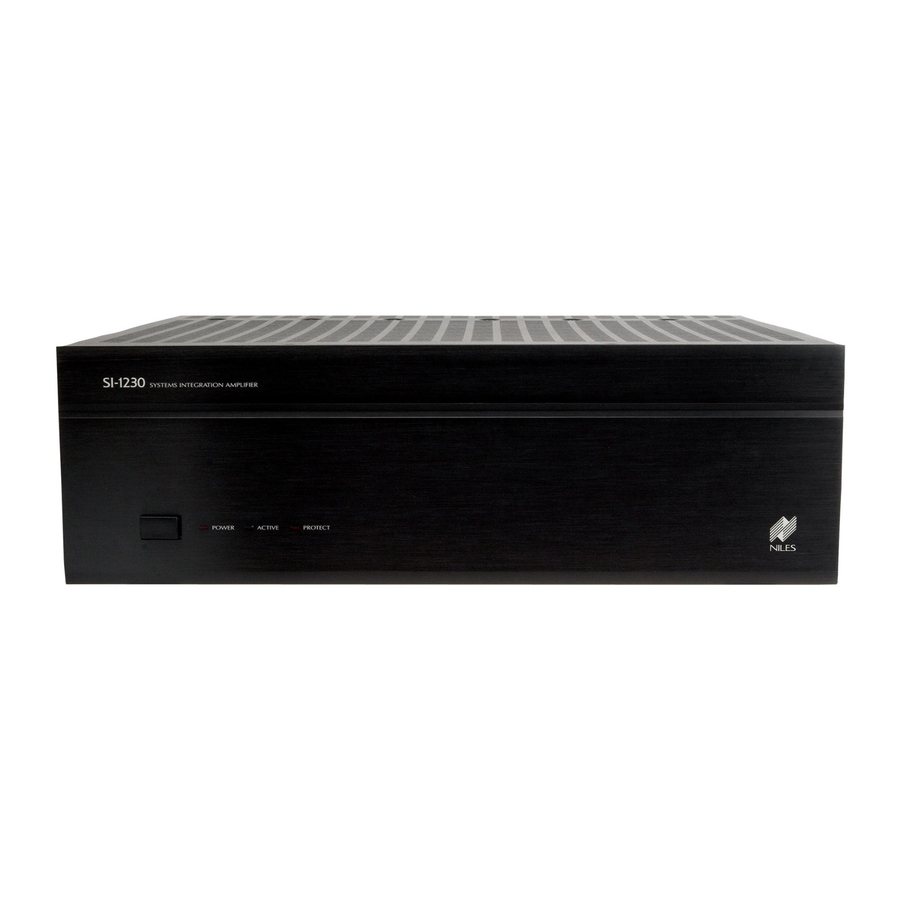
- Page 17 Red “protect” LED indicated a Attractive extruded fault condition (D.C. output). aluminum front panel s, BusMatrix controls, dedicated Gold-plated controls for each channel. RCA jacks Serial Number. Dual banana spaced binding Removable Two-prong post for speaker connections. 16 gauge 6’ AC power cord.
- Page 18 Do not use speakers with an impedance of less than 8 ohms with a bridged channel. An unbridged channel of the SI-1230 is designed to play into a speaker load of four ohms or more. When a four ohm speaker is connected, the continuous power rating of the amplifier increases to 37 watts RMS per channel, (all channels driven).
- Page 19 Cable and Wire Because the SI-1230 has so many connections on the back panel it is very impor- tant that you label all the input cables and speaker wires. If you label the cables and wires for their destination or source, rather than which terminal of the SI-1230 they are connected to, it will be easier to reconfigure your system in the future.
-
Page 20: Installation
SETTINGS SHOULD BE MADE WITH THE AMPLIFIER’S FRONT PANEL MASTER POWER SWITCH OFF. Bridging Two Channels into One The SI-1230’s bridging switches allow you to create a more powerful amplifier channel by combining or “bridging” two adjacent channels. Slide the bridg-... - Page 21 Bridging Two Channels Into One (continued) STEP DESCRIPTION Connect your speaker wire only to the 2. Connect the speaker wires to red terminals of the two adjacent ampli- the two Bridged speaker terminals fier channels. If one of the speaker wires (BRIDGED +, BRIDGED -).
- Page 22 Setting the Turn-On Mode Switch The SI-1230 has three turn-on modes. Select the mode you want by sliding the mode switch. See Installation Considerations on page 13 for more information about each of the turn-on modes. Slide the switch with either your fi ngernail or a 1/8”...
-
Page 23: Speaker Wire Connections
DESCRIPTION If you label the wires for their destination, 1. Label all wires. rather than which terminal of the SI-1230 they are connected to, it will be easier to reconfigure your system in the future. A. Split the speaker wire insulation so that 2. -
Page 24: Line Level Audio Inputs
5 amplifiers from each of its six outputs, allowing 30 SI-1230 power amplifiers to be fed from the same master preamplifier. If your preamp has a vacuum tube output stage, you must use a Niles AVDA-3 to drive more than a single SI-1230. - Page 25 This is much more than the typical acces- nience outlets. sory outlet on the back of a component will provide. Use the SI-1230’s auto turn- on circuitry to turn on the SI-1230 when- ever the preamp is on.
-
Page 26: Operation
Even at levels like that, the SI-1230 will sound clear and clean. However, it requires more power to achieve a reasonable volume of sound in a large room than it does in a small room. -
Page 27: Cleaning And Maintenance
Cleaning and Maintenance The internal parts of the SI-1230 are electronic and require no maintenance. Once a year it is appropriate to twist the RCA connectors on each input to remove any oxidation and improve conductivity. -
Page 28: Troubleshooting Guide
TROUBLESHOOTING GUIDE When there is a problem consult this guide first. If the problem persists, or you have additional questions, call your local Niles dealer or call Niles Technical Support at 1-800-289-4434. The most common problems relate to hook up. - Page 29 TROUBLESHOOTING GUIDE (continued) SYMPTOM POSSIBLE CAUSES AND TEST PROCEDURE Hum may be caused by a ground loop between two Hum from all of the speakers components in the system. To test for a ground loop, try reversing the AC plugs of each of the components in the system, that have non polarized plugs.
-
Page 30: Configuration Worksheet
CONFIGURATION WORKSHEET BUS INS & OUTS CONNECTED TO Left Main Bus Right Main Bus Cascade Output CH # BRIDGED INPUT SOURCE SPEAKER MODE SETTINGS IN USE SPECIAL CONNECTIONS OR NOTES Constant Audio Sense Voltage Trigger Control Output For ease of use, the Configuration Worksheet can be enlarged on a photocopier. -
Page 31: Specifications
SPECIFICATIONS Design Principle Linear voltage/current amplification. Continuous Power Output (FTC Rated) (unbridged, all channels driven) 30 watts per channel RMS at 8 ohms and 37 watts per channel RMS at 4 ohms. Bridged Power Output (Two channels bridged, all channels driven) 80 watts per channel RMS at 8 ohms. - Page 32 Tel: (305) 238-4373 ©2009 Niles Audio Corporation. Because Niles strives to continuously improve its Fax: (305) 238-0185 products, Niles reserves the right to change product specifi cations without notice. Niles, the Niles logo, Systems Integration Amplifi er, and Blending High Fidelity www.nilesaudio.com and Architecture are registered trademarks of Niles Audio Corporation.
Need help?
Do you have a question about the SI-1230 and is the answer not in the manual?
Questions and answers