Miele H 5030 BM Operating And Installation Manual
Microwave combination oven
Hide thumbs
Also See for H 5030 BM:
- Operating and installation manual (76 pages) ,
- Operating and installation instructions (76 pages)
Table of Contents
Advertisement
Advertisement
Table of Contents

Related Manuals for Miele H 5030 BM


Summary of Contents for Miele H 5030 BM
- Page 1 Operating and installation instructions Microwave combination oven H 5030 BM, H 5040 BM en - GB To avoid the risk of accidents or damage to the appliance it is essential to read these instructions before it is installed and used for the first time.
-
Page 2: Table Of Contents
Contents Warning and Safety instructions ........5 Caring for the environment . - Page 3 Contents Operation ............30 Functions which do not use microwave energy .
- Page 4 Contents Defrosting without microwave power ....... . 60 Defrosting times ........... 60 Cleaning and care .
-
Page 5: Warning And Safety Instructions
Any other use is not supported by the manufacturer and could be dangerous. To avoid the risk of accidents and Miele cannot be held liable for damage damage to the appliance, please resulting from incorrect or improper use read these instructions carefully or operation. - Page 6 Warning and Safety instructions Safety with children Technical safety Keep children away from the Installation, maintenance and microwave combination oven at all repairs should only be carried out by a times. It is not a toy! To avoid the risk of suitably qualified and competent injury do not allow them to play with it or person in strict accordance with local...
- Page 7 These If the connection cable is damaged, do not guarantee the required safety of it must be replaced by a Miele the appliance (e.g. danger of approved service technician. overheating). This appliance must not be used in For safety reasons, this appliance a non-stationary location (e.g.
- Page 8 Warning and Safety instructions Correct use It is important that the heat is allowed to spread evenly throughout the food Caution. Danger of burning. being cooked. This can be achieved by The oven interior will become very stirring and/or turning the food, and by hot when operating with functions observing a sufficiently long standing which do not use microwave power...
- Page 9 Warning and Safety instructions Never heat undiluted alcohol in the – If you wish to complete a cooking microwave as this can easily ignite. process using the residual heat in If using alcohol in your recipes, please the oven, do not switch the be aware that high temperatures can appliance off.
- Page 10 Warning and Safety instructions The microwave combination oven is When heating liquids using not suitable for cleaning or disinfecting microwave power, the boiling rod items. provided should always be placed in Items can get extremely hot and there the container. is a danger of burning when the item is removed.
- Page 11 If spare parts or accessories paper or other inflammable materials. from other manufacturers are used, this Before using single-use containers will invalidate the guarantee, and Miele make sure they are suitable for use in cannot accept liability. microwave ovens. See "Suitable containers for microwave ovens - Plastics".
-
Page 12: Caring For The Environment
Caring for the environment Disposal of the packing Disposal of your old appliance material Electrical and electronic appliances often contain materials which, if The transport and protective packing handled or disposed of incorrectly, has been selected from materials which could be potentially hazardous to are environmentally friendly for disposal human health and to the environment. -
Page 13: Guide To The Appliance
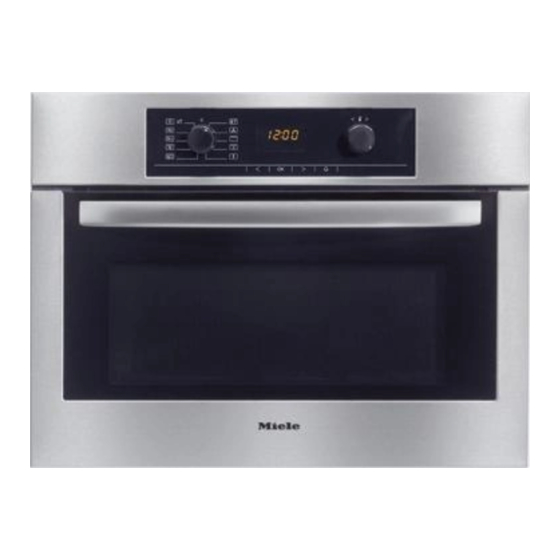
Guide to the appliance Appliance overview Control panel Oven interior Function selector Grill element Display Lighting Sensors V, OK, W, Three shelf levels Temperature selector Oven door... -
Page 14: Accessories Supplied
Guide to the appliance Accessories supplied Rack with non-tip safety notches Glass tray The rack is designed to be compatible with microwaves and so can be used The glass tray is suitable for use with all with programmes which use microwave cooking functions. - Page 15 Guide to the appliance Boiling rod When pushing the rack back in, always ensure that the safety notches are at the rear of the oven (see illustration). When heating liquids, the boiling rod provided should always be placed in the container. It helps liquids to heat evenly.
-
Page 16: Description Of Functions
Description of functions Functions For defrosting, reheating and cooking food quickly. Microwave (Solo) Functions without For cooking food when a crisp finish is required. microwave The combination programmes enable food to be Combination programmes reheated and cooked quickly with even browning (with microwave) results. - Page 17 Description of functions Safety features System lock The system lock prevents the appliance being used by children, for example. Safety cut-out A function without microwave can be started without selecting a cooking duration. To prevent over-use and the consequent danger of fire, the appliance switches off automatically after a certain length of time.
-
Page 18: Functions
Functions Microwave As heat is produced directly in the food, In a microwave oven there is a high- frequency tube called a magnetron. – food can generally be cooked This converts electrical energy into without adding much liquid or microwaves. These microwaves are cooking oil. -
Page 19: Functions Which Do Not Use Microwave Energy
Functions Functions which do not use Functions which use microwave energy microwave energy (Combination programmes) Fan plus Microwave+Grill This system works by the circulation of heated air. As the heated air reaches Microwave+Fan plus the food straight away, temperatures are lower than those needed for Microwave+Fan grill "Conventional heat"... -
Page 20: Before Using For The First Time
Before using for the first time The time of day you have selected has Before the appliance can be used, now been entered. you will need to If there is a power cut, the appliance – press and release the controls if will store the current time of day for they are pushed in when the approx. -
Page 21: Cleaning And Heating Up For The First Time
Before using for the first time ^ Before heating it up it is a good idea Cleaning and heating up for to wipe the interior out with a damp the first time cloth first. This way any dust or bits of packaging that may have Remove any protective foil from the accumulated in the oven... -
Page 22: Suitable Containers For Microwave Ovens
Suitable containers for microwave ovens Microwaves Material and shape The material and shape of containers used affect cooking results and times. Heat distribution is more even in round and oval shaped flat containers than in rectangular containers, providing better results. Ovenproof earthenware can retain a considerable amount of moisture. - Page 23 Suitable containers for microwave ovens Exceptions: – Metal meat skewers or clamps should only be used if they are very The rack supplied with the small in comparison to the size of the appliance is suitable for use with cut of meat. microwave power (combination programmes).
- Page 24 Suitable containers for microwave ovens Wood Plastic boiling bags can be used for Wooden dishes are not suitable. cooking and reheating. They should Moisture contained in the wood be pierced beforehand so that evaporates when exposed to steam can escape. This prevents a microwave energy, causing the build-up of pressure and reduces wood to dry and crack.
-
Page 25: Testing Dishes For Their Suitability
Suitable containers for microwave ovens Testing dishes for their Placing the dish in the oven suitability If in doubt as to whether glass, earthenware or porcelain plates or dishes are suitable for use in a microwave oven, a simple test can be performed: ^ Insert the glass tray in the oven at the lowest shelf level and place the... -
Page 26: A Cover
Suitable containers for microwave ovens A cover Do not use a cover if – prevents too much steam escaping, – food coated with breadcrumbs is especially when cooking foods which being cooked. need longer to cook, such as – cooking meals which are to be given potatoes. -
Page 27: Controls
Controls Function selector Temperature selector The right-hand control V W is used to The left-hand control is used to select the function. – set the required temperature. It can be turned clockwise or anti- – enter times (as an alternative to using clockwise. -
Page 28: Sensors
Controls Sensors The following will change each time the V or W is touched The sensors under the display react to touch. – Duration Microwave (Solo) in 10 second increments, A keypad tone will sound each time a sensor is touched. You can deactivate –... -
Page 29: Display
Controls Triangle V in the display Display I2:00 % W m Start When a sensor is touched, depending Symbols on the position of the function selector, the symbols of functions which can be The following symbols will appear in the altered will light up in the display. -
Page 30: Operation
Operation Functions which do not use When the temperature in the oven has fallen sufficiently, the cooling fan will microwave energy switch off automatically. ^ Place the food in the oven. ^ Select the function you want (e.g. Fan Recommended plus temperature The following will appear in the display:... -
Page 31: Temperature Indicator Light
Operation Rapid heat-up Temperature indicator light The temperature indicator light will The Rapid heat-up function can be also appear next to the temperature in used to pre-heat the oven. the display. The indicator light is always Pre-heating the oven on when the heating is on. Most dishes can be placed in a cold When the set temperature is reached, oven. -
Page 32: Programming Cooking Durations
Operation Programming cooking Automatic switch-off durations To switch a programme off automatically, enter the Duration or the By entering the duration and/or finish Finish time. time, the cooking process can be – Example: Entering the duration programmed to switch off, or on and off automatically. -
Page 33: Delaying The Start With Automatic Switch-Off
Operation Delaying the start with Automatic I:30 switch-off To switch a programme on and off automatically you enter both the Duration and the Finish time. We recommend using automatic ^ Whilst triangle V is flashing, enter switching on and off when roasting. the required duration in However, do not delay the start for hours:minutes (1:30) with the... -
Page 34: The End Of A Cooking Programme
Operation The oven heating, lighting and cooling To check and change an entered time fan will switch off. The Finish time will now show in the It is possible to check or change times display as long as the triangle is not entered for a cooking programme at moved to under another symbol. -
Page 35: Microwave Function
Operation Microwave function After a short while or after touching the OK sensor to confirm the entry the The following power levels can be following will appear in the display: selected: I:30 80 W, 150 W, 300 W, 450 W, 600 W, 850 W and 1000 W. -
Page 36: Combination Programmes
Operation Combination programmes After a short while or after touching the OK sensor to confirm the entry the Combination programmes combine following will appear in the display: microwave power with another I:30 cooking function, e.g. Fan plus, Grill or Fan grill. % W m Microwave+Fan plus Start... -
Page 37: Microwave+Grill
Operation Microwave+Grill After a short while or after touching the OK sensor to confirm the entry the ^ Select the Microwave+Grill following will appear in the display: function. I:30 The display will show a suggested power level of 300 W. You can also select a power level of 150 W or 80 W. -
Page 38: Minute Minder (Egg Timer)
Minute minder (egg timer) The minute minder can be used to time At the end of the time set for the minute any activity in the kitchen, e.g. boiling minder eggs. – the symbol will flash. A maximum minute minder time of –... -
Page 39: System Lock
System lock ^ Confirm your choice of setting by The system lock prevents the touching the OK sensor. appliance being operated If the "I" setting is selected, the unintentionally, by children for appliance cannot be operated. example. symbol will remind you that the ^ Turn the function selector to "0". -
Page 40: Settings
Settings Your oven is supplied with standard factory default settings. These settings "P" can be changed by altering their status "s" (see chart). Setting Status (* factory default setting) The time of day display is switched off When the function selector is turned to the "0" Time of day position, the display remains dark. -
Page 41: To Change The "Status" Of A Setting
Settings To change the "status" of a The changes remain in memory setting even after a power cut. ^ Select " Settings". ^ Touch the OK sensor. "P I" will appear in the display. ^ Touch the V or W sensor repeatedly until the setting required appears in the display. -
Page 42: Defrosting, Reheating And Cooking Using Microwave Power
Defrosting, reheating and cooking using microwave power Function Power level / Suitable for: Temperature Defrost Microwave 80 W Very delicate foods such as cream, butter, cream and butter cream filled gateaux, cheese 150 W All other types of food Reheat Microwave 450 W Food for babies and children... - Page 43 Defrosting, reheating and cooking using microwave power Before defrosting, reheating and After defrosting, reheating and cooking cooking ^ Place food (including frozen) in a Allow the food to stand at room dish that is suitable for the temperature long enough to allow the microwave, and cover it.
- Page 44 Defrosting, reheating and cooking using microwave power Guidance on reheating food Guidance on cooking Food for babies and young children Food with a thick skin or peel, such or the elderly must not be allowed to as tomatoes, sausages, jacket get too hot.
- Page 45 Defrosting, reheating and cooking using microwave power Tips Defrosting large The glass tray placed on the lowest level can be used quantities of food at for defrosting food. once, e.g. 2 kg fish Reheating food Always cover food when reheating it, except when reheating meat/fish coated in breadcrumbs.
-
Page 46: Chart For Defrosting
Defrosting, reheating and cooking using microwave power Chart for defrosting Microwave power setting Quantity 150 W 80 W Standing time Time in min. Time in min. in min. Dairy products Cream 250 ml – 13 – 17 10 – 15 Butter 250 g –... -
Page 47: Chart For Reheating Food
Defrosting, reheating and cooking using microwave power Chart for reheating food Drinks Microwave power setting Quantity 1000 W 450 W Standing time Time in min. Time in min. in min. Coffee, drinking temperature 60 – 65 °C 1 cup, 200 ml 0:50 –... -
Page 48: Chart For Cooking Food
Defrosting, reheating and cooking using microwave power Chart for cooking food Microwave power setting Quantity 850 W 450 W Standing Time Time time in min. in min. in min. Meat Meatballs in gravy (400 g meat) 10 – 12 2 – 3 Stew (750 g meat) 2 –... -
Page 49: Baking
Baking Functions Bakeware For the best baking results make sure ß Fan plus that you chose bakeware in a material suitable for the oven function you are Ideal for baking biscuits, sponges, choux pastry, puff pastry and filo using. pastry. Fan plus ß... -
Page 50: Shelf Level
Baking Shelf level Eating food which has been cooked correctly is important for good Fan plus health. Cakes baked in Lowest shelf level Only bake cakes, pizza, chips etc. cake tins until they are golden brown. Do not Biscuits, tray 2nd shelf level from overcook them. - Page 51 Baking Problem Possible cause and remedy Cakes or biscuits are Check that the correct temperature has been set. not properly cooked Check whether there has been a change to the recipe. after the time The addition of more liquid or more eggs makes a recommended in the moister mix which would take longer to cook.
-
Page 52: Baking Chart
Baking chart Fan plus Microwave+Fan plus Temperature Time Power level Temperature Time in °C in min. in W in °C in min. Creamed mixture Victoria sponge 140 – 160 60 – 80 – – – Fruit cake 150 – 170 65 –... -
Page 53: Roasting
Roasting Functions Containers For best results, make sure that you ß Fan plus select containers suitable for roasting. Suitable for meat and poultry dishes with a crispy topping. Fan plus The following containers are suitable: ß Microwave+Fan plus Roasting tins, casserole dishes, ovenproof glass, earthenware. -
Page 54: Pot Roasting
Roasting Pot roasting Shelf level Roasting in a covered pot is highly Fan plus recommended: ^ Insert the rack with the food on it at – The meat stays succulent, the lowest shelf level. – and the oven stays cleaner, too. Microwave+Fan plus –... -
Page 55: Roasting Time
Roasting Roasting time Useful tips The roasting time will depend on the Take the meat out of the oven, wrap in type of meat, the size and thickness of aluminium foil and leave to stand for the cut, The traditional British method is about 10 minutes. -
Page 56: Roasting Chart
Roasting chart Fan plus Microwave+Fan plus Temperature Time Power level Temperature Time 1) 2) in °C in min. in W in °C in min. Roast beef (approx. 1 kg) 170 – 190 100 – 120 – – – 3), 4) Beef fillet (approx. -
Page 57: Grilling
Grilling Functions Grilling on the rack ß Grill Pre-heat the grill for approx. 5 minutes with the oven Suitable for flat items, such as: cutlets, door shut. Do not select or switch on steak, burgers, toast, cheese toast. the microwave function during this time. -
Page 58: Fan Grill
Grilling Fan grill Testing to see if cooked One way of finding out how far through Temperature a piece of meat has been cooked is to press down on it with a spoon. 220 °C For thin cuts of meat –... -
Page 59: Grilling Chart
Grilling chart Pre-heat the grill for approx five minutes. Do not select or switch on the microwave function during this time. Food to be grilled Grill Fan grill Recommended Setting Total Temperature Total shelf level grilling time in °C grilling time from the bottom in min. -
Page 60: Defrosting Without Microwave Power
Defrosting without microwave power Function Useful tips ß Defrost It is particularly important to observe food hygiene rules when The air in the oven is kept at room defrosting poultry. Do not use the temperature and circulated by the fan liquid from the defrosted poultry. -
Page 61: Cleaning And Care
Miele oven However, it is very important to clean cleaning spray can be left on for longer. - Page 62 Cleaning and care The following cause lasting damage Note: to the surface structure and reduce – Soiling such as spilt juices and cake the anti-stick effect. They must not mixtures are best removed whilst the be used on PerfectClean surfaces: oven or tray is still warm.
- Page 63 Cleaning and care Oven interior roof If the oven interior roof is badly soiled, the grill element can be lowered to make cleaning easier. Make sure the oven heating elements are switched off and cool. Danger of burning. ^ Lower the grill element gently. Do not use force to lower it as this can cause it to break.
-
Page 64: Door Interior And Door Seal
Clean the interior of the door and the remove, and the surface could seal using a damp Miele microfibre E- become discoloured or altered. cloth (see "Optional accessories") or with a clean sponge and a solution of Clean the front using a damp Miele hot water and washing-up liquid. -
Page 65: Accessories Supplied
Cleaning and care Accessories supplied To prevent damage to external surfaces, when cleaning do not use: Rack – cleaning agents containing soda, ammonia, acids or chlorides, The surface has been treated with PerfectClean. The rack should be – cleaning agents containing cleaned according to the cleaning descaling agents, instructions for PerfectClean described... -
Page 66: Problem Solving Guide
With the aid of the following guide, minor problems can be easily corrected without contacting Miele. If you cannot resolve the problem following these instructions please contact Miele (see back cover for contact details). Do not attempt to open the appliance casing yourself! - Page 67 Problem solving guide Problem Possible cause and remedy A noise is heard after a The cooling fan continues to run for a while after a programme has programme has finished to prevent any humidity finished. building up in the oven, on the control panel or on the oven housing unit.
- Page 68 ^ Reconnect the appliance to the mains supply. Fault messages in the Possible cause and remedy display Fault messages are Contact Miele. indicated by "Fault" plus a number.
-
Page 69: Optional Accessories
Optional accessories Miele offer a comprehensive range of useful accessories as well as cleaning and conditioning products for your appliance. These products can be ordered online at www.miele-shop.com or from Miele (see back cover for contact details). Gourmet oven dish Gourmet oven dish lid A lid is available separately. - Page 70 Removes grease and stains and leaves no smearing. Suitable for cleaning surfaces such as stainless steel, glass, plastic and chrome without the use of chemicals. Miele oven cleaner Suitable for removing stubborn soiling. It is not necessary to pre-heat the oven beforehand.
-
Page 71: After Sales / Guarantee
– your Miele Dealer – Miele (see back cover for contact details). When contacting Miele, please quote the model and serial number of your appliance. These are given on the data plate which is located on the front of the oven cavity. -
Page 72: Electrical Connection
For extra safety it is advisable to protect the appliance with a suitable residual current device (RCD). Please contact a qualified electrician for advice. If the cable is damaged a new cable must be fitted by a Miele approved service technician. -
Page 73: Installation
Installation Appliance dimensions and unit Installation in a base unit cut-out If fitted underneath a hob, the installation instructions for the hob Installation in a tall unit must also be taken into account. * Appliances with glass front ** Appliances with metal front * Appliances with glass front ** Appliances with metal front... -
Page 74: Front Dimensions
Installation Front dimensions Installation The appliance must not be operated until it has been correctly installed in its housing unit. Otherwise it poses an electric shock hazard. ^ Connect the appliance to the electricity supply. A Appliances with glass front: 22 mm Appliances with metal front: 23 mm B H 5030: 53.2 mm H 5040: 47.5 mm... - Page 76 Alteration rights reserved / 22 / 1311 M.-Nr. 07 954 120 / 01 (H 5030 BM, H 5040 BM)
Need help?
Do you have a question about the H 5030 BM and is the answer not in the manual?
Questions and answers