Miele KWT 4154 UG-1 Operating And Installation Manual
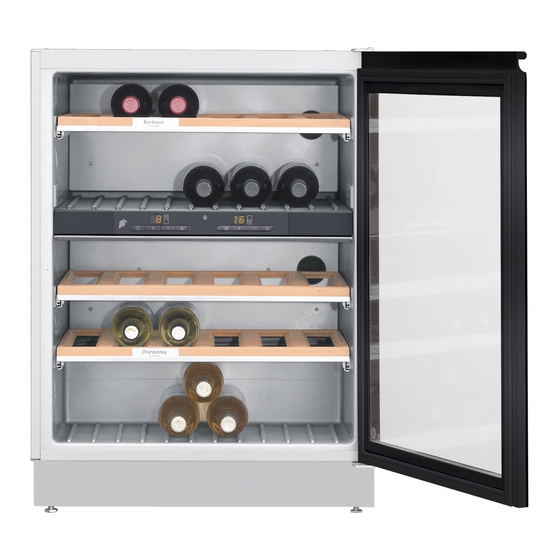
Under counter wine cooler
Hide thumbs
Also See for KWT 4154 UG-1:
- Operating and installation manual (36 pages) ,
- Operating and installation manual (36 pages)
Table of Contents
Advertisement
Advertisement
Table of Contents

Related Manuals for Miele KWT 4154 UG-1


Summary of Contents for Miele KWT 4154 UG-1
- Page 1 Operating and installation instructions Under counter wine cooler KWT 4154 UG-1 en - GB To avoid the risk of accidents or damage to the appliance, it is essential to read these operating instructions before it is installed or used for the first time.
-
Page 2: Table Of Contents
Contents Description of the appliance ......... 4 Caring for the environment . - Page 3 Contents Noises ............25 How to save energy .
-
Page 4: Description Of The Appliance
Description of the appliance a On/Off button e Safety lock indicator light b Temperature display for upper zone f Alarm "off" button c Temperature selector buttons for g Temperature display for lower zone upper zone h Temperature selector buttons for left hand button: warmer lower zone right hand button: colder... - Page 5 Description of the appliance a Interior lighting b Isolation shelf for thermal separation c Wooden shelf with décor strip for descriptive labels d Active charcoal filter e Condensate channel and drain hole To ensure the correct functioning of the appliance in tropical climates where the ambient temperature exceeds 38°C and air humidity levels exceed 70% the appliance must only be used in a climate controlled room.
-
Page 6: Caring For The Environment
Caring for the environment Disposal of the packing Disposal of your old appliance material Electrical and electronic appliances often contain materials which, if The transport and protective packing handled or disposed of incorrectly, has been selected from materials which could be potentially hazardous to are environmentally friendly for human health and to the environment. -
Page 7: Warning And Safety Instructions
Warning and Safety instructions Correct application This appliance complies with all This appliance is intended for relevant local and national safety domestic use only for storing wine. requirements. Improper use can, Any other usage is not supported by however, present a risk of both the manufacturer and could be personal injury and material dangerous. -
Page 8: Technical Safety
If the connection cable is faulty it – disconnect from the mains, must only be replaced by a Miele approved service technician to protect – air the room in which the appliance is the user from danger. - Page 9 Warning and Safety instructions Correct use Installation work, maintenance and repairs may only be carried out by Do not store explosive materials in suitably qualified and competent the appliance or any products persons in accordance with national containing propellants (e.g. spray and local safety regulations.
- Page 10 Warning and Safety instructions Disposing of your old appliance Before disposing of an old appliance, first make the door latch or lock unusable. This way you will prevent children from accidentally locking themselves in and endangering their lives. Be careful not to damage any part of the pipework whilst awaiting disposal, e.g.
-
Page 11: Switching On And Off
Switching on and off Before using for the first time Switching off ^ Clean the inside of the appliance and ^ Press the On/Off button until the the accessories with warm water and temperature displays go dark. a little washing up liquid, and then The cooling system switches off. -
Page 12: Switching Off For Longer Periods Of Time
Switching on and off ^ Press the constant humidity button to save the setting. The safety lock indicator light will light up when the safety lock has been activated. ^ Press the On/Off button to come out of setting mode. If you do not do this the electronics will switch over to normal operation automatically after a couple of minutes. -
Page 13: The Correct Temperature And Humidity
The correct temperature and humidity Wine keeps on maturing depending on Isolation shelf for thermal separation the surrounding conditions. The length The appliance has a fixed isolation of time for which wine can be kept in shelf which divides the cabinet into two good condition will therefore depend on zones. -
Page 14: Temperature Range
The correct temperature and humidity Approx. 5 seconds after letting go of Temperature display brightness the button, the current temperature The appliance is supplied with the inside the applicable zone is brightness of the temperature display automatically shown. set as low as possible. The two temperature zones are cooled You can adjust the brightness of the alternately, which means that... -
Page 15: Humidity Level
The correct temperature and humidity ^ Press the constant humidity button to Constant humidity (Dynamic cooling) button m save the setting. This setting enables the relative humidity inside the wine cooler and the temperature to be distributed evenly around the interior so you can store all ^ Press the On/Off button to come out your wine under exactly the same of the setting mode. -
Page 16: Switching Off
Replace the active charcoal filters with new ones once a year (see "Cleaning and care"). These are available from your dealer or the nearest Miele spare parts department. -
Page 17: Interior Lighting
Interior lighting There is lighting in both the upper and Adjusting the brightness lower zones of the wine cooler so that The brightness of the interior lighting both zones can be lit up. can be adjusted. ^ Press and hold the interior lighting Do not remove the lamp covers. -
Page 18: Storing Wine Bottles
Additional labels can be purchased other on the same shelf. Removing a from your Miele dealer or from the bottle of one type will then leave the Spare Parts Department. other types undisturbed and will avoid the need to move different bottles around. -
Page 19: Alarm
Alarm Activating the alarm system Your appliance is fitted with a warning system which ensures that the The alarm system is always active. It temperature cannot rise or fall does not have to be switched on unnoticed and impair the wine. manually. -
Page 20: Defrosting
Defrosting Condensate and frost can build up on the back wall of the appliance whilst it is in use. These are automatically defrosted and removed by the appliance. The condensate is drained away via a channel and drain hole into an evaporation system at the back of the appliance. -
Page 21: Cleaning And Care
E-Cloth circuit. A microfibre "E-Cloth" is available from the Miele UK Spare Parts Department, The data plate located inside the which is suitable for cleaning surfaces appliance must not be removed. It such as stainless steel, glass, plastic... -
Page 22: Door Seal
Active charcoal filter Replace the active charcoal filters with new ones once a year. These can be purchased from your Miele dealer or from the Spare Parts Department. ^ Turn the filters 90° clockwise or anti-clockwise. -
Page 23: Problem Solving Guide
If it has, contact the Miele Ser- vice Department.."F0" or "F1" appears in the temperature display. - Page 24 Problem solving guide If you still cannot remedy the fault having followed these suggestions, please contact the Miele Service Department. To prevent unnecessary loss of temperature it is advisable not to open the door while waiting for the appliance to be serviced.
-
Page 25: Noises
Noises Normal noises What causes them Humming noise made by the motor (compressor). This noise can Brrrrr... get louder for brief periods when the motor is switching on. Blubb, blubb..A gurgling noise can be heard when coolant is circulating through the pipes. -
Page 26: How To Save Energy
How to save energy Normal energy Increased energy consumption consumption Installation site In a ventilated room. In an enclosed, unventilated room. Protected from direct sunlight. In direct sunlight. Not situated near to a heat source Situated near to a heat source (radiator, oven). -
Page 27: After Sales / Guarantee
– your Miele Dealer – Miele (see back cover for contact details). When contacting your Dealer or Miele, please quote the model and serial number of your appliance. This information is given on the data plate inside your appliance. -
Page 28: Electrical Connection Irl, U.k., Za
Electrical connection IRL, U.K., ZA All electrical work should be carried out Non-rewireable plugs (BS 1363) by a suitably qualified and competent The fuse cover must be re-fitted when person in strict accordance with current changing the fuse, and if the fuse cover local and national safety regulations is lost, the plug must not be used until a (BS 7671 in the UK). -
Page 29: Electrical Connection Aus, Nz
Electrical connection AUS, NZ All electrical work should be carried out WARNING by a suitably qualified and competent THIS APPLIANCE MUST BE person in accordance with local and EARTHED national safety regulations. The appliance is supplied with a mains cable and moulded plug ready for connection to 220-240 V 50 Hz supply. -
Page 30: Installation
The appliance housing unit must appliances. This condensation will be constructed to allow sufficient space disappear when humidity levels for ventilation. Miele kitchen units are drop. For prevention, it is advisable designed to provide this ventilation. to install the appliance with sufficient... -
Page 31: Changing The Door Hinging
Changing the door hinging The appliance is supplied right hand hinged. If left hand door hinging is required, follow the instructions below. ^ Unscrew the top hinge plate e, turn it around and refit it on the opposite side. ^ Unscrew the lower hinge plate f. ^ Close the door, and unscrew the top hinge pin from the door a. - Page 32 Changing the door hinging ^ Swap over the plug h and the hinge pin guide i in the top of the door. ^ Hang the door on the lower hinge pin j, and close the door k. ^ Refit the top hinge pin l through the hinge pin plate into the door.
-
Page 33: Building Under
Building under Make sure that the ventilation gaps in the plinth are at least 300 cm so that warm air can disperse unhindered. Otherwise the appliance has to work harder, resulting in an increase in electricity consumption. Aligning the appliance to taller unit doors ^ Align the appliance to the height of the niche by altering the adjustable... -
Page 34: Securing The Appliance
Building under Securing the appliance ^ If the door is right hand hinged, the fixing bracket a should be fixed right aligned to the back of the filler ^ Secure the appliance by tightening panel b; if the door is left hand the screws in the niche through the hinged, then the fixing bracket fixing strip. - Page 36 Alteration rights reserved / 0910 M.-Nr. 07 057 851 / 03 KWT 4154 UG-1...
Need help?
Do you have a question about the KWT 4154 UG-1 and is the answer not in the manual?
Questions and answers