Table of Contents
Advertisement
Advertisement
Table of Contents

Related Manuals for Sirius Satellite Radio Sportster SP5


Summary of Contents for Sirius Satellite Radio Sportster SP5
- Page 1 User Guide User Guide Sportster 5 Sportster 5 Satellite Radio...
- Page 3 Congratulations on the Purchase of your new SIRIUS Sportster SP5 Plug-n-Play Radio ® Your new SIRIUS Sportster™ SP5 Plug-n-Play Radio lets you enjoy SIRIUS Satel- lite Radio’s digital entertainment anywhere you’ve installed the SUPH1 SIRIUS Uni- versal Plug and Play Home Kit, SUPV1 SIRIUS Universal Plug and Play Vehicle Kit, or the SUBX1 SIRIUS Plug and Play Universal Boombox (each sold separately).
-
Page 4: Table Of Contents
CONTROLS ......62 SIRIUS Sportster SP5 Front Panel ..... 62 Remote Control Buttons . - Page 5 Direct Tuning ......75 Channel Presets ......75 Jump Button .
-
Page 6: Warning And Safety Information
Warning and Safety Information FCC Information This device complies with part 15 of the FCC Rules. Operation is subject to the follow- ing two conditions: This device may not cause harmful interference, and This device must accept any interference received, including interference that may cause undesired operation. -
Page 7: Canadian Compliance
WARNING Changes or modifications not expressly approved by the manufacturer could void the user’s authority to operate the equipment. Canadian Compliance This Class B digital apparatus complies with Canadian ICES-003. Cet appareil numérique de la classe B est conforme à la norme NMB-003 du Canada. General Precautions Liquid Crystal Precautions If the LCD screen on the SIRIUS Sportster is damaged, do not to touch the liquid crystal... -
Page 8: Warnings
• Be sure the unit is installed as described in these installation instructions and the instructions which accompany each accessory kit. SIRIUS Satellite Radio is not responsible for issues arising from installations which were not installed according to the instructions. - Page 9 Warnings Notice To Drivers In California and Minnesota State law prohibits drivers in California and Minnesota from using suction mounts on their windshields while operating motor vehicles. Other dashboard or friction mounting options should be used. SIRIUS does not take any responsibility for any fines, penalties, or damages that may be incurred as a result of disregarding this notice.
-
Page 10: Copyrights & Trademarks
Portions of the software on this radio are licensed under the eCos License. Distribution of eCos requires that the eCos source code be made available to SIRIUS Satellite Radio customers. The eCos License and eCos source code are available to the public at http:// www.sirius.com/ecoslicense. -
Page 11: Package Contents
Package Contents The following items are included with your SIRIUS Sportster SP5 radio: Sportster SP5 Radio Remote Control Vehicle Dock Package Contents... - Page 12 Suction Cup Mount Vent Mount & Cigarette Lighter Extended Vent Hooks Adapter Magnetic Antenna Mounting Alcohol Antenna Cover/Tail Screws Wipe Package Contents...
- Page 13 Self Adhesive Cable Guides (3) Unpack your SIRIUS Sportster SP5 carefully and make sure that everything shown is present. If anything is missing or damaged, or if your SIRIUS Sportster radio fails to operate, notify your dealer immediately. It is recommended that you retain the original carton and packing materials in case you need to ship your radio in the future.
-
Page 14: Installation
Installation SIRIUS suggests that you have your Sportster SP5 professionally-installed in your vehicle. Professional installation provides an experienced technician to in- stall this product in your vehicle, advice for selecting a suitable mounting loca- tion for the Vehicle Dock, installation of the antenna, and proper routing of all the necessary wires and cables. - Page 15 Figure 1 Depending upon the mounting location you select in your vehicle, the mount should be attached to the vehicle dock and installed as described in the following sections. Installation...
- Page 16 Suction Cup Mount Method (A) The suction cup mount may be attached to your vehicle’s windshield. Before attaching the suction cup mount to your windshield, you should check your state and local laws for regulations regarding mounting this device on your windshield. To mount the vehicle dock using the suction cup mount, assemble the mount as follows: Attach the vehicle dock to the suction cup mount using the provided screws.
- Page 17 Be sure the cam lever is up (as shown in Figure 3) and position the suction cup mount on the windshield or other location you have chosen. Press the cam lever all the way down towards the base of the mount until it locks to firmly adhere the suction cup. (To unlock the suction cup, lift the lever up.) Press Lever Down To...
- Page 18 Vent Mount Method (B) To mount the vehicle dock using the vent mount method, install the vent mount as follows: If the vent louvers in your vehicle are recessed, you may need to use the longer vent hooks with the vent mount. Refer to Figure 4 and install the longer vent hooks into the vent mount.
- Page 19 Refer to Figure 6 and attach the vent mount to a heating/air conditioning vent in your vehicle. Position the two tension springs A against a vent louver B. Then push the vent mount into the vent, far enough so that the hooks C drop down and hook the rear of the vent louver (see Figure 7).
- Page 20 The angle of the vehicle dock may be changed by changing the position of foot D on the vent mount to a different adjustment hole. (See Figure 8.) ADJUSTMENT HOLES Figure 8 Installation...
-
Page 21: Installing The Magnetic Antenna
Installing the Magnetic Antenna Caution Because adhesive is used in the installation of the Rubber Antenna Cover/Tail, we recommend that you install the antenna at or above room temperature (68° F). The adhesive on the Rubber Cover/Tail may not adhere properly to the vehicle roof at tem- peratures lower than this. - Page 22 ANTENNA MOUNTING The SIRIUS Magnetic Mount Vehicle Antenna has a strong magnetic mount designed to hold it in place during normal driving conditions (highway/city). This also makes the antenna easy to remove for transferring it to other vehicles. Figure 9 shows the optimal mounting location for the antenna on several types of vehicles.
- Page 23 The SIRIUS antenna needs to have an unobstructed area of 3 inches by 3 inches around it. It is important to mount the antenna where no obstructions will block the antenna from receiving the SIRIUS signal. Objects which can obstruct the antenna could be a roof rack, a sunroof, a roof-mounted cargo container, another antenna, etc.
- Page 24 Peel the protective material from the adhesive strips (see Figure 10, on page 23) and press the rubber Cover/Tail firmly into place on the vehicle. Double check that the location of the antenna and rubber cover/tail are correct, and continue to press firmly down on the Rubber Cover/Tail for another 30 seconds. At room temperature (68°...
- Page 25 Sedan /Coupe Antenna Cable Routing Procedure Figure 11 shows how the antenna cable should be routed from the antenna to your SIRIUS radio in a sedan/coupe. 1. Feed Cable Under 6. Bring Cable Out To Rubber Molding SIRIUS Receiver Around Window Location 2.
- Page 26 Route the antenna cable out of the window molding and into the rubber weather stripping around the trunk opening. Lift the weather stripping from the opening and tuck the cable inside it, then replace the weather stripping. To avoid sharp bends in the cable, run the cable inside of the weather stripping for a few inches, then remove the cable from the weather stripping inside of the trunk.
- Page 27 Pickup Truck Antenna Cable Routing Procedure Figure 12 shows how the antenna cable should be routed from the antenna to your SIRIUS radio in a pickup truck. NTENNA 1. Route Cable Under Rubber Molding Around Windshield 2. Continue Tucking Cable Under Molding To Bottom of Windshield 5.
- Page 28 At the lowest corner of the windshield, route the cable out of the windshield mold- ing and into the rubber weather stripping around the door opening. Lift the weather stripping from the opening and tuck the cable inside it, then replace the weather stripping.
- Page 29 1. Feed Cable Under 4. Bring Cable Out To Rubber Seal Around SIRIUS Receiver Hatch Opening Location NTENNA 3. Route Cable Under Carpet to Dashboard 2. Route Cable Under Interior Trim, into Cabin and Towards Front of Vehicle Figure 13 Follow these detailed cable installation instructions: Feed the antenna cable underneath the rubber weather stripping of the rear tail- gate window/door and route the cable along the rear hatch.
- Page 30 Bring the cable out from the trim near the firewall and route it under the carpet toward the dashboard or console. Coil any excess cable in a hidden location, such as under the carpet, keeping it away from any vehicle pedals or controls. Secure the excess cable with wire ties.
- Page 31 Follow these detailed cable installation instructions: Bring the cable from the antenna into the trunk at the front edge of the trunk lid. Keep any bends in the cable loose. Tape or tie the cable along the inside of the trunk lid to the trunk lid hinge strut.
- Page 32 TIPS The following DO and DO NOT antenna mounting tips illustrate how to install the antenna for optimal performance, and also illustrate where the antenna should not be installed. Mount the antenna on the roof, at least 3 inches from the edge.
- Page 33 3” Mount the antenna on the roof where it has at least 3 inch- es of clear space around it. supplied Rubber Tail Cover to protect the antenna cable. Installation...
- Page 34 Don’t mount antenna inside the vehicle, for example, on the dashboard. Don’t mount antenna on any of the vehicle’s front, back or side pillars. Installation...
- Page 35 Don’t mount antenna close to a roof rack. Adjust the rack so it’s further away from the an- tenna or move the antenna closer to the center of the roof. Don’t mount antenna close another antenna. Mount it at least 3 inches away.
- Page 36 Don’t mount the an- tenna closer than 3 inches from the edge of the roof. Use the supplied rubber tail/ cover as a guide for judging proper length and correct position- ing. After you’ve routed the cable to the SIRIUS Vehicle Dock, connect the antenna cable to the A connection on the right side of the Vehicle Dock.
-
Page 37: Connecting The Cigarette Lighter Adapter
Connecting the Cigarette Lighter Adapter Connect the provided cigarette lighter adapter to the 5VDC connector on the back of the Vehicle Dock. (See Figure 16.) Vehicle Cigarette Lighter 5V DC Dock Adapter Connection (Left Side) Power Outlet 5VDC AUDIO Figure 16 Note: Do not power the Vehicle Dock directly from your vehicle’s 12VDC power system without using the Cigarette Lighter Adapter. -
Page 38: Connecting Your Sirius Radio To Your Vehicle's Audio System
Connecting Your SIRIUS Radio to Your Vehicle’s Audio System There are two ways to connect your SIRIUS Sportster SP5 to your vehicle’s audio system: Direct Connection or Wireless Connection. Which one will perform best in your vehicle depends on your vehicle’s audio system. -
Page 39: Direct Fm Audio Connection
Direct FM Audio Connection If your vehicle’s audio system does not have an Aux In/Line In connection, a SIR- IUS FM Direct Adapter (sold separately) will provide the next best quality con- nection between your SIRIUS radio and your vehicle radio. You will listen to your SIRIUS radio through your car radio’s FM tuner, but the SIRIUS FM Direct Adapter connects your vehicle’s FM radio directly to your SIRIUS radio’s FM Out jack, eliminating the outside static and interference you sometimes experience when... -
Page 40: Cassette Adapter
Cassette Adapter If your vehicle’s audio system has a cassette player you can purchase a cassette adapter from your local electronics retailer or from SIRIUS at http://shop.sirius.com. Plug the adapter’s connector into the A jack on the left side of the Vehicle Dock, and insert the adapter UDIO into your vehicle’s cassette player. - Page 41 Vehicle FM Antenna Vehicle Radio SIRIUS Sportster SP5 Match Frequencies Figure 21 1. Tune through your vehicle radio’s FM channels to fi nd an FM channel (between 88.1MHz and 107.9MHz) that is not broadcasting in your area. 2. Once you have located an FM channel that is not broadcasting in your area, save it as a preset on your vehicle radio.
- Page 42 6. The FM T screen will appear (see Figure 23, left). Rotate the knob to high- RANSMITTER light S FM P and press the Knob to select it. RESETS Figure 23 7. The S FM P screen will appear (see Figure 23, right). FM1 will be highlighted. RESETS (FM1 is factory-set to 88.1MHz.
-
Page 43: Wireless Audio Connection Using The Fm Extender Antenna
TIP: If you regularly travel between cities with different active FM channels, you may need to find channels that are not broadcasting in each city. Your SIRIUS Sportster SP5 can store up to 5 preset FM transmit channels (see Figure 23, right), so you can easily switch to the best FM channel for each city. - Page 44 Because of the different kinds and locations of radio antennas found in different vehicles, SIRIUS suggests that the FM Extender Antenna be professionally installed in your vehicle. Professional installation provides an experienced technician to install the Extender Antenna, knowledge of your vehicle for locating its radio antenna, and routing the cable and connecting it to your SIRIUS radio.
- Page 45 • The installation and use suggestions contained in this manual are subject to any restrictions or limitations that may be imposed by applicable law. The purchaser should check applicable law for any restrictions or limitations before installing the extender cable. WARNING Notice To Drivers In California and Minnesota State law prohibits drivers in California and Minnesota from using suction mounts on...
- Page 46 INSTALLATION Step 1: Determine the type and location of your vehicle’s FM antenna The key to properly installing the FEA in your vehicle is being able to determine the type and location of your vehicle’s FM antenna. The type and location of the FM antenna in your vehicle should be one of the following (see Figure 26, opposite): A.
- Page 47 Figure 26 Installation...
- Page 48 Step 2: Prepare the FEA for temporary installation Attach the suction cups to the antenna portion of the FEA in the positions shown in Figure 27. The antenna portion of the FEA is the relatively thinner section of the cable in between the bead and the arrow that transmits the FM signal to your vehicle’s FM antenna.
- Page 49 For vehicles with type FM antennas: • Whip/aerial mounted on the front fender or hood • Whip/aerial mounted in the A-pillar of car frame Mount FEA at Edge of Windshield Nearest to Vehicle Antenna Alternate Mounting Location on Adjacent A-Pillar Figure 28 Mount the FEA vertically on the front windshield at the edge of the glass, on the same side as the vehicle’s antenna (i.e.
- Page 50 For vehicles with type FM antennas: • In-glass, in the rear windshield • Whip/aerial mounted on rear part of roof FM ANTENNA Mount FEA on Rear Windshield DEFROSTER WIRES Figure 29 Mount the FEA horizontally along the top edge of the rear windshield (see Figure 29). For vehicles with a rooftop antenna, center the FEA below the antenna whip.
- Page 51 For vehicles with an type FM antenna: • Whip/aerial mounted on the rear fender or trunk Mount FEA at Edge of Windshield Nearest to Vehicle Antenna Figure 30 Mount the FEA vertically on the rear windshield at the edge of the glass, on the same side as the vehicle’s antenna (i.e.
- Page 52 For vehicles with type FM antennas: • Whip/aerial mounted on the front part of roof • In-glass, in the front windshield Alternate Mounting Mount FEA Along Location Tucked Top Edge of Into Headliner Windshield Figure 31 Mount the FEA horizontally along the top edge of the front windshield or install it into the headliner of the vehicle just above the front windshield (see Figure 31).
- Page 53 For vehicles with an type FM antenna: • In-glass, in a rear side window Mount FEA Directly Over Antenna Wires Figure 32 Mount the FEA directly over the in-glass antenna wires. If the antenna wires are vertical, mount the FEA vertically on the glass; if the in-glass antenna wires are horizontal, mount the FEA horizontally on the glass.
- Page 54 Step 4: Temporarily plug the FEA into the Vehicle Dock’s FM OUT connector See Figure 33. Vehicle Dock (Right Side) FM O Jack Cable From FM Extender Antenna FM OUT Figure 33 Step 5: Tune your vehicle’s FM radio to an FM channel that’s not being used in your area Use your vehicle radio’s Tune function (not the Scan function) to find an FM channel (between 88.1MHz and 107.9MHz) that is not broadcasting in your...
- Page 55 Step 6: Set Your SIRIUS Sportster SP5’s FM transmitter to the same FM channel a. Dock your Sportster SP5 and turn its power ON. Wait for the Channel Update to finish before pressing any buttons. b. Press and hold the FM Presets button (see Figure 34, left). The M PTIONS screen will appear.
- Page 56 f. Press the Knob to select FM1. The S FM P 1 screen will appear (see RESET Figure 36, left). Figure 36 g. Rotate the Knob to highlight the FM frequency that matches the channel that you preset on your vehicle radio, then press the Knob to select it. (See Figure 36, right.) h.
- Page 57 Step 7: Optimize the placement of the FEA Mute the volume of your Sportster SP5. The easiest way to do this is to use the button on the remote control (see pages 65 – 66). Note, your SIRIUS radio is still ON.
- Page 58 Step 9: Route and hide the cable through the vehicle to the Vehicle Dock Hide the FEA cable by properly routing it to your SIRIUS Vehicle Dock (see Figure 40). Use the cable guides to hold the cable in place until it reaches the inner trim or mould- ing at the edge of the window.
- Page 59 Appendix A: Tips for Identifying the FM Antenna Correctly identifying your vehicle’s FM antenna is a key to successfully installing the FEA. The preceding installation section already showed you the different kinds of FM antennas found on vehicles. However, there are several types of antennas found on vehicles that you may at first believe to be the FM antenna but which in reality are not.
- Page 60 Greater confusion may arise with whip type antennas. Figure 42 shows some whip type antennas which can be found on the front or rear of a vehicle’s roof, or on the rear windshield. Some of these antennas could be the FM antenna and some are not the FM antenna.
-
Page 61: Subscribing To The Sirius Service
Before you can listen to the SIRIUS service, you need to subscribe to the SIRIUS Satellite Radio service. To subscribe, do the following: Be sure that your SIRIUS Sportster SP5 is correctly installed, is properly docked in the Vehicle Dock, and that the antenna is oriented to receive the SIRIUS signal. -
Page 62: Controls
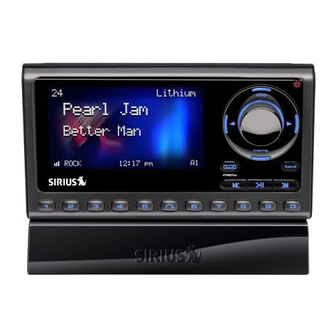
Controls SIRIUS Sportster SP5 Front Panel Figure 43 and the section following identify and describe the SIRIUS Sportster SP5’s buttons and controls. Figure 43 Controls... - Page 63 Color LCD Display Screen: Provides information about the SP5’s operation, the program that is playing and other programming that is available. FM Presets/M Button: Lets you select between the different FM preset frequencies used by the SP5’s built-in internal FM transmitter. Press-and-hold accesses Menu options to make setup and feature changes.
- Page 64 Rewind Button: Used to rewind through content saved to Instant Replay. Pressing and releasing this button rewinds to the beginning of the song or program. Pressing and holding rewinds by time through the saved content. Fast-Forward Button: Used to fast-forward through Instant Replay saved content.
-
Page 65: Remote Control Buttons
Remote Control Buttons Figure 44 and the section following identify the remote control’s buttons. Figure 44 Power Button: Turns the SP5 ON and OFF. Select Button: Selects items highlighted in a list; hold-down to jump to the previously- received channel. When not in a menu or list, pressing the Select button selects the channel entered using the number buttons. - Page 66 Category Buttons: Press and release navigates through the C screens ATEGORY which display the SIRIUS channel categories. Pressing and holding the buttons increase or decrease the display’s brightness, or lets you adjust the Auto Brightness settings, depending on the option selected in the Menu Options (see page 97) FM Presets Button: Selects between the different FM preset frequencies used by the SP5’s built-in internal FM transmitter.
- Page 67 Jump Button: Jumps to a preset favorite channel. Pressing the button again returns back to the original channel. Remote Control Battery Installation To install the remote control battery, turn the remote control over and locate the battery cover near the bottom edge. Open the battery compartment and place the battery in the compartment with the + side of the battery facing up.
-
Page 68: Vehicle Dock Reference Guide
Vehicle Dock Reference Guide Figure 46 and the section following identify and describe the Vehicle Dock’s features and connectors. 5VDC FM OUT AUDIO Figure 46 DC5V Power Connector: Power connection for the supplied cigarette lighter adapter (see page 37). Audio Out (A ) Connector: Audio output for directly connecting to your vehi- UDIO cle’s audio system (see pages 38 &... -
Page 69: Operation
Operation Display Screen Information Your SIRIUS Sportster SP5’s display screen provides information about the operation of the radio, such as the currently tuned channel, song or show being played, artist name, time and other information. This screen is referred to as the Default screen in this manual. -
Page 70: Navigating Menus And Lists
Navigating Menus and Lists The menu and list structures in your SIRIUS Sportster SP5 are navigated by turning the Knob to scroll through a menu or list to highlight your choice, and then pressing the Knob (also called the Select button) to select the choice. When using the remote... - Page 71 Pressing and holding the D button for 1½ seconds enters the Channel List mode. Once the Channel List mode is active, repeatedly pressing and releasing the D button will cycle the display between these four screens (see Figure 49): • Combination List Screen: Displays a list of channel numbers and names along with the currently-playing song titles and artist names on each channel.
-
Page 72: Search Modes (Category, Channel, Artist, Song Title)
Search Modes (Preset, Category, Channel, Artist, Song Title) You can search for and select music four ways on your Sportster SP5: by category, by channel, by artist, and by song title. Searching Categories If you want to browse different entertainment categories, press either Category button to... - Page 73 Pressing the D button while in the cat- egory search mode will cycle between the category’s channel names, the currently- playing artist names, and the currently- playing song titles to enable you to preview what is playing on other channels before making a selection.
- Page 74 Searching Channels (Channel List Mode) It is possible to search for a different channel while listening to your current channel. Be sure that the display shows the Default display screen prior to the following steps: Press and hold the D button for 1½...
-
Page 75: Direct Tuning
Direct Tuning Channels can be directly accessed by pressing and releasing the Knob and then using the 0 – 9 keys to enter the desired channel number (see Figure 53). Once the desired number has been entered, the channel will change and the display will revert to the Default screen for the selected channel. - Page 76 The selected preset number will flash and then remain lit on the display to show that it has been memorized. If the preset button you selected already has a channel stored in it, the preset will be replaced with the newly stored channel. Recalling Channel Presets The 10 presets in the active bank (A, B, or C) can be selected by pressing the 0 through 9 buttons.
-
Page 77: Jump Button
RESETS button for 1½ seconds. Jump Button Your SIRIUS Sportster SP5 features a special button called Jump. This button can be programmed to jump to a channel which is accessed frequently and temporarily such as traffic, weather, news, or sports. The J... -
Page 78: Memory (Memo) And Song Seek (S-Seek) Functions
Memory (MEMO) and Song Seek (S-Seek) Functions Your Sportster SP5 lets you to capture and store information (artist, song, sports team, or traffic city) about the programming on the currently-tuned channel, up to a total of 30 items. The SP5 then continuously searches all the SIRIUS channels and alerts you when a match to a saved program is being played. - Page 79 Storing Artist Names, Song Titles, and Sports Teams to Memory If you are listening to a song or other entertainment channel, or a sports team, and wish to save the artist, song, or sports team selection to memory for future S-Seek alerts, do the following: For Artist Names or Song Titles: If the currently tuned-channel is a music or en- tertainment channel, momentarily press and release the M...
- Page 80 For Sports Events: If the currently-tuned channel is an NFL, NBA, NHL, NASCAR or college play-by-play sports broadcast, momentarily press and release the M button. The SP5 will display a menu to choose which sports team (or for NASCAR, which car number) should be saved to memory (see Figure 58) Figure 58 If either of the teams is not available to save, that team will be displayed as unavailable (see Figure 59).
- Page 81 The next screen will ask which kind of alert you wish to have (see Figure 60). Figure 60 will provide a pop-up alert when the team you have chosen is playing LERT NITIAL a game; A will provide a pop-up alert when the team you have chosen is playing a game, and when the score for the game is updated.
- Page 82 If all of the memory spaces are full when you press the M button, a M EMORY screen will be displayed for one second (see Figure 62). Figure 62 –C screen will then be displayed (see Figure 63). EPLACE ANCEL Figure 63 Turn the Knob (on the remote, use the Channel UP/DOWN buttons) to highlight whether to replace an existing alert or cancel saving the alert to memory, and press the Select button.
- Page 83 Each listing will be preceded by an icon that identifies the type of listing: a musical note for songs, a happy face for artists and a flag for sports teams/cars. Turn the Knob (on the remote, use the Channel UP/DOWN buttons) to highlight the alert that you would like to replace and press the Select button to store the new alert.
- Page 84 Deleting a Song Title Stored in Memory To delete a song title stored in memory: Press and release the Select button while in S-S mode. A pop-up screen displaying various selectable options will be displayed (see Figure 66). Figure 66 Turn the Knob (on the remote, use the Channel UP/DOWN buttons) to highlight the option.
- Page 85 Activating the Song (S-Seek) Alert When S-Seek alerts are enabled, whenever the Sportster SP5 is on it automatically searches the channels to determine if a match exists with the program information stored in radio’s memory. If one or more matches are found, a S-S...
- Page 86 SPORTS ALERT Your SIRIUS Sportster SP5 can automatically identify when your favorite sports team is playing. When a game is found, a S is displayed listing the sports events PORTS LERT which are currently being played (see Figure 69, left). Press the Select button to tune to the event.
-
Page 87: Instant Replay
Instant Replay The SIRIUS Sportster SP5 is capable of storing the audio of the channel that you’re listening to for later playback (up to approximately 44 minutes, depending upon the channel to which you are tuned). As soon as you tune to a channel, the radio automatically begins storing the audio, enabling you to rewind at any time to replay the audio again. - Page 88 • Button : This fast-forwards through the stored audio. Pressing- ORWARD and-releasing the F button forwards to the start of the next ORWARD song or program in the stored audio and playback automatically begins from there. Repeatedly pressing and releasing the Fast-Forward button continues to move forward in the stored audio to the starts of each song or program until the end of the stored audio is reached.
- Page 89 Note: When the radio is tuned to another channel, all audio stored in the Instant Replay memory is erased and the tuned channel begins to play. Tuning to another channel may automatically occur if another feature of the radio has been programmed to do so.
- Page 90 While you are in the playback mode, the radio continues to store the audio from the channel. Obviously, you will be unable to “catch up” to the live broadcast during play- back, as new audio is being stored at the same rate at which you are playing back the stored audio.
-
Page 91: Fm Presets Button
FM Presets Button If you are using a wireless connection between your SIRIUS SP5 and your vehicle’s audio system (see page 41), you can easily select between the five different FM transmitter preset frequencies by pressing the FM Presets/M button (or pressing the FM Presets button on the remote). -
Page 92: Menu Options
Menu Options Menu Options allows you to set and/or change the various features and settings of your SIRIUS Sportster SP5. To enter the menu options, press and release the M button. The M screen will be displayed (see Figure 75). -
Page 93: Sirius Id
Each of these menu options is explained in the following sections. Note that if a selection is not made within 10 seconds, the SP5 will exit the M screen and PTIONS revert back to the Default display screen. Sirius ID This displays your 12-digit SIRIUS ID (SID) number (see Figure 76). -
Page 94: Settings
Settings The Settings menu allows you access the following settings: • FM Transmitter • Jump Settings • Display Settings • S-Seek Alert Settings • Audio Levels • Channel Preview • Factory Default • Parental Control Press the M button, then highlight and select S . -
Page 95: Fm Transmitter
FM TRANSMITTER The FM T menu option allows you to enable or disable the SP5’s built-in FM RANSMITTER transmitter, and select up to 5 different FM transmitter frequencies. FM Presets Select the FM T menu option. The FM T screen will appear. See RANSMITTER RANSMITTER Figure 78, left. -
Page 96: Jump Settings
JUMP SETTINGS You can access the J menu from the M > S screens, or by ETTINGS PTIONS ETTINGS pressing and holding the J button for 1½ seconds. There are two options available for jump button settings: T (see RAFFIC AND HANNEL Figure 79, left). -
Page 97: Display Settings
DISPLAY SETTINGS You can control the SP5’s Auto Dimmer feature, adjust the brightness and contrast of the SP5’s color LCD display screen, and can select from 15 different color options for the screen and the SP5’s buttons: Select the D menu option. - Page 98 • Setting the brightness to the lowest setting enables a Dark Mode that extinguishes all illumination except for 5 seconds after any button is pressed. This is useful when using the Sleep Mode (see page 115). Note: You can increase and reduce the screen brightness without entering the Menu system by pressing and holding the Category <...
- Page 99 Contrast: This setting adjusts the relationship between the background and the text on the LCD display screen. The bar graph on the display screen will move to indicate the change (see Figure 83). When you’re finished, press the M button to exit Figure 83 Menu Options...
- Page 100 Color Options: You can select from 15 different color combinations for the SP5’s LCD screen background and text, and the front-panel button backlight color. Selecting activates the C screen. Turning the Knob (on the remote, OLOR PTIONS OLOR PTIONS pressing the Channel UP/DOWN buttons) will cycle the SP5 through the following color combinations: CREEN CREEN...
-
Page 101: S-Seek Alert Settings
S-SEEK ALERT SETTINGS This menu lets you turn S-Seek ON or OFF, turn the audible alert tone ON or OFF, turn the on-screen alerts ON or OFF and browse all of the S-Seek memory entries. In addi- tion, you can clear all 50 S-Seek entries. Select the S-S menu option (see Figure 84). -
Page 102: Audio Level
AUDIO LEVEL You can adjust the audio output level of your Sportster SP5 to match the levels of the other source components in your audio system, or to fine-tune the audio level for best performance. This is important when using both the included Vehicle Dock or the optional Home Docking Station. -
Page 103: Channel Preview Mode
CHANNEL PREVIEW Activating Channel Preview lets you browse what’s on other channels when the Default Screen is active. Normally, when the Default Screen is active, rotating the Knob or pressing a Channel UP or DOWN button on the remote automatically tunes the Sportster SP5 to the next higher or lower channel. -
Page 104: Factory Default
ACTORY EFAULT Sportster SP5. Note that factory default will not reset the lock code if you have changed it from the default lock code (see page 106). To perform a factory default reset: Select the Factory Default menu option. The R... -
Page 105: Parental Control
PARENTAL CONTROL Your SIRIUS Sportster SP5 has the ability to lock channels you do not want others (such as children) to access without your permission. Locked channels will not ap- pear when browsing channels with the Knob or Channel Select buttons. When the... - Page 106 Changing the Lock/Unlock Code The first time you access the L menu, you must enter the default lock code. NLOCK The default lock code is 0 0 0 0. You can keep this code or change it. To change the lock code: Select the P menu option.
-
Page 107: Sports Alerts
(You may select multiple teams/car numbers within each sport or league.) Your SIRIUS Sportster SP5 will constantly scan the channels and will alert you when a team or car you stored in memory is playing a game or running a race, or when there is a score update for a team, depending upon which options you have chosen for each team or car number. -
Page 108: Nascar
SPORTS SELECTIONS Choose S from the S screen (see Figure 91, on page 107). ELECTIONS PORTS LERTS The S screen will appear (see Figure 92). Highlight and select the PORTS ELECTIONS category of the team/car number you wish to add (NASCAR, NFL, NBA, NHL, College Football, College Basketball). - Page 109 Selecting the A option notifies you when any NASCAR driver is racing. You can choose to be notified either by the pop-up NASCAR Alert, by the NASCAR ticker, or by both (see Figure 94, below): a) Pressing the Select button will select T (a check-mark will appear in the ICKER adjacent box).
-
Page 110: Nfl, Nba, Nhl, College Football, College Basketball
NFL, NBA, NHL, COLLEGE FOOTBALL, COLLEGE BASKETBALL When you select one of the above leagues on the S screen (see Sports PORTS ELECTIONS Selections, on page 108), that league’s screen will appear (see Figure 95, left). Note that although the NFL is shown here, the screens for all the leagues contain the same options. Figure 95 To Select Teams: 1. - Page 111 League Settings: The NFL screen (Figure 95, on page 110) lets you turn Alerts and/or the Ticker ON and OFF for all of your selected teams in the league without having to do so for each team individually: : A pop-up alert will be displayed when any of your selected teams is LERT playing, and when the team(s) begin playing a game.
-
Page 112: Time-Based Features
Time-Based Features Time-Based Features menu lets you access the C LOCK LARM ROGRAM LERT , and S functions. HUTDOWN LEEP Press the M button and select T . The T screen ASED EATURES ASED EATURES will appear (see Figure 97). Figure 97 CLOCK The C... -
Page 113: Alarm
ALARM The A screen (see Figure 99) lets you to set your Sportster SP5 to turn ON at a LARM specific time. The last selected channel prior to shutdown will play when the SP5 powers-on. After highlighting an item, use the Select button to make your choices. -
Page 114: Program Alert
Snooze function: When the alarm turns the SP5 ON, pressing any button will mute the audio and turn the backlight off for 8 minutes, after which time the audio and backlight will turn ON again. Pressing the S button will cancel the alarm function until the ELECT next day but leave the SP5’s audio ON;... -
Page 115: Auto Shutdown
AUTO SHUTDOWN The A screen (see Figure 101) lets you program the SP5 to automatically shut HUTDOWN OFF after a one-hour period of inactivity (no button presses or other user intervention). Figure 101 After 59 minutes of inactivity, a beep tone will sound and a C ANCEL HUTDOWN display prompt appears on the screen to allow you to delay the automatic shutdown. -
Page 116: Signal Indicator
Signal Indicator When using the optional Home Docking Station or Boombox indoors, it is important to aim the antenna for maximum signal reception. The S screen (see Figure 103) IGNAL NDICATOR visually shows the strength of the satellite and terrestrial signals being received by the SP5. -
Page 117: Troubleshooting
Troubleshooting Symptom Solution SIRIUS Sportster Blown fuse, or the power cable is not properly connected. does not power on Check for a bad fuse and check power cable connection SIRIUS Sportster The satellite antenna is not connected to the radio dock. displays: Antenna Not Check the satellite antenna connection to the dock. -
Page 118: Specifications
Specifications Satellite Frequencies ..............2322.293/2330.207 MHz Terrestrial Frequencies ..................2326.250MHz Power Requirements ............5.2 Volts, Negative Ground, DC Audio Output ............2.8V (normal); 3.0V (max.) (Peak-to-Peak) Total Harmonic Distortion (THD) ..................<0.3% Signal-to-noise (S/N).................Greater than 75dB Operation Temperature ............-20° to +85° C (-4° to +185° F) Radio Dimensions (Length x Height x Depth) ....114.2mm x 62.5mm x 16.9mm (4.5”... -
Page 119: Sirius Id
SIRIUS ID Write down the SIRIUS ID (SID) of your SIRIUS Sportster 5 in the space provided below. SID: ____________________________________ SIRIUS ID... - Page 120 Notes...
- Page 121 Notes...
- Page 122 SIRIUS Customer Service: 1-888-869-5590 customercare@sirius-radio.com SIRIUS Satellite Radio Inc. 1221 Avenue of the Americas New York, NY 10020 1-800-869-5590 http://www.sirius.com...
- Page 124 Sirius Satellite Radio Inc. 1221 Avenue of the Americas New York, NY 10020 800.869.5590 Sportster 5 User Guide (091307c)
Need help?
Do you have a question about the Sportster SP5 and is the answer not in the manual?
Questions and answers