
Related Manuals for Honda 2005 CB900F


Summary of Contents for Honda 2005 CB900F
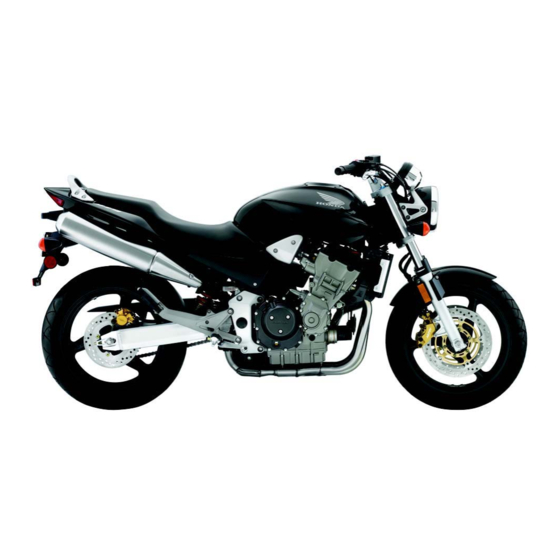
- Page 1 2005 CB900F SET-UP INSTRUCTIONS Set-up and pre-delivery service must be performed by an authorized Honda motorcycle dealer. MPD 10969 (0501) Issued: March 2005 ©2005 American Honda Motor Co., Inc. - All Rights Reserved...
-
Page 2: For Your Customer's Safety
IMPORTANCE OF PROPER SET-UP AND PRE-DELIVERY SERVICE FOR YOUR CUSTOMER'S SAFETY Proper set-up and pre-delivery service are essential to rider safety and the reliability of the machine. Any error or oversight made by the technician assembling and servicing a new machine can result in faulty operation, damage to the machine, or injury to the rider. - Page 3 2005 CB900F How To Use This Manual Follow the complete sequence of steps as shown. Do not short-cut any steps. The sequence has been established to ensure the unit is properly assembled. The individual steps are composed of three components: Sub-heading—The large sub-headings are a brief description of the step.
- Page 4 1. Remove the carton cover and check COVERED CRATE for damage. CARTON COVER CARDBOARD TOP STRAP The CB900F is crated at the factory in either a covered or uncovered crate. You may receive either one. Covered crate: Cut the strap and remove the carton cover. Remove the cardboard top.
- Page 5 2005 CB900F 4. Remove the crate frame and the BOLTS BRACES loose parts carton. Remove the bolts and braces. Using two people lift off the crate frame, being careful not to damage the motorcycle. PARTS Cut the strap and remove the loose CARTON parts carton.
- Page 6 5. Loose Parts Information. Unpack the remaining loose parts and check them against this illustration and list. DESRIPTION PART NUMBER STEP 1. Handlebar 53100-MCZ-000 2. Mirrors 88210-MCC-000 3. Tool kit 89010-MCZ-000 4. Owner’s Manual 31MCZ630* 5. Riding Tips & Practice Guide G0045** 6.
-
Page 7: Install The Handlebars
2005 CB900F 6. Remove the front shipping bracket. BOLTS Remove the bolts and front shipping bracket from the handlebar mount. FRONT SHIPPING BRACKET 7. Install the throttle grip. Remove the protective wrap from the throttle HOLE grip/switch assembly. Slide the throttle grip/switch assembly onto the right side of the handlebar. - Page 8 9. Attach the handlebar weight. HANDLEBAR WEIGHT Align the tab on the handlebar weight with the recess in the handlebar. Insert the weight into the handlebar and attach it with a 6 x 65 mm oval head screw. Torque the screw. Torque: 10 N·m (1.0 kgf·m, 7 lbf-ft) 10.
- Page 9 2005 CB900F 12. Install the clutch lever assembly. PUNCH MARK Position the clutch lever assembly on the left side of the handlebar. Loosely attach it using its holder and two 6 x 22 mm small head flange bolts. Be sure the holder's UP mark is facing up.
- Page 10 13. Remove the motorcycle from the LEFT SIDE: RIGHT SIDE: crate base (cont.). BRACE BRACE Remove the 6 and 8 mm bolts and right crate shipping brace. Remove the 6 and 8 mm bolts and left crate shipping brace. Discard the bolts. BOLTS BOLTS Install and torque the 8 x 22 mm socket bolts...
- Page 11 2005 CB900F 15. Store the Owner’s Manual and TOOL KIT STRAP tool kit (cont.). Place the tool kit in the holder and secure it with the rubber restraining strap. Place the Owner's Manual in its bag and secure it in the holder located on the bottom of the seat.
- Page 12 16. Check the cables, hoses, and wire harness routing. CLUTCH CABLE THROTTLE CABLES RIGHT HANDLEBAR SWITCH WIRE LEFT HANDLEBAR SWITCH WIRE FRONT BRAKE HOSE POSITIVE (+) NEGATIVE (-) BATTERY CABLE BATTERY CABLE BATTERY ©2005 American Honda Motor Co., Inc. - All Rights Reserved...
- Page 13 2005 CB900F 17. Service and install the battery. Service the battery only if the motorcycle has been sold or is to be used as a demonstration vehicle. Remove the seat (see step 15). Remove the bolt, then pull back the right side cover from the motorcycle.
- Page 14 18. Check the throttle operation. Check the throttle cable for damage. Check that the throttle returns from all open positions to the fully closed position smoothly and automatically in all steering positions. Measure the throttle grip free play. Throttle grip free play: 2 – 4 mm 2 –...
- Page 15 2005 CB900F 19. Check the clutch lever free play. Measure the clutch lever free play at the lever tip. 10 – 20 mm (3/8 – 13/16 in) Clutch lever free play: 10 - 20 mm (3/8 - 13/16 in) To adjust the free play:...
-
Page 16: Check The Engine Oil
21. Check the engine oil. FILLER CAP Before starting the engine, remove the anti- rust coating from the engine and exhaust system using a mild detergent and water. Rinse with clean water. Support the motorcycle in an upright position UPPER on a firm, level surface. -
Page 17: Check The Tire Pressure
2005 CB900F 23. Check the idle speed. THROTTLE STOP SCREW Support the motorcycle on its side stand on a firm, level surface. Connect a tachometer to the engine. Place the transmission in neutral. Start the engine and warm it to the normal operating temperature. - Page 18 MINI MINI Lg/Y Gr/Bu Bl/W Bu/Y O/Bl G/Bu Y/Bu W/Bu Y/Bl Br/Bl Y/Bl P/Bu P/Bl MINI G/Bl G/Bl Bl/Br Bl/Bu Bl/W Bu/Y Bl/W Y/Bu G/Bu Bu/R Bu/R BAT2 W/Bl W/Bl W/Bl Bu/W Bu/W Bu/W Bl/R Bl/R Bl/R BAT4 BAT1 R/Bl R/Bl R/Bl R/Bl...
Need help?
Do you have a question about the 2005 CB900F and is the answer not in the manual?
Questions and answers