Table of Contents
Advertisement
Available languages
Available languages
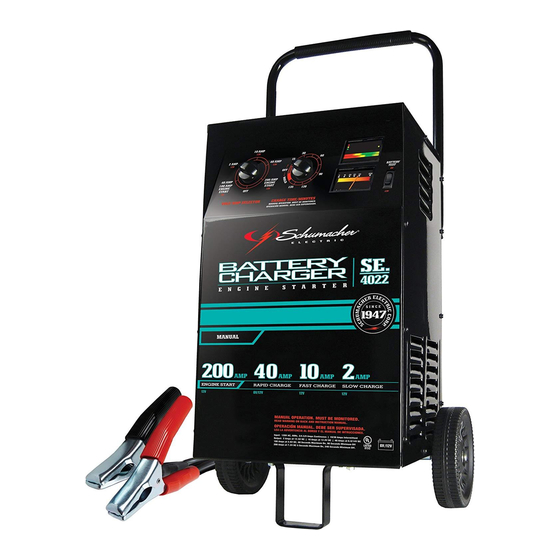
Models / Modelos: SE-2254, SE-2352, SE-3000, SE-3612,
Manual Battery Charger
Cargador de Batería Manual
DO NOT RETURN THIS PRODUCT TO THE STORE!
Call Customer Service for assistance: 800-621-5485
¡NO LO DEVUELVA ESTE PRODUCTO A LA TIENDA!
Llame a Servicios al Cliente para asistencia: 800-621-5485
READ THE ENTIRE MANUAL BEFORE USING THIS PRODUCT.
FAILURE TO DO SO COULD RESULT IN SERIOUS INJURY OR DEATH.
LEA EL MANUAL COMPLETO ANTES DE UTILIZAR ESTE PRODUCTO. CUALQUIER
FALLA PODRÍA RESULTAR EN SERIAS LESIONES O PODRÍA SER MORTAL.
SE-4020, SE-4022, SE-5025, SE-6030,
SE-8050
OWNER'S MANUAL
MANUAL DEL USUARIO
0099001275-00
Advertisement
Table of Contents

Related Manuals for Schumacher SE-2254


Summary of Contents for Schumacher SE-2254
-
Page 1: Manual Del Usuario
OWNER’S MANUAL MANUAL DEL USUARIO Models / Modelos: SE-2254, SE-2352, SE-3000, SE-3612, SE-4020, SE-4022, SE-5025, SE-6030, SE-8050 Manual Battery Charger Cargador de Batería Manual DO NOT RETURN THIS PRODUCT TO THE STORE! Call Customer Service for assistance: 800-621-5485 ¡NO LO DEVUELVA ESTE PRODUCTO A LA TIENDA! Llame a Servicios al Cliente para asistencia: 800-621-5485 READ THE ENTIRE MANUAL BEFORE USING THIS PRODUCT. - Page 2 Keep out of reach of children. Do not expose the charger to rain or snow. Use only recommended attachments. Use of an attachment not recommended or sold by Schumacher Electric Corporation ® may result in a risk of fire, electric shock or injury to persons or damage to property.
- Page 3 1.11 To reduce the risk of a battery explosion, follow these instructions and those published by the battery manufacturer and the manufacturer of any equipment you intend to use in the vicinity of the battery. Review the cautionary markings on these products and on the engine.
-
Page 4: Charger Location
CHARGER LOCATION RISK OF EXPLOSION AND CONTACT WITH BATTERY ACID. Locate the charger as far away from the battery as the DC cables permit. Never place the charger directly above the battery being charged; gases from the battery will corrode and damage the charger. Do not set the battery on top of the charger. - Page 5 Connect the POSITIVE (RED) charger clip to the POSITIVE (POS, P, +) post of the battery. Position yourself and the free end of the cable you previously attached to the NEGATIVE (NEG, N, -) battery post as far away from the battery as possible – then connect the NEGATIVE (BLACK) charger clip to the free end of the cable.
- Page 6 PARTS TOOLS NEEDED (2) 10-32, thread cutting screws 3/8" wrench (for mounting foot) (4) ¼-20, thread cutting screws 5/16" wrench (for mounting wheels) (4) Phillips head sheet metal screws 1/4" wrench (for mounting handle) (2) wheels hammer (1) axle screwdriver (flat blade) (2) axle caps screwdriver (Phillips) (2) axle brackets...
-
Page 7: Control Panel
CONTROL PANEL Note: Not all controls are available on all models. Charge Rate Selector Switch Use the Charge Rate selector switch to select the charge rate or engine starting setting you require. • 2A Slow Charge Rate – Intended for charging small batteries such as those commonly used in garden tractors, snow mobiles and motorcycles. - Page 8 Battery Load Tester Switch (Model SE-8050 only) When testing a battery, use this switch to apply a load to it. Battery Tester Switch (Models SE-2254 and SE-4022 only) When testing a battery, use this switch to select between testing a 6 volt battery and testing a 12 volt battery.
-
Page 9: Battery Is Installed In A Vehicle)
STOP cranking the engine until the other problem has been diagnosed and corrected. Using the Battery Voltage Tester (Models SE-2254 and SE-4022 only) 1. Set the Voltage Selector switch to the correct setting (6V or 12V) to match the battery to be tested. -
Page 10: Calculating Charge Time
Yellow or Red, but the needle remains steady – Indicates that the battery capacity is not satisfactory. The battery may be either defective or not fully charged. Check the specific gravity of the battery to see which condition exists. If charging does not bring the battery up to a full charge, the battery should be replaced. -
Page 11: Maintenance Instructions
The Chart Method Use the following table to more accurately determine the time it will take to bring a battery to full charge. First, identify where your battery fits into the chart. CCA = Cold Cranking Amps RC = Reserve Capacity Ah = Amp Hour NR means that the charger setting is NOT RECOMMENDED. -
Page 12: Troubleshooting
TROUBLESHOOTING PROBLEM POSSIBLE CAUSE REASON/SOLUTION No reading on the Charger is not plugged in. Plug the charger into an ammeter. A.C. outlet. No power at the receptacle. Check for open fuse or circuit breaker supplying A.C. outlet. Clips are not making a good Check for poor connection to connection to the battery. -
Page 13: Before Returning For Repairs
PROBLEM POSSIBLE CAUSE REASON/SOLUTION Charger makes a loud Transformer laminations vibrate No problem; this is a normal buzz or hum. (buzz). condition. Shorted Diode Assembly or Have charger checked by a Output Rectifier Assembly (hum). qualified technician. Short or no start Drawing more than the engine Crank time varies with the cycle when cranking... -
Page 14: Limited Warranty
Manufacturer does not provide any warranty for any accessories used with this product that are not manufactured by Schumacher Electric Corporation and approved for use with this product. This Limited Warranty is void if the product is misused, subjected to careless handling, repaired, or modified by anyone other than Manufacturer or if this unit is resold through an unauthorized retailer. - Page 15 ORIGINAL receipt because it will be required for any warranty claims. This warranty is not transferable. Send warranty card only. Do not send unit to this address for repair. Mail this card to: Schumacher Electric Corporation 801 Business Center Drive Mount Prospect, IL 60056-2179 Name_______________________________________________________________...
- Page 16 • •...
- Page 17 Manténgase alejado de los niños. No exponga el cargador a la lluvia o a la nieve. Utilice solamente accesorios recomendados. El uso de un accesorio no recomendado o suministrado por Schumacher ® Electric Corporation puede provocar riesgo de incendio, descarga eléctrica o lesiones a personas o daño a la propiedad.
- Page 18 RIESGO DE GASES EXPLOSIVOS. 1.10 RESULTA PELIGROSO TRABAJAR EN FORMA CERCANA A UNA BATERÍA DE PLOMO. LAS BATERÍAS GENERAN GASES EXPLOSIVOS DURANTE SU NORMAL FUNCIONAMIENTO. POR ESTE MOTIVO, RESULTA DE SUMA IMPORTANCIA QUE SIGA LAS INSTRUCCIONES CADA VEZ QUE UTILIZA EL CARGADOR. 1.11 Para reducir el riesgo de explosión de una batería, siga estas instrucciones y aquellas publicadas por el fabricante de la batería y por el fabricante de cualquier equipo que...
-
Page 19: Ubicación Del Cargador
Agregue agua destilada a cada pila hasta que el ácido de la batería alcance el nivel especificado por el fabricante de la batería. No provoque derrames. En lo que concierne a baterías que no cuentan con tapas extraíbles para pilas, tales como baterías de plomo-ácido reguladas por válvulas (VRLA, por sus siglas en inglés), siga cuidadosamente las instrucciones de recarga del fabricante. -
Page 20: Siga Estos Pasos Cuando La Batería Se Encuentre Fuera Del Vehículo
En un vehículo con descarga a tierra por borne positivo, conecte el gancho NEGATIVO (NEGRO) del cargador de batería al borne NEGATIVO (NEG, N, -) sin descarga a tierra de la batería. Conecte el gancho POSITIVO (ROJO) al chasis del vehículo o al bloque motor alejado de la batería. -
Page 21: Instrucciones De Montaje
Nunca altere el cable o enchufe de C.A. suministrado, si no se ajusta al tomacorriente, haga instalar un tomacorriente adecuado con descarga a tierra por medio de un electricista capacitado. Una conexión inadecuada puede provocar un riesgo de descarga eléctrica o electrocución. NOTA: De acuerdo a las Leyes Canadienses, el uso de un enchufe adaptador no es permitido en el Canada. -
Page 22: Panel De Control
Acople el pie: retire el cargador de los materiales de embalaje y ubíquelo en forma invertida sobre una superficie plana. Acople el pie y asegúrelo con los cuatro tornillos de rosca cortante de ¼-20 que se suministran. Ensamble las ruedas y el eje: mantenga el eje en posición vertical sobre el piso o sobre la superficie de trabajo. - Page 23 Interruptor del Probador de Carga en la Bateria (Modelo SE-8050 solamente) Utilice este interruptor para probar la carga de la batería. Interruptor de Probador de Bateria (Modelo SE-2254 y SE-4022 solamente) Utilice este interruptor para probar baterías de 6 volts y baterías de 12 volts.
-
Page 24: Instrucciones De Operación
NOTA: Este es un cargador manual y se sobrecarga la batería si se le permite operar durante largos periodos de tiempo. Vigilar el proceso de carga con frecuencia. Carga (Modelos SE-2254, SE-3000, SE-4020, SE-4022, SE-5025, SE-6030 y SE-8050) 1. Asegúrese de que todas las piezas del cargador estén bien instaladas y en buenas condiciones para su función, incluyendo los protectores de plástico de las pinzas de la... - Page 25 DEJE de darle arranque al motor hasta que el otro problema se diagnostique y se corrija. Usando el Probador de Voltaje de la Bateria (Modelos SE-2254 y SE-4022 solamente) 1. Fije el interruptor del selector de voltaje al ajuste correcto (6V o 12V) para emparejar la batería a probarse.
-
Page 26: Cálculo De Tiempo De Carga
Amarillo o Rojo – pero la aguja continúa inmóvil-indica que la capacidad de la batería no es satisfactoria. La batería podría estar defectuosa o no cargada completamente. Compruebe la gravedad específica de la batería para serciorarse de la condición existente. Si la carga no puede completarse, quiere decir que la batería debe ser reeplazada. -
Page 27: Instrucciones De Mantenimiento
Necesitará cargar la batería de 100 amperes por hora por un poco más de 3 horas a un índice de carga de 20 amperes utilizando el ejemplo anterior. El método del gráfico Utilice la siguiente tabla para determinar con mayor exactitud el tiempo que le llevará completar la carga de la batería. -
Page 28: Localización Y Solución De Problemas
LOCALIZACIÓN Y SOLUCIÓN DE PROBLEMAS PROBLEMA POSIBLE CAUSA SOLUCIÓN No se manifiesta Cargador desenchufado. Enchufe el cargador a un la lectura en el tomacorriente de C.A. amperímetro. No hay electricidad en el Verifique la posible presencia de tomacorriente. fusibles abiertos o disyuntores que suministren energía al tomacorriente de C.A. - Page 29 PROBLEMA POSIBLE CAUSA SOLUCIÓN Se escucha un sonido Buena batería pero La batería tal vez no decida seco en el cargador extremadamente descargada. aceptar una carga debido a un (“clic”). [continuado] estado de agotamiento. Permita que la carga continúe hasta que la batería tenga la oportunidad de recuperarse lo suficientemente como para aceptar una carga.
-
Page 30: Antes De Devolver A Reparaciones
PROBLEMA POSIBLE CAUSA SOLUCIÓN El cargador no se Tomacorriente de C.A. fuera de Controle la posible presencia de enciende incluso al funcionamiento. fusibles abiertos o disyuntores estar bien conectado. que suministren energía al tomacorriente de C.A. Conexión eléctrica deficiente. Controle la posible pérdida del enchufe perteneciente a los cables de alimentación o al alargador. -
Page 31: Garantía Limitada
El Fabricante no presta garantía por lo accesorios utilizados con este producto que no sean los fabricados por Schumacher Electric Corporation y que no estén aprobados para su uso con este producto. La presente Garantía Limitada será nula si el producto se utiliza en forma errónea, se trata de manera inadecuada, es reparado o modificado...