
Related Manuals for Sanyo LCD-32XR10SA


Summary of Contents for Sanyo LCD-32XR10SA
-
Page 1: Instruction Manual
LCD-32XR10SA INSTRUCTION MANUAL LCD TV Before connecting, operating or adjusting this product, please read the manual completely. Please keep this manual for future reference. -
Page 2: Table Of Contents
Contents Important Information Important Safety Precautions Important Notice Identification of Controls Setting Up Connections Basic Operations Memorizing the Channels & Setting the Channels Adjusting the Picture Adjusting the Sound & Setting Stereo Mode Adjusting basic settings Setting Parental Control Adjusting the Computer Image Using USB Troubleshooting Specifications... -
Page 3: Important Information
IMPORTANT INFORMATION If a television is not positioned in a sufficiently stable location, it can be potentially hazardous due to falling. Many injuries, particularly to children, can be avoided by taking simple precautions such as: ! Using cabinets or stands recommended by the manufacturer of the television. ! Only using furniture that can safely support the television. -
Page 4: Important Safety Precautions
Important Safety Precautions Electrical energy can perform many useful functions, but it can also cause personal injuries and property damage if improperly handled. This product has been engineered and manufactured with the highest priority on safety. But IMPROPER USE CAN RESULT IN POTENTIAL ELECTRICAL SHOCK OR FIRE HAZARD. In order to prevent potential danger, please observe the following instructions when installing, operating and cleaning the product. - Page 5 Important Safety Precautions (Continued) 15. Stand---Use only with the cart, stand, tripod, bracket, or table specified by the manufacturer, or sold with the apparatus. Do not place the product on an unstable trolley, stand, tripod or table. Placing the product on an unstable base can cause the product to fall, resulting in serious personal injuries as well as damage to the product.
-
Page 6: Important Notice
Important Notice About Temperature Do not use in hot and cold rooms (locations) When the unit is used in rooms (locations) with low temperature, the picture may leave trails or appear slightly delayed. This is not a malfunction, and the unit will recover when the temperature returns to normal. -
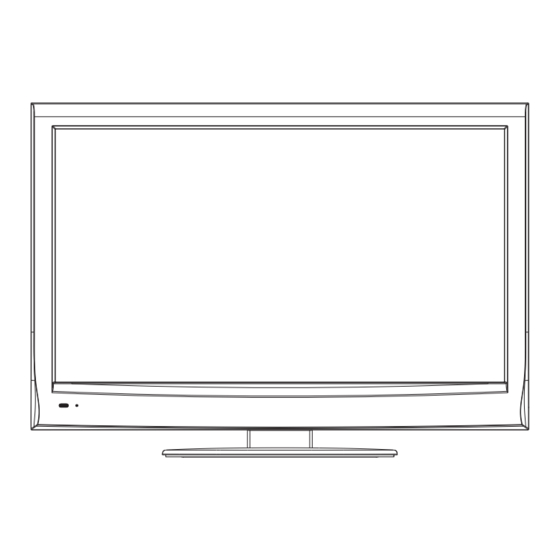
Page 7: Identification Of Controls
Identification of Controls Main Unit (front view) 1. Remote sensor Receives signals from the remote control. Do not block. 2. Power indicator Lights blue when in operating mode. Lights red when in standby mode. INPUT MENU 3. POWER Press this button to turn the unit ON from STANDBY mode. Press it again to turn the set back to STANDBY. - Page 8 Identification of Controls (Continued) Remote control unit 1. POWER : Switches the TV power on or Standby. 2: ZOOM: Selects the picture aspect ratio. 3. INPUT: Displays Input menu. 4. COMP: Press to switch to Component mode. 5. VGA: Press to switch to VGA mode. 6.
-
Page 9: Setting Up
Setting Up You should select a location for the TV: Selecting a location Where direct light does not reflect on the screen. · That has indirect and soft lighting. · Where the TV has access to an antenna or cable TV connection. ·... -
Page 10: Connections
Connections Cautions Before Connecting When connecting an external device to the TV, make sure that the TV and the device are turned off. Check the plugs on the ends of cables to make sure that they are the correct type before you try plugging them into jacks on the TV. - Page 11 Connections (Continued) To connect headphones: Connecting Headphones Insert the plug of the headphone into the TV’s Headphone jack. When using headphones, adjust the headphone volume so as to avoid excessive levels, as hearing damage may result. TV Side Headphones Connecting a USB device Insert your USB device into the USB port.
-
Page 12: Connecting A Computer
Connections (Continued) Connecting a component video device TV REAR To connect a component video device: Connect the Component Video cable between the Y, Cb/Pb, Cr/Pr input jacks on the TV and Y, Cb/Pb, Cr/Pr output jacks on the device . Connect the Audio cable between the AUDIO input jacks on the TV and AUDIO output jacks on the device. - Page 13 Connections (Continued) Connecting a VCR To connect a VCR: Connect the Audio/Video cables between the Audio (L/R)/Video jacks on the TV and VCR. TV REAR Note: For better video, you can use the S-VIDEO jack if your source supports it. To play the VCR: 1.
-
Page 14: Basic Operations
Basic Operations Turning the TV on or off To turn the TV on or off: Plug the power cord into an AC power outlet. Now the set is in standby mode. Wait some seconds until the power indicator lights up, then press POWER to turn on the TV. - Page 15 Basic Operations (Continued) On-screen menu overview CHANNEL menu VIDEO menu CHANNEL VIDEO Picture Mode User AIR/CABLE CABLE Contrast MONO Brightness Color System AUTO Color Auto Scan Sharpness Channel Edit Advanced Move Enter Exit Move Enter Exit SETTING menu AUDIO menu SETTING AUDIO Language...
-
Page 16: Memorizing The Channels & Setting The Channels
Memorizing the Channels & Setting the Channels When you turn on the TV for the first time, you should perform an auto channel scan to set up stations on your TV. Note: Be sure to select the TV input source before operation. Before your TV can memorize the available channels, you must specify Setting the AIR/CABLE option the type of signal source that is connected to the unit. -
Page 17: Skipping Channels
Memorizing the Channels & Setting the Channels (Continued) Setting color system If some channel’s color is abnormal, it may be that the color system setting is wrong, please do the following to select a proper color system. CHANNEL To set color system AIR/CABLE CABLE MONO... -
Page 18: Adjusting The Picture
Adjusting the Picture To adjust the picture: Adjusting the picture Press MENU. The on-screen menu opens with the VIDEO menu VIDEO displayed, then press ENTER to access. Press 6 or 5 to highlight an option, press 3 to adjust the Picture Mode User Contrast... -
Page 19: Adjusting The Sound & Setting Stereo Mode
Adjusting the Sound & Setting Stereo Mode To adjust the sound: Adjusting the sound Press MENU. The on-screen menu opens. AUDIO Press 6 or 5 to display AUDIO menu, press ENTER to access. Sound Mode User Normal Equalizer Music Press 6 or 5 to highlight an option, press ENTER to access the Balance... -
Page 20: Adjusting Basic Settings
Adjusting basic settings To adjust basic settings: Adjusting basic settings Press MENU. The on-screen menu opens. SETTING Language English Press 6 or 5 to display SETTING menu, then press ENTER. OSD Menu Sleep Mode Press 6 or 5 to highlight an option, press ENTER to access the OSD Skin Blue option. -
Page 21: Setting Parental Control
Setting Parental Control Parental Control enables parents to prevent their children from watching inappropriate material on TV. Parental Control reads the ratings for programming (except for news, sports, unedited movies on premium cable and Emergency System signals),the denies access to programming if the program's rating meets the limitations you select. In this case, the program will be blocked. - Page 22 Setting Parental Control (Continued) You can make use of Parental Control menu to setup ratings including TV Rating Setup rating, Movie rating, Canadian English rating and Canadian French rating. SETTING To set ratings: Change Password Use password to access SETTING-Parental Control menu. Parental Control MPAA USA TV...
- Page 23 Setting Parental Control (Continued) SETTING SETTING 8ans+ 13ans+ 16ans+ 18ans+ Move Enter Return Move Enter Return CF Sub-Menu CE Sub-Menu Rating Rating Options Exempt – Exempt programming. Canadian English rating (CE) All children. This rating allows you to block various types of movies and television programs based on the rating systems Children 8 years and older.
-
Page 24: Adjusting The Computer Image
Adjusting the computer image & Using USB Adjusting the PC image To adjust the computer image: Make sure that your TV is in VGA mode. H.Position Press MENU. The on-screen menu opens. V.Position Clock Press 6 or 5 to display PC menu, press ENTER to access. Phase Press 6 or 5... -
Page 25: Viewing Photos
Using USB (Continued) To view photos: Viewing photos When switching to USB mode, the USB main menu will appear automatically. Photo Press 3 to select Photo icon, then press ENTER to access . Now the upper screen shows compatible files while bottom screen shows folders. -
Page 26: Troubleshooting
Troubleshooting If, after reading these operating instructions, you have additional questions related to the use of your television, please call the services center in your local area. Before calling service, please check the symptoms and follow suggested solutions. Remote Control Problem Possible Solutions The batteries could be weak. -
Page 27: Specifications
Specifications Type: LCD TV Panel: 32” TFT LCD TV system: PAL- M, PAL-N, NTSC-M Power Requirement: ~ 100-240 V, 50/60 Hz Power Consumption: 120 W Dimensions (W x H x D, with stand): ×555×210 mm Weight(with stand): 10.3 kg Terminals: Antenna in (1) AV in (2) S-VIDEO (1) -
Page 30: Appendix: Installing The Stand
Appendix: Installing the Stand If the stand is provided, please read these instructions thoroughly before attempting this installation. You must install your TV into the stand in order for it to stand upright on a cabinet or other flat surface. If you intend to mount your TV on a wall or other vertical surface, you must remove the stand column. - Page 31 5944039120 Ver. 1.0...
Need help?
Do you have a question about the LCD-32XR10SA and is the answer not in the manual?
Questions and answers