
Related Manuals for Haier HW70-1401


Summary of Contents for Haier HW70-1401
-
Page 1: User Manual
AUTOMATIC DRUM WASHING MACHINE USER MANUAL HW70- 1 401 HW70- 1 201 HW70- 1 001 HW60- 1 401 HW60- 1 201 HW60- 1 001... -
Page 2: Table Of Contents
10 - 15 16- 20 TABLE OF CONTENTS BEFORE USE USING THE APPLIANCE MAINTENANCE COMPONENTS ....... 03 CLEANING & CARE ......16 > PROGRAM SELECTION ..... 10 > > PREPARATION ........ 04 DISPLAY CODES ......18 > CONSUMPTION AND TECHNICAL DATA .. -
Page 3: Before Use
BEFORE USE COMPONENTS Please read these instructions carefully before using this appliance. The instructions contain important information which will help you get the best out of the appliance and ensure safe and proper installation, use and maintenance. Keep this manual in a convenient place so you can always refer to it for the safe and proper use of the appliance. If you sell the appliance, give it away, or leave it behind when you move house, make sure you also pass on this manual so that the new owner can become familiar with the appliance and safety warnings. -
Page 4: Preparation
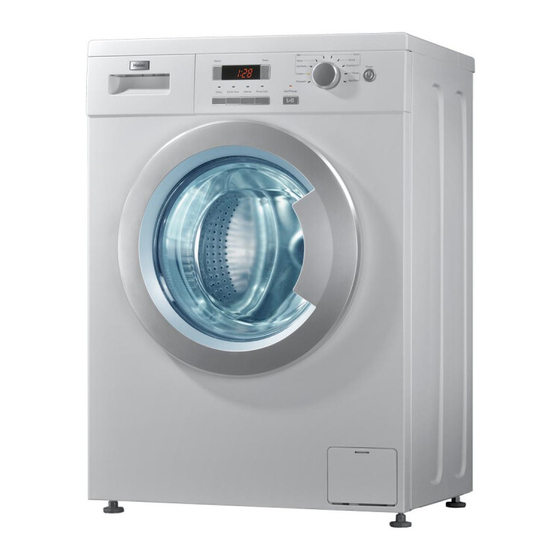
BEFORE USE PREPARATION PREPARING THE MACHINE Remove all the packing materials to prevent unsteadiness, including the polystyrene base. Upon opening the package, water drops may be seen on the plastic bag and the porthole. This is normal phenomenon resulting from water tests in the factory. DESCRIPTION This diagram may be slightly different from the layout of the washing machine you have just purchased due to technical improvements. -
Page 5: Safety Instructions
BEFORE USE SAFETY INSTRUCTIONS BEFORE SWITCHING THE APPLIANCE ON FOR THE FIRST TIME DO ... DO NOT ..Make sure that the transport bolt are removed..Touch or use the appliance when barefoot or with wet ... Use a separate earthed socket for the power supply. or damp hands or feet. -
Page 6: Installation
BEFORE USE INSTALLATION DISMANTLE THE TRANSPORTATION BOLTS The transportation bolts are designed for clamping anti-vibration components inside of the washing machine during the transportation process. Remove the back cover. Remove the four bolts on the rear side and take out the synthetic stabilisers from within the machine. - Page 7 BEFORE USE INLET HOSE 1. Connect the nut on the inlet hose to the connector on the water valve. 2. Apply inlet hose to a water tap with cold, fresh water. Note: Use the hose-set supplied with the appliance. Old hose-sets should not be reused. DRAIN HOSE 1.
-
Page 8: Control Panel
BEFORE USE CONTROL PANEL Mixto Deportivo Lana Rápido 40’ Velocidad Temperatura Sintético Express 15’ Inicio Algodón Aclarado Centrifugado/ Prelavado Vaciado Inicio Aclarado Parada Intensivo Inicio/Pausa Diferido Extra cuba llena Program knob Detergent distribution drawer Power Switch Display Start/Pause button Intense button Spinning Speed Setting button Extra rinse... - Page 9 BEFORE USE ¬ Delay Button Touch this button lightly, the washing machine will start operation after a period of time and the corresponding indicator will go on. The range is 0.5-24 hours; each touch of this button increases a half hour. After the button is set, press the Start/Pause button to start countdown of the set time (the time is displayed on the screen until the program ends).
- Page 10 USING THE APPLIANCE PROGRAM SELECTION PROGRAM MODES 1 Detergent compartment for prewash mode 2 Detergent compartment 3 Compartment for softener and other additives Temperature Preset spin speed Program Maximum Preset Recommended Laundry - - to 90 °C 40°C ¬ Prewash Heavy soiling 1000 rpm - - to 90 °C 40°C...
-
Page 11: Consumption And Technical Data
0.02kwh/0.02kwh 20L/22L - -°C 0:15 ¬ Express15 EN 60456 test program / Energy label program with Standard 60°C and max. spin speed and Intense function. TECHNICAL DATA HW70-1401 HW60-1401 HW70-1201 HW60-1201 HW70-1001 HW60-1001 Power source 220 - 240V~/50Hz 220 - 240V~/50Hz Max. - Page 12 USING THE APPLIANCE WASHING METHODS PLEASE NOTE This washing machine is for domestic use only. If the machine is use for commercial purpose the guarantee will not be valid anymore.Do not use it for purposes other than that for which it was designed. Follow the instructions given on the label of each garment and wash only machine-washable garments.
-
Page 13: Using The Appliance
USING THE APPLIANCE LOADING THE MACHINE Open the washer door, put in the laundry piece by piece. Close the door tightly. ¬ When fi rst using the washing machine, let it run unloaded for one program to prevent the laundry from being tainted by oil or dirty water from the washing machine. - Page 14 USING THE APPLIANCE SETTING WASHING TEMPERATURE Mixto Deportivo Rápido 40’ Temperatura Lana Velocidad Sintético Express 15’ Inicio Algodón Aclarado Press and hold down the temperature button until the desired Prelavado Centrifugado/ Vaciado Inicio Aclarado Parada temperature is selected . Intensivo Inicio/Pausa Diferido Extra...
- Page 15 USING THE APPLIANCE CARE CHART Resistant material Bleachable in cold water Don't dry clean Delicate fabric Do not bleach Dry fl at Washable at 95 °C Iron at 200 °C Hung to dry Washable at 60 °C Iron at 150 °C Dry on clothes hanger Washable at 40 °C Iron at 100 °C...
-
Page 16: Maintenance
MAINTENANCE CLEANING & CARE AFTER WASHING Turn off the water supply and pull out electricity plug after each wash. Open the washer door to prevent formation of moisture and odours. If the washing machine is left idle for a long period, drain the water in the machine and replace the drain hose. - Page 17 MAINTENANCE WATER INLET VALVE AND INLET VALVE FILTER To prevent blockage to the water supply by ingress of foreign substances, clean the water inlet valve and inlet valve fi lter regularly. MOVING THE MACHINE If the machine is to be moved to a distant location, replace the transportation bolts removed before installation to prevent damage as shown below.
-
Page 18: Display Codes
MAINTENANCE DISPLAY CODES DISPLAY CODES AND SPECIAL FUNCTIONS CODES CAUSES SOLUTIONS Err1 ¬ Door is not properly shut. _ Shut the door properly. Err2 ¬ Drainage error, water not emptied within 6 _ Clean the fi lter and check the drain hose for blockage. If error minutes. -
Page 19: Troubleshooting
MAINTENANCE TROUBLESHOOTING TROUBLESHOOTING The following circumstances do not constitute problems. Do not contact the Service Center until the problem has been confi rmed. PROBLEM CAUSES SOLUTIONS Washing machine fails to ¬ Poor connection to the power supply. _ Check connection to the power supply. operate. -
Page 20: Wiring Circuit
IMPORTANT SAFETY INFORMATION WIRING CIRCUIT WIRING CIRCUIT FUSE MOTOR FUSE Motor--------------Motor PCB----------------Printed Circuit Board MR------------------Door lock R---------------------Heating Element PS-------------------Drainage Pump EVF,EVP-----------Water Inlet Magnetic Valve P----------------------Pressure Switch FA---------------------Interference Suppresser NTC------------------Temperature Sensor... - Page 21 LAVADORA AUTOMÁTICA DE CARGA FRONTAL MANUAL DE USUARIO HW70- 1 401 HW70- 1 201 HW70- 1 001 HW60- 1 401 HW60- 1 201 HW60- 1 001...
- Page 22 03 – 09 10 – 15 16 – 20 ÍNDICE ANTES DE UTILIZAR LA LAVADORA CÓMO UTILIZAR LA LAVADORA MANTENIMIENTO SELECCIÓN DE UN PROGRAMA ......10 COMPONENTES ..........03 LIMPIEZA Y CUIDADO ........16 > > > DE CONSUMO ..........11 PREPARACIÓN ..........04 MENSAJES DE LA PANTALLA ....18 >...
-
Page 23: Antes De Utilizar La Lavadora
ANTES DE UTILIZAR LA LAVADORA COMPONENTES Por favor, lea las instrucciones detenidamente antes de utilizar este electrodoméstico. Las instrucciones contienen información importante que puede ayudarle a obtener un resultado óptimo de su electrodoméstico y asegurar una instalación, uso y mantenimiento correcto y seguro. Guarde este manual en un lugar accesible para un uso correcto y seguro de su electrodoméstico. -
Page 24: Preparación
ANTES DE UTILIZAR LA LAVADORA PREPARACIÓN PREPARAR LA LAVADORA Retire todos los materiales de embalaje para evitar la inestabilidad, incluida la base de poliestireno. Al abrir la caja, pueden aparecer gotas de agua en el envoltorio de plástico y en la ventanilla de la puerta. Es un fenómeno habitual debido a las pruebas de agua que se llevan a cabo en la fábrica. -
Page 25: Instrucciones De Seguridad
ANTES DE UTILIZAR LA LAVADORA INSTRUCCIONES DE SEGURIDAD ANTES DE UTILIZAR LA LAVADORA POR PRIMERA VEZ NO DEBE… DEBE..Asegurarse de que ha retirado los tornillos de transporte..Tocar o utilice la lavadora cuando vaya descalzo o con las manos o los pies húmedos o mojados. -
Page 26: Instalación
ANTES DE UTILIZAR LA LAVADORA INSTALACIÓN DESMONTAJE DE LOS TORNILLOS DE TRANSPORTE Los tornillos de transporte están diseñados para sujetar el tambor de la lavadora durante el transporte. 1. Retire la cubierta trasera. 2. Extraiga los tres tornillos situados en la parte trasera y retire los estabilizadores sintéticos de la máquina. - Page 27 ANTES DE UTILIZAR LA LAVADORA MANGUERA DE ENTRADA 1.Enrosque la manguera de entrada en la llave de agua. 2. Enrosque la manguera de entrada en grifo de su red hidráulica. Aviso: Utilice el conjunto de piezas de la manguera proporcionado con el aparato. El conjunto de piezas de mangueras antiguas no deben volverse a utilizar.
-
Page 28: Panel De Control
ANTES DE UTILIZAR LA LAVADORA PANEL DE CONTROL Mixto Deportivo Lana Rápido 40’ Velocidad Temperatura Sintético Express 15’ Inicio Algodón Aclarado Centrifugado/ Prelavado Vaciado Inicio Aclarado Parada Intensivo Inicio/Pausa Diferido Extra cuba llena Funciones Compartimento para el detergente Botón de encendido Display Botón de inicio/pausa Intensivo... - Page 29 ANTES DE UTILIZAR LA LAVADORA ¬ Incio Diferido _Al presionar este botón, la lavadora empezará el proceso de lavado después de un periodo de tiempo y se encenderá el indicador correspondiente. El periodo de tiempo puede oscilar entre 0,5 y 24 horas; cada vez que presione este botón, aumenta media hora. Después de establecer el tiempo, pulse el botón Inicio/Pausa para iniciar la cuenta atrás del tiempo establecido (el tiempo se muestra en la pantalla hasta que fi...
-
Page 30: Selección De Un Programa
CÓMO UTILIZAR LA LAVADORA CÓMO UTILIZAR LA LAVADORA CÓMO UTILIZAR LA LAVADORA PROGRAMA SELECCIÓN DE UN TIPO DE PROGRAMAS 1 Compartimento de detergente para la modalidad de prelavado 2 Compartimento de detergente 3 Compartimento para el suavizante y otros productos Temperatura Velocidad centrifugado Programa... -
Page 31: De Consumo
- -°C 0:15 ¬ Express 15’ Programa de pruebas EN 60456 / Programa de etiquetas de efi ciencia energética con Algodón 60 ºC y velocidad de centrifugado de Máx. DATOS TÉCNICOS HW70-1401 HW60-1401 HW70-1201 HW60-1201 HW70-1001 HW60-1001 Fuente de energía... -
Page 32: Métodos De Lavado
CÓMO UTILIZAR LA LAVADORA CÓMO UTILIZAR LA LAVADORA CÓMO UTILIZAR LA LAVADORA MÉTODOS DE LAVADO AVISO La lavadora únicamente debe emplearse para uso doméstico. Si el electrodoméstico se utiliza con fi nes comerciales, la garantía no tendrá validez. No lo utilice con fi nes distintos de aquel para el que se diseñó. - Page 33 CÓMO UTILIZAR LA LAVADORA CARGAR LA LAVADORA Abra la puerta de la lavadora, introduzca las prendas pieza por pieza. Cierre la puerta con fuerza. ¬ Cuando utilice la lavadora por primera vez, déjela en funcionamiento sin carga durante la duración de un programa para evitar que las prendas se manchen de aceite o de agua sucia de la misma lavadora.
- Page 34 CÓMO UTILIZAR LA LAVADORA CÓMO UTILIZAR LA LAVADORA CÓMO UTILIZAR LA LAVADORA SELECCIONAR LA TEMPERATURA DE LAVADO Mixto Deportivo Pulse y mantenga presionado el botón de temperatura hasta que se Lana Rápido 40’ Velocidad Temperatura Express 15’ Sintético Inicio muestre la temperatura deseada o aparezca el símbolo “--“ para no Algodón Aclarado Prelavado...
- Page 35 CÓMO UTILIZAR LA LAVADORA CUADRO DE CUIDADOS Material resistente Blanquear con agua fría No limpiar en seco No blanquear Tejidos delicados Secar sobre una superfi cie Lavable a 95 ºC Planchar a 200 ºC Colgar para secar Lavable a 60 ºC Planchar a 150 ºC Secar en una percha Lavable a 40 ºC...
-
Page 36: Mantenimiento
MANTENIMIENTO LIMPIEZA Y CUIDADO DESPUÉS DEL LAVADO Cierre el suministro de agua y desconéctela de la electricidad después de cada lavado. Abra la puerta de la lavadora para prevenir la humedad y olores. Si el aparato está sin funcionar durante un largo periodo de tiempo, retire el agua y cambie la manguera de drenaje. - Page 37 MANTENIMIENTO VÁLVULA DE ENTRADA DE AGUA Y FILTRO DE LA VÁLVULA DE ENTRADA Para evitar el bloqueo en el suministro de agua a causa de sustancias externas, limpie la entrada de agua y el fi ltro de la válvula de entrada con frecuencia. MOVER LA MÁQUINA Si debe mover la máquina para ubicarla en otro lugar, vuelva a poner los tornillos de transporte que retiró...
-
Page 38: Mensajes De La Pantalla
MENSAJES DE LA PANTALLA CÓDIGOS DE CONFIGURACIÓN Y FUNCIONES ESPECIALES Ó C G I D I C U Err1 ¬ La puerta no está cerrada correctamente. _ Cierre la puerta correctamente. Err2 ¬ Error de drenaje: no se ha vaciado el agua en 6 _ Si el mensaje de error persiste, póngase en contacto minutos. -
Page 39: Resolución De Problemas
MANTENIMIENTO RESOLUCIÓN DE PROBLEMAS RESOLUCIÓN DE PROBLEMAS No se ponga en contacto con el Servicio Técnico hasta que no se haya confi rmado que se trata de una incidencia real. E L B O V I I C U N Ó La lavadora no funciona. -
Page 40: Diagrama Eléctrico
Información importante de seguridad DIAGRAMA ELÉCTRICO DIAGRAMA ELÉCTRICO FUSE MOTOR FUSE Motor--------------Motor PCB----------------Placa de circuito impreso MR------------------Cerradura R---------------------Calentador PS-------------------Bomba de desagÜe EVF,EVP-----------Válvula de suministro magnética P----------------------Interruptor de presion FA---------------------Supresor de interferencia NTC------------------Sensor de temperatura...
Need help?
Do you have a question about the HW70-1401 and is the answer not in the manual?
Questions and answers