Philips CED1900BT User Manual
Hide thumbs
Also See for CED1900BT:
- User manual (26 pages) ,
- Quick start manual (4 pages) ,
- Addendum (2 pages)

Related Manuals for Philips CED1900BT


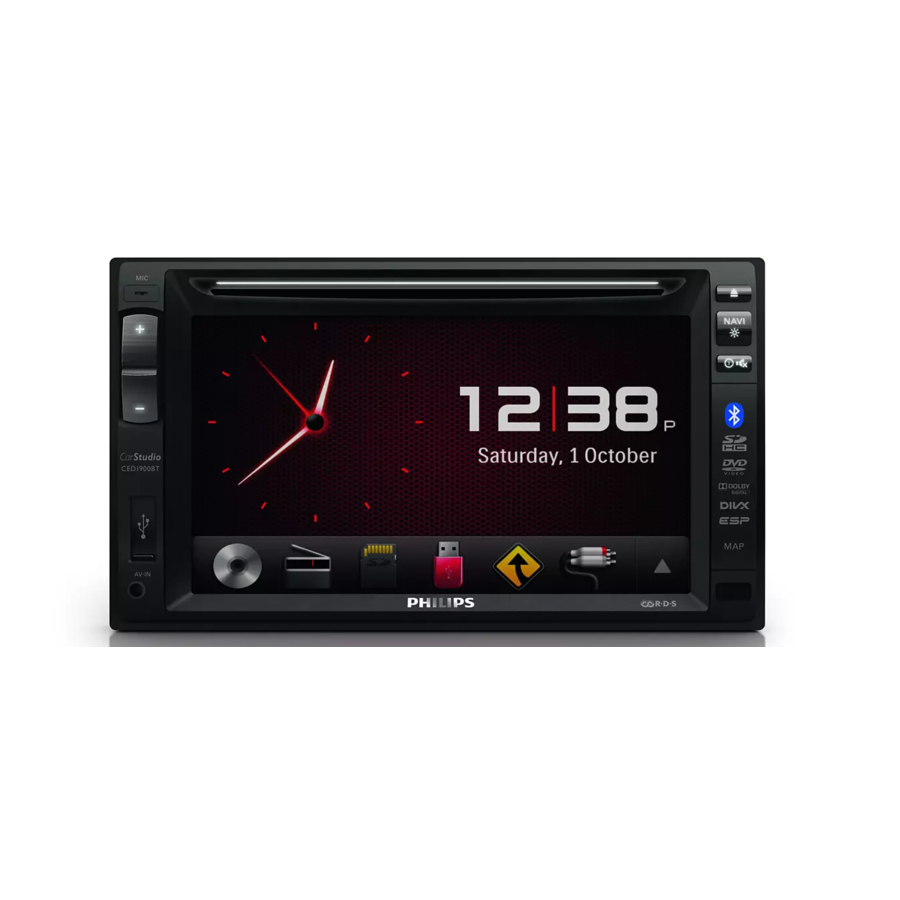
Summary of Contents for Philips CED1900BT
- Page 1 Always there to help you Register your product and get support at www.philips.com/welcome CED1900BT Question? Contact Philips User manual...
-
Page 3: Table Of Contents
Contents 8 Use Bluetooth devices 1 Safety Activate the Bluetooth function Pair a device 2 Your car entertainment system Play audio from a connected device Introduction Make a call What's in the box Overview of the main unit 9 Play from an iPod/iPhone Overview of the remote control Compatible iPod/iPhone models Connect your iPod/iPhone... - Page 4 14 Troubleshooting General About the Bluetooth device 15 Notice Compliance Care of the environment Trademark notice Copyright...
-
Page 5: Safety
1 Safety • Risk of swallowing batteries! A coin type battery is bundled, which can be swallowed. Keep the battery out of reach of children at all times! Read and understand all instructions before you use the device. If damage is caused by failure to follow instructions, the warranty does not apply. -
Page 6: Your Car Entertainment System
Check and identify the contents of the package: system Congratulations on your purchase, and welcome to Philips! To fully benefit from the support that Philips offers, register your product at www.philips.com/welcome. Introduction With the car entertainment system, you can •... -
Page 7: Overview Of The Main Unit
Overview of the main unit • Press to eject the disc. • Connect to a USB storage device or iPod/iPhone. • Press to access the navigation system. j LCD screen • Press and hold to adjust the brightness k +/- of LCD screen. -
Page 8: Overview Of The Remote Control
Overview of the remote • Enable or disable the FullSound effect. control i DVD AUDIO • Select an audio language or audio channel. j DBB • Enable or disable the DBB (Dynamic Bass Boost) sound effect. k EQ • Select a preset sound equalizer. l MUSIC ZONE •... -
Page 9: Install The Car Entertainment System
3 Install the car /PRESET +/PRESET - • Tune to the previous or next preset entertainment radio station. • Skip to the previous or next folder. system • Press to turn on the system. • Press and hold to turn off the system. •... -
Page 10: Connect Wires
Connect other wires if necessary. Connect wires Caution Note • To avoid an accident, the driver must not watch video • Make sure that all loose leads are insulated with while driving. By design, this system disallows watching electrical tape. video during drive. - Page 11 Connectors and sockets on rear panel External sockets or connectors For ISO male connectors As indicated above REAR OUT L (White socket) Rear left speaker REAR OUT R (Red socket) Rear right speaker FRONT OUT R (Red socket) Front right speaker FRONT OUT L (White socket) Front left speaker VIDEO OUT 1 (Yellow socket)
- Page 12 (Not Supplied) c d e g h i j k l...
-
Page 13: Mount Into The Dashboard
Slide the unit into the dashboard until a Mount into the dashboard click sound is heard. Note • Make sure that wires are correctly connected before you mount the main unit into a car. • If preset radio stations are lost when the ignition key is turned OFF and then back ON, reconnect the red leads crosswise to the yellow ones. -
Page 14: Get Started
Turn on • Risk of car accidents! Never watch video or operate this system while driving. Press » PHILIPS logo and a progress bar are displayed while boot-up. Prepare the remote control • To turn off the system, press and hold for 3 seconds. -
Page 15: Use The Home Menu
Tap to select a radio region that matches • To access the full menu with all feature your location. icons displayed, tap » The following interface is displayed. • To return to the home menu, tap [Radio]: Switch the source to FM/ •... -
Page 16: Set The Date And Time
[24hr]: 24-hour time format • Customize the home menu [12hr]: 12-hour time format • Tap [Date] to display the interface for setting the date. Tap and hold an icon until it is movable. Drag it to the target place, and then release your finger. -
Page 17: Switch Display Designs
5 Play from hard Switch display designs media Select a preset display design. , and then [Display In any mode, tap Design]. You can use this system to listen to audio, watch » The [Display Design] interface is videos, and view photos that are stored on a displayed. -
Page 18: Connect A Usb Storage Device
Region code Insert an SD/SDHC card This system can play DVD discs marked with the following region code. Note DVD region Countries and regions • Make sure that the SD/SDHC card contains compatible code files. Asia Pacific, Taiwan, Korea • NTFS (New Technology File System) file system is not supported. -
Page 19: Control Play
DVD: [Repeat chapter] (repeat the • Control play current chapter), [Repeat title] (repeat the current title), [Repeat all] (repeat all chapters and titles), or [Repeat off] (cancel repeat play). Videos VCD/SVCD: [Repeat one] (repeat the • current track) or [Repeat all] (repeat all tracks). -
Page 20: Browse Recorded Files
• : Return to the list of tracks or folders (see 'Browse recorded files' on page 18). • : Skip to the previous or next track. • To search forward fast or rewind the track, tap on the progress bar. •... -
Page 21: About Divx ® Videos
Transfer the DivX VOD videos to a ® • : Display the list of video files or supported recordable disc. folders. Tap the name of a file to start play. On your product Play the DivX VOD videos from the disc. ®... -
Page 22: Listen To Radio
6 Listen to radio Select a radio range Tap [Radio Range]. Switch to radio mode After the boot-up at the first time, the system switches to radio mode automatically. To switch the source back to radio afterwards, [Radio] on the home menu. »... -
Page 23: Store Radio Stations In Memory
Tap FM or AM to select a band. Tune to a preset radio station • FM bands: FM1, FM2, FM3 • AM bands: AM1, AM2 Select a band. repeatedly until the frequency of target radio station is Tap one of the preset channels (1 to 6) to displayed. - Page 24 found, the RDS station is broadcast DOCUMENT Documentary automatically. TEST Alarm Test • To save the RDS station, tap and hold ALARM Alarm one of the preset channels. • To search for another RDS station, repeat steps 1 and 2. Use alternate frequencies RDS program types If the signal of an RDS station is poor, enable...
-
Page 25: Use The Navigation System
7 Use the Follow the user manual of the navigation map to set navigation specifications. navigation system Insert the map data card Note • The map data card is not included in the packaging. • Before using the map data card, update the map data if necessary. -
Page 26: Use Bluetooth Devices
Pair a device Note In the device list, tap the name of your • Philips does not guarantee the compatibility with all Bluetooth device, and then tap Bluetooth devices. • Before pairing a device with this system, read its user behind the name. - Page 27 On your device, enable or permit the Pair more devices connection with CED1900. • If a player is connected, the music Activate the Bluetooth function on this playback interface is displayed on this system. system. » One of the following interfaces is displayed.
-
Page 28: Play Audio From A Connected Device
Note • • If you want to manually reconnect a device after the You can connect a music player and a mobile phone connection is interrupted, disable the function of simultaneously. automatic connection (see 'Adjust Bluetooth settings' on page 35). Manage paired devices Activate the Bluetooth function. -
Page 29: Make A Call
Make a call Note • Keep the Bluetooth connection active between the system and your mobile phone. Locate the external microphone Tap number icons to enter the phone number. You can connect an external microphone for • To clear the last digit, tap better communication quality. - Page 30 Tap the name of a contact from the list, to answer the call. and then tap to send a call. • To reject or end the call, tap Manage the phone book Transfer a phone call to mobile phone Tap the name of a contact from the list. By default, the voice comes from the »...
-
Page 31: Play From An Ipod/Iphone
9 Play from an to display the favorite call list. behind a sequence number. iPod/iPhone Enter the number and then tap OK to confirm. » The number is saved. • To send a call, tap the number from the list. Note •... -
Page 32: Control Play
» The system starts playing tracks that Search for a track are stored on your iPod/iPhone. You can select a track quickly through the music menu. to access the music menu. • Once your iPod/iPhone is connected and recognized, is displayed in the bar of popular icons on the home menu. -
Page 33: Adjust Sound
This feature is unavailable when you listen to radio. video, follow the instructions below to adjust sound. Philips FullSound restores the audio details that are lost due to compression. It enriches the Adjust the volume level music signals so that what you hear is the full sound with every nuance of emotion and every detail of musical genius. -
Page 34: Others
[80 Hz]/[120 Hz]/[160 Hz]: Tap to select a • low pass filter range for the sub-woofer. Select a listening zone Philips’ innovative Zone technology enables the driver or passengers to enjoy music with the best speakers balance and experience more : Tap to display the [Music •... -
Page 35: Adjust Settings
11 Adjust settings Access system setup menus > to display all feature icons. Tap a gray point to switch the listening zone. » The highlighted area indicates the current listening zone. [Settings]. » The [General] menu is displayed. Tap an icon on the left. : Access the [General] menu to •... -
Page 36: Adjust General Settings
[Parking] [On]/[Off] Enable or Adjust general settings disable the video blocking system. [Demo] [On]/[Off] Enable it to (Auto start demonstrate after power features after off) the system is power off. View system information Settings Options Description [Radio Select a Region] radio region that matches your location. -
Page 37: Adjust Navigation Settings
Adjust Navigation settings Adjust Bluetooth settings [Navigation Program Path]: Tap [Enter] to • Bluetooth Options Description access the Navigation Program Path mode. settings • [Navigation Voice]: Tap [Enter] to display [New Search for new the [Navigation Voice] interface. Pairing] devices. [Auto [On] When a paired... -
Page 38: Others
12 Others Use rear monitors If one or two monitors are connected for backseat passengers, you can select different sources for front and backseat passengers. Play external audio/video input Note • Make sure that rear monitors are correctly connected You can connect an external audio/video player to this system. -
Page 39: Use Buttons On The Steering Wheel
Use buttons on the steering wheel You can assign a function to a button on the steering wheel, and then control the system with that button. > to access the full menu with all feature icons displayed. Tap to select an available source to start »... -
Page 40: Set The Rear View Camera
» Picture from rear camera is displayed. Insert a new fuse with the same specifications (15 A). • If the fuse gets damaged immediately after it is replaced, an internal malfunction may occur. In this case, consult your Philips retailer. -
Page 41: Upgrade The Firmware
Log in with your account on the prompt Web page. • If you have no account for Club Philips, create one first on this Web page. Search your product with "CED1900BT/98" as the keyword. Click the link of search result to access the Web page for registering your product. -
Page 42: Product Information
13 Product Radio information Frequency range - FM 87 5 - 108.0 MHz (50 kHz per step) Frequency range - 522 - 1620 kHz (9 AM(MW) kHz per step) Note Usable sensitivity - FM 2 uV Usable sensitivity - AM 25 uV •... -
Page 43: Troubleshooting
Philips Web page levels (www.philips.com/support). When you contact • Number of albums/folders: maximum 99 Philips, make sure that the product is nearby • Number of tracks/titles: maximum 999 and the model number and serial number are •... -
Page 44: About The Bluetooth Device
The disc does not play. About the Bluetooth device • The disc is upside down. Make sure that the printed side is upwards. • The disc is dirty. Clean the disc with a Music playback is unavailable on the system clean, soft, lint-free cloth. -
Page 45: Notice
® registered trademarks owned by Bluetooth Care of the environment SIG, Inc. and any use of such marks by Philips is under license. Your product is designed and manufactured Windows Media and the Windows logo... -
Page 46: Copyright
ABOUT DIVX VIDEO-ON-DEMAND: This DivX Certified device must be registered ® 2012 © Koninklijke Philips Electronics N.V. in order to play purchased DivX Video-on- Specifications are subject to change without Demand (VOD) movies. To obtain your notice. Trademarks are the property of registration code, locate the DivX VOD section Koninklijke Philips Electronics N.V or their... - Page 47 Specifications are subject to change without notice © 2012 Koninklijke Philips Electronics N.V. All rights reserved. CED1900BT_98_UM_V1.0...
Need help?
Do you have a question about the CED1900BT and is the answer not in the manual?
Questions and answers
I need to upgrade my android software on my device but I can't get the software
To upgrade the firmware on your Philips CED1900BT device, follow these steps:
1. Check the current firmware version of the system (refer to "View system information" in the manual).
2. Go to www.philips.com/support.
3. Log in with your Club Philips account.
4. Download the latest firmware update if available.
5. Follow the provided instructions to complete the upgrade.
6. If the upgrade succeeds, all settings are restored to factory defaults.
7. If the upgrade fails, reboot the system and try the upgrade again.
Note: The document does not mention upgrading the Android software, only the firmware update process.
This answer is automatically generated