Kenwood ProTalk TK-3201 Instruction Manual
Hide thumbs
Also See for ProTalk TK-3201:
- Service manual (39 pages) ,
- Service manual supplement (33 pages) ,
- Service manual (4 pages)
Table of Contents
Advertisement
INSTRUCTION MANUAL
MODE D'EMPLOI
MANUAL DE INSTRUCCIONES
MANUALE DI ISTRUZIONI
BEDIENUNGSANLEITUNG
GEBRUIKSAANWIJZING
ProTalk
TK-3201
UHF FM TRANSCEIVER
ÉMETTEUR-RÉCEPTEUR FM UHF
TRANSCEPTOR DE FM UHF
RICETRASMETTITORE FM UHF
UHF-FM-TRANSCEIVER
UHF FM ZENDONTVANGER
© B62-1980-00 (E2, T2)
09 08 07 06 05 04 03 02 01 00
Advertisement
Table of Contents

Related Manuals for Kenwood ProTalk TK-3201


Summary of Contents for Kenwood ProTalk TK-3201
- Page 1 INSTRUCTION MANUAL MODE D’EMPLOI MANUAL DE INSTRUCCIONES MANUALE DI ISTRUZIONI BEDIENUNGSANLEITUNG GEBRUIKSAANWIJZING ProTalk TK-3201 UHF FM TRANSCEIVER ÉMETTEUR-RÉCEPTEUR FM UHF TRANSCEPTOR DE FM UHF RICETRASMETTITORE FM UHF UHF-FM-TRANSCEIVER UHF FM ZENDONTVANGER © B62-1980-00 (E2, T2) 09 08 07 06 05 04 03 02 01 00...
- Page 2 ProTalk TK-3201 UHF FM TRANSCEIVER INSTRUCTION MANUAL...
-
Page 3: Operating Conditions
HANK We are grateful for your purchase of this KENWOOD product and welcome you to the Private Mobile Radio service (PMR 446). PMR is a mobile communication system for both business and personal use without the need for a license and with no call charges. - Page 4 Ensure that there are no metallic items located between the transceiver and the battery pack. • Do not use options not specified by KENWOOD. • If the die-cast chassis or other transceiver part is damaged, do not touch the damaged parts.
- Page 5 If an abnormal odor or smoke is detected coming from the transceiver, switch the transceiver power off immediately, remove the battery pack from the transceiver, and contact your KENWOOD dealer. • Use of the transceiver while you are driving may be against traffic laws.
-
Page 6: Table Of Contents
CONTENTS UNPACKING AND CHECKING EQUIPMENT ........1 ............1 UPPLIED CCESSORIES ORIENTATION ..............3 PREPARATION ..............4 ............ 4 ATTERY RECAUTIONS ........... 8 HARGING THE ATTERY ........10 NSTALLING EMOVING THE ATTERY ............. 11 NSTALLING THE ....11 NSTALLING THE OVER OVER THE PEAKER ICROPHONE... -
Page 7: Unpacking And Checking Equipment
UNPACKING AND CHECKING EQUIPMENT Carefully unpack the transceiver. We recommend you identify the items listed in the following table before discarding the packing material. If any items are missing or have been damaged during shipment, file a claim with the carrier immediately. - Page 8 Battery charger AC adapter (E2) (KSC-35) AC adapter (T2) Li-ion battery pack (KNB-45L) Speaker/ microphone Speaker/ microphone jack cover locking bracket Belt clip (KBH-10) Screw set...
-
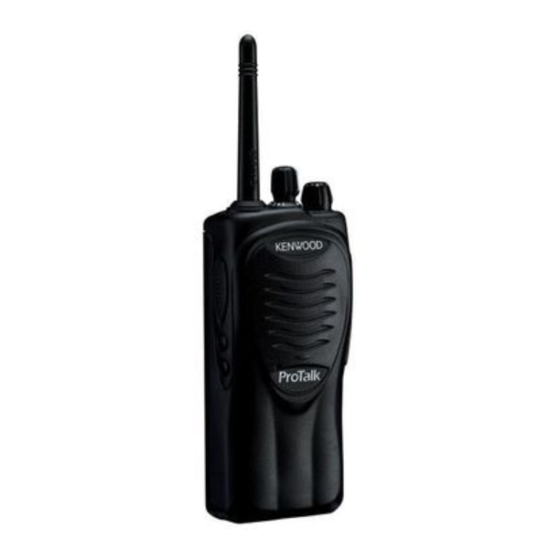
Page 9: Orientation
ORIENTATION Channel selector Rotate to change the Antenna operating channel from 1 ~ 16. LED indicator Indicates the transceiver Power switch/ status. Lights red while Volume control transmitting, green while Turn clockwise to receiving, and flashes switch the power ON red while the battery and counterclockwise power is low while... -
Page 10: Preparation
RECAUTIONS Do not use battery packs or battery chargers not recommended by KENWOOD. ◆ Do not recharge the battery pack if it is already fully charged. Doing so may cause the life of the battery pack to shorten or the battery pack may be damaged. - Page 11 DANGER • Do not short-circuit the battery! Do not join the + and – terminals using any form of metal (such as a paper clip or wire). Do not carry or store the battery pack in containers holding metal objects (such as wires, chain-necklace or hairpins).
- Page 12 DANGER • Do not jar or throw the battery! An impact may cause the battery to leak, generate heat or smoke, rupture, and/or burst into flame. If the battery’s protection circuit is damaged, the battery may charge at an abnormal current (or voltage), and an abnormal chemical reaction may occur.
- Page 13 • Do not place the battery pack into a microwave or high pressure container! The battery may generate heat or smoke, rupture, or burst into flame. • Keep ruptured and leaking battery packs away from fire! If the battery pack is leaking (or the battery emits a bad odor), immediately remove it from flammable areas.
-
Page 14: Charging The Battery Pack
HARGING THE ATTERY The battery pack is not charged at the factory; charge it before use. Average battery pack life (calculated using 5% transmit time, 5% receive time, and 90% standby time) is 20 hours. ATTENTION: Always switch OFF a transceiver equipped with a battery pack before inserting the transceiver into the charger. - Page 15 When charging is completed, the indicator lights green. Remove the battery pack or the transceiver from the charging slot of the charger. It takes approximately 3 hours to charge the battery pack. When the charger will not be used for a long time, unplug the AC adapter from the AC outlet.
-
Page 16: Nstalling Emoving The Battery Ack
NSTALLING EMOVING THE ATTERY ◆ Do not short the battery terminals. ◆ Do not dispose of the battery by fire. ◆ Never attempt to remove the casing from the battery pack. Align the battery pack with the back of the transceiver, then press the battery pack and transceiver firmly together until the release latch on the base of... -
Page 17: Clip
NSTALLING THE If necessary, attach the belt clip using the two supplied 3 x 8 mm screws. Note: If the belt clip is not installed, its mounting location may get hot during continuous transmission or when left sitting in a hot environment. Do not use glue which is designed to prevent screw loosening when installing the belt clip, as it may cause damage to the transceiver. -
Page 18: Installing The Optional Speaker / Microphone ( Or Headset )
NSTALLING THE PTIONAL PEAKER ICROPHONE EADSET Insert the speaker/ microphone (or headset) plugs into the speaker/ microphone jacks. Note: Always switch OFF the transceiver power when installing or removing a speaker/ microphone or headset. Attach the locking bracket using the supplied 3 x 6 mm screw. Note: The transceiver is not fully water resistant while using the speaker/ microphone. -
Page 19: Getting Started
GETTING STARTED Turn the Power switch/ Volume control clockwise to switch the transceiver power ON. A beep sounds. Press and hold the Monitor key to hear background noise, then rotate the Power switch/ Volume control to adjust the volume. Rotate the Channel selector to select your desired channel. -
Page 20: Voice Operated Transmission (Vox)
VOICE OPERATED TRANSMISSION (VOX) Using the VOX feature, you can operate the transceiver hands-free. In order to use this feature, however, you must use an optional headset; VOX will not function with the built-in microphone. For best operating conditions, we recommend you use an optional headset with both an ear piece and a microphone on a boom that rests in front of your mouth. - Page 21 Press the Call key to increase the VOX Gain level and the Monitor key to decrease the level. The VOX Gain can be adjusted from level 1 to level 10 and OF F. The transceiver announces the VOX Gain level as you adjust it. If OFF is selected, the transceiver announces “Off”.
-
Page 22: Vox Operation
VOX O PERATION Set up a VOX Gain level from 1 to 10 {page 14}. To transmit, simply speak into the headset microphone. You do not need to press the PTT switch; the transceiver automatically detects your voice and begins transmitting. To stop transmitting, stop speaking. -
Page 23: Key Functions
KEY FUNCTIONS The default function of the Call key is Calling Alert. Calling alert tones are used to identify yourself to your party members and inform them that you are about to make a call. Your dealer can set up your transceiver with 1 of 10 different calling alert tones. -
Page 24: Background Operations
BACKGROUND OPERATIONS (TOT) IMER The purpose of the Time-out Timer is to prevent you from using a channel for an extended period of time. This function is useful, for example, when you accidentally keep the PTT switch pressed. Additionally, by limiting the amount of time you can continuously transmit, this feature helps you save on battery power consumption. -
Page 25: Quiet
(QT)/ D (DQT) UIET IGITAL UIET Quiet Talk (QT) and Digital Quiet Talk (DQT) are functions that reject signals from undesired parties that are using the same channel as you. You will hear audio from the speaker only when you receive a signal that contains a QT tone or a DQT code that matches the one set up on the channel you are using. -
Page 26: Channel Setup Mode
CHANNEL SETUP MODE This transceiver allows you to reprogram each of the channels with different frequencies and Quiet Talk/ Digital Quiet Talk settings. The table below lists the default channel settings. i t t Note: If you do not select an operating frequency for a channel, you will not be able to select a Quiet Talk/ Digital Quiet Talk setting for that same channel. -
Page 27: Channel Operating Frequencies
HANNEL PERATING REQUENCIES To change the operating frequency of a channel: With the transceiver power OFF, press and hold the PTT switch and Call key while turning the transceiver power ON. Continue to hold the PTT switch and Call key until the LED lights orange and the transceiver announces “Self”. - Page 28 Press the PTT switch within 5 seconds to save the setting, otherwise the operation will cancel. A beep will sound. Repeat steps 3 to 5 to set up another channel. Turn the transceiver power OFF and then ON again to activate the new settings.
-
Page 29: Quiet
(QT)/ D (DQT) S UIET IGITAL UIET ETTINGS To change the QT/DQT settings of a channel: With the transceiver power OFF, press and hold the PTT switch and Call key while turning the transceiver power ON. Continue to hold the PTT switch and Call key until the LED lights orange and the transceiver announces “Self”. - Page 30 Press the Call key to increment the Tone number or the Monitor key to decrement the number, to select the new tone or code. Tone numbers and their corresponding tones/ codes are provided in the table on page 25. Press and hold the Call or Monitor key to increment/ decrement the Tone number by 5 at a time.
- Page 31 i t t i t t i t t Note: The QT/DQT settings can be changed by your dealer.
-
Page 32: Channel Confirmation Mode
HANNEL ONFIRMATION To confirm your channel settings: With the transceiver power OFF, press and hold the PTT switch while turning the transceiver power ON. Continue to hold the PTT switch until the LED lights orange and the transceiver announces “Channel Confirm”. Release the PTT switch. -
Page 33: Key Assignment Mode
KEY ASSIGNMENT MODE This transceiver allows you to reprogram the Call and Monitor keys with any of the functions listed in the table below. Explanations on the use of each function are provided on the following pages. i t c n i l ) t l ) t l... - Page 34 To change the functions of the Call and Monitor keys: With the transceiver power OFF, press and hold the Call and Monitor keys while turning the transceiver power ON. Continue to hold the Call and Monitor keys until the LED lights orange and the transceiver announces “Setup”.
-
Page 35: Calling Alert
Press the PTT switch within 5 seconds to save the setting, otherwise the operation will cancel. A beep will sound and the transceiver will announce the new Table number. Turn the transceiver power OFF and then ON again to activate the new settings. -
Page 36: Key Lock
Press and hold the key programmed as Key Lock for 1 second to lock/ unlock the transceiver keys. The following keys/ functions can still be used when Key Lock is active: Calling Alert, Key Lock, Monitor, Monitor Momentary, PTT, Squelch Off, Squelch Off Momentary, and Volume. If the key is programmed as Key Lock Status Memory, when the transceiver power is turned OFF and then ON again, the keys remain locked. -
Page 37: Scan
Scan is useful for monitoring signals on the transceiver channels. When scanning, the transceiver checks for a signal on each channel and only stops if a signal is present. If the QT/DQT matches, the transceiver stops at the channel and opens the squelch so you can listen to the call. If the QT/DQT does not match, the call is ignored and scanning continues. -
Page 38: Revert Channel
■ Temporary Delete You can temporarily remove specific channels from the scanning sequence during Scan. When Scan pauses at a channel, you can remove that channel from the scanning sequence by pressing and holding the key programmed as Temporary Delete for 1 second or Scan + Temporary Delete for 3 seconds. -
Page 39: Scrambler
CRAMBLER Whereas the Quiet Talk and Digital Quiet Talk functions {page 19} allows you to ignore unwanted calls, Scrambler allows you to hold a conversation in complete privacy. When activated, any other party listening in on your channel will be unable to understand your conversation. -
Page 40: Optional Accessories
OPTIONAL ACCESSORIES KMC-17 (Speaker/ microphone) KMC-21 (Speaker/ microphone) KHS-1 (Headset) KHS-21 (Headset) KWR-1 (Water resistant bag) -
Page 41: Troubleshooting Guide
TROUBLESHOOTING GUIDE • • e l l . y l l l a • y l t • • s ’ • • l l a ) ’...
Need help?
Do you have a question about the ProTalk TK-3201 and is the answer not in the manual?
Questions and answers