Ricoh GlobalScan Administrator's Manual
Hide thumbs
Also See for GlobalScan:
- Quick start manual (6 pages) ,
- Administrator's manual (118 pages)
Table of Contents
Advertisement
Administrator's Guide
© Copyright 2008 by Ricoh Americas Corporation. All Rights Reserved.
Content Overview
........................................................
.............................................
..............................................
Guide...................................
.............................................
......................................
.............................................
.......................................................
Rules............................................
.........................................
Profile..................................
Services...............................
GlobalScan Management ..................................130
MFDs..............................................130
Detection.............................140
Logs................................................143
................................................145
...........................................147
Appendix .............................................................155
See pages
3
-
5
for a detailed Table of Contents.
v3.1
6
6
..................................
6
7
7
..............................
8
9
........
10
12
24
..............................
24
...............................
28
31
34
36
.............
43
..............................
43
Parameters.............
44
46
................................
55
Project.....................
63
Profile.......................
72
79
.......................125
Icons..........................141
Advertisement
Table of Contents

Related Manuals for Ricoh GlobalScan


Summary of Contents for Ricoh GlobalScan
-
Page 1: Table Of Contents
GlobalScan Management ........130 Manage MFDs..........130 Manage Status Detection......140 Manage MFD Project Icons......141 Manage Logs..........143 Manage Jobs ..........145 Manage Failover ...........147 Appendix .............155 See pages for a detailed Table of Contents. © Copyright 2008 by Ricoh Americas Corporation. All Rights Reserved. - Page 2 Ricoh Americas Corporation reserves the right to make changes in the product design without reservation and without notification to its users. All screens used within this guide are for illustration purposes only, i.e., filenames, field entries, etc., may vary based on actual system...
- Page 3 GlobalScan Documentation......................Feature Highlights ........................System Requirements and Specifications................Before Getting Started ........................ Setup Procedures ......................... GlobalScan Services ......................MFD Display Types ....................... Key GlobalScan Terms......................Authentication ........................Profile ..........................Project ..........................Services ..........................System Parameters......................WebAdmin Module......................On-screen Help......................
- Page 4 Profile....................Sort Profile’s Projects ....................Remove Project from Profile ..................Step 7: Configure Services......................Standard and Optional GlobalScan Services ............Configure Authentication Services ..............LDAP Authentication ..................... Novell Authentication .................... NT Authentication ....................Configure Email Service ..................Configure Scan-to-Folder Service ................
- Page 5 Secondary Server Failover Settings ........................................GlobalScan-compatible MFDs....................Universal Soft Keyboard Support (by brand/model)............New Features and Enhancements ..................GlobalScan v3.x vs. v2.x......................GlobalScan Workflow Suite Family ..................Optional RightFax Plug-in ..........................................Overview ..................RightFax Configuration GlobalScan Activation Status ....................
-
Page 6: Introduction
MFDs, creating digital files of common business documents – contracts, invoices, brochures, photographs, reports, etc. Working together, the GlobalScan Server and the MFD enable timely delivery of these files to destinations around the corner or around the globe. -
Page 7: About This Guide
GlobalScan Server IP address, DNS IP, protocol (HTTP/HTTPS) and proxy server settings. About Setting Levels – This section provides an overview of how GlobalScan’s system, profile, and project levels interact. GlobalScan WebAdmin Module Configuration – This section contains instructions on configuration and management of connected MFDs through GlobalScan’s WebAdmin Module. -
Page 8: Globalscan Documentation
(and after) installation of the GlobalScan software. GlobalScan v3.1 Administrator’s Guide (this guide) This guide explains how to utilize GlobalScan’s WebAdmin module to configure and manage GlobalScan Server settings and operations, for example, creation of profiles and projects, and selection of required Services. -
Page 9: Feature Highlights
GlobalScan v3.1 Administrator’s Guide Feature Highlights Scan-to-Fax Supports up to 250 GlobalScan-enabled MFDs per ® GlobalScan Server; runs as Windows Service Optional Captaris RightFax Plug-in provides an easy- to-use, reliable fax and email delivery solution Intuitive operation through the MFD’s touch-screen Scan-to-EDMS (Enterprise Document Mngmt System) display;... -
Page 10: System Requirements And Specifications
• Intel Pentium class processor (CPU), 1GHz or faster • 1GB RAM or more (Important: If OCR is running on the same server as GlobalScan, it is recommended that 2GB of RAM be installed) • 40GB hard drive or larger •... - Page 11 Standard: Single-Page TIFF, Multi-Page TIFF; PDF Image; JPEG (color MFD) • ® ® OCR Plug-in: XLS (Microsoft Excel); RTF (Microsoft Word); Adobe PDF, password- protected PDF, PDF ImageText; PDF Text Important: For additional installation requirements, see GlobalScan v3.1 Server Software Installation Guide. Specifications subject to change without notice.
-
Page 12: Before Getting Started
This section provides an overview of pre-installation procedures and key terms, along with a workflow scenario and tips on how to navigate the WebAdmin Module. By reading this section you will gain an understanding of how you can configure GlobalScan to create an efficient document capture and distribution system. -
Page 13: Globalscan Services
Scan-to-Folder The MFD user can direct a scanned document to one or more local and/or network folders/subfolders. GlobalScan v3.1 GlobalScan v3.1 Workflow Suite (Standard Edition) is a bundled 1, 2 Workflow Suite plug-in that, if installed, enables capture, management, storage,... - Page 14 RightFax Server. Note: For details, see Appendix F: Optional RightFax Plug-in. See Appendix E: GlobalScan v3.1 Workflow Suite Family. Using this service requires installation of associated software components. See GlobalScan v3.1 Server Software Installation Guide.
-
Page 15: Mfd Display Types
Administrator’s Guide MFD Display Types The size and appearance of the GlobalScan user interface is based on the MFD model. For instance, models that support the WVGA or SVGA touch screens can display project icons, as shown in Fig. 1a Fig. - Page 16 GlobalScan v3.1 Administrator’s Guide HVGA Black & White Touch Screen Project Screen Fig. 1c HVGA Black & White Touch Screen Services Screen Fig. 1d...
-
Page 17: Key Globalscan Terms
Key GlobalScan Terms (in alphabetical order) Authentication Each project can be defined by its own Authentication method. GlobalScan supports LDAP, Novell and NT Authentication. Under Authentication, when a user presses a project button, log-in is required. After entry of the required credentials (e.g., user name and password), the user presses the [Login] button;... -
Page 18: Profile
Domain field will auto-populate. Profile Each MFD is associated with a specific profile – parameters that define general GlobalScan settings, such as MFD Reset Time, Keep-alive Timer, etc. The profile contains one or more projects. Project Projects provide multiple ways of configuring services based on the specific needs of a user group. - Page 19 GlobalScan v3.1 Administrator’s Guide GlobalScan Terms, cont. Login Screen: One Fig. 3 project / login required. After successful login, the Services screen (Fig. 2) opens. Domain field will auto-populate. When two or more projects are configured in a profile, corresponding buttons will appear on the MFD touch screen, each addressing specific application requirements.
-
Page 20: Services
System Parameters Within the WebAdmin Module’s System Parameters screen (see Fig. 6), you will select/enter all system-level data – settings that control GlobalScan Server operation, such as Default Profile, Storage Folder, Log Folder, etc. Fig. 6 The language selected during Globa- Scan Server software installation displays here, but can be changed. -
Page 21: Webadmin Module
Scan Server. Following GlobalScan Server software installation, you can open the WebAdmin ® Module using your Web browser (Microsoft Internet Explorer 6.0 or 7.0). After launching GlobalScan, the Home Page appears, as shown below. To access a desired function, simply click shortcut icon or the corresponding menu link. -
Page 22: Workflow
Administrator’s Guide GlobalScan Terms, cont. Workflow When the MFD is powered on, the device calls the GlobalScan Server to request its profile. For example, in Diagram A, the Sales Department MFD requests Profile 1, with Project A offering the MFD users Email, Folder and Fax scan services. - Page 23 GlobalScan v3.1 Administrator’s Guide GlobalScan Terms, cont. Workflow, cont. Again, one or more project buttons can appear on the MFD touch screen. The user simply selects a button by touching it. After doing so, the services screen opens (see Fig.
-
Page 24: Mfd Configuration
GlobalScan v3.1 Administrator’s Guide There are two ways to configure GlobalScan settings on the MFD, remotely (via the Web) or manually (via the MFD control panel). Remote MFD Configuration (via Web) GlobalScan v3.1 supports remote configuration for select Ricoh-manufactured MFDs (running v2.x or v3.0 firmware), enabling the Administrator to easily establish GlobalScan settings from his/her... - Page 25 (Required): Enter either the server’s IP address or fully qualified domain name. Note: • If you click the [Update], with the GlobalScan Srvr field blank, an error message will appear. Click the [OK] button, and then enter the IP address. •...
- Page 26 GlobalScan v3.1 Administrator’s Guide Proxy Password: Enter the password for access to the proxy server (maximum of 20 characters). Change Admin Password: To change the admin password, click the [Change Admin Password] button. Enter fields (all are required). Click the [Update], and then click the [Close] button.
- Page 27 GlobalScan v3.1 Administrator’s Guide Session Timeout If a session timeout occurs, click the [OK] button, and then click [Yes] to close your Web browser. Reopen your browser, repeat step and continue. Note: ® This will only occur if the browser is Microsoft...
-
Page 28: Manual Mfd Configuration
Firmware version can also be viewed from the WebAdmin module. See GlobalScan Management A. Manage MFDs. Important: MFDs running v2.x and v3.0 firmware can connect to a GlobalScan v3.1 server. Parameter Description GlbScan Server IP address of the GlobalScan Server or fully qualified domain (Required) name. - Page 29 This initiates another download attempt by the GlobalScan Server. If this action still returns an error, log out of GlobalScan (from the MFD) and open the MFD configuration screen (see previous page). Check that all parameters are correct.
- Page 30 GlobalScan v3.1 Administrator’s Guide Enter/edit data, as needed. Note: Enter characters by touching corresponding keyboard characters. To erase characters, right to left, press the [Backspace] button. To erase entire entry, press the [Delete All] button. To select a single uppercase letter or symbol, press the [Shift] button. To select multiple...
-
Page 31: Localization
MFD production date Note: • GlobalScan’s soft keyboard will reflect the localization selected in the firmware and display the special character set of the selected language. • If an MFD does not support the Universal Soft Keyboard, and you select French as the system language, then you have the choice of the European French or French-Canadian keyboard, as shown below. - Page 32 Administrator’s Guide French-Canadian Keyboard Compiled Version To determine which version of GlobalScan is currently installed on the MFD, open the GlobalScan configuration screen, as follows: Press the [Scanner] key (once or twice). A control panel key other than the [Scanner] key may access GlobalScan.
- Page 33 MFD’s GlobalScan screens. Note: See your MFD Operating Instructions for details on setting the device’s display language. Important: In order for GlobalScan to acknowledge a new display language setting, you must reboot the MFD. See p. 34, MFD Reboot Rules.
-
Page 34: Mfd Reboot Rules
Administrator’s Guide MFD Reboot Rules In order for the GlobalScan Server and MFD to share configuration data, it may be necessary to reboot the MFD. The conditions where reboot is required or not required are outlined below. Following the chart are instructions on how to properly reboot the device - remotely (via the Web) or manually (via the MFD’s control panel). - Page 35 GlobalScan v3.1 Administrator’s Guide Remote Reboot Procedure (via Web Image Monitor) Web Image Monitor is firmware built into the MFD that allows the Administrator to use a standard Web browser to remotely manage a single device connected to the network.
-
Page 36: About Setting Levels
Administrator’s Guide Three Levels – System, Profile, Project This section provides an overview of GlobalScan’s three setting levels – system, profile and project. After reading this section, you will be prepared to design and administer document workflows that enable MFD users to easily address their document distribution needs. - Page 37 GlobalScan v3.1 Administrator’s Guide Profile Level Profiles can inherit service settings from the system level (A) unless changes are made on the profile level (B). In that event, any subsequent changes on the system level will not cascade to the profile. Changes made on the profile level override those established on the system level.
- Page 38 GlobalScan v3.1 Administrator’s Guide Project Level Projects can inherit service settings from either the system level or profile level. A project can inherit settings from the system level, provided the project belongs to a profile that has inherited settings from the system level (A). A project can also inherit settings from the profile level, provided the project belongs to a profile that has its own settings (not inherited from the system level).
-
Page 39: Restore Settings
GlobalScan v3.1 Administrator’s Guide To set a parameter for a specific project, e.g., Black & White and 200dpi, you drill down to the project level to establish the settings (1). Settings established on the project level override any settings made on the profile or system level. -
Page 40: Inherit Password Feature
GlobalScan v3.1 Administrator’s Guide Inherit Password Feature Services that support password protection can be set on the system level. Entry on the profile or project level is not necessary, as the password is “inherited” from the system level. This saves time over manual entry on the system, profile and project levels. - Page 41 GlobalScan v3.1 Administrator’s Guide Note that the screen includes text that reads Inherited from System and a User password from System check box. This indicates that the password entered in Fig. 1 automatically applies on the profile level. Fig. 3 If you would like to set a different password, unique to the profile –...
- Page 42 GlobalScan v3.1 Administrator’s Guide Fig. 5 This same principle applies to setting a password on the project level. When selecting the project, the screen will indicate if a profile or system level password applies by displaying a check box that...
-
Page 43: Globalscan Webadmin Configuration
GlobalScan v3.1 Administrator’s Guide This section describes how to configure GlobalScan Server settings via the GlobalScan WebAdmin Module. GlobalScan-enabled MFDs can then join in network-scanning operations. Step 1: Launch GlobalScan Open your browser. Enter the GlobalScan Server URL: http://IP address/gsadmin. -
Page 44: Step 2: Enter/Edit System Parameters
GlobalScan v3.1 Administrator’s Guide Step 2: Enter/Edit System Parameters To configure general GlobalScan settings that control MFD functionality, proceed as follows: Click the System Parameters link (or associated Home Page shortcut icon). Display reads: Select/enter the following: • Language (Required) – English is the default display language. If you wish to display... - Page 45 (Required) – If necessary, enter path to the folder where GlobalScan log files are to be stored. The Log Folder is the location GlobalScan uses to store the log data related to GlobalScan operation. Be sure that the directory is local to the GlobalScan Server.
-
Page 46: Step 3: Add/Edit A Profile
Note: • When the MFD connects to the GlobalScan Server for the first time, a default profile (with one project that contains default services) is automatically assigned. The default profile (and related settings) can be changed via the System Parameters screen (see Step 2: Enter/Edit System Parameters). - Page 47 (Required) – This is the time period before the MFD ends the session with the GlobalScan Server. By default, logout is automatic if the MFD is idle for 60 seconds, i.e., no buttons on the MFD are pressed. Enter a reset time up to a maximum of 600 seconds.
- Page 48 GlobalScan v3.1 Administrator’s Guide A profile with correct settings appears below: The display indicates when changes have been made but not saved. Confirm accuracy of the settings, and then click the [Add] button to save the settings. The screen is now ready for entry of another profile (as shown below).
- Page 49 GlobalScan v3.1 Administrator’s Guide After profiles are created, view the profile list as follows: Click the Manage Profiles menu link (or click the [<<Back] button). Display reads: Column Description Default Profile The default profile is selected in the System Parameters screen (see Step 2: Enter/Edit System Parameters).
- Page 50 GlobalScan v3.1 Administrator’s Guide Projects Clicking this button opens the Project Configuration screen. See Step 4: Add/Edit a Project. Delete Clicking this button deletes a profile. Note that there is no [Delete] button for any profile that has one or more MFDs assigned to it, or for the default profile (a default profile cannot be deleted).
-
Page 51: Edit Existing Profile
GlobalScan v3.1 Administrator’s Guide Edit Existing Profile To edit profile settings, i.e., Profile Name, MFD Reset Time and/or Keep-alive Timer, proceed as follows: Click the Manage Profiles link (or associated Home Page shortcut icon). Highlight the desired field entry, for instance the Profile Name (circled below). -
Page 52: Sort Profile List
GlobalScan v3.1 Administrator’s Guide Sort Profile List To sort the profile list, proceed as follows: Click the Manage Profiles link (or associated Home Page shortcut icon). [∨]. Click the category drop-down button Select the category to sort by. [∨]. Select... -
Page 53: Delete Profile
GlobalScan v3.1 Administrator’s Guide Delete Profile When deleting a profile, it is important to note that you do not delete any projects or any services associated with the project. Click the Manage Profiles menu link (or associated Home Page shortcut icon). -
Page 54: Reassign Mfds To Different Profile
GlobalScan v3.1 Administrator’s Guide Reassign MFDs to Different Profile In order to delete a profile that has MFDs assigned to it, you must first reassign the devices to a different profile. To do so, proceed as follows: Click the Manage Profiles menu link (or associated Home Page shortcut icon). -
Page 55: Step 4: Add/Edit A Project
All] buttons are duplicated at the top and bottom of the screen. This enables easier access to functions within longer project lists. For your convenience, GlobalScan Project (1) as a default project. If you wish to edit the default project,... - Page 56 (4) project buttons per screen. The user can scroll up/down to view/ select a project button. Note: The appearance of project buttons will vary based on MFD model and GlobalScan configuration settings. For details, see Before Getting Started, GlobalScan Terms, Project.
- Page 57 (see Fig. 7). To determine which type of display a MFD supports, see Appendix A: GlobalScan-compat- [∨] ible MFDs. To select a project icon, click the Project Icon drop-down button .
- Page 58 If checked (on), a timestamp is appended to the scanned image’s file name, e.g., doc name_yyyymmddhhmmss. If the user has not entered a document name via the MFD, a timestamp is created and applied – as the document name – by the GlobalScan Server during job processing. • French-Canadian Keyboard Layout –...
- Page 59 GlobalScan v3.1 Administrator’s Guide Note: If you click the [<<Back] button, before clicking the [Update] button, the error message below will be displayed. If you do not want to save the changes, click the [OK] button. If you do want to save changes, click [Cancel] to return to the current page, and then click the [Update] button.
-
Page 60: Edit Existing Project
GlobalScan v3.1 Administrator’s Guide Edit Existing Project To edit basic project settings, i.e., Project Name, Description, Timestamp Suffix and/or Keyboard Layout, proceed as follows: Click the Manage Projects menu link (or associated Home Page shortcut icon). Display reads: Click the desired column entry. In the example above,... -
Page 61: Sort Project List
GlobalScan v3.1 Administrator’s Guide Sort Project List To sort the project list, proceed as follows: Click the Manage Projects menu link (or associated Home Page shortcut icon). [∨] Click the category drop-down button Select the category to sort by. [∨]... -
Page 62: Delete Project
GlobalScan v3.1 Administrator’s Guide Delete Project This procedure deletes only the project, not the services associated with that project. Click the Manage Projects menu link (or associated Home Page shortcut icon). Display reads: Note: The [Delete Checked Items] button (B) is disabled (gray) until a project check box (circled above) is selected. -
Page 63: Step 5: Add Services To A Project
Step 7: Configure Services. Important: • If you are adding the ActivePDF and/or OCR service to a project, you must install related components on the GlobalScan Server. For more information, see GlobalScan v3.1 Server Software Installation Guide Pre-installation Requirements Plug-in Preparation. - Page 64 GlobalScan v3.1 Administrator’s Guide Note: By default, Log, Job Tracking Scan Setting services (as shown above) are added to each new project. Job Log and Scan Settings tabs will display on the MFD touch screen; Job Tracking is an internal service, thus will not display. These services can be removed, if necessary.
- Page 65 GlobalScan v3.1 Administrator’s Guide Display reads: For details on each column heading, see Service Roles, to follow. To add additional services, repeat – 5. Display reads: Click the information ToolTip icon to view a brief description of the service. For details on sorting a list of Services, see Sort Project’s...
-
Page 66: Service Roles
GlobalScan v3.1 Administrator’s Guide Service Roles The following column heading (and associated check boxes) provides a summary of each service. Each plug-in will have at least one role check box, which cannot be deselected. Note: The fields/check boxes can also be customized by developers, and thus can vary based on workflow needs. -
Page 67: Display Sequence
TIFF file by email and also receive the same document as a PDF file that is directly deposited to a folder. By setting the Processing Order, GlobalScan Job Processor can efficiently and accurately perform the requested conversion. If this step is not performed, the MFD user may select one file format, but the recipient then receives an unexpected file format. - Page 68 Data is converted to the supported file format. For Image Management details, Step 7: Configure Services D: Configure Scan ActivePDF Settings Service GlobalScan File Format Support At-A-Glance. Email Scan data is forwarded to the selected email, folder or Scan-to-Folder EDMS destination(s).
-
Page 69: Sort Project's Services
– If checked, the service must be completed before a job can be submitted from the MFD to the GlobalScan Server. If the service has not been completed, the [Start] key on the MFD control panel will not turn green, a requirement for a scan operation to be executed. -
Page 70: Remove Service From Project
GlobalScan v3.1 Administrator’s Guide Remove Service from Project If you wish to de-associate a service from a particular project, proceed as follows: Note: Services are permanent, so this procedure will not delete the actual service, only remove it from the project. - Page 71 GlobalScan v3.1 Administrator’s Guide Use one of the following three methods to remove a service from the project: Remove One Service Remove Multiple Services Remove All Services • • • Click the [Remove] Click the check box(es) Click the [Remove...
-
Page 72: Step 6: Add Projects To A Profile
GlobalScan v3.1 Administrator’s Guide Step Add Projects to a Profile After services have been added to a project, you are ready to add the project to the appropriate profile. To do so, proceed as follows: Click the Manage Profiles menu link (or associated Home Page shortcut icon). - Page 73 GlobalScan v3.1 Administrator’s Guide Display reads: Click the Project Name, for example, Scan to Email. Display reads: Click the [Add] button.
- Page 74 GlobalScan v3.1 Administrator’s Guide Display reads: The service now appears in the profile’s project list. Repeat – 5, selecting another Project Name, for example, Scan to Folder. Display reads: Next, enter the Display Sequence, i.e., the order in which the project buttons will appear on...
- Page 75 GlobalScan v3.1 Administrator’s Guide For instance, if you would like the [Scan to Folder] button to appear first, place a “1” in that column. Display reads: Though this profile has two projects, Scan to Email and Scan to Folder, these Services can be combined within just one project.
-
Page 76: Sort Profile's Projects
GlobalScan v3.1 Administrator’s Guide Sort Profile’s Projects To sort the profile’s project list, proceed as follows: Click the Manage Profiles menu link (or associated Home Page shortcut icon). [∨] Click the category drop-down button Select the category to sort by. -
Page 77: Remove Project From Profile
GlobalScan v3.1 Administrator’s Guide Remove Project from Profile If you wish to de-associate a project from a particular profile, proceed as follows: Important: This procedure will not delete the actual project. It will only remove the project from the profile. - Page 78 GlobalScan v3.1 Administrator’s Guide Use one of the following three methods to remove a project from a profile: A. Remove One Project B. Remove Multiple Projects C. Remove All Projects • • • Click the [Remove] Click the check boxes...
-
Page 79: Step 7: Configure Services
Added a project (Step 4) Added services to a project (Step 5) Added projects to a profile (Step 6) The next step is to configure GlobalScan services, e.g., Email, Scan-to-Folder, Scan Settings, etc. Click the Manage Services menu link (or associated Home Page shortcut icon). - Page 80 Services, cont. Standard Services Description Section GlobalScan v3.1 GlobalScan v3.1 Workflow Suite (Standard Edition) is a Workflow Suite bundled solution that, if installed, supports transmission of scanned images to email, folder, fax, EDMS (Enterprise Note: To extend Document Management Systems), FTP and SFTP, functionality, Express Microsoft SharePoint, Lotus Domino.doc and any ODBC-...
-
Page 81: Configure Authentication Services
Authentication service is added into the project and the Login and Required check boxes are selected, as shown below. Note that the user will be prompted for their credentials even if the Required field is not checked. However, GlobalScan will only Authenticate the user when both the Login and Required check boxes are selected. -
Page 82: Ldap Authentication
GlobalScan v3.1 Administrator’s Guide LDAP Authentication From the Manage Services screen, click LDAP Authentication, the associated Configure button. Note: If you wish to configure NT or Novell Authentication, proceed to that section. Display reads: Drag this bar to change size of window, if needed. - Page 83 GlobalScan v3.1 Administrator’s Guide Project Level In the screen below, the Scan to Email project has been selected (see A, next page). To save setup time, you can choose which profile you would like the project to inherit LDAP settings from (see B, next page). After choosing a profile, the screen refreshes with those settings.
- Page 84 Important: When implementing a self-certificate with CA (Certificate Authority) from Active Directory, for example, an additional procedure may be executed on the Microsoft Management Console (MMC). For information, see GlobalScan v3.1 Server Software Installation Guide Appendix I: SSL (Secure Socket Layer) Support.
- Page 85 GlobalScan v3.1 Administrator’s Guide Result Fields: The default results field is as follows: sAMAccountName – Netscape Directory Server/Sun IPlanet – If selected, the Filter Criteria and Results Fields are automatically populated, as follows. Adjust, as needed. Filter Criteria: The default LDAP Filter Criteria field is as follows: (&(objectClass=organizationalPerson)(UID={0}))
- Page 86 GlobalScan v3.1 Administrator’s Guide Field Name – For example, enter sn=jones. [∨] Search Criteria – From the drop-down , select Equal, Begins With Contains. [∨] Others – From the drop-down , select Blank, Not Blank or Others. Filter Criteria – Specify default Filter Criteria. For example, enter UID=jsmith.
-
Page 87: Novell Authentication
GlobalScan Server. For more information, see GlobalScan v3.1 Server Software Installation Guide Additional Server Preparation Appendix H: Novell Component Installation. After the necessary components are installed on the GlobalScan Server, you can enter Novell Authentication settings as follows: From the Manage Services screen, click... - Page 88 GlobalScan v3.1 Administrator’s Guide • Login UI Config – This drop-down will allow you to select the Novell Authentication that will be displayed on the MFD. If you wish to test NDS Authentication, enter the following settings under “Test Novell NDS Account.
-
Page 89: Nt Authentication
GlobalScan v3.1 Administrator’s Guide NT Authentication To enter NT Authentication settings, proceed as follows: From the Manage Services screen, click NT Authentication or the associated [Configure] button. Display reads: Click the Use full DNS name for default domain check box. When checked, the login domain is displayed on the MFD’s display in full DNS format. -
Page 90: Configure Email Service
GlobalScan v3.1 Administrator’s Guide B. Configure Email Service The Scan-to-Email service allows the MFD user to scan a hardcopy document for transmission to one or more email addresses. To configure the Scan-to-Email service, proceed as follows: From the Manage Services... - Page 91 GlobalScan v3.1 Administrator’s Guide Choose the level you would like to configure the Scan-to-Email service on. System Level By default, you enter the Email Configuration screen at the system level; screen reads “System Settings,” as shown above. Settings made at the system level apply to all MFDs, unless you change settings on the profile or project level.
- Page 92 GlobalScan v3.1 Administrator’s Guide Project Level In the screen below, the Scan to Email project has been selected (A). To save setup time, you can choose which profile you would like the project to inherit Email settings from (B). After choosing a profile, the screen refreshes with those settings. After entering the settings and clicking Update, the project has its own settings, not those inherited from the profile or system level.
- Page 93 GlobalScan v3.1 Administrator’s Guide SMTP Settings SMTP settings will change dynamically based on the selected mail system (SMTP or ® Microsoft Exchange). Enter the settings that apply to your installation. SMTP • Mail Server (Required) – Specify the mail server’s name or IP address.
- Page 94 GlobalScan v3.1 Administrator’s Guide Show Reply-To is useful if, for example, mail is sent via a Lotus Notes system that automatically identifies all mail as coming from the individual who configured the client (inbox). By entering a Reply-To address at the time of transmission any response is automatically sent to the actual sender or perhaps a third party.
- Page 95 If so, emails sent via GlobalScan will also be delivered to the logon user’s email address. Also, indicate how the email should be sent by clicking the adjacent drop-down [∨]...
- Page 96 GlobalScan v3.1 Administrator’s Guide Enter the following additional fields: • LDAP Server (Required) • LDAP Port (Required) For a description of each field, see A. Configure • Base DN Authentication Services LDAP Authentication. • LDAP Type (Required) • Authentication Type •...
- Page 97 GlobalScan v3.1 Administrator’s Guide • Recipient Display Name Attribute (Required) – Specify the attribute used to identify the recipient’s name, for example, givenname. Advanced Settings You can set default email message text to append to each outgoing email message, along with a default subject line text.
- Page 98 Administrator’s Guide Note: You can change email message text to any displayed language, such as French, by entering text in the corresponding field. The GlobalScan Server must be running v3.1 software and the MFD must be running v3.0 firmware. To have empty email default message text (user and admin enter no text), both the GlobalScan Server and MFD must be running v3.x software and firmware.
- Page 99 GlobalScan v3.1 Administrator’s Guide Test Configuration To perform a test of the search configuration, enter a Sample Recipient Address Sample Sender Address, and then click the [Test Mail] button. If the Allow Address Search check box has been selected, the...
-
Page 100: Configure Scan-To-Folder Service
Administrator’s Guide C. Configure Scan-to-Folder Service GlobalScan’s Scan-to-Folder service enables the MFD user to scan hardcopy documents directly to a selected folder/subfolder on a local or network directory. The user can perform one or both of the following operations related to Scan-to-Folder: Scan to Home –... - Page 101 GlobalScan v3.1 Administrator’s Guide Scan-to-Folder Configuration Screen Drag this bar to change size of window, if needed. Choose the level you would like to configure Scan-to-Folder settings on. System Level By default, you enter the Scan-to-Folder Configuration screen at the system level;...
- Page 102 GlobalScan v3.1 Administrator’s Guide Profile Level In the screen below, the Accounting Dept. profile has been selected, thus Scan-to- Folder settings entered here will apply to that profile. Any projects within that profile will inherit those values, unless changes are made on the project level.
- Page 103 GlobalScan v3.1 Administrator’s Guide After selecting the level, select/enter the Scan-to-Folder settings as follows: • Allow Scan to Home Directory If Known – If enabled (checked), the logon user can select his/her Home directory as a target to deposit scanned documents. This directory, for example, “Jsmith –...
- Page 104 GlobalScan v3.1 Administrator’s Guide To enter another Path and Description, do so and then click the [Add] button again. Display reads: Repeat 5, if necessary. After all fields are entered and verified, click the [Update] button. Display reads Operation successful.
-
Page 105: Configure Globalscan Workflow Suite Service
Administrator’s Guide D. Configure GlobalScan Workflow Suite Service If the GlobalScan v3.1 Workflow Suite (Connector) software is installed on the GlobalScan v3.1 Server you must set the Capture Server IP Address and Port, as follows: From the Manage Services... -
Page 106: Configure Scan Settings Service
GlobalScan v3.1 Administrator’s Guide E. Configure Scan Settings Service The Scan Settings service enables you to set the MFD’s default scan parameters, e.g., resolution, file format, etc. The user (at the MFD touch screen) can override scan settings, provided the setting is not identified by the Administrator as read-only. - Page 107 GlobalScan v3.1 Administrator’s Guide Scan Settings Configuration Screen Scan settings can be identified as read-only, preventing the MFD user from changing parameters. Click the [?] button to open a dialog box that contains an explanation of the function. Click the drop-down button [∨] to display settings.
- Page 108 GlobalScan v3.1 Administrator’s Guide • Scan Size – The default setting is AUTO DETECT. To change the default scan size, click [∨] the drop-down button and choose from the following: 8.5 x 11 (Portrait) A4 (Portrait) 8.5 x 11(Landscape) A4 (Landscape)
- Page 109 GlobalScan v3.1 Administrator’s Guide GlobalScan File Format Support, At-a-Glance Service Image Management ActivePDF Color MFD Single-Page TIFF/JPEG Single-Page TIFF/JPEG Single-Page TIFF/JPEG ® File Formats Multi-Page TIFF/JPEG Adobe Multi-Page TIFF/JPEG Note: With [Color Scan] Note: With [Color Scan] PDF ImageText button enabled (at MFD),...
- Page 110 Important: When multiple services overlap, i.e., perform the same function, it is important that you establish the Processing Order. For instance, both ActivePDF and OCR can convert a scanned image into PDF format. By setting the Processing Order, GlobalScan Job Processor can efficiently control data flow.
- Page 111 GlobalScan v3.1 Administrator’s Guide • Auto-Orientation – If this check box is selected, the OCR engine will attempt to automatically determine whether or not rotation is required. After all fields are selected and verified, click the [Update] button. Display reads Operation successful.
-
Page 112: Configure Image Processing Services
GlobalScan v3.1 Administrator’s Guide F. Configure Image Processing Services GlobalScan v3.1 supports the following standard Image Processing services: • • ActivePDF • Image Management To configure Image Processing services, continue with the applicable section. Configure OCR Service Important: In order to correctly configure the OCR service, you must configure the OCR Engine. - Page 113 GlobalScan v3.1 Administrator’s Guide OCR Configuration Screen Drag this bar to change size of window, if needed. OCR services can be set on the system, profile or project level… System Level By default, you enter the OCR Configuration screen at the system level; screen reads “System Settings,”...
- Page 114 (Required) – Enter the folder path you specified during OCR engine installation and configuration. This path, e.g., c:\ocr, is the repository used by the OCR engine during job processing. For more information, see GlobalScan v3.1 Server Software Installation Guide Appendix B: OCR Engine Installation and Configuration.
- Page 115 Program). GlobalScan’s Job Monitor service examines this file in order to determine whether or not OCR is up and running. If GlobalScan does not see the updated time stamp of the “heartbeat.dat” file at the specified interval, an error condition occurs, telling the Administrator that OCR is not operational.
- Page 116 GlobalScan v3.1 Administrator’s Guide Read Password – If this password is set, the recipient will be prompted to enter this password before viewing, printing and/or editing the document. Edit Password – If this password is set, the recipient can open the document without a password.
- Page 117 GlobalScan v3.1 Administrator’s Guide Recognized File Formats – The current OCR engine recognizes TIFF, TIF, JPEG and JPG file formats. Note: If you add a file format, via the [Add] button, the OCR engine will either ignore the format (continue processing) or return an error (terminate processing), whichever...
-
Page 118: Configure Activepdf Service
Administrator’s Guide Configure ActivePDF Service Important: Using this service requires installation of associated software components. See GlobalScan v3.1 Server Software Installation Guide Appendix G: ActivePDF Installation. To establish ActivePDF settings, proceed as follows: From the Manage Services screen, click ActivePDF or the associated [Configure] button. - Page 119 GlobalScan v3.1 Administrator’s Guide System Level By default, you enter the ActivePDF Configuration screen at the system level; screen reads “System Settings,” (circled below). Settings made at the system level apply to all MFDs, unless you change settings on the profile or project level.
- Page 120 Ignore Return Error specify what should happen when an unknown file type is encountered. This setting determines how the GlobalScan Server will handle an unrecognized file format. • Ignore is the default setting. If a file format is encountered, other than the recognized file formats, the scan job will continue to be processed, but the requested conversion will not take place.
-
Page 121: Configure Image Management Service
Administrator’s Guide Configure Image Management Service GlobalScan Image Management Service supports viewing of thumbnail images from the MFD touch screen, that is, digital images of scanned pages that have not yet been processed by the GlobalScan Server. Thumbnail Feature Support... - Page 122 GlobalScan v3.1 Administrator’s Guide Display reads: Choose the level you would like to configure Image Preview settings on. System Level By default, you enter the Image Preview Configuration screen at the system level; screen reads “System Settings,” (circled below). Settings made at the system level...
- Page 123 GlobalScan v3.1 Administrator’s Guide Profile Level In the screen below, an Accounting Dept. profile has been selected, thus Imaging service settings entered here will apply to that profile. Any projects within that profile will inherit those values, unless changes are made on the project level.
- Page 124 GlobalScan v3.1 Administrator’s Guide numbers are rounded to the nearest 20 or 200 value and text values are converted to 20; the results are rounded to the nearest whole number and the list is sorted. • Page Options – Choose the page preview options that are available to the user: None; All;...
-
Page 125: Step 8: Create One-Touch Scan
GlobalScan v3.1 Administrator’s Guide Step 8: Create One-touch Scan The One-touch Scan function enables the MFD user to quickly execute a scan function, since destination entry or selection is not required. For example, expense reports can be directed to email and/or folder destinations using the following features: A. - Page 126 GlobalScan v3.1 Administrator’s Guide Display reads: Click the [Configure] button associated with the Email service. Scroll down to Advanced Settings, and then click the [Set Email Defaults] button. Display reads: In the row (circled above), click on the Display field and enter text, e.g., Accounting.
- Page 127 GlobalScan v3.1 Administrator’s Guide Click on the Value field and enter the email address, e.g., ajones@xyz.com. This value will display on the MFD touch screen as the default recipient. Click the [Add] button to complete the entry. Note: If you do not complete this step, the fields will reappear empty, i.e., the entry will not be applied.
- Page 128 GlobalScan v3.1 Administrator’s Guide B. One-touch Scan-to-Folder Click the Manage Projects link (or associated Home Page shortcut icon). Display reads: Click the project’s associated [Services] button. Click the Scan to Folder [Configure] button. If necessary, enter Path and Description. Select Select By Default check box (adjacent to “Description”...
- Page 129 GlobalScan v3.1 Administrator’s Guide When finished, click the [Update] button. Click the [Close] button or close the window [X] The MFD’s touch screen will populate with the predefined folder(s). The user places the document on the ADF (or platen glass) and presses the [Start] key. Depending on system settings, the user...
-
Page 130: Globalscan Management
Manage Failover Manage MFDs The GlobalScan system has the ability to dynamically display the status of the MFD in relation to the GlobalScan Server. For example, view enabled/disabled MFDs, firmware version, serial number or IP address. The Manage MFDs screen will display the updated status (after device reboot). -
Page 131: Edit Existing Mfd Configuration
Total Number of Enabled MFDs – Identifies the number of MFDs that currently communicate with the GlobalScan Server. The total number of enabled MFDs must be equal to or less than the number specified by the license. For example, if you have a 10- MFD license, the total number of enabled MFDs cannot exceed 10. - Page 132 • Enabled – If checked (on), the MFD can connect to the GlobalScan Server, i.e., can join in GlobalScan operations. If unchecked (off), the MFD is disabled, thus cannot connect. If an MFD has been disabled, an error message will be displayed on the MFD’s touch screen.
- Page 133 GlobalScan v3.1 Administrator’s Guide Display reads: Modify field(s), as needed. Below, we have changed the Device Name to 2035e and selected Marketing Dept. as the Profile Name. Click the [Update] button. Display reads: Click the [ << Back] button to view the modified screen.
-
Page 134: About Smartdevicemonitor (Sdm)
GlobalScan v3.1 Administrator’s Guide About SmartDeviceMonitor (SDM) When the SmartDeviceMonitor for Client utility has been installed on the GlobalScan Server, you will see a Status column with traffic light icons on the Manage MFDs screen. Important: • See GlobalScan v3.1 Server Software Installation Guide Appendix E: SmartDeviceMonitor for Client Installation for instructions on installing SDM. - Page 135 GlobalScan v3.1 Administrator’s Guide Also, note that with installation of the SmartDeviceMonitor for Client, you can view real-time device status and settings, as follows: Click on the MFD’s IP Address (circled below). Navigate the links to display information regarding the MFD, e.g., configuration settings, toner and paper levels, etc.
-
Page 136: Sort Mfd List
GlobalScan v3.1 Administrator’s Guide Sort MFD List To sort the MFD list, proceed as follows: Click the Manage MFDs menu link (or associated Home Page shortcut icon). [∨] Click the category drop-down button Select the category to sort by. [∨]... -
Page 137: Delete Mfd(S) From List
GlobalScan v3.1 Administrator’s Guide Delete MFD(s) from List To delete an MFD from the GlobalScan system, proceed as follows: Click the Manage MFDs menu link (or associated Home Page shortcut icon). Display reads: Use one of the following three methods to delete the MFD(s):... -
Page 138: Manually Add New Mfd(S)
GlobalScan v3.1 Administrator’s Guide Manually Add New MFD(s) Auto Registration process means that you are not required to add a device manually, unless you wish to select a different default profile. To manually add an MFD, proceed as follows: Click the Manage MFDs menu link (or associated shortcut icon). - Page 139 • Enabled – If checked (on), the MFD can connect to the GlobalScan Server, i.e., can join in GlobalScan operations. If unchecked (off), the MFD is disabled and cannot connect to the GlobalScan Server. If an MFD has been disabled in the Manage MFDs screen, an error message will be displayed on the MFD’s touch screen.
-
Page 140: Manage Status Detection
Manage Status Detection menu link (circled below). This screen allows you to set the maximum time period used by the GlobalScan Server to retrieve the status of connected/enabled MFD(s). To set the status detection time period, proceed as follows:... -
Page 141: Manage Mfd Project Icons
By displaying these icons, users can intuitively select a function for faster job execution. Note: To determine which type of display an MFD supports, see Appendix A: GlobalScan- compatible MFDs. To view the available images, proceed as follows:... - Page 142 GlobalScan v3.1 Administrator’s Guide Click the [Images] button associated with desired icon – defaultIcon1, 2, 3 or 4. Default icon Icon 1 Icon 2 Icon 3 Icon 4 (Scan-to-Email) (Scan-to-Fax) (Scan-to-Folder) (Scan-to-EDMS) Display reads: Click on the black & white or color thumbnail (circled above) to view an enlargement.
-
Page 143: Manage Logs
Failover – Displays information related to Failover service. Note: Failover will only appear if the GlobalScan Server has been activated as a Primary or Secondary Server. For details on the optional Failover service, see F. Manage Failover, to follow. - Page 144 The primary purpose for this data is to have an audit trail of all jobs processed by GlobalScan. Though this data is not displayed in the Manage Logs screen, as the file size can be significant, it can be viewed by opening the XML files directly.
-
Page 145: Manage Jobs
Administrator’s Guide Manage Jobs The jobs that GlobalScan is currently processing are displayed here, reflected under the Status column. If a job may have failed, perhaps while being sent to the SMTP server, the details regarding that job are displayed and categorized by job name, and include date/time created, time/date of last attempt, etc. - Page 146 GlobalScan v3.1 Administrator’s Guide Manage Jobs Screen • Job ID – Sequence of upload file. • Status – Whether or not the job is being uploaded (in progress) or an error was encountered. • Time Created – The date and time of file upload.
-
Page 147: Manage Failover
GlobalScan Server should the primary GlobalScan Server go down. Incorporating Failover ensures maximum uptime of the GlobalScan system. Failover is transparent to the user, though once implemented he/she may be required to log in again. Once the primary server is back on line, and after the current user session on the secondary server is completed, GlobalScan operation resumes on the primary server. -
Page 148: Primary Server Failover Settings
GlobalScan WebAdmin Module. Primary Server Failover Settings If an MFD cannot submit a job to the primary GlobalScan Server, the system will revert to Failover mode, with the secondary server processing jobs until the primary server is restored (provided the secondary server has been properly configured). - Page 149 If you are using a shared folder on the secondary server, the identity running the Application Pool must have full access rights to the drop file folder on the secondary server. For more information, see GlobalScan v3.1 Server Software Installation Guide Appendix A.1: Set Application Pool Identity.
- Page 150 • Synchronize Now - Click this button to instruct GlobalScan to generate a drop file into the Drop File location (specified above), regardless of whether there have been any configuration changes. For this to occur, GlobalScan Failover Service must run as a user who has full access rights to the specified drop file location.
-
Page 151: Secondary Server Failover Settings
On the secondary server, most GlobalScan WebAdmin Module screens, e.g., System Parameters, Profiles and Projects, etc. are read-only, so no changes can be made. Manage Failover (Failover status/configuration screen), Manage Logs and Manage Jobs screens, however, can be accessed and updated. - Page 152 • Synchronize Now – Click this button to instruct GlobalScan to pick up a drop file from the Drop File location (specified above), regardless of whether there have been any configuration changes. For this to occur, GlobalScan Failover Service must run as a user who has full access rights to the specified drop file location.
- Page 153 GlobalScan v3.1 Administrator’s Guide • Date/Time of Last Synchronization Request – This indicates when the last time a drop file was requested, and was found. If this number does not change, either the drop file cannot be found or there is a problem synchronizing with the secondary server.
- Page 154 Failover does not support the Image Preview feature, i.e., preview images have not yet been sent to the GlobalScan server, thus will be lost. For example, if the user is in the process of viewing and modifying a scan image on the MFD touch screen and Failover occurs, those images and modifications will not saved.
-
Page 155: Appendix
GlobalScan v3.1 Administrator’s Guide... -
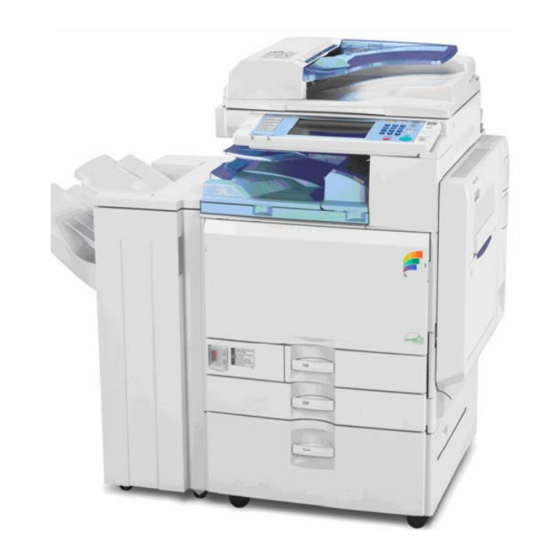
Page 156: A: Globalscan-Compatible Mfds
GlobalScan v3.1 Administrator’s Guide Display Ricoh Savin Lanier Gestetner Type Code Aficio 2035 4035/4135G LD035 3532 HVGA B079 Aficio 2045 4045 LD045 4532 B082 Aficio 2035e 4035e LD135 DSm635 HVGA B135 Aficio 2045e 4045e LD145 DSm645 B138 Aficio 2090e 4090... -
Page 157: B: Universal Soft Keyboard Support (By Brand/Model)
GlobalScan v3.1 Administrator’s Guide Ricoh Savin Lanier Gestetner 3035/SP/SPF/SPi/G 8035/sp/spf/spi/34g LD235 DSm735/sp/spf/spi/g 3045/SP/SPF/SPi/G 8045/sp/spf/spi/g LD245 DSm745/sp/spf/spi/g Aficio MP 3500 8035e LD335 DSm735e Aficio MP 3500G 8035eg LD345 DSm735eg Aficio MP 4500 8045e DSm845e Aficio MP 4500G 8045eg DSm845eg 3025/SP/SPF/SPi/P 8025/sp/spf/spi/p... -
Page 158: C: New Features And Enhancements
Administrator’s Guide New features and enhancements introduced with the launch of GlobalScan v3.1 include: 1. RightFax Plug-in Enhancement • Ability to send notification if error occurred when GlobalScan connects to RightFax Server. • Allows the Administrator to test the configuration. •... - Page 159 Administrator’s Guide MFD Feature Enhancements • Ability to remotely upgrade and configure GlobalScan firmware for select models. • Allows user to cancel any ongoing scan operation for all MFD models. • Allows user to continue an ongoing scan job after paper jam is cleared without resubmitting the entire scan job, for all MFD models.
- Page 160 Allows the Administrator to remove scan setting tab from MFD, when needed. • Allow the Administrator to remove Job Log tab from MFD, when needed. • Ability to display MFD GlobalScan firmware version. • Additional log categories for easier information search. •...
- Page 161 User ID and password are optional – they do not have to be displayed – for plug-ins that use swipe cards or biometric identification devices. • Ability to participate in GlobalScan events, such as changes in configuration. • Allows download of GlobalScan configuration data, such as MFDs, profiles, etc.
- Page 162 • Both GlobalScan Server v3.1 and v2.x work with GlobalScan firmware v3.0. • All the new features of GlobalScan Server v3.1 are supported if the MFD is running firmware v3.0. • Only limited new features of GlobalScan v3.1 are supported if the MFD is running firmware v2.x.
-
Page 163: D: Globalscan V3.X Vs. V2.X
Support for Failover; two GlobalScan Servers with duplicate configurations Support for Lotus Notes Server Backup and Restore Utility GlobalScan v3.1 is backward compatible with only GlobalScan v3.0 and v2.x MFD firmware. Only limited features of GlobalScan v3.1 are supported if the MFD is running v2.x firmware. -
Page 164: E: Globalscan Workflow Suite Family
GlobalScan v3.1 Administrator’s Guide GlobalScan Workflow Suite Standard Express Full Function Edition Edition Edition Capture Paper Documents Ricoh GlobalScan-enabled MFDs Optional Connectors for other manufacturer devices & scanners – Canon, Fujitsu, HP, Kodak, Kyocera, Sharp & Xerox Capture Electronic Files Windows &... - Page 165 Based on directory credentials Microsoft Active Directory Novell eDirectory SSL support Bundled with GlobalScan v3.1 Server software. Available option. Available option. Also optionally supports SMARTICKET, which offers easy workflow automation via bar code recognition. Note: For further details, visit www.ricohconnects.com.
-
Page 166: F: Optional Rightfax Plug-In
Important: Prior to adding the RightFax service to a project (as outlined in Step 5: Add Services to a Project, in this guide), you must also install the RightFax Client on the GlobalScan Server. For more information, see the Plug-in Preparation section of the GlobalScan v3.1 Server Software Installation Guide. - Page 167 GlobalScan v3.1 Administrator’s Guide RightFax Configuration Screen Note: If the screen reads “Client software does not appear to be installed. RightFax cannot be configured until the client software is installed and properly configured”. Please install the RightFax client software. Choose the setting level - system (shown above), profile or project. For details, see About Setting Levels.
- Page 168 Project’s Services screen. If the Login checkbox is not selected, as shown, GlobalScan will use proxy user credentials to perform Fax Number lookup, Cover Sheet and Billing Code selection, as well as fax communication. If the Login checkbox is selected, the logon user’s...
- Page 169 GlobalScan v3.1 Administrator’s Guide • Search Field * (Required) – Specify a valid RightFax phonebook field against which searches will be performed. The user can search either their Private Phonebook or the Public Phonebook. Note: Authentication required: If the user presses the [Public] button, this allows him/her to search everyone else’s published entries, except their own.
- Page 170 Select by Default checkbox. - If you enter all three fields, be sure that the entries are exact. If not, GlobalScan will send the fax to the number entered in the Fax Number field, not the fax number associated with the ID on the RightFax Server.
-
Page 171: G: Globalscan Activation Status
Licenses Purchased, (2) MFDs, and (3) Enabled MFDs is also available. Any third-party services that have been installed on the GlobalScan Server are listed as well, e.g., RightFax and OCR). To view the new GlobalScan Activation page, launch the GlobalScan WebAdmin Module, as follows. - Page 172 CD Keys are displayed in descending order, with the most current CD Key listed on top. A maximum of 8 CD Keys can be displayed, so if the GlobalScan Server has been upgraded 9 times, the last 8 CD Keys will be displayed.
-
Page 173: H: Globalscan Backup And Restore Utility
Projects, Profiles and server/MFD-related data is common. This Backup utility enables you to easily migrate GlobalScan settings to a new v3.1 server or quickly recover in the event of network/hardware failure. After performing the Backup procedure, use the Restore procedure to apply the saved database (on the same or different GlobalScan v3.1... - Page 174 [All Programs] > [GlobalScan]. Click [Utilities]. Display reads: Click [Backup] tab. Note: If GlobalScan is not currently activated on the computer, the bottom of the screen reads, Data restore is not available. GlobalScan server must be activated with “standalone” or “primary server”...
- Page 175 Click [Restore] tab. If necessary, click [Browse] and locate the folder containing the backup data file. Select the Backup File Version, either GlobalScan v3.x or GlobalScan v2.x. Click [Restore]. Display reads: The message shown at right applies to GlobalScan Servers that are running the optional Failover service.
- Page 176 Click [Yes]. Backup and Restore with Command Line Steps 1 and 2 cover backup and restore functions using the GlobalScan Backup/Restore Utility. It is also possible to integrate these features with a scheduling tool for automated backup and restore functionality. To do so, use the following command line syntax: Backup Syntax c:\Ricoh\GlobalScan\GSutilities\bin\GSutilities backup file=”c:\temp\07080.bkp”...
- Page 177 Administrator’s Guide Information Tab The Information screen within the GlobalScan Backup and Restore Utility enables you to configure settings that controls the gathering of log history and thread information. To configure settings, proceed as follows: Click the [Information] tab.
- Page 178 Note that many files will be created. The zip file contains all the files also created for easy file transfer. Advanced Tools Tab The Advanced Tools screen supports additional functionality within the GlobalScan Backup and Restore Utility, specifically: •...
- Page 179 – Click this button to reset the administrative password to a blank value. • Delete Performance Counters – Click this button to delete performance counters used by GlobalScan. • Create Performance Counters – Click this button to create (or reset existing) GlobalScan performance counters.
-
Page 180: I: Globalscan Mfd Error Codes
Failover does not succeed, GlobalScan Servers are down. Please ask administrator for help. Failover does not succeed, GlobalScan Server IP is not defined. Please ask administrator for help. Unable to connect to the GlobalScan server. Press OK to try again. - Page 181 No Index Entries Returned from Server Invalid Validation Code Returned from Server. Get Services failed. Please ask administrator for help. Get Session Manager failed. Please ask administrator for help. GlobalScan internal XML error. Parse XML file failed. Create XML file failed. 1001 Failed to Send Keyboard Validation Request to Server.
-
Page 182: J: Frequently Asked Questions
Q. How many multifunctional devices can a single GlobalScan Server service/support? A. GlobalScan will support up to 250 enabled MFDs with a single GlobalScan Server installed within your organization. - Page 183 If this should occur, simply press the [Scanner] button again and the display will be restored. Note: A key other than [Scanner] may be allocated to GlobalScan. Q. Can I scan a group of originals that are of different sizes, e.g., letter and legal sizes? A.
- Page 184 MFD times out. Q. How does the Image Preview feature work? A. Image Preview, a feature of GlobalScan v3.1, allows the user to view thumbnail images, and, if necessary, modify a scanned document directly from the MFD touch screen, i.e., before the job is processed.
- Page 185 Administrator’s Guide Q. Can the MFD scan double-sided documents to GlobalScan? A. Yes, GlobalScan’s Scan Settings screen enables the user to not only select resolution and file format, but also original type, i.e., single-sided or double-sided, provided the Administrator has not set the parameter(s) as read-only. When scanning double-sided documents the user can also select the text orientation (top-to-top or top-to-bottom) and identify page orientation (standard or 90-degree).
-
Page 186: K: Glossary Of Terms
HTTP (Hypertext Transfer Protocol) – The protocol used by the World Wide Web for sending HTML pages from a server computer to a client computer or application, such as GlobalScan. HTTPS (Secure HTTP) – The protocol used by the World Wide Web for sending and receiving secure HTML pages. - Page 187 “pair” to encrypt and decrypt communications. All of the major browsers are SSL enabled. SmartDeviceMonitor for Client – When installed on the GlobalScan Server, the SmartDevice- Monitor for Client utility displays the status of connected GlobalScan-enabled devices, letting you know which devices can participate in scan operations.
- Page 188 GlobalScan v3.1 Administrator’s Guide Web Browser – A browser is a software application used to locate and display Web pages, e.g., ® Microsoft Internet Explorer. Web Image Monitor – Web Image Monitor is firmware built into the controller of the MFD that enables a System Administrator to manage settings on a single device.
- Page 189 Ricoh Americas Corporation, Five Dedrick Place, West Caldwell, NJ 07006 Phone (973) 882-2000 www.ricoh-usa.com 5/08 Rev. 1...
Need help?
Do you have a question about the GlobalScan and is the answer not in the manual?
Questions and answers