Table of Contents
Advertisement
Quick Links
OPERATORS MANUAL
QUICK START
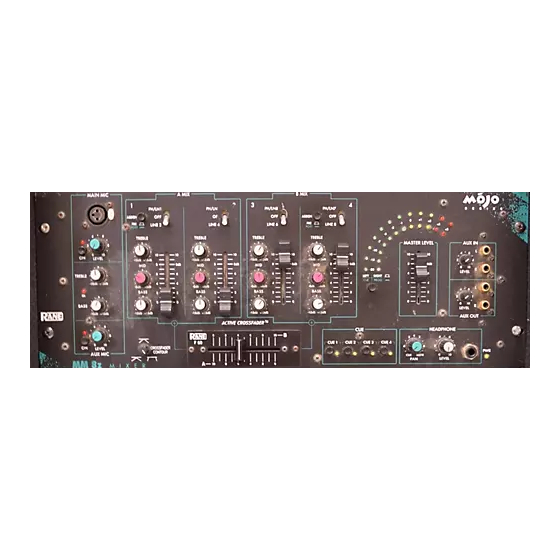
Here are a few basic "plug and play" steps to get you performing. If you are a first-time DJ mixer user, please do
yourself a favor and at least read this section.
Begin by making sure your amplifier is off before making connections. The MM 8z has all unbalanced connectors,
except for the ¼" balanced Main Outputs and XLR Mic Inputs. Plug a source component, such as a CD player, into one of
the four LINE Inputs on the rear. Connect the MAIN OUTPUTS to your amplifier. Set all front panel controls to the
middle of their travel and all pushbuttons to their out position. Slide the MASTER LEVEL down to 0. Set the INPUT
SELECT switch to your active Source Input. Plug in the MM 8z's power supply and see the PWR indicator illuminate.
Turn on your source and amplifier. Slowly turn up the MASTER LEVEL, as the meters light and music is heard from the
speakers.
You can get tripped up at two places. If you have a phono signal into one of the four PH/LN Inputs, be sure the PH/LN
switch is in the PHONO position (in); likewise, when using a tape deck or CD into these Inputs, be sure the switch is in the
LINE (out) position. If you plug into the PROGRAM LOOP, the internal signal path is broken. Be sure that a complete
loop is made, to and from an outside device.
Couldn't be easier, right?
With the CROSSFADER CONTOUR set to full
counter-clockwise position, it operates as a typical constant-
power crossfader. Set to clockwise position, the crossfader
has the very steep slope as indicated in Figure 1 to the right.
Now that was a pretty quick start, right?
Never connect anything except a Rane RS 1 to the
thing that looks like a red telephone jack on the rear of the
MM 8z. This is an AC supply and requires some special
attention if you do not have an operational power supply
exactly like the one that came with your unit. Consult the
Rane factory for a replacement or substitution.
WEAR PART
This product contains the following wear part subject to the ninety (90) day warranty period described on page Service-1:
(1) Active Crossfader Assembly F 60.
MM 8z
MOJO CLUB MIXER
CrossFader Contour
A
0
20
40
60
80
100
Figure 1. Crossfader Contour control
B
travel
Manual-1
Advertisement
Table of Contents

Summary of Contents for Rane MOJO MM 8z
-
Page 1: Quick Start
Figure 1 to the right. Now that was a pretty quick start, right? Never connect anything except a Rane RS 1 to the thing that looks like a red telephone jack on the rear of the MM 8z. -
Page 2: Front Panel Description
FRONT PANEL DESCRIPTION MAIN MIC ON switch: puts the Main Mic signal into the mixer signal path. When the switch is pressed in, the Main Mic is on and the adjacent red indicator blinks. Front panel MAIN MIC input: accepts a balanced microphone with an XLR connector. A parallel Main Mic Input is on the rear of the unit. -
Page 3: Fader Cleaning
CROSSFADER CONTOUR control: Allows adjusting the “shape” of the Crossfader response from a gentle curve for smooth, long running fades, to the steep pitch required for top performance cut and scratch effects. See Figure 1 on page Manual-1. Meter and Mode switch: This peak-dBu reading meter displays one of two modes, depending on the switch position. In the LEFT/RIGHT (out) position, the meter indicates the stereo level in the LEFT and RIGHT Main Outputs. - Page 4 TOP / REAR PANEL DESCRIPTION Remote POWER Supply Input: The unit is supplied from the factory with a Rane Model RS 1 remote power supply suitable for connection to this input jack. The power requirement of the unit specifies an 18 volt AC center-tapped trans- former only.
-
Page 5: Operating Instructions
MM 8z CONNECTION With the MM 8z’s ability to accommodate a wide variety which provide good hum rejection and allow long (greater of systems, these basic guidelines will assist the user in than 10 feet) lengths of interconnect cable without significant incorporating this mixer into their equipment setup. - Page 6 ACTIVE CROSSFADER With the ASSIGN switches in the PRE position, Sources 1 in the Mic On switch, lighting the adjacent indicator, and and 2 create the A Mix and Sources 3 and 4 create the B Mix. adjust the Main Mic (or Aux Mic) Level. The tonal balance of The output of these Mixes are under control of the Active the Main and Aux Mic Inputs may be adjusted via the Mic Crossfader.
- Page 7 MM 8z APPLICATIONS Two Pre/Post Crossfader ASSIGN switches add to the while having the output of a 2 Performance Mixer connected flexibility of the MM 8z. By placing these in the POST to Source 1 and summed post Crossfader. Source 4 could be position, the Crossfader is bypassed, allowing the Source 1 or summed Pre-crossfader for use with a 3 booth turntable, or...
- Page 8 WARNING: SHOCK HAZARD Never use an AC line cord ground-lift adapter or cut off the 3rd pin. It is illegal and dangerous. ©Rane Corporation 10802 47th Ave. W., Mukilteo WA 98275-5098 TEL (425)355-6000 FAX (425)347-7757 WEB http://www.rane.com Manual-8 103297...


Need help?
Do you have a question about the MOJO MM 8z and is the answer not in the manual?
Questions and answers