Subscribe to Our Youtube Channel
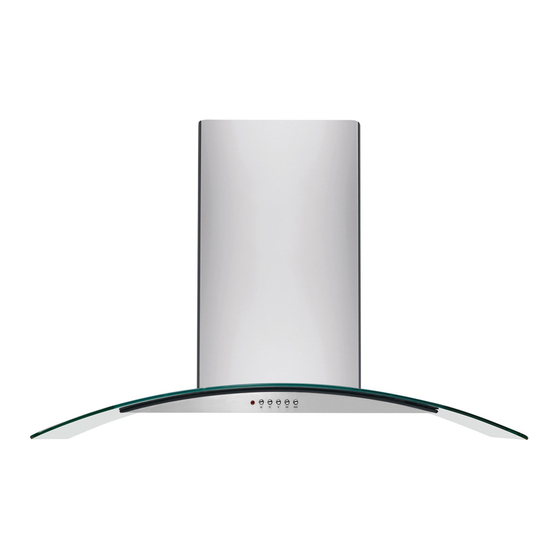
Summary of Contents for Electrolux FHWC3060LSA
- Page 1 Use _ care guide cuidado Guia de uso y Guide d'utiiisation et d'entretien 30" and 36" Range Hood .......... /////////' o 00_ ° °...
-
Page 2: Table Of Contents
information TaNeofcontents ii:i:i:i:i:i:i:i:i:i:i:i:i:i:i:i:i:i:i:i:i:i:i:i:i:i:i: Pleasereadandsavethisgoide ........_:_:_:_:_:_:_:_:_:_:_:_:_:_:_:_:_:_:_:_:_:_:_:_:_:_:_:_:_:_:_:_:_:_:_:_:_:_:_:_:_:_:_: Keeparecordforq_c_re_erence ........iiiiiiiiiiiiiiiiiiiiiiiiiiiiiiiiiiiiiiiiiiiiiiiiiiiiiiii ........Electricalreq_irements ............. _ntendedu............... For toll-free telephone support in the U.S.: 1-800- 944-4044 or Canada: 1-800-265-8352 Parts supplied ..............05 online support Internet production installingthe hood ............06-10 information visit http://www.frigidaire.com _mpoAant safety instructions... - Page 3 important safety instructions .... Important safety instructions Child safety Packing _ate_ials: • Packing cartons covered with rugs, bedspreads, plastic sheets, o_stretch w_ap _ay become airtight c hambers a_d oa_q.icklyoa.se suffocation. Remove the protective film covering the appliance before putting it into [ _ operation.
- Page 4 important safety instructions mmportant safety instructions iiiiiiiiiiiiiiiiiiiiiiiiiiiiiiiiiiiiiiiiiiiiiiiiiiiiiiiiiiii iiiiiiiiiiiiiiiiiiiiiiiiiiiiiiiiiiiiiiiiiiiiiiiiiiiiiiiiiiii iiiiiiiiiiiiiiiiiiiiiiiiiiiiiiiiiiiiiiiiiiiiiiiiiiiiiiiiiiii iiiiiiiiiiiiiiiiiiiiiiiiiiiiiiiiiiiiiiiiiiiiiiiiiiiiiiiiiiii iiiiiiiiiiiiiiiiiiiiiiiiiiiiiiiiiiiiiiiiiiiiiiiiiiiiiiiiiiii iiiiiiiiiiiiiiiiiiiiiiiiiiiiiiiiiiiiiiiiiiiiiiiiiiiiiiiiiiii iiiiiiiiiiiiiiiiiiiiiiiiiiiiiiiiiiiiiiiiiiiiiiiiiiiiiiiiiiii iiiiiiiiiiiiiiiiiiiiiiiiiiiiiiiiiiiiiiiiiiiiiiiiiiiiiiiiiiii iiiiiiiiiiiiiiiiiiiiiiiiiiiiiiiiiiiiiiiiiiiiiiiiiiiiiiiiiiii iiiiiiiiiiiiiiiiiiiiiiiiiiiiiiiiiiiiiiiiiiiiiiiiiiiiiiiiiiii iiiiiiiiiiiiiiiiiiiiiiiiiiiiiiiiiiiiiiiiiiiiiiiiiiiiiiiiiiii iiiiiiiiiiiiiiiiiiiiiiiiiiiiiiiiiiiiiiiiiiiiiiiiiiiiiiiiiiii iiiiiiiiiiiiiiiiiiiiiiiiiiiiiiiiiiiiiiiiiiiiiiiiiiiiiiiiiiii iiiiiiiiiiiiiiiiiiiiiiiiiiiiiiiiiiiiiiiiiiiiiiiiiiiiiiiiiiii iiiiiiiiiiiiiiiiiiiiiiiiiiiiiiiiiiiiiiiiiiiiiiiiiiiiiiiiiiii iiiiiiiiiiiiiiiiiiiiiiiiiiiiiiiiiiiiiiiiiiiiiiiiiiiiiiiiiiii iiiiiiiiiiiiiiiiiiiiiiiiiiiiiiiiiiiiiiiiiiiiiiiiiiiiiiiiiiii iiiiiiiiiiiiiiiiiiiiiiiiiiiiiiiiiiiiiiiiiiiiiiiiiiiiiiiiiiii iiiiiiiiiiiiiiiiiiiiiiiiiiiiiiiiiiiiiiiiiiiiiiiiiiiiiiiiiiii iiiiiiiiiiiiiiiiiiiiiiiiiiiiiiiiiiiiiiiiiiiiiiiiiiiiiiiiiiii iiiiiiiiiiiiiiiiiiiiiiiiiiiiiiiiiiiiiiiiiiiiiiiiiiiiiiiiiiii iiiiiiiiiiiiiiiiiiiiiiiiiiiiiiiiiiiiiiiiiiiiiiiiiiiiiiiiiiii E ect ica equirements It is the customer's responsibility: to contact a qualified electrical installer. ®...
-
Page 5: Parts Supplied
Installing the hood • Do not have a fuse in the neutral or ground circuit. Upper and lower chimney Upper bracket Lower bracket Collar Recirculation kit Wire sizes must conform to the requirements (optional the National Electrical Code ANSI/NFPA 70 - latest accessories) edition", or CSA Standards... - Page 6 Installing the hood iiiiiiiiiiiiiiiiiiiiiiiiiiiiiiiiiiiiiiiiiiiiiiiiiiiiiiiiiiii If open fireplaces are operated in the same room, Installing the hood ask your local chimney sweeper about the local regulations prior to installation. If you are renting, then approval must be obtained from the owner of the property. Attention! In order for the range hood to reach optimal performance, install it over the middle of...
-
Page 7: Installingthe Hood
Installing the hood ,,!!!"7 • Flexible metal round ducts should only be used /_g. when no other duct fitting exists Limit use to iiiiiiiiiiiiiiiiiiiiiiiiiiiiiiiiiiii " iiiiiiiiiiiiiiiiiiiiiiiiiiiiiiiiiiiiiiiiiiiiiiiiiiiiiiiiiiii short lengths and do not crush when making :::_-- _: opening for ductwork iiiiiiiiiiiiiiiiiiiiiiiiiiiiiiiiiiii corners. - Page 8 Installing the hood • Insert 2 screws (10 or 14) in the top location, but do not fully insert the screws (fig. (_)). Mount the ._10.9" ran ge hcod (1) to t he wall and tig hten the screw s. _=_-_ _ ,,, _ Insert and t_ghten the 2 remaining screws on the...
- Page 9 Installing the hood L (live) = Black_ ® tg_o_n_/= G,een I .._ 1 Mount the junction box onto the range hood using 2 short screws (15) (fig. (_)). Electrical connections fig. Step 6: Insert the upper chimney (3) into the lower chimney (3) from top to bottom (fig.
-
Page 10: Operation
Installing the hood :::::::::::::::::::::::::::::::::::::::::::::::::::::::::::: UIUIUIUIUIUIUIUIUIUIUIUIUIUIUIUIUIUIUIUIUIUIUIUIUIUIUIUIUIUI Installing range hood to the wall in ______________________________________________________________________________________________________ recirculation mode i_i_i_i_i_i_i_i_i_i_i_i_i_i_i_i_i_i_i_i_i_i_i_i_i_i_i_i_i_i_i_i_i_i_i_i_i_i_i_i_i_i_i_i_i_i_i_i_i_i_i_i_i_i_i_i_i_i_i_i_ • For the operation of the range hood with recirculation mode a recirculator, model _________________________________________________________________________________________________________________ FHWRKT60LS, needsto beobtained. Pleasecall i_i_i_i_i_i_i_i_i_i_i_i_i_i_i_i_i_i_i_i_i_i_i_i_i_i_i_i_i_i_i_i_i_i_i_i_i_i_i_i_i_i_i_i_i_i_i_i_i_i_i_i_i_i_i_i_i_i_i_i_ Frigidaireat1.800.944.9044toorderthiskit. • Follow steps 1 to4 fromFixingrangehoodto _Exhaustoperation wall(withexhaustducting) chapter. -
Page 11: Cleaningand Maintenance
For best performance Charcoa f,ters: • If the model is not vented to the outside, the air will be recirculated through disposable charcoal filters that help remove smoke and odors. = • The charcoal filters cannot be cleaned, they must be replaced regularly (depending on range hood usage). -
Page 12: Technicaldata
Troubleshootin fig. Distance between the Readjust the distance (page appliance and the cooking 7, fig. (_) and Suction place too table below) performance fig. large. is not good. Clean Metallic anti- filters (see grease filter is Cleaning and dirty. maintenance). Environmental protection ®... - Page 13 Home Products, Inc. In Canada, your appliance of Alaska. warranted by Electrolux Canada Corp. 12. Damages to the finish of appliance or home Electrolux authorizes no person to change or add to any incurred during installation, including but not obligations under this warranty.


Need help?
Do you have a question about the FHWC3060LSA and is the answer not in the manual?
Questions and answers